![]()
![]()
![]()
 Perma-Chink Systems, Inc
Log & Timber Home Care Experts
Perma-Chink Systems, Inc
Log & Timber Home Care Experts

Michael
Upward facing checks (cracks) in log surfaces are potential causes of moisture infiltration and should be properly sealed
It is virtually impossible to prevent logs from developing cracks and checks as they age and dry. That's because as a large piece of wood seasons, mechanical stresses build up until the surface stress becomes so great that the wood cracks. We call these stress cracks “checks.”...
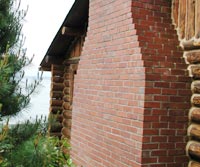
Molalla, Oregon has a rich history in the logging industry and to recognize the contributions of the industry, the Logging Mural Project was commissioned.
Construction of the mural was performed by Ray Sparre. (www.sparreworks.com)
The log structure was prepared using Log Wash wood cleaner and was protected by Shell-Guard RTU borate wood preservative...
Just as clear coats are vital to the performance of today's automotive finishes our Advance Topcoats are an integral part of all of our exterior finish systems.
Not only do they extend the life of the color coats but they do much more. They significantly improve the look of the finish by enhancing the color, clarity and depth of the finish. In other words, they make our finishes the most beautiful log home finishes in the world. Second, they help keep the surface clean. The very nature of a pigmented stain makes it susceptible to dirt pick-up through adhesion or impregnation.
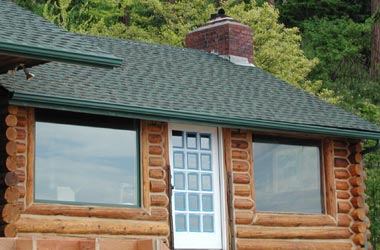
You can see this restoration project at the point of completion. Notice (compared to week 6) the log replacements (extending out from the horizontal wall) and the chinking that has been applied to the vertical joint to ensure the termination of water and air infiltration.
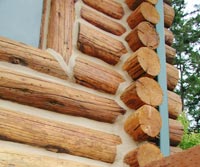
Well done Chris!
Thank you for following us on this project.
We will have more exciting restoration projects. Please come back again.
Move to: Week 1, Week 2, Week 3, Week 4, Week 5, Week 6, or return to 2. Restore
It's almost done. Chris will use epoxies to repair log corners.
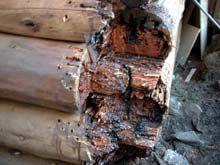
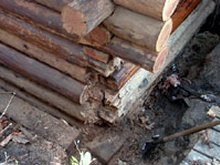
The next step for Chris is to repair the rotted ends of the logs. This part of the log maintains the greatest chance of becoming damaged and losing structural integrity. The reasons are:
- It's the part of the log that is most likely to be exposed to nature's elements
- It's the part of the log that will always absorb water most easily
- Wood leaving an exposed surface that's been cut against the grain is softer, thus easier to be infested with wood destroying pests.
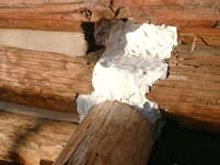
What Chris will do is "build up" the log using M-Balm, a resin applied to the soft wood to give it a strong, hard foundation to which he will apply E-Wood, a two part putty compound which will be molded into place. Following the curing of E-Wood, he'll have a stainable, lightweight "manufactured" log that is strong enough to hold a nail or screw.
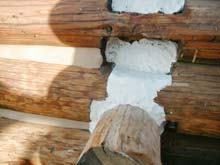
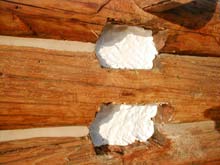
These pictures illustrate how Chris can also use the E-Wood as a form fitting gasket into which he will place a perpendicular log to achieve a weather-tight seal, or simply to fill in a large void.
Move to: Week 1, Week 2, Week 3, Week 4, Week 5, Week 7, or return to 2. Restore
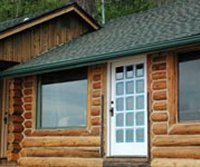
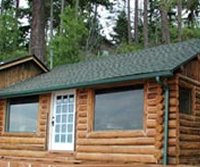
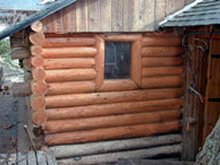
Following the treatment of Shell-Guard and Oxcon to brighten the wood (see week #3), Chris installed one window to the left for better appearance of this home. Now that house is protected against wood-destroying insects, an application of stain and topcoat will not only enhance your home's asthetic appeal, but will offer protection as well.
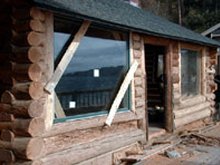
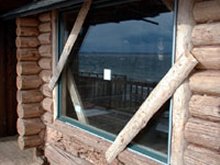
The transparent stain will protect your wood from the damaging effects of UV exposure. We recommend one coat of Lifeline Advance (clear coat finish, similar technology used in the automobile industry) over the stain color for protection and extending the life of the pigments in the stain. It also will give a maximum protection against water penetration.
Next week Chris will repair the water-damaged log ends and will bring us to the final step: applying Perma-Chink between all logs to further protect against air and water intrusion. Stay tuned with us to see the chinking application in progress, starting next week.
Move to: Week 1, Week 2, Week 3, Week 5, Week 6, Week 7, or return to 2. Restore
New Age Blast Media Available Sizes
Call 1-800-548-3554 to Order
Features
- Made from recycled glass
- Superior to corn, walnut, sand or soda media