
Log End Seal Clear End Sealer for Log Homes
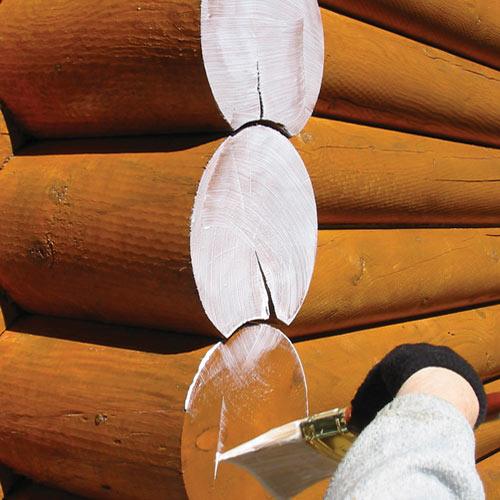
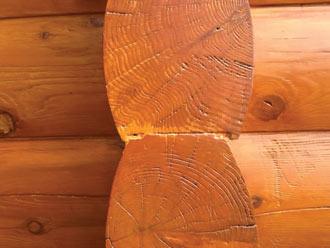
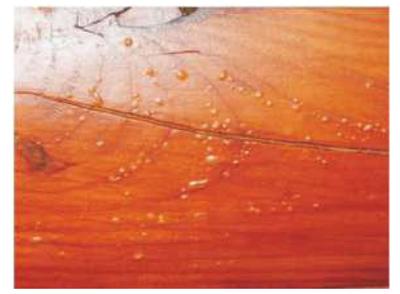
Log End Seal is a clear finish that is designed to protect exposed log ends from deterioration due to the elements. The end-grain of your logs are particularly vulnerable to checking and absorbing water, and can act like tiny straws, drawing excessive moisture into the wood. Log End Seal provides a durable, water-repellent barrier against sun, rain, snow and ice.
For use exclusively with Lifeline wood finishes.

Log End Seal Available Sizes
Log End Seal is available in 1 gallon container.
Product Information
Features
- Dries clear
- Protects from snow and rain
- Prevents excessive checking
Resource Links
Application Temperature
40° to 90°F
Application Methods
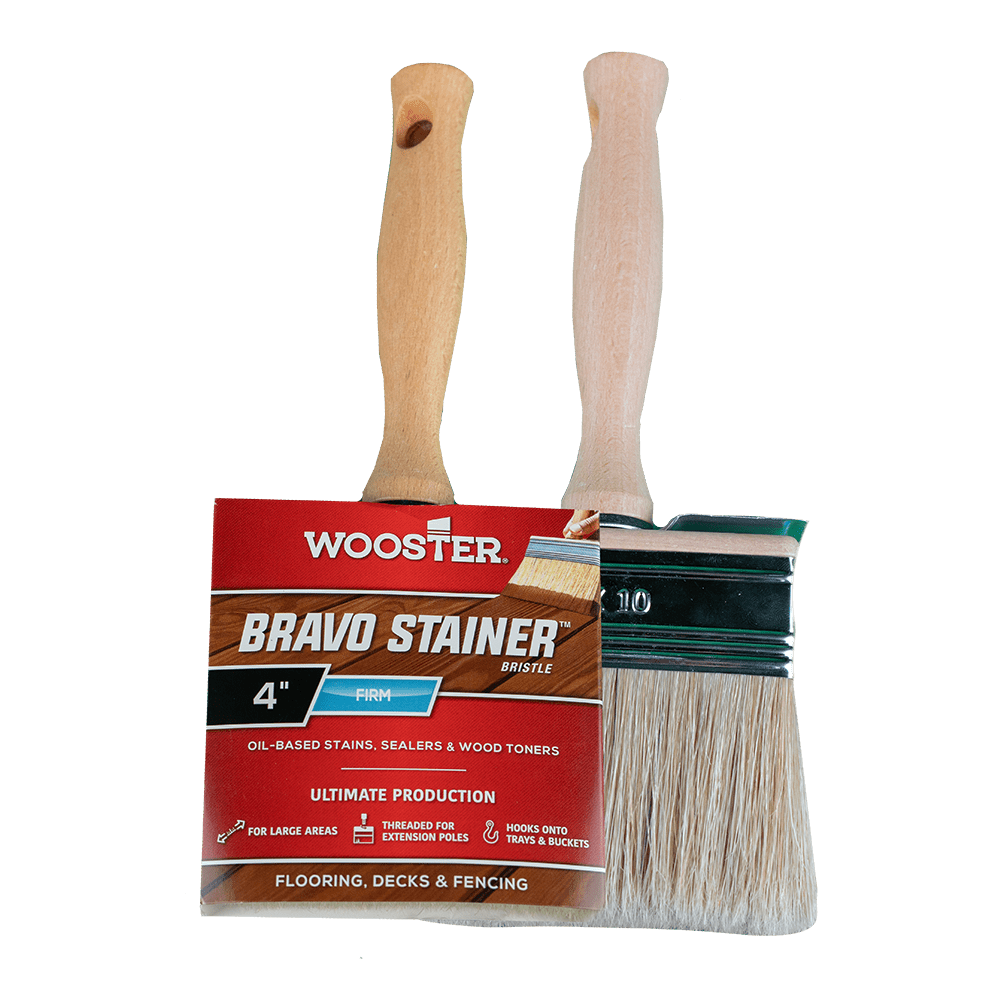
- Brush
Surface Preparation
- Clean and dry
- Sand log ends
- Apply Lifeline Stain before Log End Seal
Special Instructions
- Apply Lifeline stain to the entire home, including the log ends
- When the Lifeline has dried, apply Log End Seal with a brush, completely covering the exposed log end. Wipe off any extra that may have worked its way onto the sides of logs.
- Apply Log End Seal before applying clear topcoat
- Wash equipment and brushes with a soap and warm water
Shelf Life
3 Years
Frequency
As needed, depending on climate and weather exposure
Drying Time
- Dry to the touch in 1-3 hours
Coverage Rate
- 30-40 square feet / gallon
- Approximately 180 6″ logs ends
Recommended Products

Frequently Asked Questions
Lifeline FAQ
Do Lifeline finishes need a clear topcoat?
Yes. For all Lifeline exterior finishes we recommend Advance topcoat in either satin or gloss finish. Lifeline interior finishes we recommend Acrylic or PCS Clear Shield.
Do your finishes offer UV protection?
Yes. Ultra-7 and Ultra-2 finishes have UV Boost premixed. UV Boost is available to add to other Lifeline finishes.
Do I need to stain first before chinking?
It depends on the project. We recommend applying finish first, then chink. Read our article here for more info.

Why do my choices regarding surface prep, stain, and color matter?
When it comes to choosing a finish system for your log home exterior there are many factors to consider and depending on what choices you make it will have a significant impact on the longevity of the finish system. For example, some of these choices include surface preparation, type of stain, and color choice. Let us take a closer look at each one of these factors and discover how they each contribute to a systems performance.
Surface Preparation
First, surface preparation is often overlooked, not taken seriously, or even dismissed entirely. At Perma-Chink Systems we have learned through many years of testing and experience that this is an important step and forms the foundation for a successful finish system.
Does the surface of the wood have mold, dirt, discoloration, existing finishes, metal contaminants or greyed weathering? All these wood conditions will likely lead to problems with your finish system if left unaddressed. Perma-Chink Systems offers a full line of wood restoration and cleaning products and literature to deal effectively with each of these wood conditions.
Increased wood surface porosity is also important and to achieve best results, we recommend sanding your wood with 60 grit sandpaper. This allows for improved mechanical adhesion of the stain with the wood fibers and increases overall performance of the system as well as color uniformity. The overall color development will be much darker than on un-sanded wood. Nevertheless, the protection of the wood surface is increased substantially. Staining on smooth/un-sanded wood can look splotchy due to the reduced porosity and unevenness of the wood. As a result, not much stain goes on the wall and the performance is reduced accordingly.
If, however, surface preparation is skipped or done improperly prior to an application of stain, it will impact the appearance and longevity of the final system. Some of the likely outcomes such as peeling and early discoloration and unhappy homeowners are the usual result.
Choosing the Right Stain
The type of stain you choose also will impact performance. For all horizontal surfaces it is more advantageous to go with a penetrating type of stain such as our Deck Defense™. If you want to coat both horizontal and vertical surfaces another penetrating flat stain such as our Log and Timber Defense™ is an excellent choice. For all vertical surfaces film forming stains such as Lifeline Ultra 7™, Lifeline Ultra 2™ or Lifeline Exterior™ are your choices. For long lasting color fastness and protection on vertical surfaces the best option is our all-acrylic Lifeline Ultra 7.
Two broad categories for stain type are oil and water-based stains. What distinguishes these two types from each other? The advantages of oils are ease of application, extended drying time and initial high gloss appearance. The disadvantages of oil types are, more hazardous to work with due to dangerous flammable solvents as a primary ingredient, the gloss appearance dulls relativity quickly with exposure and due to its high solid content is less breathable and can chip and peel more easily than a water-based stain. Clean up of oils requires dangerous paint thinner solvents and is arguably more difficult. All our water-based stains are non-hazardous and easy soap and water cleanup as well as breathable making them less susceptible to peeling and chipping.
Choosing the Right Colors
Finally, color strongly influences the performance of any finish system. Our stains are designed to be semi-transparent. This allows the observer to more easily see the unique features of the wood such as grain and texture. However, by their very nature transparent type finishes do not offer the kind of protection afforded opaque systems such as paint. In many of our exterior formulations we use Transparent Oxide type pigments. These pigment types still allow light to pass through so that you can see the grain while at the same time providing a high level of protection from the sun. In addition, we avoid using organic type colorants that are not as colorfast as oxide-based colorants. In general, the darker tone colors will provide more protection and longevity for your home while lighter honey tone colors offer reduced protection. Nevertheless, at Perma-Chink we understand that color is a very personal preference and we all cannot agree on exactly what we would like our home to look like. Perma-Chink offers a broad range of color choices to meet our customers’ expectations and desires when it comes to color. Color formulation have been carefully evaluated for color longevity. Pigment loading levels have been formulated to give the greatest protection possible while at the same time providing color choices that meet our customers’ needs.
Some additional choices such as how many coats of stain, topcoat or no topcoat and surface porosity are also important factors. In general, two coats of Lifeline stain are better than one. It helps to even the color out and provides increased protection of the wood. Having a clear topcoat, such as our Lifeline Advance™, is also a great benefit. This helps keep the system sealed, dirt pickup is greatly reduced, performance of the system is increased, and it provides a great look to the final product.
Contact Us for Assistance
As a log homeowner you have many important decisions to make when it comes to the care and maintenance of your home. At Perma-Chink Systems we have spent the last 40 years developing solutions to help meet your needs. Your choices as well as ours do matter and will make a difference. Let us work together to keep your log home looking great well into the future. For more information about our products please give us a call at 1-800-548-3554 and tell us what your needs are. You can also visit our website at www.permachink.com where you can find more information and order our products directly.
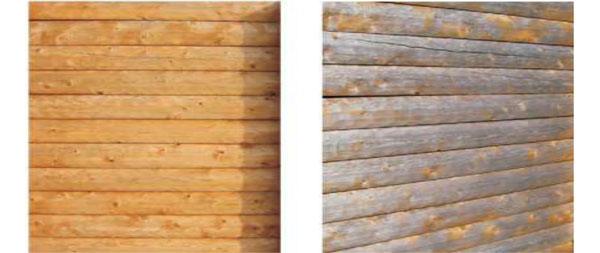
Let us assume that you have a brand new log home, or a home that has had an old finish recently removed. The bare wood is nice and bright, and the color is exactly what you always envisioned for your log home. What’s wrong with applying one or two coats of some type of clear sealer to hold the color of the wood and protect your logs from rain, snow, and ultraviolet (UV) light damage?
Here are the problems with this approach. The most damaging environmental factors to wood are water and sunlight. Water penetration creates conditions conducive to decay while the UV component of sunlight destroys the integrity of the wood’s cellular structure. Technically, we define this UV damage as the photo-oxidation of the lignin. Although clear coats alone can temporarily provide a barrier against water penetration, they have difficulty dealing with UV light for more than a few months. Clear coats rely on two mechanisms to protect the underlying wood from UV light, reflection and absorption. If the clear coat is slick and shiny, it will reflect much of the UV light but as it gets dirty or dull less and less light is reflected allowing more UV light getting through to the wood.
Chemical UV inhibitors may be included in the formulation, but these are sacrificial, in other words the more UV light that they are exposed to, the quicker they get used up. The bottom line is that if only clear coats are applied to exterior bare wood they provide only temporary protection against UV damage and degrade fairly rapidly so that even their ability to repel water may only last for a year or two. Within a few months the home will end up being multicolored with sun protected areas being significantly lighter than those areas exposed to direct sunlight.
So how does a colored finish avoid these same issues? The colorants or pigments contained in a colored finish absorb UV light and remain active as long as the pigments remain on the surface. It’s the pigments that do the majority of the work protecting the underlying wood from the effects of UV exposure. The purpose of our Advance™ Clear Topcoat is to protect the color coats just like the clear coat on a car. In addition to making a car attractive, car paint is designed to protect the underlying metal. The job of the clear coat is to protect the paint. The same concept applies to our exterior finish systems. The color coats protect the underlying wood and the Advance Clear Topcoat protects the color coats from the effects of dirt, wind, sunlight and weather. If you want a bare wood look, you can choose a color like Butternut or Wheat. They have the appearance of bare wood, but offer the UV protection inherent in a high quality pigmented stain. Note: These colors still need to be topcoated with Advance.
We occasionally get calls from potential customers who only want to purchase our Advance exterior clear coat to apply to bare wood and become upset when we refuse to sell it to them. It’s because we know that they will be disappointed with the results. We pride ourselves in supplying the very best finish systems in the world and to knowingly sell something to a log home owner that will not live up to our high performance standards is not the way Perma-Chink Systems, Inc. does business.
We often get asked if it is acceptable to apply our Lifeline™ finish systems over an existing oil-based or petroleum stain. It would be nice if there was a simple yes or no answer to this question, but there is not. It depends on a number of factors, including how many coats have been applied, how long the stain has been on the walls, and which oil-based or petroleum stain is present on the wood surface. In general, it is ALWAYS best to remove an existing competitive finish before applying Lifeline.
All too often a homeowner has no idea what is on the walls, let alone how many coats were applied. What they do know is that they want to apply something on top of what’s already there to avoid the cost and effort of stripping the surface down to bare wood. This approach is very risky, especially with a water-based, high performance film-forming finish like Lifeline.
Let’s look at some of the individual parameters that have to be dealt with and addressed.
Appearance
Perma-Chink’s Lifeline stains are transparent finish systems. This means that any discolorations or residual pigmentation that remains on the wood will show through our finish systems. With few exceptions, our finishes have little or no hiding power. Once our Lifeline system has been applied, it essentially locks the surface of the wood in place. If you are dissatisfied with the final look and appearance, it can be quite costly and time consuming to remove the finish, address of the discolorations, and refinish the wood surface.
Adhesion
How much residual oil still remains in the wood and is it enough to interfere with the adhesion of Lifeline stain? These are questions that are just about impossible to answer. Yes, a small test area may quickly determine that there is a problem, but if a problem does not show up within a few days there is no way to tell what may happen over a period of several months or years. We have seen several issues that were directly attributed to the prior application of oil-based or petroleum stains. Peeling occurred around checks and micro-fissures because they had been flooded with an oil-based product during the initial staining process, and although most of the oil had evaporated from the surface of the logs, the checks had retained enough oil to reduce the adhesion of a water-based film.
Blisters
When several coats of an oil-based or petroleum, penetrating stain have been applied to a wall within the course of a few years, the underlying wood can become so saturated with oil that it may take a long time for it to evaporate. When a homeowner finally decides that it is time to change to a quality finish like Lifeline, pressure washing with just water, or even a mild detergent, may appear to remove most of the residual oil and colorants, and give the appearance of a prepared surface for the Lifeline finish. The wood may look clean and bare, but in reality the old oil carriers may still be in the top layer of wood. With the application of the first coat of Lifeline, these oils are now trapped in the wood and serve as a vapor barrier. Yes, our finishes breathe water vapor, but oil molecules are much larger and can’t make it through the film.
Now weather comes into the equation. If the days stay cool and cloudy until the entire finish system is applied and has time to cure, there’s a good chance that nothing of consequence will occur. But if the sun comes out and heats up the wall while the finish is still soft and pliable, the oils contained in the wood will begin to evaporate, creating blisters in the finish. This can occur after the first coat, second coat, or even after the entire finish system has been applied. One thing that these types of problems have in common is that they typically show up within a week after application.
If you plan to apply Lifeline after having applied a penetrating oil-based stain, what is the best way to minimize the chance of forming blisters? The product to use in these cases is S-100™ Finish Remover. S-100’s formulation includes a strong and aggressive detergent package that will help make the residual oils water soluble and easier to remove and wash away from the wood surface.
Once the finish is removed using S-100, allow the surface to remain bare for a couple of months to allow any remaining oil to evaporate. When you are ready to stain, wash the surface with Log Wash™, allow it to dry and apply the first coat of Lifeline.