
 Starting Out On The Right Foot
Basic Instructions on how to Tool Perma-Chink Sealants
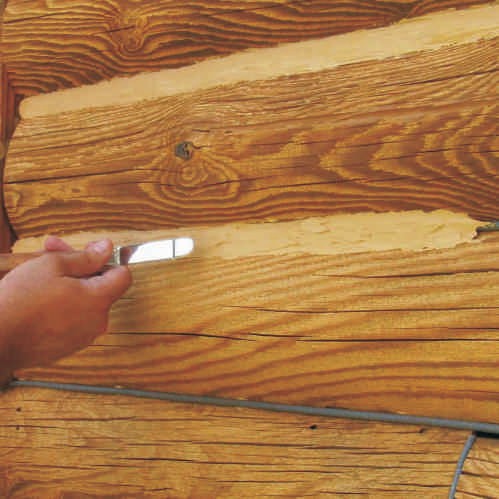 Smoothing your sealant you have just applied from the gun is not nearly as important as making sure you have really good contact to the top and bottom log, with no air trapped under the sealant. A good adhesion is accomplished by using the small spatula or trowel, misting the back of the knife slightly with water, and tooling the sealant. Ensuring a proper seal should be done with the top of the blade held at a very slight angle away from the top log for the upper part of the gap, and the bottom edge of the blade at a very slight angle away from the bottom log on the lower part of the gap.
Anytime you tool the chinking, spray a little water on it first. You want enough water to allow a smooth motion with the trowel, but not so much it pools and runs all down the logs. The water prevents the chinking from sticking to your trowel and gives a nice, smooth surface free of bumps and edges. Make more smoothing passes after you have created good adhesion to those logs to remove any tooling marks. All of these passes are a very light pressure, with ½” to ¾” of the tip of the knife being used. Depending on the appearance you are looking for, you may leave your sealant line as smooth or as rough as you would like.
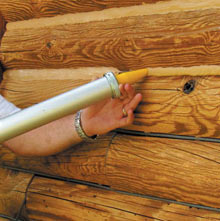
We also carry standard ratchet-style caulking guns for 11oz. tubes and 30oz. tubes, battery-powered guns, and a variety of trowels and spatulas to fit the variety of log home gaps.
Recommended Videos
 |
 |
 |
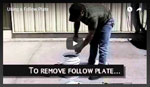 |
| Chinking Tutorial | Log Home Chinking | Log Cabin Chinking | Follow Plate |
Hope this helps! Check our Tools and Dry-In section on the website to find all the items needed to get you started on your project! And if you need more information, our professional sales representative is standing by to take your call at 800-548-3554 or send us an e-mail to This email address is being protected from spambots. You need JavaScript enabled to view it.
Click here to view the Log Home Sealants Application Guide![]()