
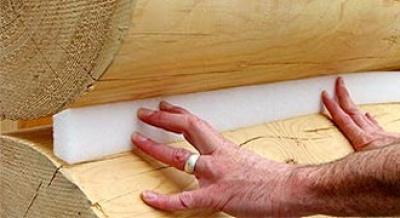
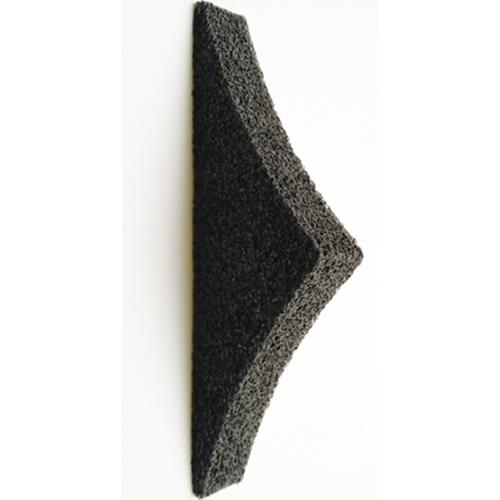
Grip Strip Trapezoidal Backer for Log Cabins
Grip Strip is chemically inert closed-cell polyethylene that is shaped to fit between log courses to form a flat surface for the application of Perma-Chink or Energy Seal. This makes it easier to maintain a consistent thickness of sealant across the seam, reducing the amount of sealant required and improving the sealant’s performance.
- Provides a firm chinking or caulking surface
- Shape and texture allow it to be easily installed without using staples, nails or glue
- Repels water
- Compatible with all commonly available synthetic chinking
- Helps prevent blistering of chinking surfaces
- Provides extra insulation against heat loss
- R-value for Grip Strip: 1.2 for 2.5″ & up; .9 for 1.25″-2″; and .6 for 1″ & under
Grip Strip Available Sizes
Trapezoid-shaped foam backer rod designed for wide gaps in log homes.
Available Sizes
| Size | Total Length/Box | Pieces per Box | Price per 4′ Piece/Whole Box |
|---|---|---|---|
| 3/4″ | 1200′ | 300 | $1.16/$231.99 |
| 1″ | 960′ | 240 | $1.48/$236.99 |
| 1 1/4″ | 600′ | 150 | $2.48/$247.99 |
| 1 1/2″ | 460′ | 115 | $3.20/$244.99 |
| 2″ | 360′ | 90 | $4.23/$253.99 |
| 3″ | 200′ | 50 | $7.77/$258.99 |
| 4″ | 144′ | 36 | $11.54/$276.99 |
| 5″ | 120′ | 30 | $13.85/$276.99 |
| 6″ | 96′ | 24 | $17.50/$279.99 |
Recommended Products
Frequently Asked Questions
Your questions about Grip Strip answered.
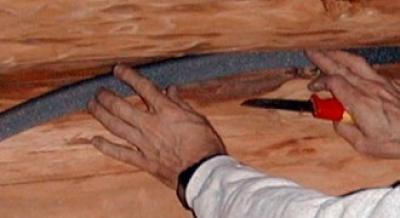
Do I need to use backing material?
Yes. For proper adhesion and elasticity of sealants, backing materials should be used. Read more here.
Can I use any foam for backing?
No. The wrong foam, like pink or blue colored foam, will “out-gas” and cause blisters in sealants.
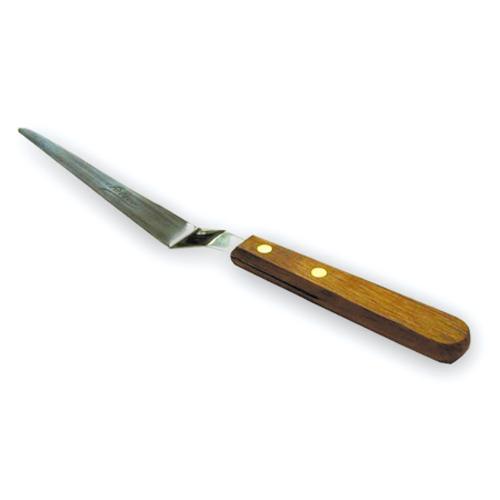
How do I smooth out my sealant?
For a smooth finish, spray the sealant with water and smooth it using a metal spatula. You can learn more about the process of tooling here.

One of the greatest mistakes you can make when applying a new finish to your home is to use inexpensive paint or stain brushes. You will be putting a lot of time, money, and effort into your project and saving a few dollars by using cheap brushes can compromise the beauty and performance of your new finish!
When applying water-based finishes like Lifeline™, use brushes made from synthetic nylon/polyester, or blends of bristle and polyester. Ever since the industry started moving away from oil-based coatings, brush manufacturers have designed brushes specifically made for the application of water-based stains and clear coats. These brushes are durable, so they’re great for staining rough surfaces. They maintain their stiffness when exposed to water and are easy to clean. You don’t want to use a 100% natural bristle brush for applying a water-based coating, as natural bristles absorb water. You’ll end up with a limp brush that won’t work very well. Also, rough surfaces will quickly wear out a pure bristle brush. Since transparent stains are typically much less viscous than paints, if you use a normal paint brush, the brush won’t hold much product and you’ll end up having to constantly dip the brush after just a few strokes.
Some Features of Quality Brushes
Bristle Quality – As previously stated, choose brushes with bristles made specifically for applying water-based stains. Using less expensive all-purpose brushes will result in drips, runs, and other defects in the finish.
Bristle Retention – There is probably nothing more exasperating than trying to pick loose bristles off of a surface that you just finished. If the finish has dried, it becomes virtually impossible to remove them without removing some of the finish also.
Ergonomics – The brush will be in your hand for several hours at a time. An ill-designed handle will quickly become uncomfortable to hold and work with.
Threaded Handle – Some high quality brushes come with a removable threaded handle that can be removed and replaced with an extension pole. This comes in handy when working on high, hard-to-reach areas.
Choose the Correct Brush for the Job
Use the largest brush suitable for the surface you are coating. You’ll probably need small brushes for narrow surfaces like frames and trim, but when coating logs and siding, larger brushes carry more finish; there will be less dipping to refill the brush, and fewer strokes to cover the surface. Larger brushes also do a better job when back-brushing a surface that has had a finish applied with an airless sprayer.
Properly Using Your Brush
Never press too hard on your brush. Stains and topcoats should be applied with the tips of the brush, not the sides. Don’t try to load too much finish on your brush. A heavily loaded brush will result in more drips and runs. If your brush becomes messy, don’t be afraid to stop and occasionally wash it out. One of the advantages of using quality brushes is that they can be repeatedly washed without harming the brush. One tool that you may want to consider purchasing is a brush and roller spinner/dryer. It will quickly spin most of the water out of a brush after washing.
Care and Maintenance
If properly cleaned and maintained, a good quality brush will give you many years of good service. If you take a break even for just a few minutes, rinse your brush out with clean water and shake out the water. If you are through for the day, thoroughly wash your brush with a mild soap or detergent, shake or spin the water out and return the brush back into its original storage sleeve. Don’t just throw it into your tool box. You don’t want to pick up any contamination like small particles of steel and the sleeve will help retain the brush’s shape while it dries.
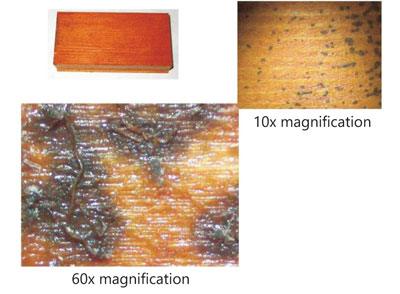
Most of the Directions for Use for our finishes contain the statement “Do not use Lifeline™ on surfaces that have been brushed or rubbed with steel wool or a wire brush. If you do, rust spots may appear under the finish.” Fortunately we rarely see the consequences of applying one of our finishes over a wall that has been rubbed or brushed with steel wool or a wire brush, but occasionally it does happen.

The customer who took this picture thought that the dark spots in the corners were due to mold; however, they appeared within just days after the finish was applied. We were able to obtain a small section of the discolored wood and just looking at it gives the impression that the discolorations could well be mold, or some flecks of dirt that may have been present at the time of staining. Even under the microscope at 10X magnification, there’s no indication of what caused the black spots.
But at 60X magnification it quickly becomes apparent that every black spot is associated with some type of fiber imbedded in the film. These fibers are bits of steel wool. Since the black spots are concentrated in the corners, it’s evident that someone had tried to wipe the wall clean but missed the corners entirely.
The first question about bulk loading guns is if they are worth buying. For example*, comparing the retail cost of Perma-Chink in pails to 30 ounce tubes; the price of two pails is $591.98, whereas the price of an equivalent amount of Perma-Chink in 30 oz. tubes for four cases is $883.96. Rather than buying four cases of 30oz. tubes you can purchase two pails of Perma-Chink and an Albion Bulk Loading Gun for $106.00 and a Follow Plate for $74.99 and still have $110.99 leftover. Plus you will have a great tool for future use.
In the case of Energy Seal, the savings are even greater. Two pails of Energy Seal plus the Bulk Loading Gun and Follow Plate ends up being less expensive than four cases of 30oz. tubes.
So now that we know that they can save you money, how easy are they to use? First of all, don’t try to save more money by not buying the Follow Plate. The Follow Plate is an integral part of the Bulk Loading Gun system and trying to load a gun without it can be a very frustrating and messy experience.
*Pricing example based on retail pricing as of 2025 and may not reflect current actual pricing
Let’s go through the procedure of loading and using an Albion Bulk Loading Gun step by step.
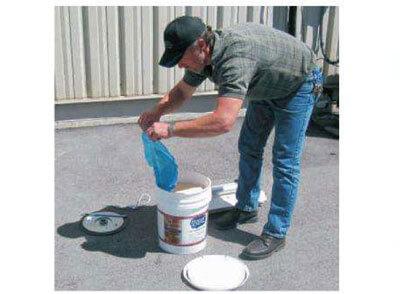
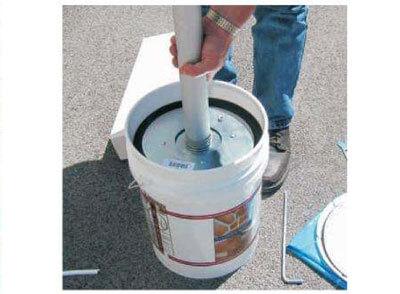
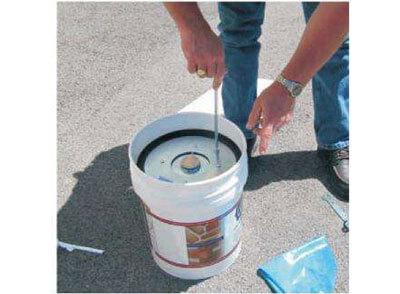
1. Remove the lid and the plastic liner from the pail. Put them aside and try to keep them clean in case you need to reseal the pail later.
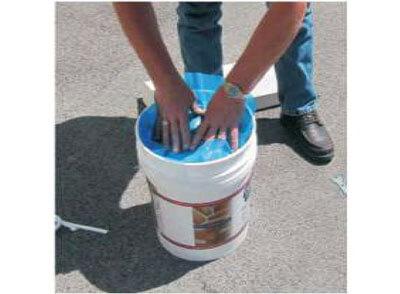
2. Place the follow plate on top of the product in the pail making sure that there is a good seal between the wall of the pail and the flexible edges of the follow plate.
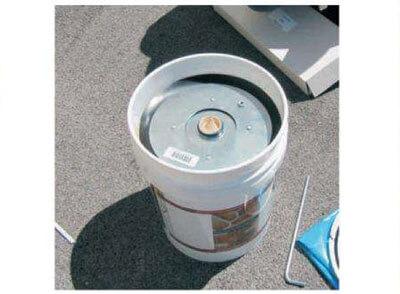
3. Remove the cap and cone tip from the end of the Albion gun barrel and ensure that the rod and plunger are fully forward.
4. Push the end of the barrel onto the lip surrounding the hole in the middle of the Follow Plate. Make sure the gun is perpendicular to the plate, and there is a tight seal between the barrel and the O-ring. If the barrel is tilted, air will be sucked into the gun during the loading process.
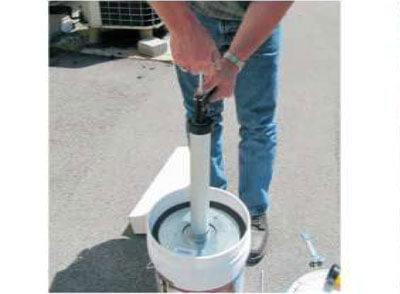
5. Depress the rod release plate and draw back the rod with a smooth, even pull. Make sure the barrel stays flush with the plate and don’t tilt the gun as you pull the rod back.
6. Once the rod is fully extended and the barrel is full of product, give the trigger one squeeze then disengage the barrel from the Follow Plate with a twisting motion.
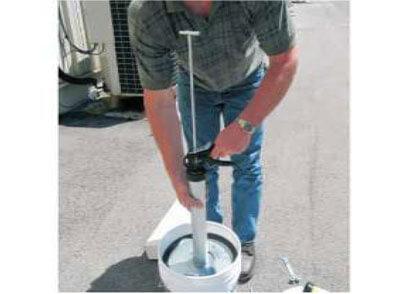
7. Attach the end cap and cone tip to the end of the barrel. Make sure the tip of the cone is cut to the diameter of the bead you want to apply.
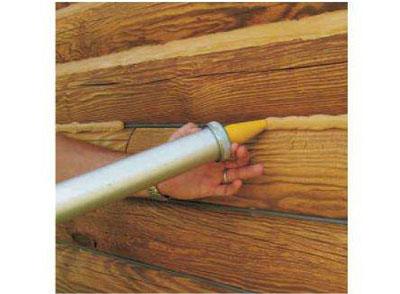
8. Apply sealant using the same technique as you would use with a standard caulk tube and ratchet gun.
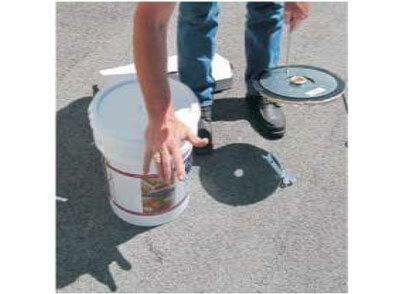
9. To remove the Follow Plate from an empty or partially used container, insert the handle rod into the open nut on the surface of the plate and pull it out.
10. Replace plastic liner over the surface of the sealant.
11. Replace the lid. Make sure that it is seated tight on the pail.
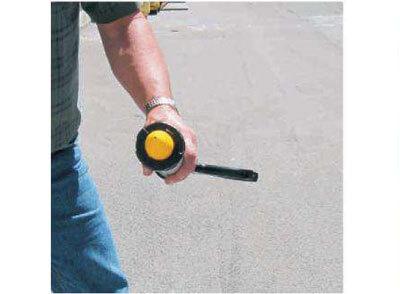
Tip: Make sure that the plungers are positioned correctly on the end of the rod. If the gun begins to suck air, tighten the blue base with the wrench that comes with the gun.
Step 1
Step 2
Step 3
Step 4
Step 5
Step 6
Step 7
Step 8
Step 9
Step 10