Blog
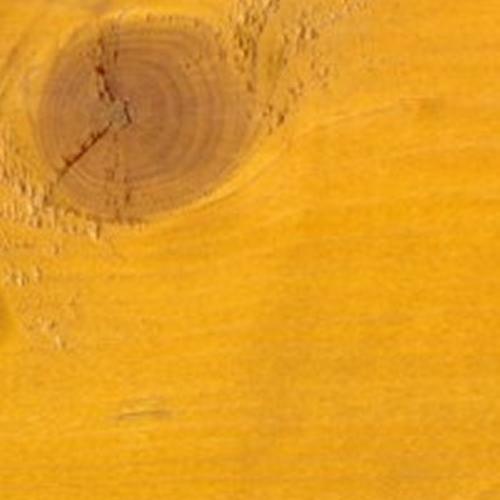
Perma-Chink was designed to eliminate the undesirable results often obtained by using older less successful methods of wood slabs, mud, and cement types of chinking, as basically they did not work well over the long haul. So it became a constant worry or job to re-chink or repair the failing products. Most of the products used did not have any degree of flexibility or they did not adhere to wood that well. The results were cracking cement caused by the stress of the logs shifting or shrinking. The resulting failure often allowed separation between the chinking and the log surface allowing water intrusion, and possibly early wood decay.
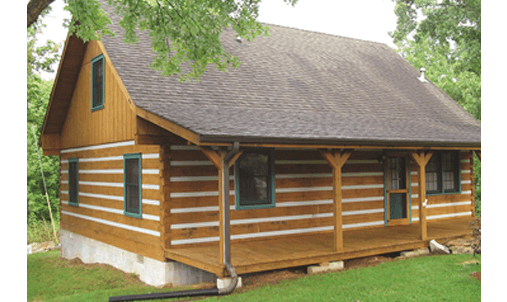
So as for a particular type of home, yes Perma-Chink is designed for any home that incorporates a specific joint design where it could be employed. For example; the large timber square logs that use a dovetail system as seen throughout the Eastern United States, as well as the large handcrafted round logs from the Western part of the United States. These homes were designed to be chinked from the start.
I think it’s important to interject another fact regarding log homes. Not only has the formulations of Perma-Chink changed over the years, so has the entire log home industry. Many people think log homes are still being cut by someone with a pickup truck and a chainsaw, working from a drawing on piece of cardboard. Today’s log home are engineered structures designed and approved by architects and require approval by various build codes in given areas. They are high-quality structures designed and manufactured by professionals using computer programmed tools and equipment to create structures that are built to stringent specifications. These homes are designed to require less maintenance, last longer and to provide a sound investment for your money. They are not just log cabins anymore, they are log homes.
How has log home chinking changed over the past few decades?
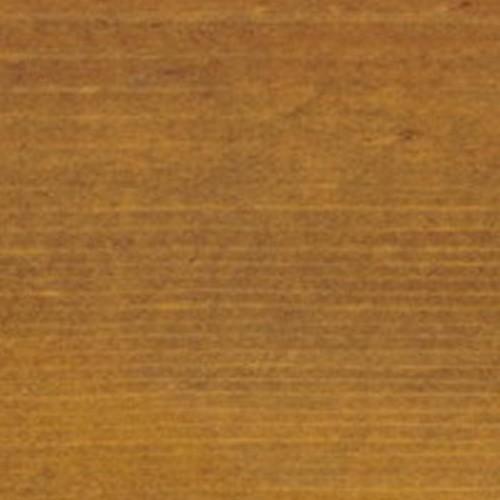
Perma-Chink was the first synthetic chinking produced in 1981, there have been many significant changes made in formulations to improve the adhesion, flexibility, and longevity. Early formulations were lacking in elongation and freeze-thaw stability which resulted in performance issues and storage and application concerns. Today’s Perma-Chink offers excellent qualities in all areas to meet the needs of the industry. Application can be accomplished in a much wider range of temperature extremes with little or no worries about product performance. There have also been additions to the color palette of the products keep up with the homeowner’s desire to mix and match shades and hues of today’s finishes.
Who can apply log chinking properly? A DIYer or a Pro?
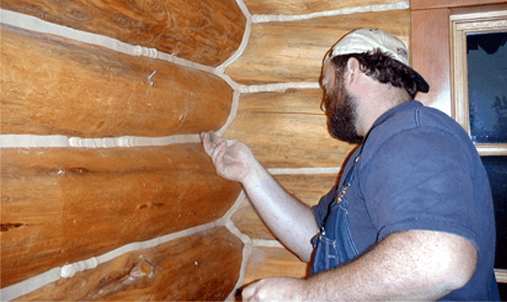
Basically anyone can apply Perma-Chink properly if they follow instructions. Some homeowners attend workshops or seminars to learn how to apply Perma-Chink, if they decide to DIY. But in today’s busy environments, some homeowners choose to use the services of trained contractors as the design of their dream home may require the use of specialized equipment such as lifts or scaffolding, and a trained contractor can usually shorten the time required to accomplish the job. Therefore the homeowner can tend to the other necessities involved to get moved in, and sometimes there are just not enough hours in the day for the homeowner to do this.
Visit our Find A Contractor tool to find a professional log home chinking contractor near you.

If you’re looking for some ideas this Thanksgiving to partner with your baked, smoked, or deep-fried turkey, we’ve compiled a list of recipes that you might find new and interesting to serve this year.
Side Dishes
Maple Roasted Brussels Sprouts
Not everyone’s favorite, but for those that love Brussels sprouts, this is a winner.

Click here for the recipe from AllRecipes.com
Air Fryer Hasselback Potatoes

Click here for the recipe from AllRecipes.com
Succotash
The list of ingredients for this Southern succotash recipe – including fresh corn, tomatoes, lima beans, and okra – are practically synonymous with summer (something we’re thankful for). And the combination of these five complementary flavors is only heightened with the additions of crumbled bacon and fresh basil.

Click here for recipe from Southern Living
Mashed Sweet Potatoes with Bacon
Bacon makes everything better, doesn’t it? A new addition to the sides could be this delicious dish.

Click here for recipe from Food Network
Awesome Sausage, Apple, and Cranberry Stuffing
This Thanksgiving apple sausage stuffing is fantastic! It is very flavorful and fresh-tasting. This recipe will stuff a 10-pound turkey (which serves six) plus extra. You can replace the usual pork sausage with much healthier turkey sausage. Other dried fruits may also be used in place of cranberries.

Click here for recipe from All Recipes
Desserts
Mini Apple Pies
For me, one apple pie is mini… I think I could eat two or three apple pies. But, if you want to pace yourself this holiday, these bite-sized treats will be a winner!

Click here for recipe from The Pioneer Woman
Glazed Maple Shortbread Cookies
These cookies are fantastic for Fall! Shortbread and maple together make this cookie a sweet treat and a great alternative for those who aren’t a fan of pumpkin pie.

Click here for recipe from Taste of Home
Drinks
Cranberry Fizz (non-alcoholic)
This drink is very popular for holiday gatherings and there’s never enough!

Click here for recipe from Taste of Home
Bourbon Slush
A drink customizable with your favorite tea.

Click here for the recipe on TasteofHome.com
Spiced Bourbon with Red Wine
Liven up the party with a creative cocktail.

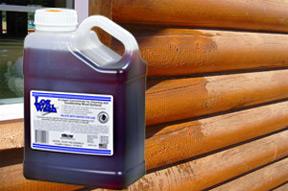
Before you apply coatings to interior surfaces, always thoroughly wash them with a recommended cleaning solution. Log Wash is made for this purpose and should be used as follows:
Mix 1/2 cup of Log Wash Concentrate in a pail with one gallon of warm water. Apply the Log Wash solution to the wall with a rag or sponge. Allow the solution to remain on the wall, keeping it wet for at least 10-15 minutes. Using a clean rag or sponge and a pail of clean water, wipe the Log Wash solution off of the surface. Frequently rinse the sponge or rag in the pail of water and frequently exchange the water in the pail with clean water.
To make sure you have the correct amount of finish, read this Tech Tip on determining square footage, as log homes are built in various layouts which all affect square footage.
Applying Interior Finishes
1. Stir the containers of LIFELINE finishes thoroughly before starting. Remember that even clear coats require stirring to blend different ingredients within the container. Use a drill-powered paint agitator for 5 minutes on a newly opened container to completely mix settled ingredients.
2. NOTE: Sure Shine should be hand-stirred, using a paddle or a paint stick to avoid entraining air in the liquid.
3. When using multiple containers of colored finishes, they should be ‘boxed’ (see ‘Mixing and Boxing Stains & Topcoats‘). Do this by thoroughly stirring LIFELINE in its original container and then combining contents of different containers together in a separate container.
4. To avoid leaning ladders against freshly applied LIFELINE, it is best to start at the top of the wall. Place ladder end on unfinished logs below your work line.
5. Wipe up runs and drips immediately. They will come off best using a wet rag.
6. When you take a break, submerge the sprayer tip in water to prevent clogging with partially-dried LIFELINE.
7. Avoid lap marks. Work on one or two courses of logs at a time and never stop in the middle of a log. Work to natural break points such as corners, window edges, butt ends of logs, or other natural break points.
8. Continue application by running a wet edge until a break point is reached. As you approach a break point, feather your wet edge and continue working the LIFELINE from your brush until the product runs out. Start spray pattern away from the break point and finish back-brushing to the break.
9. Apply LIFELINE in thin coats. If it runs down the wall, you are applying too much. OBSERVE CORRECT COVERAGE RATES as listed on label.
Beauty is a Duty.
Your log home manufacturer built you a beautiful home. Now it is your duty to finish it with the best log home products to highlight and preserve that beauty. Let Perma-Chink Systems offer you the world-class stain and finish brand: Lifeline Ultra.
Simply Unmatched.
The benefits of Lifeline Ultra are endless, but here are some points that differentiate the Lifeline brand from others.
Not just Beautiful, but also Durable!
In addition to building a strong home, you want to build a beautiful home, too, which is why the finished appearance of your logs is so important. No doubt that high-quality finishes will save you time and money in the long run. Longer lasting finishes equates to less labor expense over the life of the finish.
Top 5 Benefits of The Lifeline Ultra brand:
1. Unsurpassed Adhesion to Wood
The secret behind its durability is Lifeline’s state-of-the-art resin that creates a flexible and tough seal on your home’s logs. Perhaps more importantly than the seal’s strength, the resin ensures a continuous seal, providing protection from holes and gaps that might otherwise develop with an inferior finish.
2. More Resistant to UV Degradation and Color Fading
The transparent iron oxides protect your logs without resulting in a “painted” look that hides the natural texture and beauty of the wood grain. Plus, these pigments provide superior UV protection, blocking the fading and bleaching effects of the sun for a much longer period of time.
3. Water-Resistant and Breathable
All Lifeline finishes form water-resistant film that breathes just like Gore-Tex® to allow trapped moisture to evaporate while protecting the wood.
4. 5-Year Warranty
We are so confident in the performance of Ultra-7 and Ultra-2 that it comes with a 5-year warranty against UV exposure when applied to bare wood and covered with an initial coat of Advance clear topcoat.
5. Meets and Exceeds all Standards for low-VOC
Water-based finishes lack the chemicals in oil-based finishes that are harmful to the environment and difficult to clean up.
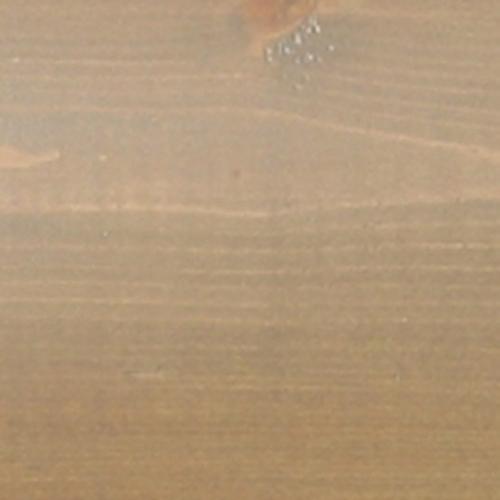
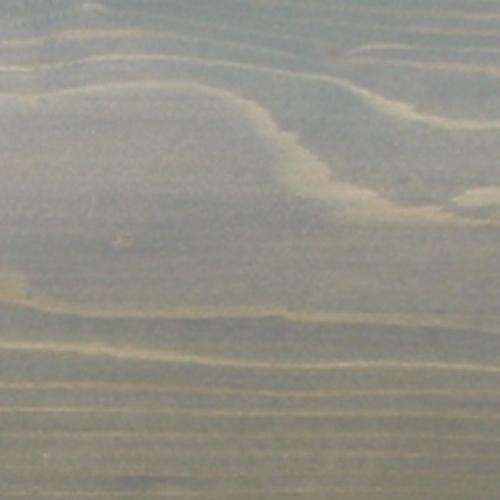
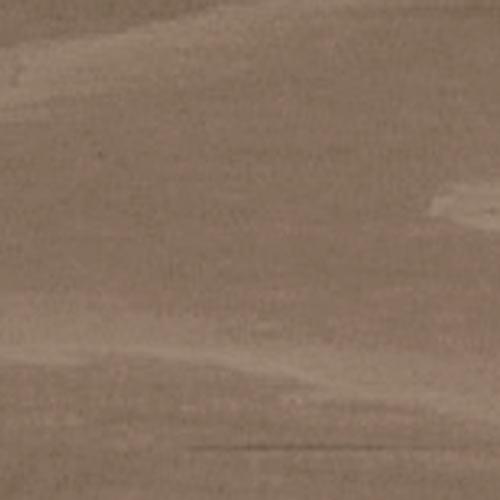
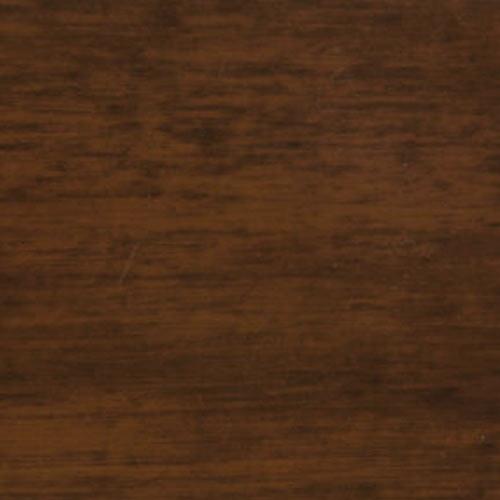
UNLIMITED COLOR CHOICES
I think we have already convinced you that Lifeline Ultra brand is the best there is in the industry for any wood home. Now here is the icing on the cake – you can choose any color your heart desires!
Choose from any colors below or send us your desired color chip. Then let us know what base you want the color to be in – Lifeline Ultra-7, Lifeline Ultra-2, Lifeline Accents or Lifeline Exterior.
If you’re looking for a different color than what we offer, we will make a custom stain color for you the same day. Don’t wait, call us today for your custom color at 1-800-548-3554.
Just A Sample Of Available Colors


Can Lifeline™ Interior stains be used to finish interior floors? Technically the answer to this question is yes, but we rarely recommend them unless whoever is going to be finishing the floor fully understands the characteristics of water-based, transparent stains and knows how to apply them.
Professional floor finishers have been using oil-based stains ever since it became fashionable to add some color to flooring. The application techniques and procedures used for applying an oil-based floor stain has not changed for decades, so most everyone selling or applying floor finishes will give a standard set of instructions to anyone planning to finish their own floors. However, if these directions are used when applying a water-based stain, the results will be unsatisfactory.
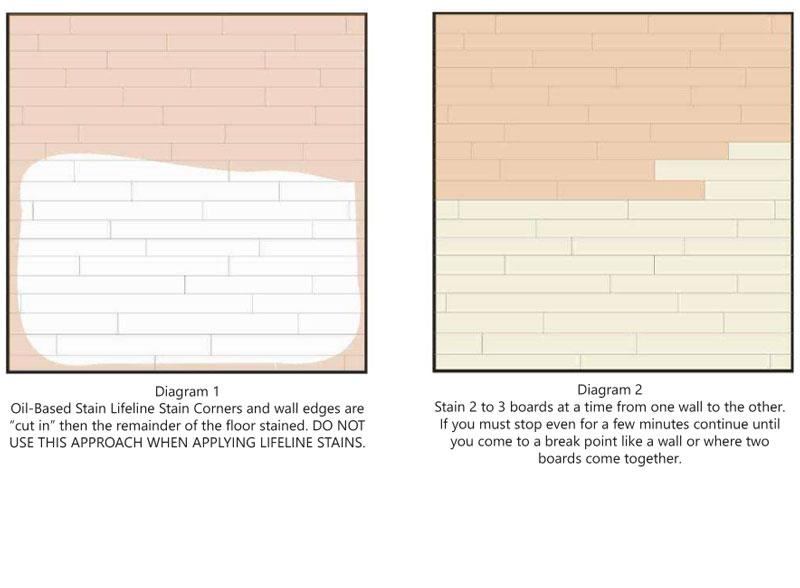
Once the floors are sanded and cleaned, a professional floor finisher using an oil-based stain will usually “cut in” around the baseboards and corners with a brush, rag, or pad, then apply the stain to the remainder of the floor [see Diagram 1].
Since oil-based stains take a fairly long time to dry, the interface between the “cut in” areas and the center area can be feathered together, so it becomes impossible to see any differences in color. Water-based stains dry very quickly, so it’s impossible to feather in any previously stained areas without creating lap marks. However, there are some distinct advantages for using a Lifeline water-based stain. These advantages include little or no odor, soap and water clean-up, quick dry time, and environmental friendliness.
If you choose to use a Lifeline Interior stain for your floor, here is the way to apply it:
1. Sand the floor as usual.
2. Vacuum, then wipe the floor with a damp cloth. Keep rinsing the cloth so that it does not accumulate too much sanding dust. It will raise the grain a bit, but that’s okay. The water-based Lifeline stain will end up raising the grain anyway, and the slight roughness will be dealt with later in the finishing process.
3. Once the floor is dry, apply one light coat of Lifeline Prelude™ clear wood primer with a brush or pad. This will seal the surface and help prevent any blotchiness due to varying porosity from the sanding process. Don’t worry about lap marks or surface roughness at this stage.
4. After Lifeline Prelude dries, apply the first coat of Lifeline stain. This is where care must be taken to avoid lap marks. Start at one corner of the floor and work on two or three boards at a time all the way across the floor. If you must stop before you get to the other side, be sure to continue to where one board ends and another begins [see Diagram 2]. Apply Lifeline in a thin coat and back-brush as you proceed.
5. When the floor dries you can decide if you want to apply another color coat. It’s not necessary and depends on how much color you want to obtain. Do not sand.
6. Once you have attained the desired color and the floor is dry, you can begin applying PCS Clear Shield to the floor. The technique for applying PCS Clear Shield is different than applying the Lifeline Prelude or Lifeline stain, so be sure to read the “Applying PCS Clear Shield” Technical Tip before you start.
7. Now that you have the first coat of PCS Clear Shield on the floor, and it’s good and dry, you can give the floor a light sanding using fine sandpaper (180 grit or higher) to remove any surface imperfections. Do not sand too hard or you’ll end up removing the finish. Once sanded, remove any dust with a damp cloth. Sanding between subsequent coats will not be necessary. Floors usually take two to four coats of PCS Clear Shield to assure maximum durability and desired uniform appearance.
8. Although you can usually walk on the finished floor within a few hours, it’s best to wait 72 hours before replacing any furniture or subjecting the floor to heavy traffic.
What about applying PCS Clear Shield over a newly applied oil-based stain? There is no problem with this as long as the oil-based stain is good and dry. Typically, we recommend waiting a week or two, but it really depends on the temperature and humidity. It is best to check with the manufacturer of the oil-based stain to see what drying time they recommend before applying a water-based polyurethane clear coat.
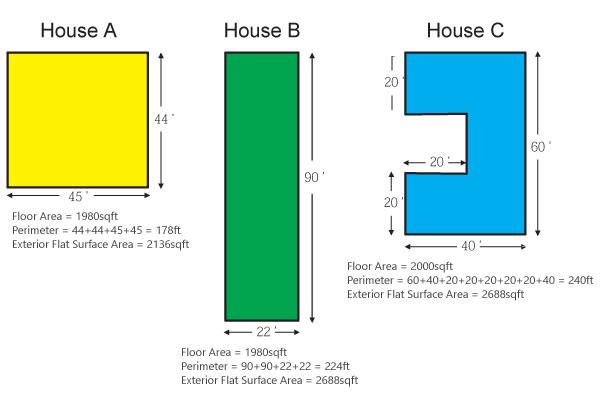
“My log home is around 2000 square feet. How much stain will I need?”
Often that’s all the information a customer has available when they first call Perma-Chink Systems. When people talk about the square footage of their home, they are usually referring to the floor area that may or may not include a garage. But does this number give us enough information to make an estimate of how much stain and topcoat will be required to finish a home?
Look at the outlines of three log homes with approximately 2000 square feet of floor area at the bottom of this page. Home A is just about square, Home B is long and narrow and Home C has two extensions on the ends. Even though the floor areas of these homes are nearly the same, the perimeters of the homes are significantly different and the perimeter is a significant factor in determining total exterior wall surface area.
For example, if we have flat log walls that are 12 feet high and ignore window and door openings, the exterior wood surface area of Home A is 2136 square feet whereas the exterior wood surface area of Home C is 2880 square feet, a difference of 35%. That’s why knowing the floor area of a home does not really help us determine the amount of finish required to stain a home.
So how can you determine the square footage of your exterior log walls?
It’s easier to work up the numbers one wall at a time then add them together. Start by measuring the length of the wall with a tape measure. Then either measure the height, or estimate it by counting the number of log courses and multiplying the number of courses by the diameter or height of the logs. Just remember that the diameter, or height, is in inches, so you will need to convert inches into feet. For example, if the logs are 6 inch high logs, they are 6/12, or 0.50 feet, in height; and if they are 10 inch logs they are 10/12, or 0.83 feet, in height.
So if we have a wall that is 25 feet long and has 16 courses of 10 inch logs the calculation is:
25 ft. x 16 courses x 0.83 ft. = 332 square feet.
Now this assumes the wall is flat, but what if the logs are round? A rule of thumb is to add 25% to the square footage of a wall to compensate for the increased surface area created by the curvature of the logs. So in the above example, if the logs are round you would multiply the 332 square feet by 1.25 resulting in 415 square feet of wood surface area.
What about log siding?
Round log siding has a curvature too but it’s typically not as pronounced as full logs. In this case a multiplying factor of 1.15 will work. Gable ends appear to present a challenge in calculating their square footage, but if you take their height from the base to the peak and the width end to end, multiply them together, then divide the number by 2, and you’ll come pretty close.
Estimating the square footage of exterior wood surfaces is not easy and mistakes are commonplace. Just remember a few tips: never multiply feet by inches, measure everything twice, and have someone else check your calculations.
We usually recommend not to deduct door and window openings (unless the windows account for over 20% of the wall area) or chink joints. It’s always best to stain the log edges of a chink joint before the joint is chinked to protect the wood from water infiltration. The last thing is to add at least 10% extra product to your order. It’s better to have some material left over than it is to run out near the end of a job.
Here is a comparison between three homes with similar floor square footage. You can see from the calculations how the footprint of your home can affect the surface area of your home.
Most people are accustomed to spring cleaning, but if you are a home owner, you know that your house needs attention year-round. Fall maintenance is much like spring house-cleaning, but more preventative and less “cleaning.” And it’s much easier to do it now rather than wait until the weather turns nasty.
From The Top
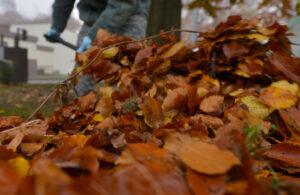
Fall means leaves—and plenty of them. You will certainly need to clean out your gutters. A word of caution: most of the automatic guard systems only screen out large leaves while allowing gunk and small sediment to accumulate. You still will have to routinely clean the nasty rotting gunk out of your gutters! So an alternative is to have your roofer regularly come and clean your gutters every fall. You should make sure that the drainage area around the downspout is functioning properly as well. The roof area should also be checked for any leaks around the flashing at the chimney and around the vents for the heating or sewer system.
While inspecting the roof area it’s important to check for any holes or access spots where squirrels, raccoons, or bats can enter your home and make themselves a vacation home for the winter. Clear away all debris from around the foundation of the house.
Caulking around all exterior areas is a must. You probably won’t find but a few areas where the caulk needs replacing, and it’s not a big job to replace old caulking with a fresh bead where needed. Weather stripping also should be examined and replaced if you find any that is curled or coming loose. Neither the caulking nor weather stripping replacement is a heavy job. It just takes some care and close examination. This can usually be done in a day for a moderate-sized home.
A Quick Scrub
Your exterior walls should get a good cleaning. In addition to making your home look great, a wash-down with Log Wash will get rid of the dust, dirt, and grime. Freezing weather is especially hard on log exteriors and a little bit of upkeep now may prevent costly repairs next spring.
Once your walls are clean, go around your home looking for signs of worn stain and failing sealant. If the stain looks faded or dingily, you should consider applying another coat of Lifeline stain and Lifeline Advance topcoat. Don’t forget the topcoat is an integral part of the system and will help protect your home and extend the life of your stain.
Seal Up New Checks
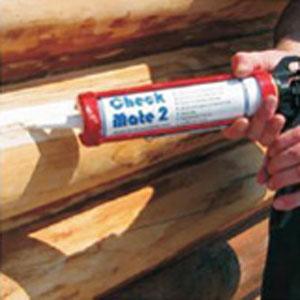
While you are at it look for any new checks that may have opened up, especially on the top half of round logs where water can enter. Our Check Mate 2 comes in a variety of colors and is the perfect solution for closing up those potentially damaging checks.
Properly sealed joints and gaps go a long way in preventing cold drafts during the winter months. In these days of rapidly rising fuel prices it is important to keep cold air from entering your home. Energy Seal is specifically designed for this purpose. Pay special attention to places where wood meets masonry. Reseal with Energy Seal. In addition to saving you money on heating bills, it will help to keep your home warm and comfortable.
Firewood Storage
Many log home owners have fireplaces or wood stoves that they use to create an attractive atmosphere or as a source of heat. Typically fall is the time of year that most people build their inventory of firewood to carry them through the winter. Here are a few things to keep in mind when storing firewood: Never store firewood on your porch or deck or next to your home. One thing is for certain, along with the firewood comes a whole community of insect pests. Although some like wood roaches, pill bugs, centipedes and ground beetles are harmless, infestations of wood boring beetles, termites, and frequently carpenter ants, can start from stored firewood piles.
Store your firewood at least two feet away from the side of your home and keep it off of the ground. This helps keep the firewood dry and allows air to circulate throughout the wood pile. When you bring firewood inside, only bring in as much as you plan to burn in a day. Firewood stored by the fireplace may look attractive but once the logs warm up and the bugs start to emerge, you may think otherwise.
Preparing your home for winter in the fall can make life so much easier for you in the cold, dark winter weeks ahead. You’ll rest easier knowing that you won’t have to fight the elements when the inevitable emergency or problem crops up, as it always does. You can sit back in front of your fireplace with your family and enjoy those cold months secure in your well-protected home!
Log homes and autumn leaves seem to go together. Enjoy the season and don’t hesitate to contact us at 1-800-548-3554 or by email at techservice@permachink.com if you have any questions about maintaining your log home.
Lifeline Prelude is a clear wood sealer and primer for surfaces that have been media blasted. Lifeline Prelude is enhanced with UV Boost for maximum protection against graying due to ultraviolet light exposure.
Over the past few years media blasting has become a popular tool for removing old finishes in preparation for applying a new coat of stain. However, media blasting significantly increases the porosity of the wood, thus allowing it to absorb much more stain than those wood surfaces that have been chemically stripped, sanded, or pressure washed.
This high absorption results in a darker final stain color than that typically reflected by a color chart. In addition, wood is not uniform and media blasting often emphasizes the differences in wood grain absorption, even on a single log. This results in streaks and blotches due to varying amount of stain absorbed by different areas of the wood. Lifeline Prelude solves many of the potential problems created by media blasting.
One coat of Prelude primer fills the pores of the wood and provides a uniform surface film in preparation for the application of a pigmented stain. However, it should be noted that Lifeline Prelude is a wood sealer/primer and is not suitable as a clear, final finish!
Recommendations for the use of Prelude:
1. After a home has been media blasted.
2. If a home is aggressively pressure washed to the point where the surface is feathered and the porosity of the wood varies from area to area.
3. On wood where the surface has been unevenly sanded.
4. On rough cut siding before the application of the color coat(s).
5. If a section of a wall has been repaired or replaced and the new sections don’t match the surface characteristics of the old.
6. Whenever an older home (more than 80 years old) is going to be restored. Once the surface of old wood is cleaned of grayed wood it typically takes on the porosity characteristics of a blasted surface.
7. Whenever you want to use only clear coats on interior surfaces. Although Lifeline Interior Clear can be used, the use of Prelude as the first sealing coat is a better deal, since it already contains UV Boost. Once Lifeline Prelude dries, Acrylic Gloss or Satin or PCS Clear Shield Gloss or Matte can be applied over it.
8. Whenever a home is completed but may remain without an exterior finish for many months, a coat of Prelude will help prevent surface graying and make it easier to clean when it comes time to stain. Adding a dose of Stay Clean™ to the Prelude will help also prevent the growth of surface mold and mildew.
For use exclusively with Lifeline wood finishes.
With so many different choices on the market for wood restoration and cleaning products, it can be confusing trying to decide just what to use. Unfortunately, when it comes to cleaning or restoring wood, there is no “one size fits all” approach. Each unique situation has a chemical solution that best solves that problem. Perma-Chink Systems understands these challenges and we have developed specific products to address each situation.
We offer a wide range of cleaning and restoration products that are designed to be fully compatible with our other wood care products. Our name says it all – Perma-Chink Systems. If you choose to stay within the system, you can have confidence in a fantastic outcome. It is difficult to determine exactly what is in a typical store brand of cleaner. Many of these cleaners, conditioners and brighteners may contain ingredients that are not compatible with our products. Some brands of wood cleaners may leave residues that prevent adhesion of our stains – even after considerable rinsing. Many of these cleaners may even damage the wood to the extent that adhesion of our stains may be a serious problem. Furthermore, a number of these cleaners can even cause unsightly wood discolorations. But do not worry, stop playing the guessing game. For over forty years now, Perma-Chink Systems has been working towards creating and testing products that work together for your success! Let us take a closer look at a few of them.
Log & Timber Wood Cleaners

Our wood cleaner Log Wash™ was originally developed to clean coated wood surfaces of mold, dirt, oils and other debris and not harm the coating. However, it was discovered that Log Wash could also be used to clean bare wood surfaces. The chemistry of wood is complex. For example, wood naturally contains chemicals that help protect it from disease and rot. Some of these natural extracts and resin oils can – and do – cause discolorations that can be undesirable to look at. Wood tannins are one such class of chemicals that, when combined (or complexed) with iron, can form dark discolorations on the surface the wood. Our Log Wash contains Phosphoric Acid which can also form chemical compounds with iron, such as iron II phosphate or iron III phosphate, that compete with the natural tannins present in most wood species. By effectively reducing the amount of free iron available to the tannins, these dark ink-like discolorations can be prevented.
Using Log Wash not only helps to clean but to also stabilize a very complex system! Many available commercial cleaners are also high in pH, such as caustic cleaners. These cleaners can do damage to the coating by softening it. Once these cleaners are rinsed or pressured washed off, the coating comes off with it. Using Log Wash according to our labeled instructions keeps the pH slightly on the acidic side where wood is naturally. By keeping the pH balance close to where wood is naturally, some undesirable chemical reactions that could more easily occur at high pH can be avoided altogether.
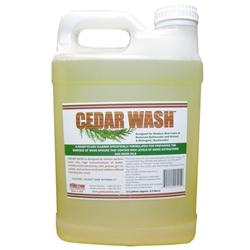
Wood is a unique, natural substrate that appeals to us due to its beauty and natural characteristics. Are all wood species the same in chemical composition? The obvious answer is no they are not. Although all wood contains cellulose and hemicellulose, it is the wood extractives and resin oils that contribute in large part to the differentiation of one species from another. In addressing these differences it brings us to our next wood cleaning product: Cedar Wash™. This product was developed to deal with certain species of wood that naturally contain very high levels of extractives and resin oils. The presence of these extractives can cause several problems including discoloration, stains and adhesion problems with a coating. Wood that falls into this category of “extractive-rich” includes Redwood, Western Red Cedar, Walnut and Mahogany. A second class of wood that contains high levels of extractives but not as high as the “extractive-rich” includes Southern Pine, Douglas Fir, Spruce and Cypress.
Cedar Wash is a Ready-To-Use formula designed to effectively remove resin oils and wood extractives from the surface of wood and it will not harm finishes that are in good condition. In addition, the product is safe to use on chinking and sealants and has a low environmental impact due to its safe chemical composition.
Dealing With Dark, Vertical Streaks
What if my wood already has metallic iron tannate stains what can I do about them? First, you need to be certain that the discoloration is from iron tannates. You can perform a simple test with a Q-tip dipped in diluted 3-to-1 bleach solution. Apply this to a small test area and if the dark color disappears, your color problems are most likely from surface mold. In contrast, iron stains will also have the appearance of streak marks running down a wall in a vertical direction and will not go away with the Q-tip test. Oxcon™, which contains Oxalic Acid, was developed to help brighten wood with dark discolorations due to iron stain. Ferric Iron, which is dark in color, will react with Oxalic Acid to form Ferrous Iron which is colorless. The key to all this working properly is good rinsing afterward. If the oxalic acid is not rinsed well, it can leave surface crystals that can interfere with adhesion.
Brighten Bare Wood Back to Original Color

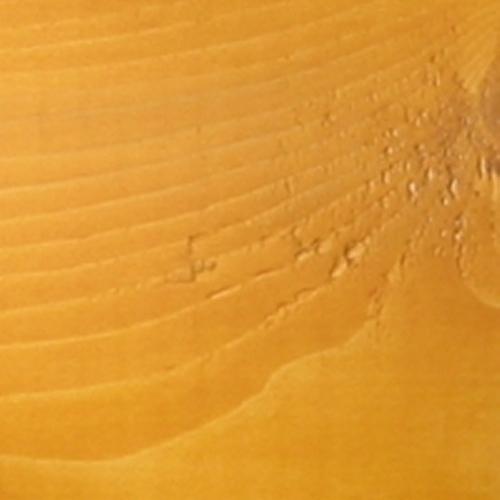
Bare wood when left exposed to the elements will weather. What do we mean by weather? Wood is continually going through changes due to sunlight, water, mechanical forces and heat. Each of these can present problems, but sunlight does considerable damage to the surface of the wood due to a process called photooxidation. In this process lignin, which provides support structure in the cell wall, is broken down and degraded, turning the wood grey in appearance.
After this damage has occurred it would be unwise to stain or paint on the surface of the damaged wood. Ask yourself would you apply paint to an old rusty metal pole and expect it to stay adhered for a long time? Of course not. In the same way, the compromised wood surface must first be removed through mechanical and chemical means before applying a coating to the surface. Perma-Chink’s product to deal with this problem is called Wood Renew™, and when dissolved in water produces hydrogen peroxide.
This, along with additional highly effective cleaning agents, work together to remove resin oils, dirt and disinfect the wood. A pressure washer is used to help mechanically remove the damaged layer of wood leaving behind a bare, clean, and newly restored surface to apply a coating. The appearance of the wood changes from a dark gray to a freshly milled yellow color. It is truly amazing to see the difference this process can have on the wood. Surface mold and spores, dirt and damaged wood fibers are all removed in this process. We are cleaning and restoring wood back to its original, bright clean form.
Finish Removal
If you have an existing finish that you need removed, we have two chemical options for you. The first is called S-100™. S-100 uses a proprietary, environmentally safe ingredient to help soften the existing film prior to removal. It forms a gel on the surface of the film, allowing it to have maximum contact time with the surface. The surface is then rinsed using a pressure washer to remove the film and S-100 from the surface. Our second option, called Strip It®, uses a highly effective but low toxicity active ingredient called Benzyl Alcohol. Like the S-100, this product also acts on the surface to soften the film and is removed with the assistance of a pressure washer. Both S-100 and Strip It are water-based products that are environmentally friendly and safe, as opposed to hazardous solvent-based products like methylene chloride, methanol, and petroleum solvents. Strip It is practically odor free, S-100 has a citrus odor, and both are non-flammable and biodegradable.
Rinse Completely
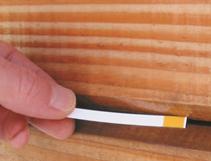
Finally, there is one important procedural step that all these cleaners and wood restoration products share, and it has to do with proper rinsing. Each product used should be thoroughly rinsed from the wood. You might ask yourself, “How do I know with certainty that I have rinsed enough?” Perma-Chink Systems can provide help with this too. We offer pH Strips that are used for testing the pH of the rinse water and wood. We strongly recommend using pH strips to help you determine if you have rinsed the substrate back close to a relatively neutral pH range of 6.5 – 7.5. Improperly rinsing the wood can lead to many problems that could easily have been avoided if proper rinsing were done in the first place.
Final Notes
At Perma-Chink Systems we have worked tirelessly to develop quality log and timber home products that work for you each step in the process, while at the same time being aware of your safety and the stewardship of our environment. We always strongly recommend that you follow all labeled instructions when using our products.
In addition, we have developed technical tips to help guide you through the process. For example, we have a cleaning guidelines and pH tech tip and many more all designed to assist you in solving your problems. These tips can be accessed on our website www.permachink.com under Info > DYI Section. We also have product specialists available at 1-800-548-3554 to help answer any questions you might have. We hope this information helps you to better understand the purposes and differences behind each of our cleaning and restoration products.
Wood Renew™ – To pre-wet or not to pre-wet?
Fairly often we get questions about Wood Renew™ with reference to whether or not to wet the surface before application. First, I would refer to the label directions as to use and application. There is no mention of the need to wet the surface prior to application. However, there is mention of proper pre-mixing and allowing a bit of “dwell” time prior to application. This dwell time allows the thickeners to activate and aid in helping it to stay on the wall so it can do its work for better results.
The dwell time also needs to extend to the wall surfaces to allow the product to clean and brighten the wood as best it can. Now, not all stains are easily removed, and it may require a bit of old-fashioned elbow grease with a stiff bristle brush to get at the stubborn stains. Try not to allow the product to dry on the surfaces as this will make it a bit more difficult to rinse away.
The best recommendations are to follow the label directions as to mixing and application, and there is no need to pre-wet the surface prior to application.
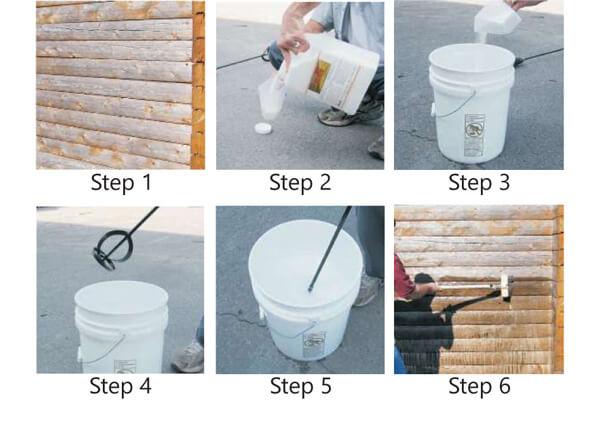
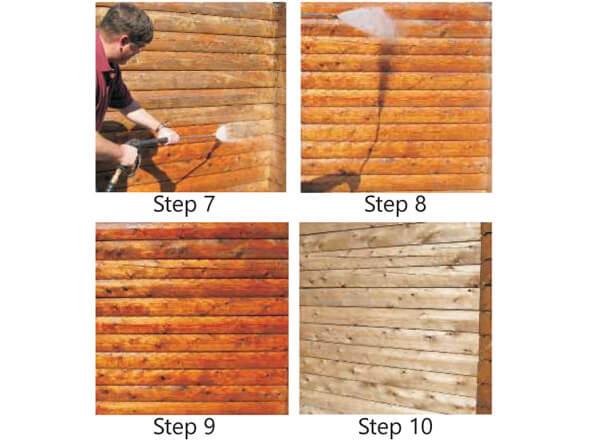
Application of Wood ReNew
Step 1: Use Wood ReNew to remove grayed surface wood.
Step 2: Only measure out enough Wood ReNew to add to a few gallons of water (0.8 cups per gallon) at a time. You need to use whatever you mix up within 1 to 2 hours.
Step 3: Pour the Wood ReNew into a pail that contains the water. Do not mix Wood ReNew in a sprayer.
Step 4: Mix the Wood ReNew with the water using a paint mixer and an electric drill.
Step 5: Stir for about five minutes or until no undissolved granules are visible. Allow the solution to thicken for 10 minutes before using.
Step 6: Apply the Wood ReNew solution to the wall with a mop, broom, or car wash brush. Start at the bottom of the wall and work up. Allow the solution to remain on the wall for 10 minutes.
Step 7: Pressure wash starting at the bottom of the wall. Work on 2 or 3 courses of logs at a time. Hold the wand at a 30 to 45 degree angle to avoid feathering the wood.
Step 8: Once the entire wall is pressure washed, rinse the wall starting at the top and work down. At this stage water volume is more important than pressure.
Step 9: Never judge the effectiveness of Wood ReNew or any other cleaner while the wood is still wet.
Step 10: Once the wood dries, many of the dark discolorations will disappear. This is the same wall that appears in the previous step after drying for three hours.
Should any questions arise please contact one of our product specialist via our toll-free number (1-800-548-3554) or visit our website at www.permachink.com and we will be happy to help you.
If a home has been media blasted, is it really necessary to wash down the wood with a Log Wash™ solution before it is stained? We believe it is and here’s why. If corncob grit or walnut shells are used, and you take a close look at a blasted wood surface, you will find lots of particles embedded in the wood. Along with the particles are invisible mold spores that can germinate and feed on these biodegradable media sources.
To prevent mold spots from developing under the stain, these mold spores need to be removed, preferably by washing the surface with a solution of Log Wash (2 cups per gallon of clean water). Even if glass, dry ice, or other types of blasting media is used, we still recommend washing down the blasted surface to remove any remaining foreign matter substances that may be adhering to, or embedded within, the wood. Blowing high pressure air on the wall will not totally remove all of the dust and old finish residue; and without actually washing the surface, you run the risk of compromising the adhesion of the new finish.
On the other hand, most chemical strippers and cleaners do a good job eliminating mold spores and dust particles which is why it may not be necessary to use Log Wash if the home is going to be stained within a few days stripping or cleaning. However, if the stain application is delayed more than seven days after the wall has been chemically cleaned, an application of a two cups per gallon Log Wash solution should be made, rinsed, and the wood allowed to dry before the stain is applied. It only takes a few days for enough mold spores, pollen, and dirt to accumulate on bare wood to create a problem.
We always recommend thorough cleaning and preparation procedure because careful preparation is the best way to help prevent unsightly fungal growth under our transparent finishes, and to ensure the best adhesion and longevity of our exterior stain and topcoat systems.
CHEMIST’S CORNER: Can All Wood Species Be Prepared the Same Way, Using the Same Cleaning Products?
The obvious answer to this question is NO. Although all wood species contain many of the same components – including cellulose and hemicellulose and minor amounts of extraneous materials – it is the wood extractives that differentiate wood species from one another.
Understanding the Bleeding of Wood Extractives.
Wood extractives are compounds present in the softwood and heartwood of a tree that contribute to such properties like color, odor, decay and insect resistance, density, and flammability. When used for log homes, naturally occurring extractives in the wood can migrate to the surface and discolor paint and finishes (water soluble extractives) as well as create adhesion issues (oil soluble extractives) for many coating types.
The organic components of the extraneous materials are referred to as extractives because they can be removed by extraction with solvents without altering the cellulose/lignin structure of the wood. Extractives include tannins and other polyphenolics, coloring matter, essential oils, fats, resins, waxes, gums, and starch. Depending upon such factors as species and growing conditions, the total extractive content of wood substance may range from less than 1% to 30% in extreme cases.
Wood Species and the Level of Extractives
All wood species contain wood extractives; however, there are a handful of wood species that are characterized as extractive-rich woods. This group includes Redwood, Western Red Cedar, Walnut and Mahogany. The second group of wood species that also contains higher levels of wood extractives but less than extractive-rich woods include Southern Pine, Douglas Fir, Spruce and Cypress.
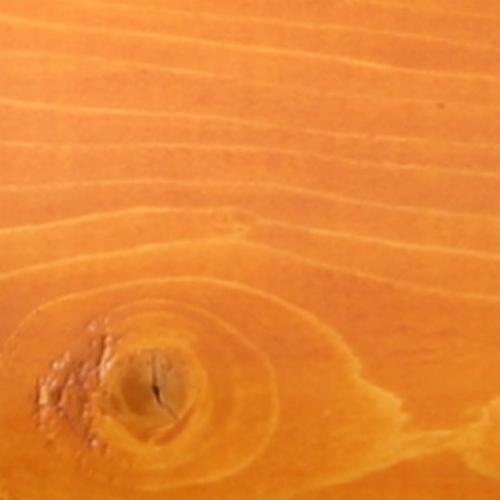
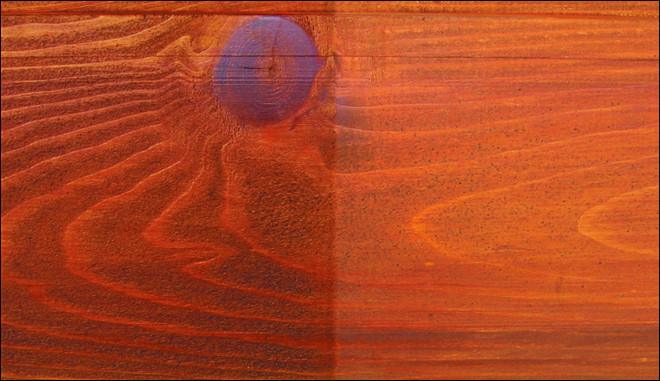
The percentage of extractives in trees is generally low, but a high concentration is found in knots and heartwood of the tree. Knot bleeding can occur when a knot contains an excessive number of extractives. In these cases, the extractives consist mainly of rosin, fats and turpentine, and these extraneous materials can make up as much as 50% of the knot by weight. The ratio of extractives can change with the season and weather (if the tree is stressed).

Extractives Affecting Wood Color
Staining or discoloration of wood may result from chemical processes that convert originally colorless or light-colored extractives into intensely colored products. Most of the “chemical stains” result from oxidation of certain wood extractives during air seasoning or kiln drying. Some resins can bleed out of the wood, as seen in pine wood. Sometimes the extractive can react with foreign material.
Using Cedar Wash for High-Extractive Wood Species
Cedar Wash is a wood cleaner with a high pH solution, which can dissolve, soften, loosen, or react with different types of extractives found in extractive-rich woods used in log homes. If a chemical is soluble in a liquid, it is easier to remove than a chemical that is only softened by that liquid. Being soluble is preferred as this means the particles are broken down to become so tiny we can no longer see them. Cedar Wash is designed to remove surface resin oils and high concentrations of water-soluble wood extractives such as sugar and protoplasm, in addition to dirt, grease, grime, pollen, and surface mold and mildew without harming the wood.
Cedar Wash was developed by Perma-Chink Systems as a Ready-to-Use cleaner specifically formulated for preparing the surface of wood species that contain high levels of wood extractives and resin oils. It is also safe for chinking and sealants.
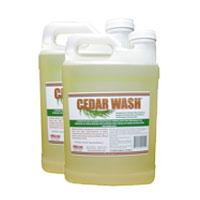
- Easy to use, Ready-to-Use formula.
- Low environmental impact
- Designed specifically for Western Red Cedar, Redwood (Softwoods), Walnut, and Mahogany (Hardwoods)
- Removes resin oils and wood extractives from the surface of the wood