Blog
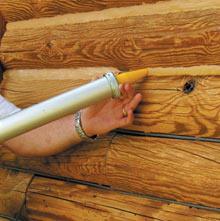
Applying and tooling Perma-Chink or Energy Seal sealant you need the right tools to make the job easier and quicker. Depending on the job and type of sealant needed, you have a few decisions to make regarding the tools and accessories you’ll need for the project.
Starting Out On The Right Foot
Having the right tools at hand is critical for a good chinking job. The most popular tool for applying Perma-Chink or Energy Seal is the bulk-loading gun. This tool is available in two sizes, the 20oz. and 30oz. capacity and operates by pulling sealant straight from the pail.
For contractors who have been applying sealants for years, the tools selected have been time tested. Contractors expanding work or new to the trade might want to know all the available options for the job. And since everyone has a different preference on tools, Perma-Chink Systems offers multiple products to get the job done.
1. The Albion Bulk Loading Caulking Gun
This is our most popular tool for applying Perma-Chink or Energy Seal. It is built to meet the demands of serious professionals, utilizing rugged, heavy-duty all steel drives and lightweight aluminum barrels to reliably dispense a wide range of materials.
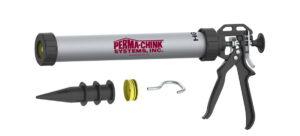
Available sizes 20oz. and 30oz.
- Professional Quality
- Efficient 12:1 Drive Ratio
- Lightweight Aluminum Barrel
- Double Grip Plates for Long Life
- No Spanner Wrench Needed!
- Barrel Rotates for no-stop application
- Kit includes 3 nozzles, one spare piston and a steel ladder hook-pull
2. Smooth Rod Style Caulking Guns for applying Perma-Chink, Energy Seal, Check Mate 2 and Woodsman
Great for professional use where bead consistency, control and clean up save time and money. A simple push of the recoil releases all pressure on the plunger and instantly stops the flow of sealant. To remove the tube, press the lever and pull back on the rod to expose the entire tube and slip it out of the gun.
Available in sizes for 11oz. tubes and 30oz. tubes
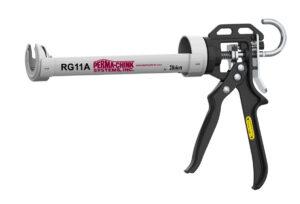
- Professional Quality
- Smooth Rod for reliable dispensing
- Efficient 12:1 Mechanical Advantage Drive
- Convenient Thumb-Release for no run-on caulking
- Full size handle for comfortable dispensing
3. Cordless Guns with a State-of-the-Art Performance, Portability and Control
How Fast is Fast! A Cordless Gun can dramatically decrease the amount of time on a chinking job.
Available in sizes for 11oz. tubes and 30oz. tubes AND 20oz. bulk
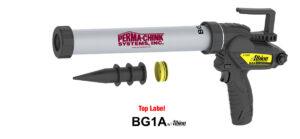
- Powerful – 400 lbs. of Dispensing Force
- Fast – Dispense 11oz. Cartridge in 16 seconds
- Lightweight Aluminum Barrel
- Long Lasting – 12 V Lithium-Ion Battery
- Control – Variable Speed Trigger with Maximum Speed Dial
- Auto Reverse for No-Drip Dispensing
- Comfortable rubber over molded handle. Swivel barrel
- Fast 30-minute recharge. Battery Fuel Gauge
- Ladder pull hook
How Bulk Loading Guns Operate
Simply insert the 2-inch wide cylinder into the pail and fill the gun by pulling back the plunger, which draws the product from the pail into the body of the gun. After wiping the threads clean and screwing on the end cap with plastic cone nozzle, you’re ready to apply the product. To make your job easier, quicker and much cleaner with less product waste, the gun-compatible follow plate can be used (highly recommended). This 9.5” round metal plate has a 1” rubber gasket which allows for the tapered shape of the pails.
Basic Instructions on how to Tool Perma-Chink Sealants
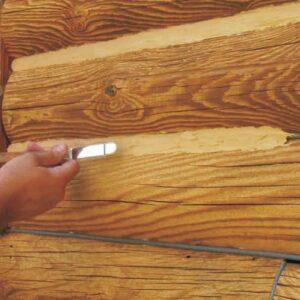
Smoothing your sealant you have just applied from the gun is not nearly as important as making sure you have really good contact to the top and bottom log, with no air trapped under the sealant.
To move the sealant into position for proper adhesion and to smooth out bumps is what we refer to as “tool” or “tooling.” The best tool we recommend is a bent trowel that’s about the width of the chink joint. The bent trowel makes it much easier to avoid trowel marks in the sealant as it dries and cures. Along with a trowel, you’ll want to have a plant mister or squirt bottle filled with plain water. Perma-Chink Systems offers a variety of stainless-steel trowels ranging from ¾” to 4-inch wide with both rounded and squared off tips in our Tools & Dry-In section.
Anytime you tool the chinking, spray a little water on it first. You want enough water to allow a smooth motion with the trowel, but not so much it pools and runs all down the logs. The water prevents the chinking from sticking to your trowel and gives a nice, smooth surface free of bumps and edges. Make more smoothing passes after you have created good adhesion to those logs to remove any tooling marks. All of these passes are a very light pressure, with ½” to ¾” of the tip of the knife being used. Depending on the appearance you are looking for, you may leave your sealant line as smooth or as rough as you would like.
Recommended Videos




Hope this helps! Check our Tools and Dry-In section on the website to find all the items needed to get you started on your project! And if you need more information, our professional sales representative is standing by at 800-548-3554 or send us an e-mail to techservice@permachink.com
Click here to view the Log Home Sealants Application Guide

Why Log Boss
Why should you use the Log Boss over what you are currently using? That is a question we are often asked when we are showing these fasteners to potential customers.
We looked a several options that were in use for fastening the logs and timbers together. The search turned up various way builders were putting things together. The old way was the use of long spiral nails that were driven in with a very large hammer, which was very tiring – especially if you had to install the nails every foot or so for the whole house. Also, lag screws were used by builders to assemble logs together. The lag screw installation requires pre-drilling and drilling a countersunk hole for the head to go into. It also required the use of a large electric impact drill to effectively set the lag screws, or a large ratchet along with a very strong person to complete the installation.
To better serve the builder/customer, there must be something better. The fastener we were looking for had to add value to the customer, and this can be accomplished in multiple ways. The best fastener we found lessens the biggest costs – reduces labor cost, speeds up the installation process, and reduces the need for specialized tools. You also must have a product that performs and meets the expectations of the user, and to do this, Perma-Chink Systems chose the Log Boss log and timber fastener to meet the demanding needs of builders and contractors.
Log Boss Design Benefits
The design of the fastener is very critical to overall performance and ease of use. At the request of many of our customers, we’ve redesigned the head for better counter-sinking and uses a 5/16” hex head driver. The wings reduce the friction between the wood and the shank, clearing out the splinters created as the fastener pulls down into the wood. This reduces the torque required to set the fastener into place. Reducing the torque decreases the strain around the wood fibers, which increases the holding power of the wood fibers between the threads. The result is much greater pullout values by eliminating thread strip out.
One of the most outstanding features of the fastener is the ‘wings’ above the threads. The goal was not to disturb the thread holding value but to drive the fasteners into timbers with less torque requirements. The wings act as a reamer, allowing the shank to rotate much easier with less friction in the log. Without wings, the wood fibers bind up on the shank, seizing it to the point it becomes almost impossible to complete the required depth. It also often results in fasteners breaking off just above the threads, which adds wasted time to the project.
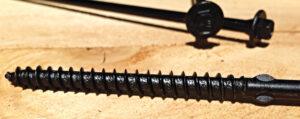
Another great feature of the Log Boss is the special rust-resistant coating applied to all fasteners, reducing the chances for rust to discolor the logs during extended exposure times on the jobsite. There is also a special lubricant applied to the fastener to aid in driving operations. Log Boss can be driven with an 18-volt cordless drill, but for best results we recommend the use of a ½” low rpm drill for optimum driving performance.
Log Boss fasteners are packaged in jobsite-friendly containers that resist damage from abuse and moisture. All sizes below 14” are packaged in plastic pails containing 250 fasteners and a drive bit.
Picking The Correct Log Boss
Now, how do you determine what size fastener that you need to use and what are the basics?
First, it is important to follow the log manufacturer’s recommendations as to the placement of the fasteners. The length of the fastener is critical to achieve the best performance. The selected fastener length must allow the threads to pass entirely through the first log, and thread into the second. The reason behind this is simple: in the event log movement happens, the log must be anchored to the bottom log, with the head providing pull-down pressure on the top log. It matters not if the screw is a little longer than you need, but make sure the threads will pass clear through the first log.
If you encounter a knot while installing the fastener, you will need to apply more torque to seat properly. It is a good idea to back the fastener out and move it over a little to avoid the knot. Another event that sometime occurs is the fastener may follow twisted grain and come out the side of the log.
So, if you want a fastener with maximum holding power and superior strength with less work, Log Boss is the answer. These fasteners were specifically designed by Perma-Chink Systems for the construction of log and timber structures. Their 3” long thread provides the grip necessary for pulling even the most difficult logs into place while the larger shank diameter increases the overall strength and pulling power.
Log Boss Benefits
Pre-drilling is not required
No washer needed. Drive it one time and forget it!
Flat head design easily counter sinks with maximum pulling power
Replaces the need for spikes or lag bolts
Lubrication coating speeds set time
Large threads prevent stripping out
Teflon® coating exceeds FM 4470 corrosion standards
Ask us for a complete line of wood-to-wood, code-approved fasteners for decks, ledger boards, and large timber applications.

As we settle into the holiday season, the cozy winter time, and potentially longer COVID-related lockdowns, the number of days inside the home can be overwhelming. Already approaching a year of COVID, our time in the home may raise our cabin fever or children if it hasn’t already.
But not to worry! There are things we can do to alleviate the time cooped up inside for the whole family. Country Living offers 25 activities to change up the routine, including classics like making your own Play-Doh! Check out their list here.
One snow-bound winter my family gathered around the fireplace and we listened to classic radio shows on cassette. My imagination became a powerful force to bring 1930’s radio show The Shadow to life during that cold December.
Today’s Parent has an impressive 87 activities, ranging from cardboard dollhouses to tye-dyed t-shirts. A lot of crafts are involved, to help kids learn motor skills. And of course, baking- but haven’t our waistlines had enough baking? You can read the long list of activities here.
Other activities may not seem as fun as making forts or throwing a dance party, but they can be greatly rewarding if more indoor living is in our future. Renovate interior, organize the kitchen “junk” drawer (I have 2!), go through your books and donate or share the ones you’ve read, and general “de-cluttering.” This is also something you can do in your digital life – unsubscribe to unwanted emails (not ours, though!), delete unnecessary emails, or clean up your digital photo albums.
Lastly, don’t forget about traditional card and board games. Some have found their way online, or are online only, and that greatly increases player pools. Many online games have chat features that allow interaction between friendly opponents. Codenames is one game that has online gameplay with others – learn more at https://codenames.game/.
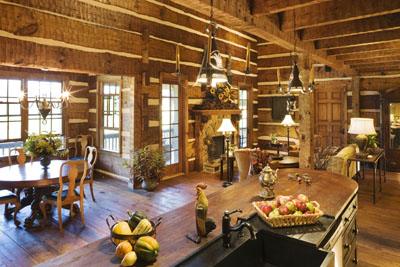
Which Log Home Sealant Should I Use?
We are asked this question very frequently about our two biggest selling log home sealants. Both of these sealants were formulated to weatherproof joinery in log and log sided buildings. Our simplest answer is that in general, Perma-Chink should be used in applications where the seam width is one inch or wider and Energy Seal is a better choice in sealant seams that are narrower than one inch or where joinery was not intended to have chinking applied to it. However, this answer is overly simplistic when you consider the variety of log profiles and joinery types and many different surfaces that come together to make up a finished log structure.
What is the Difference?
Perma-Chink is our original log home sealant (and the company namesake). It was formulated to look like the concrete mortar that was typically used on full-log construction at that time. It is the original elastic log home sealant. Today Perma-Chink is available in eight different colors, some of which look like concrete, the others are various wood tones.
Energy Seal was formulated at the request of our customers at a much later date. These customers had homes that were usually built with log profiles that did not use chinking, but required weatherproofing some time after they were finished and in use. Because the application surfaces were never intended for a sealant application, they don’t have proper geometry that includes a caulking well to allow for sealant and backing material installation. Consequently, we formulated Energy Seal to have higher elongation performance. Energy Seal comes in a wide selection of 12 colors for customers who would prefer to conceal the sealant or even to match the chinking on their log home.

Energy Seal is a Better Choice in the Following Situations:
In general, Energy Seal is a better choice for very demanding, narrow seam application where more stretch is required in a narrow sealant seam. It is also the best choice if you would like the sealant to blend in with the wood surface and not be easily seen. Energy Seal is an excellent choice for use in sealing around doors and windows, butt joints, corners, and junctions between log walls and other surfaces such as beams, rooflines or framed walls.
Perma-Chink is a Better Choice When:
Many log homes are designed, manufactured and constructed with chinking an integral part of the building envelope. Perma-Chink is the clear choice in this situation. Additionally, Perma Chink is ideal to use when sealing up the junction between wood walls and concrete, brick or stone features like fireplaces, stone accents and walls.
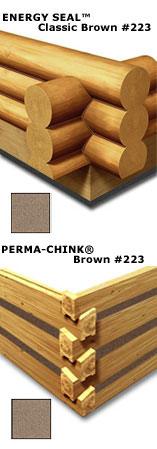
Additional Information:
Energy Seal is lightly textured to reduce shine and reflectance and to help it accept stain when you prefer to blend the sealant in with the surrounding woodwork. Perma Chink’s heavier texture mimics the look of concrete mortar.
We have additional special purpose sealants. Check Mate 2® is specifically formulated to seal checks in your logs. It has very high elasticity for the dry season when your checks open up and it compresses very well when the environment gets damp and those same checks close back up. It is available in clear and six colors to match your wall color.
For more information call Perma-Chink Systems and consult our Sealants Application Guide to gain your best understanding of how and where to apply any of our sealants to get the highest possible performance out of them.

Sometimes you just want something unique – something that truly reflects your personal style. When looking through the standard Lifeline Interior™ or Lifeline Accents™ colors, it might seem like your options are limited at first glance. The good news? There are actually countless possibilities. So let’s get creative and have some fun discovering the perfect color for your home.
Because interior wood surfaces aren’t exposed to the same harsh environmental conditions as exterior wood, you have much more flexibility to play with color. You can apply one or multiple coats, depending on the look you want to achieve.
You can take your creativity even further by incorporating Lifeline Prelude™ – one of our best-kept interior finishing secrets.
A single coat of Lifeline Prelude applied to clean, bare wood provides UV protection and dries clear, making it an excellent clear primer. Lifeline Prelude also helps your color coat(s) apply more evenly, often resulting in a slightly lighter hue with improved color consistency during application.
Start by applying one coat of Lifeline Prelude, followed by a single interior color coat of your choice. Once that coat has dried, if you’d like to deepen or adjust the color, simply apply an additional color coat and evaluate the result.
You may be surprised by the wide range of looks you can achieve by testing with or without Lifeline Prelude clear wood primer, and by layering one or more color coats. Have some fun experimenting with free samples to discover your perfect shade.

Once you have found the color for your interior walls, ensure easier cleaning and omit odor absorption by applying your choice of either Lifeline Acrylic™ or PCS Clear Shield™ over your color coat(s). Odors? Yes, you read that correctly – wood is porous and will absorb odors through the years, so protect your interior wood!
What if you just want to keep the beautiful, natural color of your interior wood and have no desire to mess with colors, is that an option?
Absolutely! There are two options you can consider for achieving the natural look while providing enduring protection:
1) Apply a single coat of Lifeline Interior Clear, #110 (we recommend adding UV Boost, as it will assist with protecting your interior walls from UV damage that receive sun exposure) and follow it with either PCS Clear Shield or Lifeline Acrylic for added protection.
2) Apply a single coat of Prelude (this already has UV inhibitors in it, so there is no need to purchase UV Boost) and follow it with either PCS Clear Shield or Lifeline Acrylic for durable protection.
Lifeline Acrylic is available in Gloss or Satin finish, and PCS Clear Shield is available in either a Gloss or Matte finish, and both are wonderful at resisting the yellowing that some finishes create. You can also apply multiple coats of both clear topcoats to obtain the lustrous sheen desired. And if you’re daunted by the task of staining the upper reaches of your ceilings, there are nifty tricks of the trade you can use to get the work done safely and inexpensively. Also check out our Interior Picture Gallery for more ideas.
If you have additional questions, please call 800-548-3554 and talk with one of our Customer Service Representatives. We are always delighted to assist you!
Enjoy making your home distinctively yours!







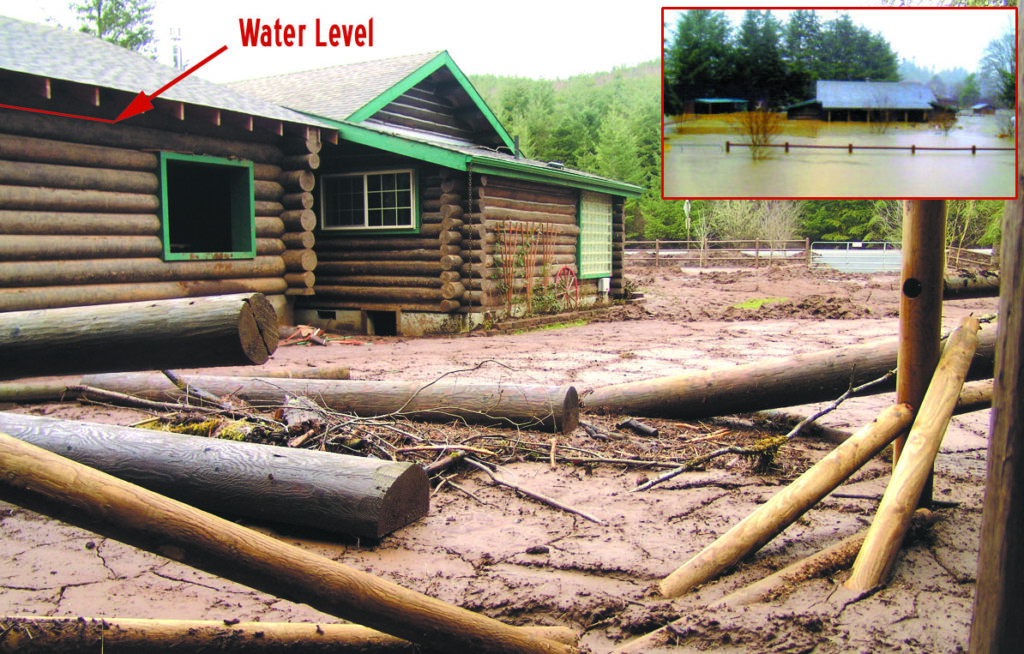
What to do if your log home was flooded?
Log homes are actually more durable than traditional homes, and are more likely to survive natural disasters, including flooding. The clean-up and repair of a log home after flooding is also much easier; follow these steps…
Interior
1) Tear out everything that is obviously ruined or that will interfere with drying out the log walls. All floor coverings (you will not be able to save any wooden floor – even if it looks good now, it will warp), trim, drywall, and insulation must go. You will probably have to replace all wet cabinetry and interior doors that were stained or contained any type of composite wood. Sometimes cabinets and doors can be saved if they were initially painted or if you choose to paint them now. Cut drywall and insulation about a foot above the high water mark. Sometimes tile floors can be saved, depending on the backer used under the tile.

2) Clean – Water usually brings in a great deal of mud or other contaminates. Once areas are cleared of debris and other building components mentioned above, then pressure-wash the log walls, studs, other framing, and sub-floors. Use products like Log Wash or Wood Renew to help lift out dirt and begin to control mold and mildew. Try not to use bleach as it can change the color of wood which can cause problems later. If you MUST use bleach, use no more than a cup per gallon of water and try to keep it off of wood that did not get wet. Apply the cleaners from bottom to top and then wash the dirt down the walls, across the floor, and out the door.
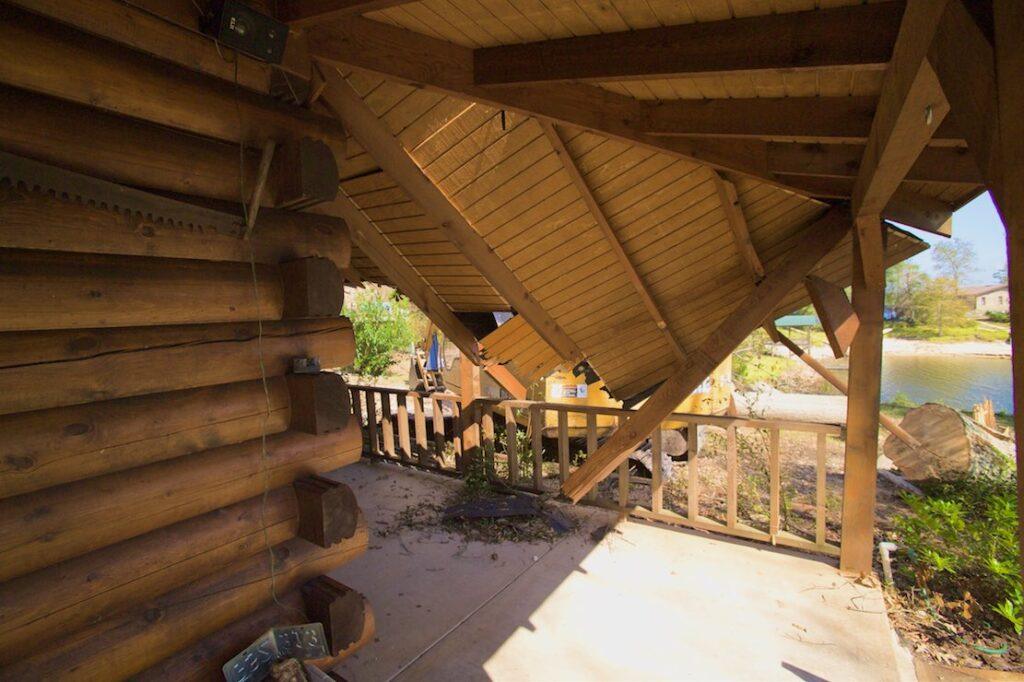
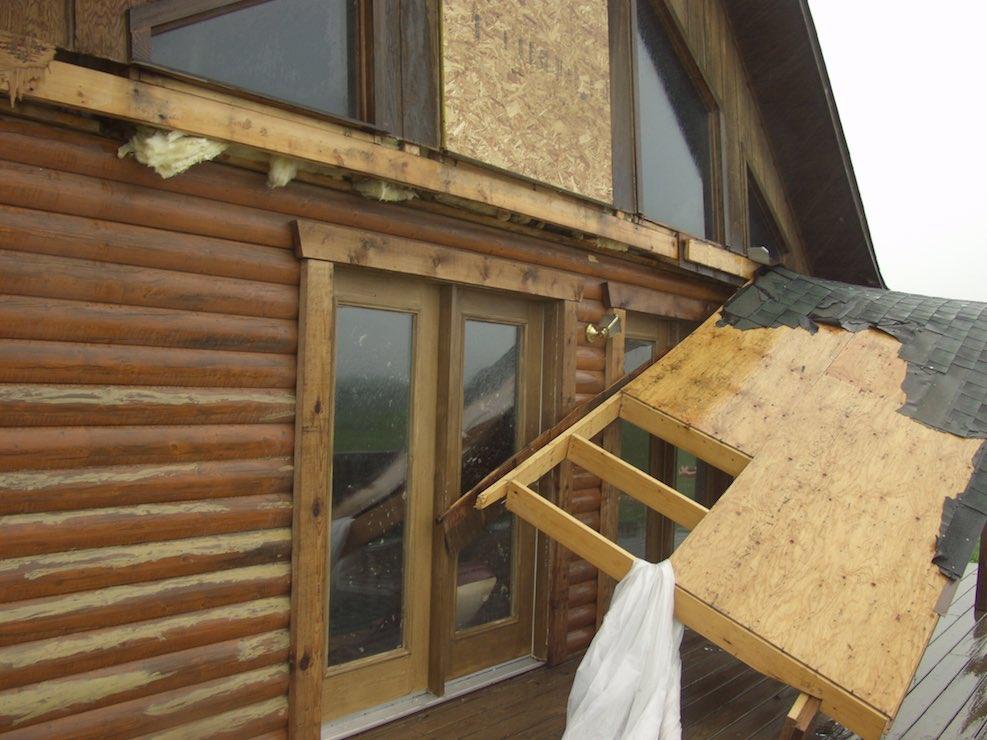
3) Dry out the log and timber components left behind. De-humidifiers are best at this task along with fans. If electricity is not available, just do your best to provide some air circulation. If only one de-humidifier is available, use it in one room at a time – running constantly until the moisture content of the wood in the wettest area of the room is below at LEAST 17%. Moisture meters are available at home centers and hardware stores. If your home is on a crawl space, close all the vents, install a new vapor barrier, and install a couple of de-humidifiers. This will quickly dry the space under the home and the sub-floor. If electricity is not available, consider removing sections of the sub-floor to provide some air circulation.

4) Disinfect – As soon as the wood is dry to the touch after cleaning. Liberally spray a mold control product on everything that got wet – Concorbium is one brand name. These products are commonly available at stores like Lowe’s or Home Depot. Buy a lot and use it. I have found these products work wonders stopping mold, mildew, and the odors and stains that accompany them. You may have to re-apply if it takes a while to dry your home out due to lack of electricity or equipment.

5) Replace and Re-build – I recommend replacing all electrical outlets and switches that were under water. If in doubt about electrical components, ask an electrician. I did not replace mine initially and had trouble later. Replace all drywall, insulation trim and re-finish. If you have a lot of open interior stud walls, I recommend applying powdered borax like Armor Guard inside the stud cavities and THEN closing them up. The borate will stay there practically forever and kill ants and roaches that crawl through it and then consume it as they groom themselves. Also apply this powder on the floor just before you re-install base cabinets in kitchens and bathrooms – same purpose.
If you had wood walls that did not have a finish applied, they may discolor. The longer wood is wet, the more likely it will have discoloration. Wood Renew or other percarbonate (hydrogen peroxide) cleaners can help remove some or all of this discoloration. Wood brightener- a product containing oxalic acid like Oxcon may also work, but be careful as these products may work TOO well and change the color of the wood beyond the desired color. If you did have a finish on the wood walls and discoloration is occurring UNDER the finish, that finish must be removed by sanding or stripping to remove discoloration.
Do not attempt to replace wooden floors until HVAC has been restored as flooring must be acclimated prior to installation.

Exterior
Luckily, log walls on the exterior are very durable if they were properly finished with a quality stain. They usually dry out nicely and require only some power-washing to clean.
Use a cleaner like Log Wash to clean off dirt. Do not try to be aggressive with the power-washer, you just want to rinse the dirt off. Some of the wood trim components that were engineered – like finger-jointed trim materials – may swell and need to be replaced. Exterior doors and windows (especially wooden ones) should be carefully examined and may need to be replaced as well. Insulated metal and fiberglass doors that get wet sometimes look fine, but they can hold water inside for a long period of time and eventually deteriorate.
Be careful around and under your home. Flood waters displace a lot of critters that may take refuge around and under your home – snakes, racoons, skunks, and opossums are no fun when they are too close.
If you have any questions, feel free to contact us at 1800-548-3554 or by email at techservice@permachink.com. We’re open 8:00AM – 8:00PM EST, Monday thru Friday.
New Color Trends
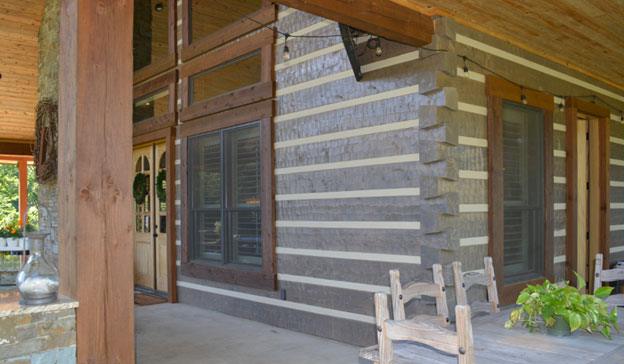
Staining your log or timber home is a humble art and is a critical part of the sense of style and feeling of what the structure creates. Whereas paint simply transforms the color of a surface, leaving no trace of its previous character, stain is typically used to enhance the beautiful grain of wood and generate that back to earth feeling that heavy wood timbers accentuate. Semi-transparent stains from Perma-Chink Systems are designed to let the beauty of the wood shine through and provide increased protection from interior and exterior elements. But what about the colors?
Gray and Browns have been popular in recent years, and this trend is still going strong. If you’re clinging to those gray tones, you’re in luck. 2020 continues to welcome these tones with open arms.
Gray is also a neutral with a reputation for being cold, with more than 50 shades of gray. With some warm beige added you will have gorgeous and stylish color, like one on the photo above, with so many sophisticated hues.
Actually, the shift toward warmer-toned gray is going so strong, that they referred to as “greige”.
Is Greige Better Than Gray?
If you love the idea of gray but worry about the coldness of most gray colors, greige could be what you are looking for. With added beige tones you will get the elegance of gray, without the cold blue undertones. Try out our Lifeline Ultra-7 in Eucalyptus or Rustic Gray colors, they are absolutely stylish!
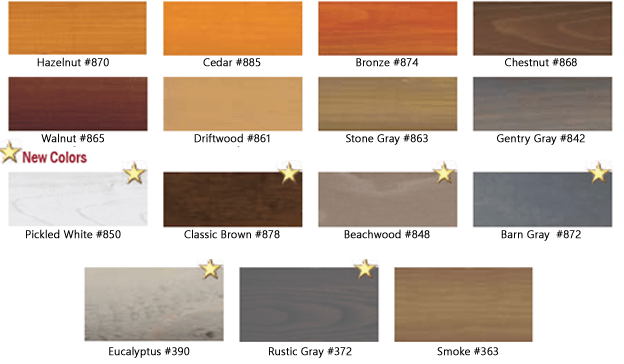
If you love your browns more than grays, but still want a hint of that rustic look, try two new browns from our Lifeline Ultra-2 collection. Maybe we should call them “brays”? And how do you mix browns and grays? You don’t! We made them for you! Check out the trendiest new colors in our Lifeline Ultra-7 and Lifeline Ultra-2 collection. Order your FREE color samples and try it on your wood.
“From colors to textures, we’ve got the scoop on which color trends are going strong and we would like you to know about it,” says Rich Dunstan, the president of Perma-Chink Systems. “We design eye-catching colors in many diverse tones that have the power to transform the entire ambience of your exteriors and interiors”
And the best part – you don’t have to mix anything, just pick your colors and order free samples to try it on your wood. Custom colors available upon request. Call 1-800-548-3554 or email techservice@permachink.com

Chip Wade and wife Pauli, of Wade Works Creative, are design professionals and lifestyle experts who love sharing their inspiring ideas with DIYers, pros and homeowners.
The Wades renovated the Misty Mill log home, located on Lake Sinclair, which was created in 1953 as part of the Georgia Power Company’s reservoir, with over 400 miles of scenic shoreline and just a 1 ½-hour drive from Atlanta.
The premise of Misty Mill is to spend time outdoors taking in views of the lake, without any worries of upkeep and maintenance. That’s why when Wade managed a total makeover of his own 2,400 sq. ft. lake house on Lake Sinclair in central Georgia, he wanted the best, top-of-the-line materials for his Misty Mill.
“All the content for this show house is about the best in innovative products and installations. I have personally selected the products I feel will be the best representation of this theme,” said Wade.
That’s where Perma-Chink Systems came in. After extensive research, Wade chose the premier log home care company to provide dependable, long-lasting and technically advanced products to ensure the creative design of the home meets not only Wade’s expectations, but future clients of Wade Works Creative.
In addition to selecting the best products, Wade also selected one of Perma-Chink Systems’ best Preferred Applicators, Nothing But Logs, to treat, finish and seal the log home. Located in Shady Dale, Georgia, Nothing But Logs has over 20 years of experience in maintaining, repairing and restoring log homes.
As the host of HGTV shows, Wade’s own creative stamp on the home required repairing the exterior to match his vision of the home. The exterior showed a lot of weathering and discoloration that would have to be addressed before applying the stain of choice.
Repair of the aged, grayed wood surfaces was accomplished with Wood ReNew. Being on the water, the home’s exposure to the weather gave the logs varying degrees of aging. Wood ReNew brightened up the wood, bringing back a true wood color, and was now prepared for staining.

The home was finished with two coats of Lifeline Ultra-2 Gentry Gray, and the newly constructed boathouse finished to match the home, making the new structure seem like it had been there all along. The choice of Ultra-2 provides the Wades with exceptional longevity and UV protection designed to prevent the extensive weathering damage. Add in the 5-year warranty of Ultra-2 when Lifeline Advance is applied and the Wades have a durable, cost-effective finish solution.

Along the way, the log home needed chinking repairs, completed with Perma-Chink White, the leading chinking. With repairs done in white, there was the issue of the old, gray chinking. Instead of re-chinking the entire home, the old chinking was freshened with textured Chink Paint in white, bringing a brand-new luster to the home. To improve energy efficiency, the end joints were sealed with Energy Seal Slate Gray, which matches the finish of the logs and presents a seamless joint.
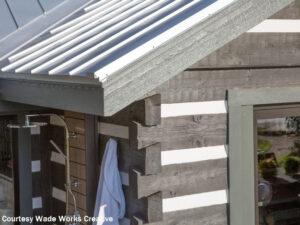
After all the staining and sealing work was done, Chip selected the clear topcoat Lifeline Advance Satin to protect the logs and finish. The end result is a magazine-quality home, and we’re proud to be involved in Wade’s extensive project.
Now this inspirational lake house has all the comforts of the indoors, with exterior materials that will keep performing and protecting the home for generations to come.

You can view Chip Wade’s Misty Mill log home – including design concepts, before and after pictures – online at https://mistymill.com/.
We often get asked whether Perma-Chink’s LIFELINE™ finishes can be applied over an existing stain. Since the answer to this question is somewhat complex we’ll look at the various types of stains individually. First and foremost, for the best look and performance of a LIFELINE finish it’s always best to remove any existing old finish unless it already is a LIFELINE finish. Even then, the existing LIFELINE finish needs to be in pretty good shape before we recommend applying another coat on top of it.
That pretty well covers what should be done. However the question is “can a LIFELINE finish be applied over other brands of existing finishes?” If the existing finish is water-based and there are no signs of grayed wood and the color on all of the walls is fairly uniform the answer is typically yes with some reservations. For example, if the existing water-based finish contains wax there may be a problem with adhesion or “fish eyes” forming during application. But you have to be careful, not all water-based finishes are created equal. Water/oil emulsion stains claim to be water-based but in fact contain enough oil that adhesion may become an issue.
In general LIFELINE should never be applied over film-forming oil stains like Sikkens Cetol Log & Siding, Sashco’s Transformation, or other alkyd oil-based stains. These types of finishes should always be removed before applying LIFELINE. But what about penetrating oil stains like WOODguard, Outlast Q8 Log Oil, TWP, Olympic and others? It really depends on the individual situation. Since one-coat oil stains usually don’t last more than a couple of years, we rarely encounter a situation where the condition of the surface is good enough to apply one of our LIFELINE transparent stains without first removing the remaining stain residue. By the time someone typically decides that the existing finish is in need of repair there is usually enough grayed wood or dark mold growth present to require getting back down to a clean bare wood surface.
A more challenging question is when someone decides that he or she wants to apply LIFELINE over a penetrating oil stain that’s less than a couple of years old. The best and safest way to proceed is to remove the existing finish. Attempting to apply LIFELINE directly over an oil-based finish is risky and the last thing any of us want is for you to be disappointed with the results.
So what’s the best way to remove an existing oil finish? If at all possible, chemical stripping is the way to go. The components in most chemical finish removers like our S-100™ and StripIt® not only soften the finish but they also help remove any residual oil that may present in the top layer of wood. Media blasting on the other hand may remove the alkyd film or the oil-based pigments but does not remove any oils that may have penetrated into the wood. If LIFELINE is immediately applied to the blasted surface, there is a chance that the remaining oil residue will come to the surface creating an adhesion problem or blisters in the LIFELINE film, especially on sunny walls. A good washing with Log Wash will help remove some of these residual oils, but it’s best to give a bare blasted surface three months exposure for the oils to evaporate before cleaning with Log Wash and applying the first coat of LIFELINE finish.
Some Rules of Thumb
- If you do not know what specific finish is on your home, remove it.
- If there are black streaks, mold spots or any other discolorations that you do not want to see through the final finish, clean the surface down to bare wood and remove them.
- If there are signs of grayed wood or if the existing finish has areas that have peeled, clean the surface down to bare wood.
- Never apply a LIFELINE finish over oil-based, alkyd film forming finishes.
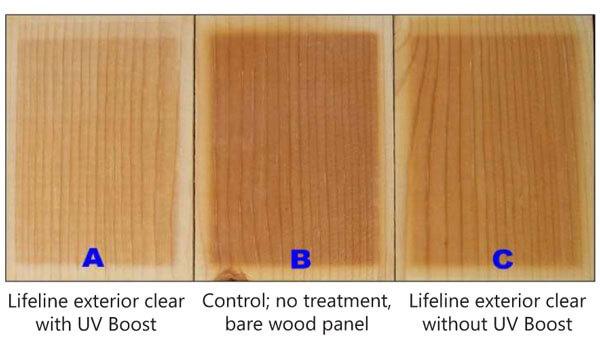
UV Boost™ is a concentrated water-based, liquid stain additive that contains a hindered amine light stabilizer specifically designed for wood protection.
Some regions of the country such as the southeast, southwest, and higher altitude areas are subject to high intensity sunlight. Over time, the ultraviolet light in sunlight photo-oxidizes the lignin component of wood. When added to the first coat of any of our Lifeline™ water-based stains, UV Boost interacts with the lignin thus slowing the photo-oxidative rate that results in wood darkening and eventually wood graying beneath the stain.
Application Tips
- UV Boost is only effective when used in the first coat of stain or finish applied to bare wood. UV Boost must be in direct contact with the wood for it to work. It is not effective when added to topcoats or stains applied over an existing finish.
- UV Boost may be used in both interior and exterior applications. When used inside it will help prevent the “picture frame” or “carpet frame” effect.
- UV Boost is designed to be used in any Lifeline water-based stain as well as Acrylic Gloss/Satin. It is not suitable for use in oil-based finishes or stains produced by manufacturers other than Perma-Chink Systems, Inc.
- Lifeline Ultra-2™, Lifeline Ultra-7™, and Prelude™ are already formulated with the maximum recommended concentration of UV Boost; therefore, it is not necessary to purchase or add additional UV Boost to these products.
- UV Boost is available in two sizes, one for the addition to one gallon containers and one for addition to five gallon containers.
Application
- Shake container of UV Boost.
- Add entire contents to the appropriately sized full container of stain or finish.
- Shake or stir the container of stain or finish until the contents are thoroughly mixed.
- Apply stain or finish according to the labeled directions.
- Any stain containing UV Boost that is left over once the initial coat is applied may be used for subsequent coats. Just be sure to “box” the remaining stain to assure a uniform color.
Cleanup
UV Boost that has been spilled may be cleaned with soap and water.
Storage/Shelf Life
- Keep container tightly sealed until ready for use.
- Do not freeze.
- UV Boost has a shelf life of three years from date of manufacturing.
Packaging
UV Boost is available in both 120 mL for adding to one gallon of stain or finish and 240 mL for adding to five gallons of stain or finish. Since the concentration of the active components differ, be sure to use the appropriate size for the amount of stain or finish you are using.
Results from panels exposed in an accelerated weathering tester for 1200 hours.
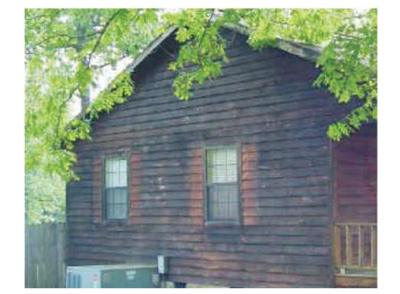
Have you ever seen the exterior of a home that has turned black? Almost without fail it’s the result of using a stain that contained linseed oil. Linseed oil is a yellowish oil derived from the dried seeds of flax plants, which is the reason it is also called flax seed oil.
Linseed oil is used as a carrier in many brands of paints and stains. Since linseed oil is organic, many varieties of mold fungi thrive on it and over time they can proliferate to point where the coated surface can turn dark brown to black. One way to tell if the darkening is due to mold rather than UV damage is that those exposed areas protected from direct sunlight under eaves and overhangs will be the same dark color as the rest of the wall.
When this occurs, washing with Log Wash™ alone will not be enough to remove all of the discoloration due to mold growth. We recommend to first use Wood ReNew™ along with some scrubbing in order to remove the visible mold. Once the surface is cleaned with Wood ReNew, use Log Wash to help remove any residual linseed oil that may still present.
Media blasting alone is not a satisfactory method of removing a heavy growth of mold. Linseed oil penetrates into the wood and although blasting may remove most of the surface discoloration, there may be enough residual linseed oil remaining in the wood to support mold growth underneath the finish. If the home has been blasted, it will be necessary to give the home a good washing with a Log Wash solution (2 cups per gallon of clean water) before applying Prelude™.
The best way to prevent this problem from reoccurring is to avoid the use of any product that contains linseed oil. None of our Lifeline™ finishes contain linseed or other types of organic, naturally derived oils.
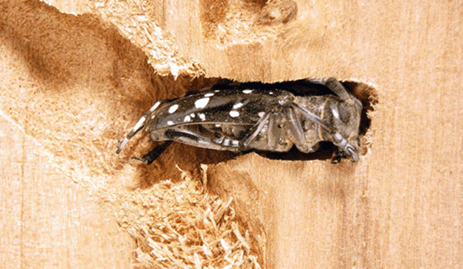
Wood-boring beetles can be found all across the United States. There are several types of beetles that can be considered “wood-boring” beetles. Often referred to as “wood worms” or “powder post beetles,” wood-boring beetles are responsible for damage to structural wood, second only to termites.
Wood-boring beetles are difficult to control once an infestation has begun. Therefore, prevention is the best management method. Great NEWS: the treatment for all types of wood-boring beetles is the same.
PenaShield® is one of the most effective ways to protect your home from wood‑boring beetles, termites, carpenter ants, wood rot, fungi, and more. Its active ingredient is borate salt, combined with proprietary glycol penetrants that allow it to diffuse quickly and deeply into the wood – providing both long‑term protection and preventive treatment against pests that damage wood.
Research results shows that the presence of borate in the wood does two things:
- It kills younger beetle larvae that are feeding in the wood.
- It prevents any old house borer eggs from hatching. The borate treatment interrupts the beetle’s life cycle and eventually the infestation will end.
About Wood-Boring Beetles
Wood-boring beetles invade and damage wood furniture as well as structural and decorative wood inside the building. The beetle larvae feed in and do most of the damage to wood, and when they reach the adult stage, they emerge through round exit holes, which they create by chewing through the wood surface. Adults of some species also bore exit holes through plaster, plastic, and even soft metals that might cover the underlying wood.
What are the signs that beetles are present in the wood?
- Sawdust or frass is the first sign of beetle infestation.
- The chewing noise made by older larvae in the wood.
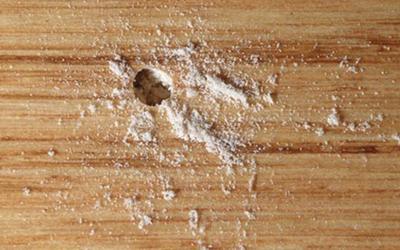
The life cycle of most wood-boring beetles is similar. It starts with an adult female depositing her eggs in the wood. The eggs hatch and a small grub-like larva emerges. It’s the beetle larvae that feed on wood, and they may continue eating the wood for several months or, in some cases, up to 20 years depending on the species. There comes a time in its life cycle when it’s getting ready to make the change that the larva makes a hole to the surface of the wood, so it can get out of the wood as an adult beetle. That’s why the holes are called “emergence holes.” Typically this is the first sign that beetles are present in the wood. Once the hole is complete and the tunnel is cleared of the sawdust or frass, the larva creates a pupa case and makes the transition to an adult beetle. The adult beetle eventually emerges from the hole, feeds on pollen and nectar and looks for a mate. Once impregnated, the female beetle can start the cycle all over again.
Order Your PenaShield or Bora-Care® to kill any wood ingesting insect it comes in contact with.

Customer Testimonial
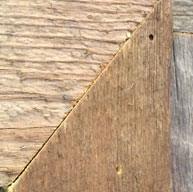
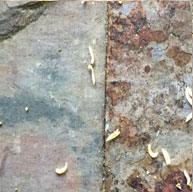
For active infestation I have successfully used borates against insects that are actively living in isolated spots on structures. In the pictures below, powder-post beetles infested barn wood on my porch. I injected borates into the actual holes using a syringe made for injecting marinade into food (any plastic syringe with a tip small enough to fit the hole will work).
These holes were treated and within a day there were dead larvae. It has been more than a year and they have not returned.