All our finish labels and application instructions emphasize the necessity for back-brushing during the application process. What exactly is “back-brushing,” and why is it so important? Back-brushing is the term we use to describe the process of working the finish into the wood and obtaining an intact, uniform film over the entire surface.
Back-brushing is typically used when applying stain with an airless sprayer; however, back-brushing is just as important if the product is manually applied with a brush. Although the directions for most log home stains call for a liberal first coat or flood coat, Lifeline™ finishes are designed to go on in thin coats, including the first coat. If applied too thick, the long-term performance of Lifeline finishes can be diminished. In other words, more is not necessarily better when it comes to applying Lifeline to your log home.
Choosing a Brush
The first step in the process is to obtain a high-quality brush. A cheap, three-dollar brush from Walmart will not give you satisfactory results. You need a good quality brush like a Purdy or Wooster. For back-brushing logs, use brush preferably three to four inches wide. Using a narrow brush takes longer and may result in visible brush marks. If you plan to hand apply the finish with a brush and pail, you will use the same brush for both the application and the back-brushing.
The objective is to carry the finish to the surface with the brush and then to spread the finish out as far as it will go, making sure to work it into all cracks and crevices, and to uniformly distribute it over the area you are coating. This entails some vigorous back-brushing over the area that has finish applied to it. Lifeline finishes dry fairly quickly, so it’s important to back-brush as you go along and not wait more than a couple of minutes before you back-brush the coat.
Airless Sprayers
We have formulated our Lifeline finishes to be most easily applied using airless spray equipment. There are two methods typically used to apply finishes with an airless sprayer.
The first method is to step back from a wall and use the sprayer to cover a larger area. This works well for a contractor with a crew since a large wall can be coated in a short period of time. This method requires at least two people, one spraying and at least one person back-brushing. When using this technique, back-brushing becomes important since the sprayer puts out lots of small droplets, which result in a lot of small dots of finish, not a uniform film. It takes back-brushing to convert these dots into an intact film, as well as to work the product into any cracks and fissures that are present on the surface.
The other method is to use the airless sprayer to carry the finish to the wall where it can be brushed out. The trick is to work on small areas at a time. Although it takes longer than spraying large areas at a time, a single person can use this technique to finish their entire home. The objective is to apply some finish on a one- to two-foot section of one or two courses of logs, and then brush out what you have applied as far as it will go. You don’t want to apply too much finish, and you need to be quick with the back-brushing to prevent stain from running down the wall. Just remember – A THIN, EVEN COAT is the key.
A custom log cabin is more than a house — it’s a foundational structure for a homesteading lifestyle built around land stewardship, self-reliance, and daily connection to your environment. For aspiring homesteaders, building a log home requires thoughtful planning long before the first log is set.
A Quick Snapshot Before You Break Ground
Building a custom log cabin for homesteading involves:
Choosing land that supports long-term food production and water access
Preparing a site that protects the structure from drainage and weather issues
Securing permits and working with experienced professionals
Designing interior and exterior spaces around real homestead workflows
Planning for construction timing, settling, and ongoing maintenance
When done intentionally, your cabin becomes an integrated part of your working landscape — not just a place to sleep.
Spend time walking the property in different weather conditions. Observe drainage patterns, wind exposure, and where snow accumulates. These observations will directly influence cabin placement.
Site Preparation Basics
Proper site preparation protects your investment:
Grade the land to direct water away from the foundation
An experienced log cabin contractor will account for settling by installing slip joints, adjustable posts, and proper window and door framing systems. This is not an area to improvise.
When interviewing contractors, ask to see previous builds. Talk to past clients. Clarify who handles subcontractors and inspections. A log cabin is a specialty build — choose someone who treats it that way.
Designing for Daily Homesteading Life
Your cabin should support how you actually live and work.
Functional Spaces to Prioritize
A mudroom for boots, tools, and wet clothing
A pantry sized for bulk storage and preserved food
A utility area for water filtration, solar equipment, or battery systems
Covered outdoor workspace for firewood processing or equipment repair
Think beyond aesthetics. For example, positioning the kitchen near garden access shortens harvest-to-prep time. Placing windows to monitor livestock saves steps during winter storms.
Design integration matters. Map your property layout — gardens, greenhouse, barn, workshop — and position the cabin as the central operational hub.
Managing the Paperwork Without Losing Your Mind
Permits, contracts, and design documents accumulate quickly during a custom build. You’ll likely juggle building permits, septic approvals, contractor agreements, engineering plans, and insurance paperwork.
Keep all documents organized and easily accessible throughout the process. Many homesteaders create a digital master file that includes every permit revision and contractor change order. Tools that let youmerge PDF files online can simplify this by combining scattered documents into one consolidated file. When inspectors call or contractors need clarification, having everything in one place reduces delays and stress.
A Resource for Learning Log Home Craft
If you want reliable, homeowner-focused information about building and maintaining a log cabin, the International Log Builders’ Association (ILBA) is an excellent resource. ILBA supports education and standards in handcrafted log construction, offering articles, training information, and technical insights into proper log building practices.
Reviewing guidance from organizations dedicated specifically to log construction can help you better understand craftsmanship standards, maintenance expectations, and what quality work should look like — whether you’re building yourself or hiring a contractor.
Ongoing Maintenance: What to Prioritize From Day One
A custom log cabin requires consistent care. Maintenance isn’t optional — it’s part of the lifestyle.
From the first year onward, prioritize:
Inspecting and maintaining sealants between logs
Monitoring moisture intrusion around windows, doors, and rooflines
Keeping gutters clear and directing water away from the foundation
Protecting wood surfaces from UV damage and pests
Regular inspections help catch small issues before they become structural problems. Specialty retailers like Perma-Chink Systems provide products and guidance specifically designed for log homes, including sealants, finishes, and repair materials. Their technical resources are especially helpful for new owners learning what to look for.
Consistent maintenance preserves not only the beauty of the logs but also the energy efficiency and structural integrity of your home.
Frequently Asked Questions
How much land do I need for a homesteading log cabin?
It depends on your goals. A few acres can support gardens and small livestock, while larger operations may require 10+ acres for pasture and crop rotation.
Do log cabins require more maintenance than standard homes?
Yes. Logs must be monitored for moisture, UV exposure, and settling-related gaps. However, routine inspection makes maintenance manageable.
How long does it take to build a custom log cabin?
From design to move-in, expect anywhere from 6 months to over a year depending on permitting timelines and project complexity.
Can I build a log cabin myself?
Some homesteaders do, especially with smaller kits. However, structural expertise and knowledge of settling systems are essential for long-term performance.
Step-by-Step Planning Checklist
Define your homesteading goals (livestock, crops, off-grid systems).
Evaluate land for water, soil, zoning, and access.
Develop a property layout map before finalizing cabin placement.
Secure permits and confirm code requirements.
Hire an experienced log cabin contractor.
Plan for settling adjustments in design.
Create a long-term maintenance schedule before move-in.
A custom log cabin built for homesteading is both shelter and system. Every decision — from land selection to maintenance habits — affects how well your home supports your self-sufficient goals. Plan carefully, build with experienced help, and treat ongoing maintenance as part of daily stewardship.
Seth Murphy is a guest contributor and can be reached at papadyi.com
Perma-Chink Systems Featured on Fox Business® Network – As Seen on Fox Business
We’re honored to have been featured on Fox Business as a top manufacturer by Alan Ackles for Manufacturing Marvels®!
Being recognized with the “As Seen on Fox Business” spotlight is something we are incredibly proud of, as not every company is chosen to be featured on Manufacturing Marvels.
If you missed the original airing, click this link 🎥 to watch the 2-minute feature and get a behind-the-scenes look at Perma-Chink Systems manufacturing and our passion for protecting log and timber homes.
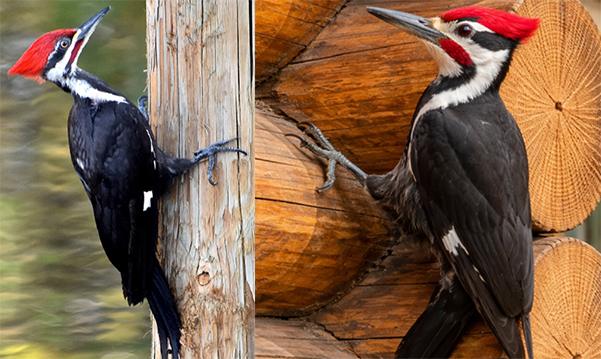
Woodpeckers cannot tell the difference between the wood in your home and dead trees in the forest, so they occasionally cause damage to logs, siding, or fascia boards. People attribute this damage to woodpeckers pecking for grubs in the wood, but that is not always the case. There are three main reasons that woodpeckers peck on wood; one, they are looking for something to eat, two, they are defining their territory and three, they are making a nest. It is usually the second reason that it creates the most damage.
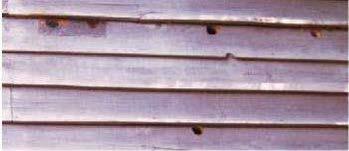
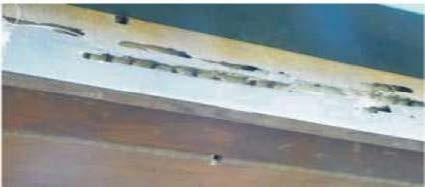
Woodpeckers are very territorial. In order to let other woodpeckers know that this is his (or in some cases her) territory, it flies around the perimeter of its territory, usually in the morning, and initiates a series of raps on hollow trees or other wood members that have the “right” sound. This behavior is called “drumming” and consists of two or three long brrrrrrrrrrrps. The woodpecker will typically drum in one spot for a minute or so, day after day. It does not take long before a large, irregular hole appears at the drumming site. If the site is a log or siding of a home, it can become a real eye sore.
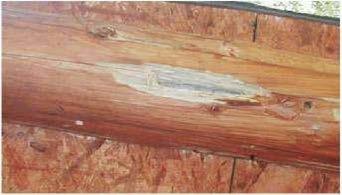
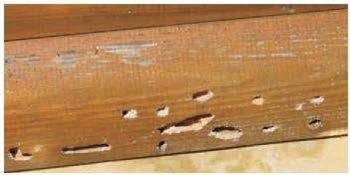
When a woodpecker pecks for grubs in wood it acts differently and makes smaller cone-shaped holes or a long gallery. If you have ever seen a woodpecker searching for grubs it will constantly turn its head as if looking for something on the wood. It is actuality listening for grubs feeding in the wood. All it needs to do is make a hole large enough for its tongue. A woodpecker’s tongue is long and thin and that is what it uses to catch a grub in a gallery. The holes woodpeckers make searching for grubs are usually no more than an inch or so in diameter. Occasionally a woodpecker will attempt to excavate out a round nesting hole in a log, but it is rare and if the wood is sound, it will usually give up after a few days. However, they will make a hole in synthetic chinking to establish a nesting site.
Solving the Problem
One thing you can try to discourage drumming woodpeckers is to put a piece of metal window screen over the area where the woodpecker drums. This often discourages it enough that it will go elsewhere. Fake owls, snakes, and other scare devices may work for a little while, but it does not take exceedingly long for the woodpecker to discover that if it just ignores it, nothing happens. Trapping and releasing woodpeckers aren’t highly effective either. They can fly and unless you release them miles away, they will return to their home territory within a few days.
For woodpeckers feeding on beetle grubs, the best solution is to kill the grubs in the wood and the way to do that is to treat the wood with a borate. This will kill the beetle larvae and if there are no grubs for the woodpecker to search for, it will move on to better feeding sites. However, borates are not effective for eliminating or preventing carpenter bees so other methods of control must be used.
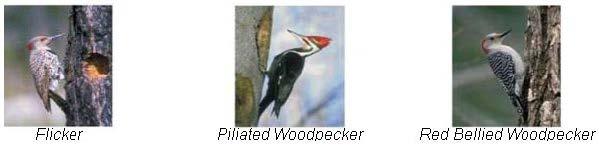
Three types of woodpeckers that occasionally damage log homes
Through late fall to early spring, we occasionally receive calls about Lifeline Advance topcoat turning milky white after application, a condition called blushing. Before discussing blushing, the formulas for both Lifeline Advance Gloss and Satin have recently been modified to reduce the probability of blushing without altering any of their properties.
Blushing is mostly caused by atmospheric humidity, reduction in rate of solvent evaporation, and low temperatures. Any water that gets trapped or incorporated into the film may cause blushing. This is particularly noticeable on shaded walls, especially where Lifeline Advance has been applied too heavily. Once Lifeline Advance has a chance to dry and cure this whitening should disappear, but it may take several warm, dry days. There is not much anyone can do to help speed up the curing process. When the blushing occurs on a few logs, using a hairdryer on the area can sometimes help (do not use hot air). Often, the best thing is to do nothing. If blushing occurs in the fall, it may take until spring for the Advance to completely resolve and turn clear.
The best way to avoid blushing is to apply the Lifeline Advance when the conditions are most favorable for success. For example, avoid applying when the temperatures are low and relative humidity is high. Dew formation is more likely as well as an increased risk for blushing. Instead, apply it during warm and dry conditions when possible.
Blushing does not affect the durability or performance of the finish. It is, however, cosmetically unattractive until the arrival of warm, dry weather. Once the Lifeline Advance is clear, blushing should never re-occur.
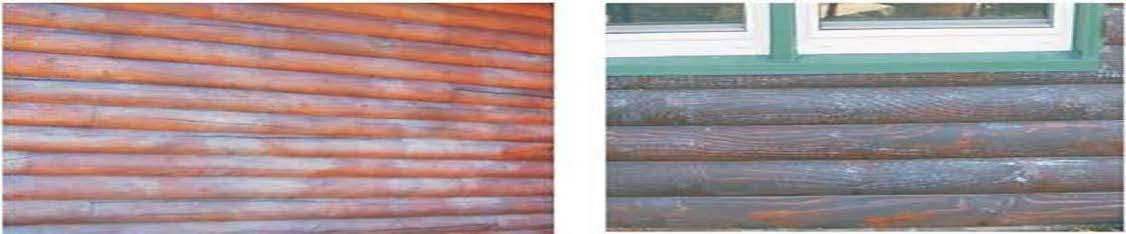
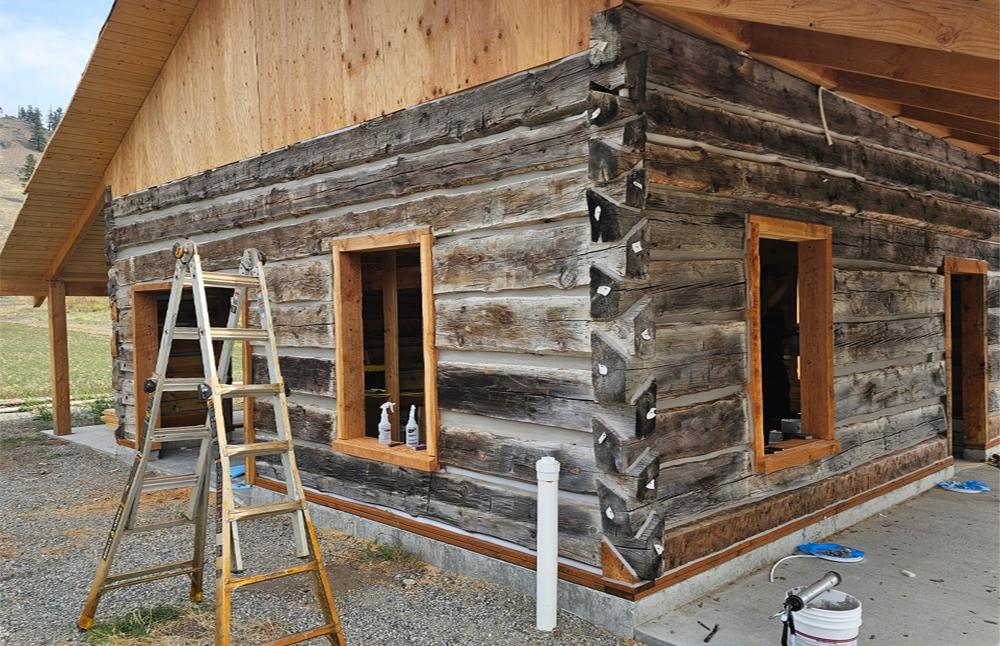
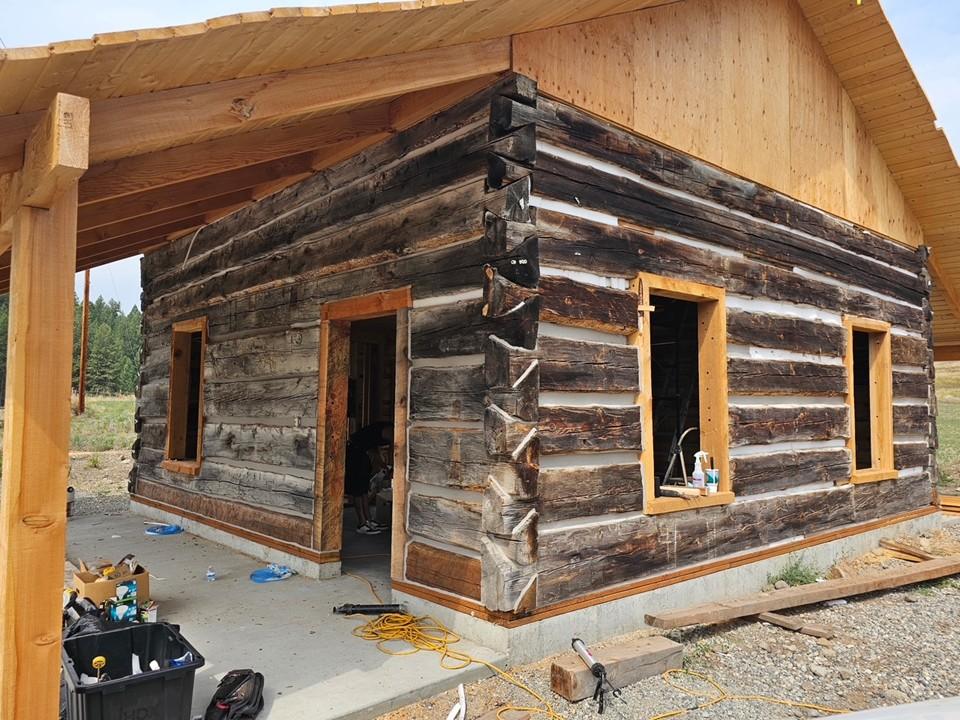
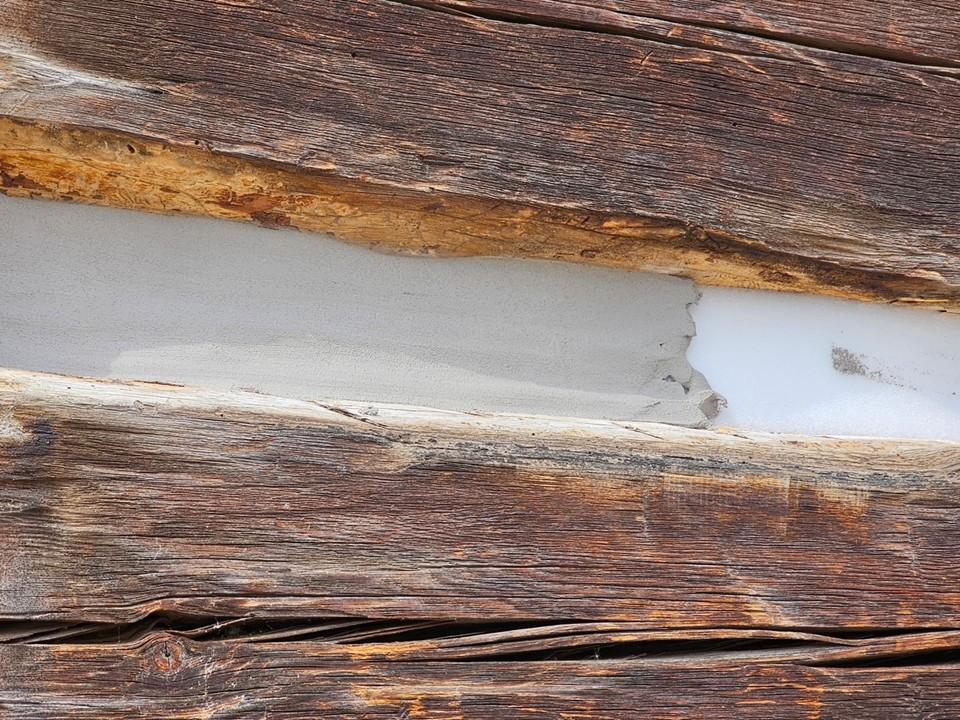
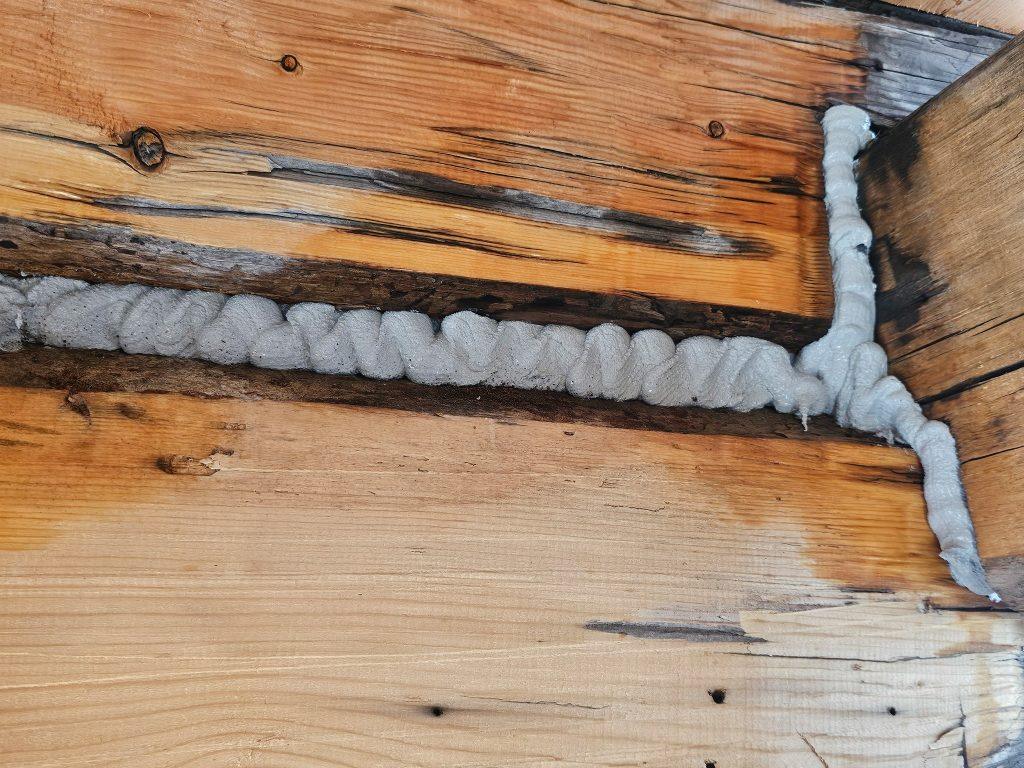
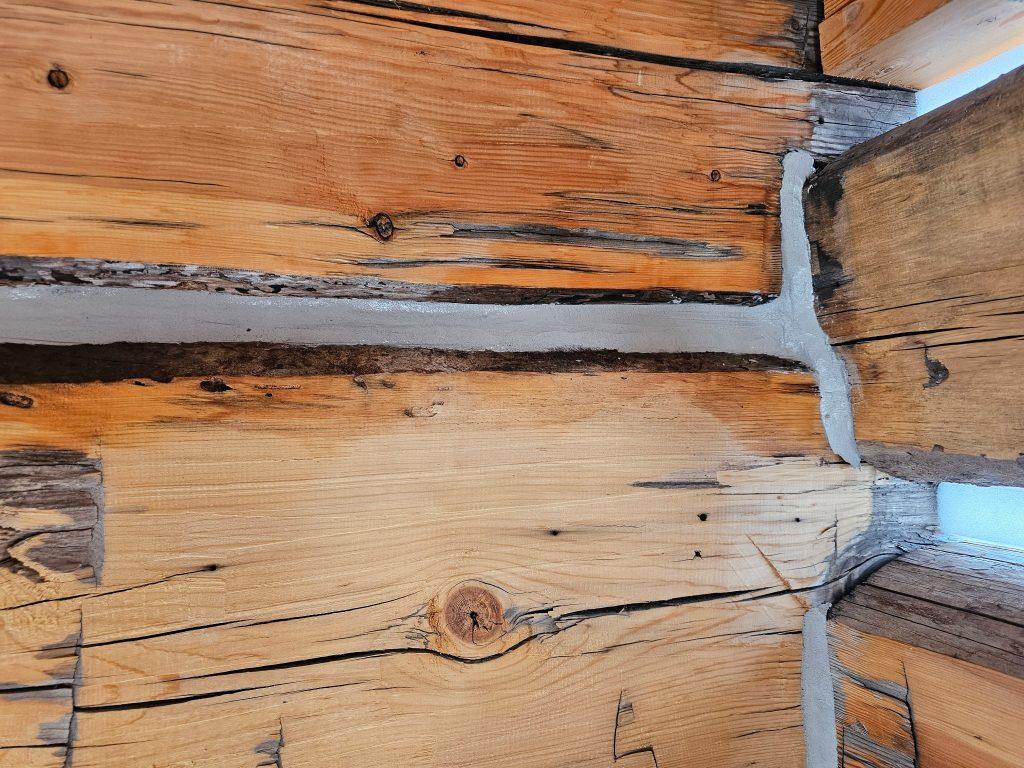
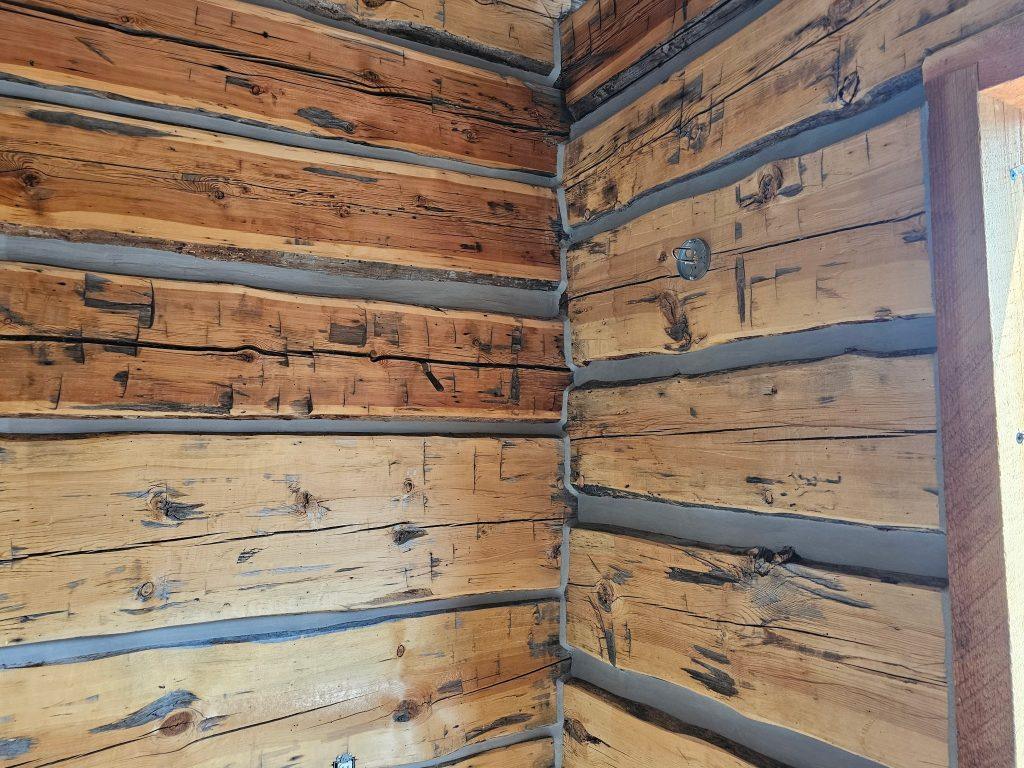
Restacking History: Expert Chinking Brings a Reclaimed Cabin Back to Life
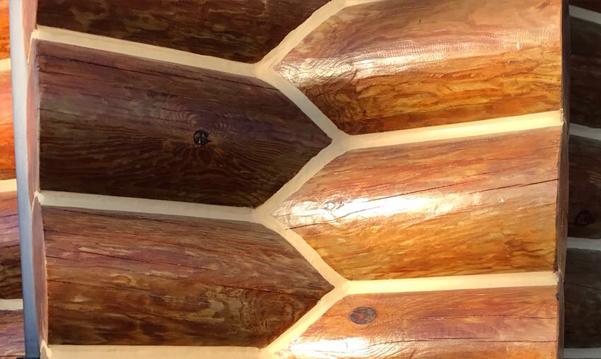
Tucked into its natural surroundings, a small cabin built from reclaimed wood was given new life with a thoughtful addition – blending old character with new craftsmanship. The cabin was dismantled and restacked in Wauconda WA, a very remote location 4 hour drive from Seattle near the Canadian border.
The project was completed by Jeff Kyger of Northwest Log Home Care, who brought his experience and attention to detail to every stage of the finish.
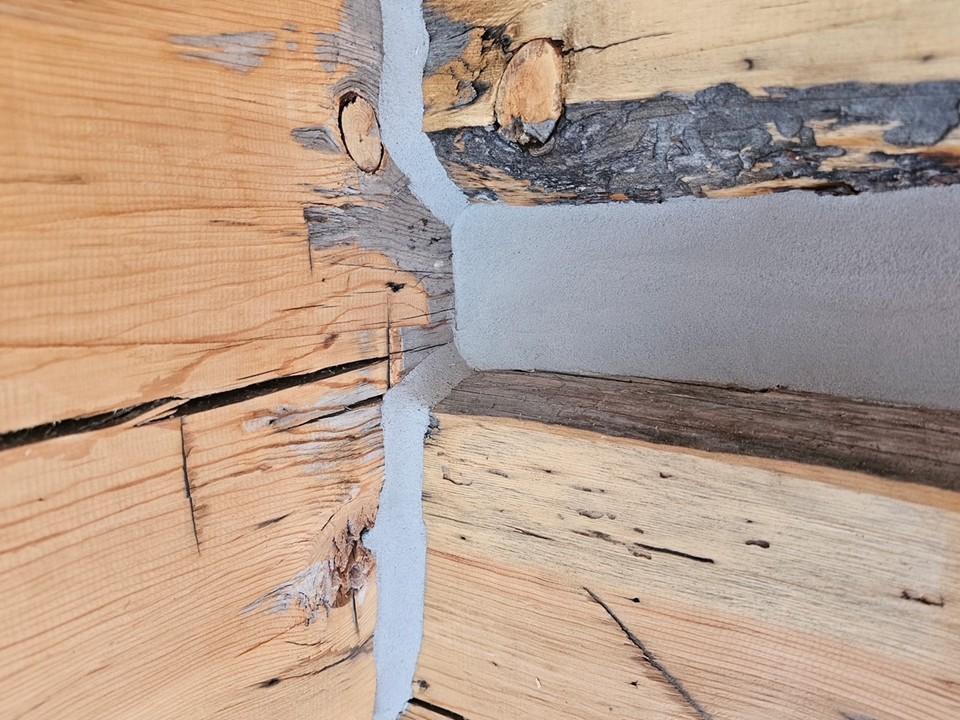
Working with reclaimed materials can be challenging, especially when it comes to irregular corners and joints. Chinking the corners of the cabin required patience and precision, but Jeff handled it with skill and confidence. Using Perma Chink® chinking in his favorite color, Medium Gray #224, he achieved clean, consistent lines that complemented the cabin’s rustic charm while providing long lasting protection.
The result is a beautifully finished cabin that honors its past while embracing modern performance – proof that with the right products and expertise, even the most challenging details can shine.
Protect Your Log Home with a Finish System Built to Last. Perma-Chink Systems offers one of the longest-lasting stain and finish systems in the industry – backed by a limited 5-year warranty.
Your stain and finish system is more than just color – it’s your home’s first line of defense against the elements.
One of the most common questions we hear from homeowners and industry professionals is:
“How long do your stains and finish last?”
It’s an important question because your stain and finish system protects one of your biggest investments – your log or timber home.
Here’s the short answer: 👉 Our system is among the longest-lasting in the industry.
We stand behind it with confidence by offering a limited 5-year warranty on our stain and finish system.
Why Longevity Matters
A high-quality stain and finish system does more than enhance appearance – it protects your home from:
UV damage
Rain and moisture intrusion
Premature weathering
Loss of beauty and curb appeal
Without proper protection, sunlight and water can break down the wood surface over time – affecting both the look and structural performance of your home.
Proper Prep = Maximum Longevity
To achieve the best results and qualify for warranty coverage, proper surface preparation is essential.
REQUIREMENT: Before applying stain, the wood surface must be:
Clean
Free of contaminants and residual chemicals
Completely dry
Proper preparation is one of the most important steps in ensuring a long-lasting, beautiful finish.
Use the Right Products for Surface Prep
For best results, always use products specifically formulated for log homes.
Log Wash™
Ideal for general cleaning and maintenance. In most cases, this is all you need to prepare your logs before staining.
Wood ReNew™ or Oxcon™
If your wood has experienced UV damage or weathering, these products help remove damaged wood fibers and restore a brighter, healthier surface before staining.
Important: Rinse thoroughly after cleaning. If unsure, use pH strips to confirm the surface is within a normal range of 6.5–7.5 pH.
Perma-Chink Systems’ Lifeline™ wood finish system is designed to deliver long-term performance and beauty.
Step 1: Stain
Lifeline stains provide rich, natural color while allowing the wood grain to show through – even after years of reapplication.
Step 2: Topcoat
Lifeline Advance™ clear topcoat enhances durability, reduces maintenance, and adds depth and luster to your finish.
Available in:
Satin
Gloss
Benefits of Lifeline Advance™:
Superior UV protection
Enhanced durability
Improved water resistance
Longer coating life
Extremely high coverage
Environmentally friendly
Flexible. Breathable. Built to Perform.
All Lifeline products are designed to be flexible and breathable, allowing moisture vapor to escape while helping prevent water from penetrating the wood.
Think of it like high-performance fabric for your home – durable, protective, and built to move with the natural expansion and contraction of wood.
Why Choose Perma-Chink Systems?
Homeowners and professionals trust Perma-Chink Systems because our products deliver:
Proven long-term performance
Beautiful, natural finishes
Reduced maintenance over time
A complete, compatible system approach
Confidence backed by warranty
Protect Your Investment
Your log or timber home deserves more than just a finish – it deserves long-term protection.
Choose a system designed for durability, beauty, and performance.