Blog
Over the past years we have discovered many things about cleaning wood. First and foremost is that chlorine bleach should never be used to clean your wood. In addition to its potential for damaging wood fibers, its use and misuse contributes to a number of problems including the loss of film adhesion, discolorations due to tannin extraction, and the formation of iron tannates, streaks, blotches, and premature failures of the finish system.
We have also discovered that a number of wood and deck cleaners available at paint and hardware stores, home improvement centers, and Do-It-Yourself outlets contain components that can interfere with the proper performance of water-based finish systems.
With this in mind, the ONLY cleaning products we recommend for use with our finishes are those products supplied or specifically approved by Perma-Chink Systems, Inc. We have tested our cleaning products with our finish systems and have confidence that when properly used and applied, their use will result in the best possible appearance and performance of a Lifeline™ finish. We cannot say the same about the use of other types and brands of wood cleaners or brighteners, and strongly discourage their use before applying any of our Lifeline finish systems.
Perma-Chink Systems Wood Cleaning Products
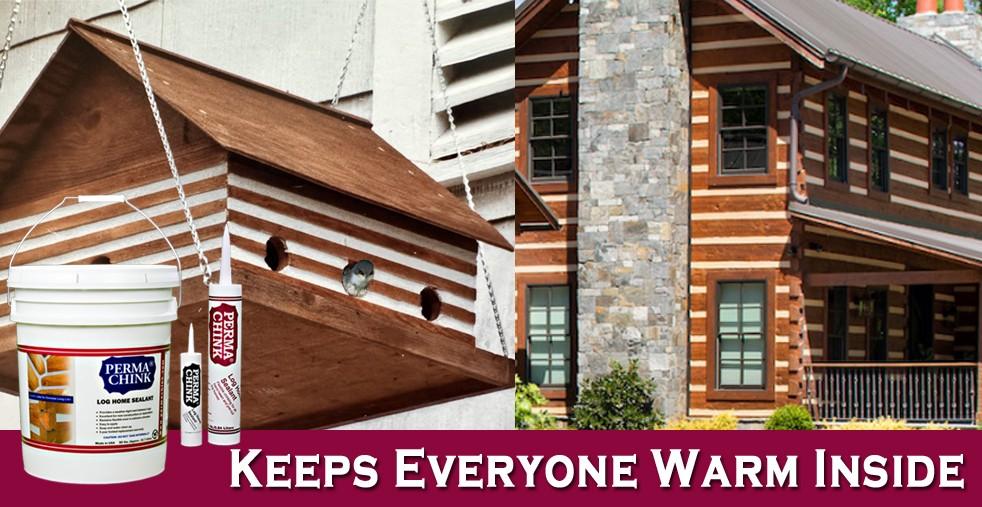
Log Wash™ – A general purpose, low-pH cleaner concentrate for removing dirt, grime, pollen, stains from surface mold and mildew from bare wood surfaces and existing finishes. Log Wash will also remove some types of brown stains and lighten the color of bare wood. Log Wash is not effective for removing grayed, oxidized wood fibers. Whenever bare wood surfaces are left exposed to the elements for more than seven days, the surfaces should be cleaned with a solution of Log Wash before the first coat of finish is applied.
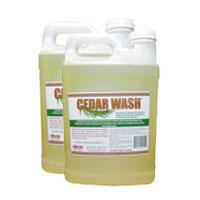
For wood species that contain high levels of wood extractives and resin oils, such as red cedar, southern pine, spruce and cypress logs, we highly recommended Cedar Wash™ as a cleaner.
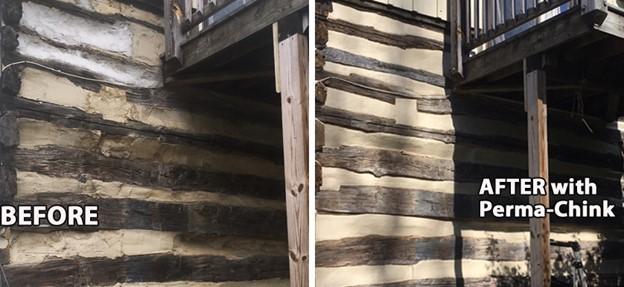
Wood ReNew™ – A concentrated powder that is dissolved in water and applied to bare wood. When used with a pressure washer, it will remove gray, oxidized surface wood as well as dirt, pollen, mold and mildew. Although Wood ReNew usually lightens the color, it can occasionally darken the wood depending on the wood species and the types of chemicals previously applied. Wood ReNew is the product of choice for removing mill glaze from new wood surfaces.
Cleaning Exterior Bare Wood Surfaces
New Log Homes
Step 1: If the wood has not grayed, wash the surface with a two cups per gallon Log Wash solution and a pressure washer no more than seven days prior to staining. Apply and clean from the bottom up and rinse from the top down. Rinse well and allow the wood to dry.
Step 2: If there are signs of gray weathered wood, use Wood ReNew according to the application instructions along with a pressure washer.
Step 3: If after Steps 1 or 2 there are still dark streaks or discolorations on the surface, use a solution of Oxcon™ oxalic acid on the entire wall according to the directions for use. Be sure to dilute the Oxcon concentrate with four parts water. Apply the solution from the bottom up, begin washing it off starting at the bottom then rinse thoroughly from the top down. Be sure to completely rinse the Oxcon solution off the wall and allow the wood to dry before staining. Never use Oxcon unless it is absolutely necessary.
New Log Siding
New log siding must always be cleaned, since it presents an especially difficult challenge to a finish system. Typically used in high exposure locations such as dormers and gable ends, siding is often manufactured from lower quality wood than logs, and frequently green wood. This makes siding more susceptible to twisting, warping, and cracking.
Since siding does not have the high thermal mass of full logs, during the summer months its temperature can range from 70ºF to 160ºF or higher during the course of one day. This puts a lot of mechanical stress on the siding and its finish, resulting in small fissures forming on the surface. Rainwater can then enter these fissures and get into the wood, behind the finish. Log siding is typically milled quite smooth and often has a mill glaze on the surface, which if not removed, prevents the proper adhesion of the finish.
Step 1: To remove mill glaze and prepare siding for the first coat of finish, clean and pressure wash the surface of the siding using Wood ReNew no more than seven days prior to staining. Apply the solution of Wood ReNew and pressure wash from the bottom up, and rinse from the top down. Allow the siding to dry before staining.
Homes that Have Been Sanded or Media Blasted
Step 1: If the surface of the wood has been sanded or media blasted, it is not considered clean. Wash the surface with a two cups per gallon Log Wash solution and a garden hose (pressure washing is not required) no more than four days prior to staining. Apply and clean from the bottom up, and rinse from the top down. Allow the wood to dry before applying the first coat of Lifeline pigmented stain or Prelude™ Clear Wood Primer.
Homes that Have Had a Finish Removed Using a Chemical Finish Remover
Step 1: If a finish has been removed using a chemical stripper, there may still be some types of discolorations present on the wood. Cleaning with a two cups per gallon Log Wash solution and garden hose, or pressure washer, will remove many types of tannin (brown) stains and even out the color of the bare wood surfaces. If the surface feathered during the finish removal process, and the feathers were removed by sanding, or with an Osborn brush, it will be necessary to clean the surface again with Log Wash. Use a two cups per gallon solution and apply and clean from the bottom up, then rinse with a garden hose from the top down. Allow the wood to dry before applying the first coat of pigmented stain.
Step 2: If, after the finish has been removed, there are areas of grayed wood fibers, apply Wood ReNew according to the directions and clean the surface with a pressure washer. Rinse well and allow the wood to dry before applying the first coat of pigmented stain.
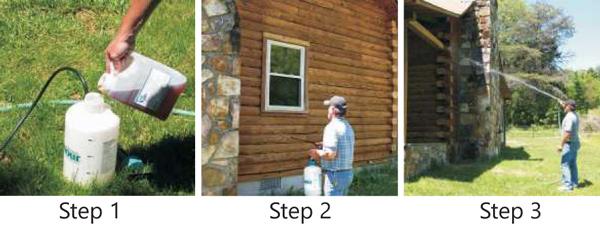
Application of Log Wash
Step 1: Add 1 gallon of water to your sprayer then add approximately 2 cups of Log Wash. If you add the Log Wash first, the sprayer will fill with foam. Be sure solution is mixed well.
Step 2: Spray the surface with the mixed Log Wash solution. Start at the bottom and work up. Allow 10 to 15 minutes contact time. Do not allow the surface to dry.
Step 3: If necessary, scrub the wall starting at the bottom and work up then rinse from the top down until you see no more foam running down the wall.
Application of Wood ReNew
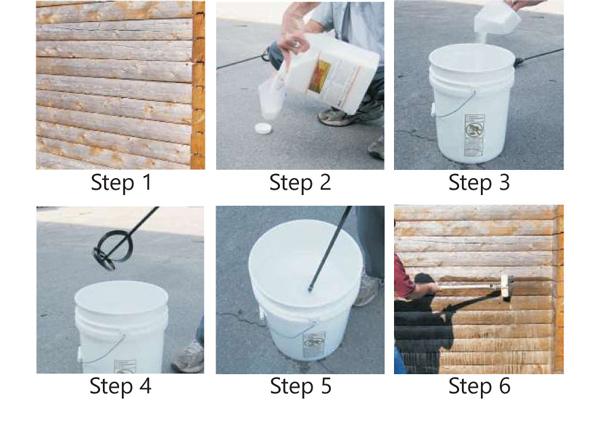
Step 1: Use Wood ReNew to remove grayed surface wood.
Step 2: Only measure out enough Wood ReNew to add to a few gallons of water (0.8 cups per gallon) at a time. You need to use whatever you mix up within 1 to 2 hours.
Step 3: Pour the Wood ReNew into a pail that contains the water. Do not mix Wood ReNew in a sprayer.
Step 4: Mix the Wood ReNew with the water using a paint mixer and an electric drill.
Step 5: Stir for about five minutes or until no undissolved granules are visible. Allow the solution to thicken for 10 minutes before using.
Step 6: Apply the Wood ReNew solution to the wall with a mop, broom, or car wash brush. Start at the bottom of the wall and work up. Allow the solution to remain on the wall for 10 minutes.
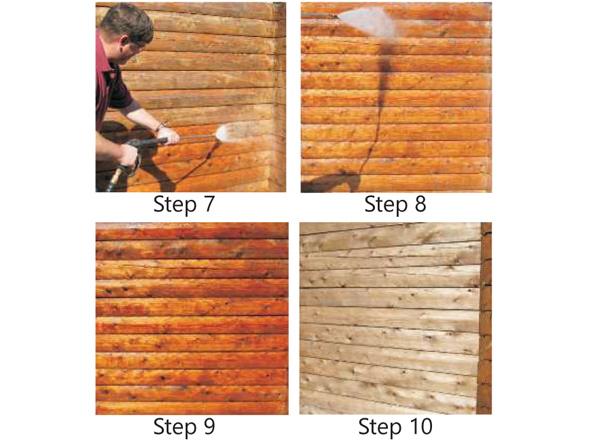
Step 7: Pressure wash starting at the bottom of the wall. Work on 2 or 3 courses of logs at a time. Hold the wand at a 30 to 45 degree angle to avoid feathering the wood.
Step 8: Once the entire wall is pressure washed, rinse the wall starting at the top and work down. At this stage water volume is more important than pressure.
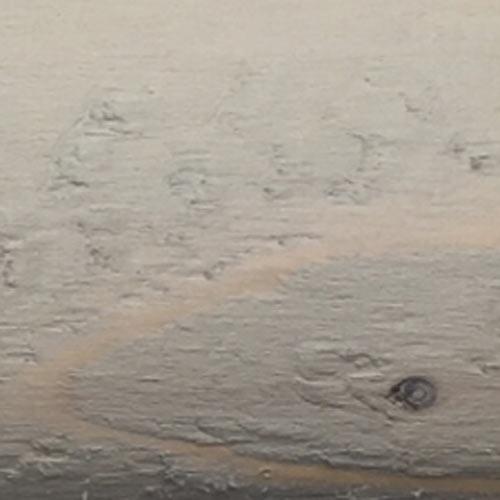
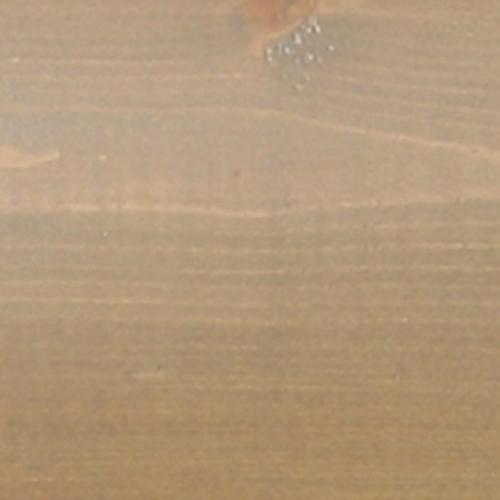
Step 9: Never judge the effectiveness of Wood ReNew or any other cleaner while the wood is still wet.
Step 10: Once the wood dries, many of the dark discolorations will disappear. This is the same wall that appears in the previous step after drying for three hours.
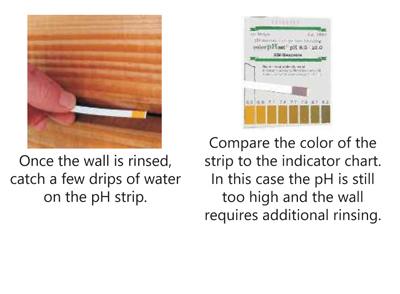
*A NOTE ABOUT RINSING*
No matter what product you use to clean bare wood, nothing is more important than making sure you have adequately rinsed the surface. Any chemical residue remaining on the wood can have serious consequences later on. We always recommend using pH strips to make sure that the surface of the wood has been sufficiently rinsed, preferably to a pH of between 6.5 and 7.5. pH strips are available at most pool supply dealers, aquarium supply shops, and Perma-Chink Systems, Inc. They are not expensive and are very easy to use.
Cleaning Interior Bare Wood Surfaces
Interior walls and ceilings must be cleaned prior to finishing. If your home is completed, you are somewhat limited in the available cleaning methods since the use of a pressure washer is typically not an option. If you want your interior walls smooth, sanding may be your best and only choice. As opposed to exterior surfaces, you can sand interior wood surfaces using 120 grit sandpaper or Osborn brush.
Although your interior wood surfaces may appear to be clean, they are never clean enough to apply a finish to them without first washing them with an appropriate cleaning solution like Log Wash.
Step 1: Mix one half or one cup of Log Wash Concentrate with one gallon of warm water, if available, in a pail.
Step 2: Apply the Log Wash solution to the wall with a rag or sponge starting at the bottom and work up. Allow the solution to remain on the wall for at least 10 minutes.
Step 3: Using a clean rag or sponge and a pail of clean water, wipe the Log Wash solution off of the surface. Frequently rinse the sponge or rag in the pail of water and occasionally exchange the water in the pail with clean water.
Step 4: Allow the surface to completely dry before applying the first coat of finish.

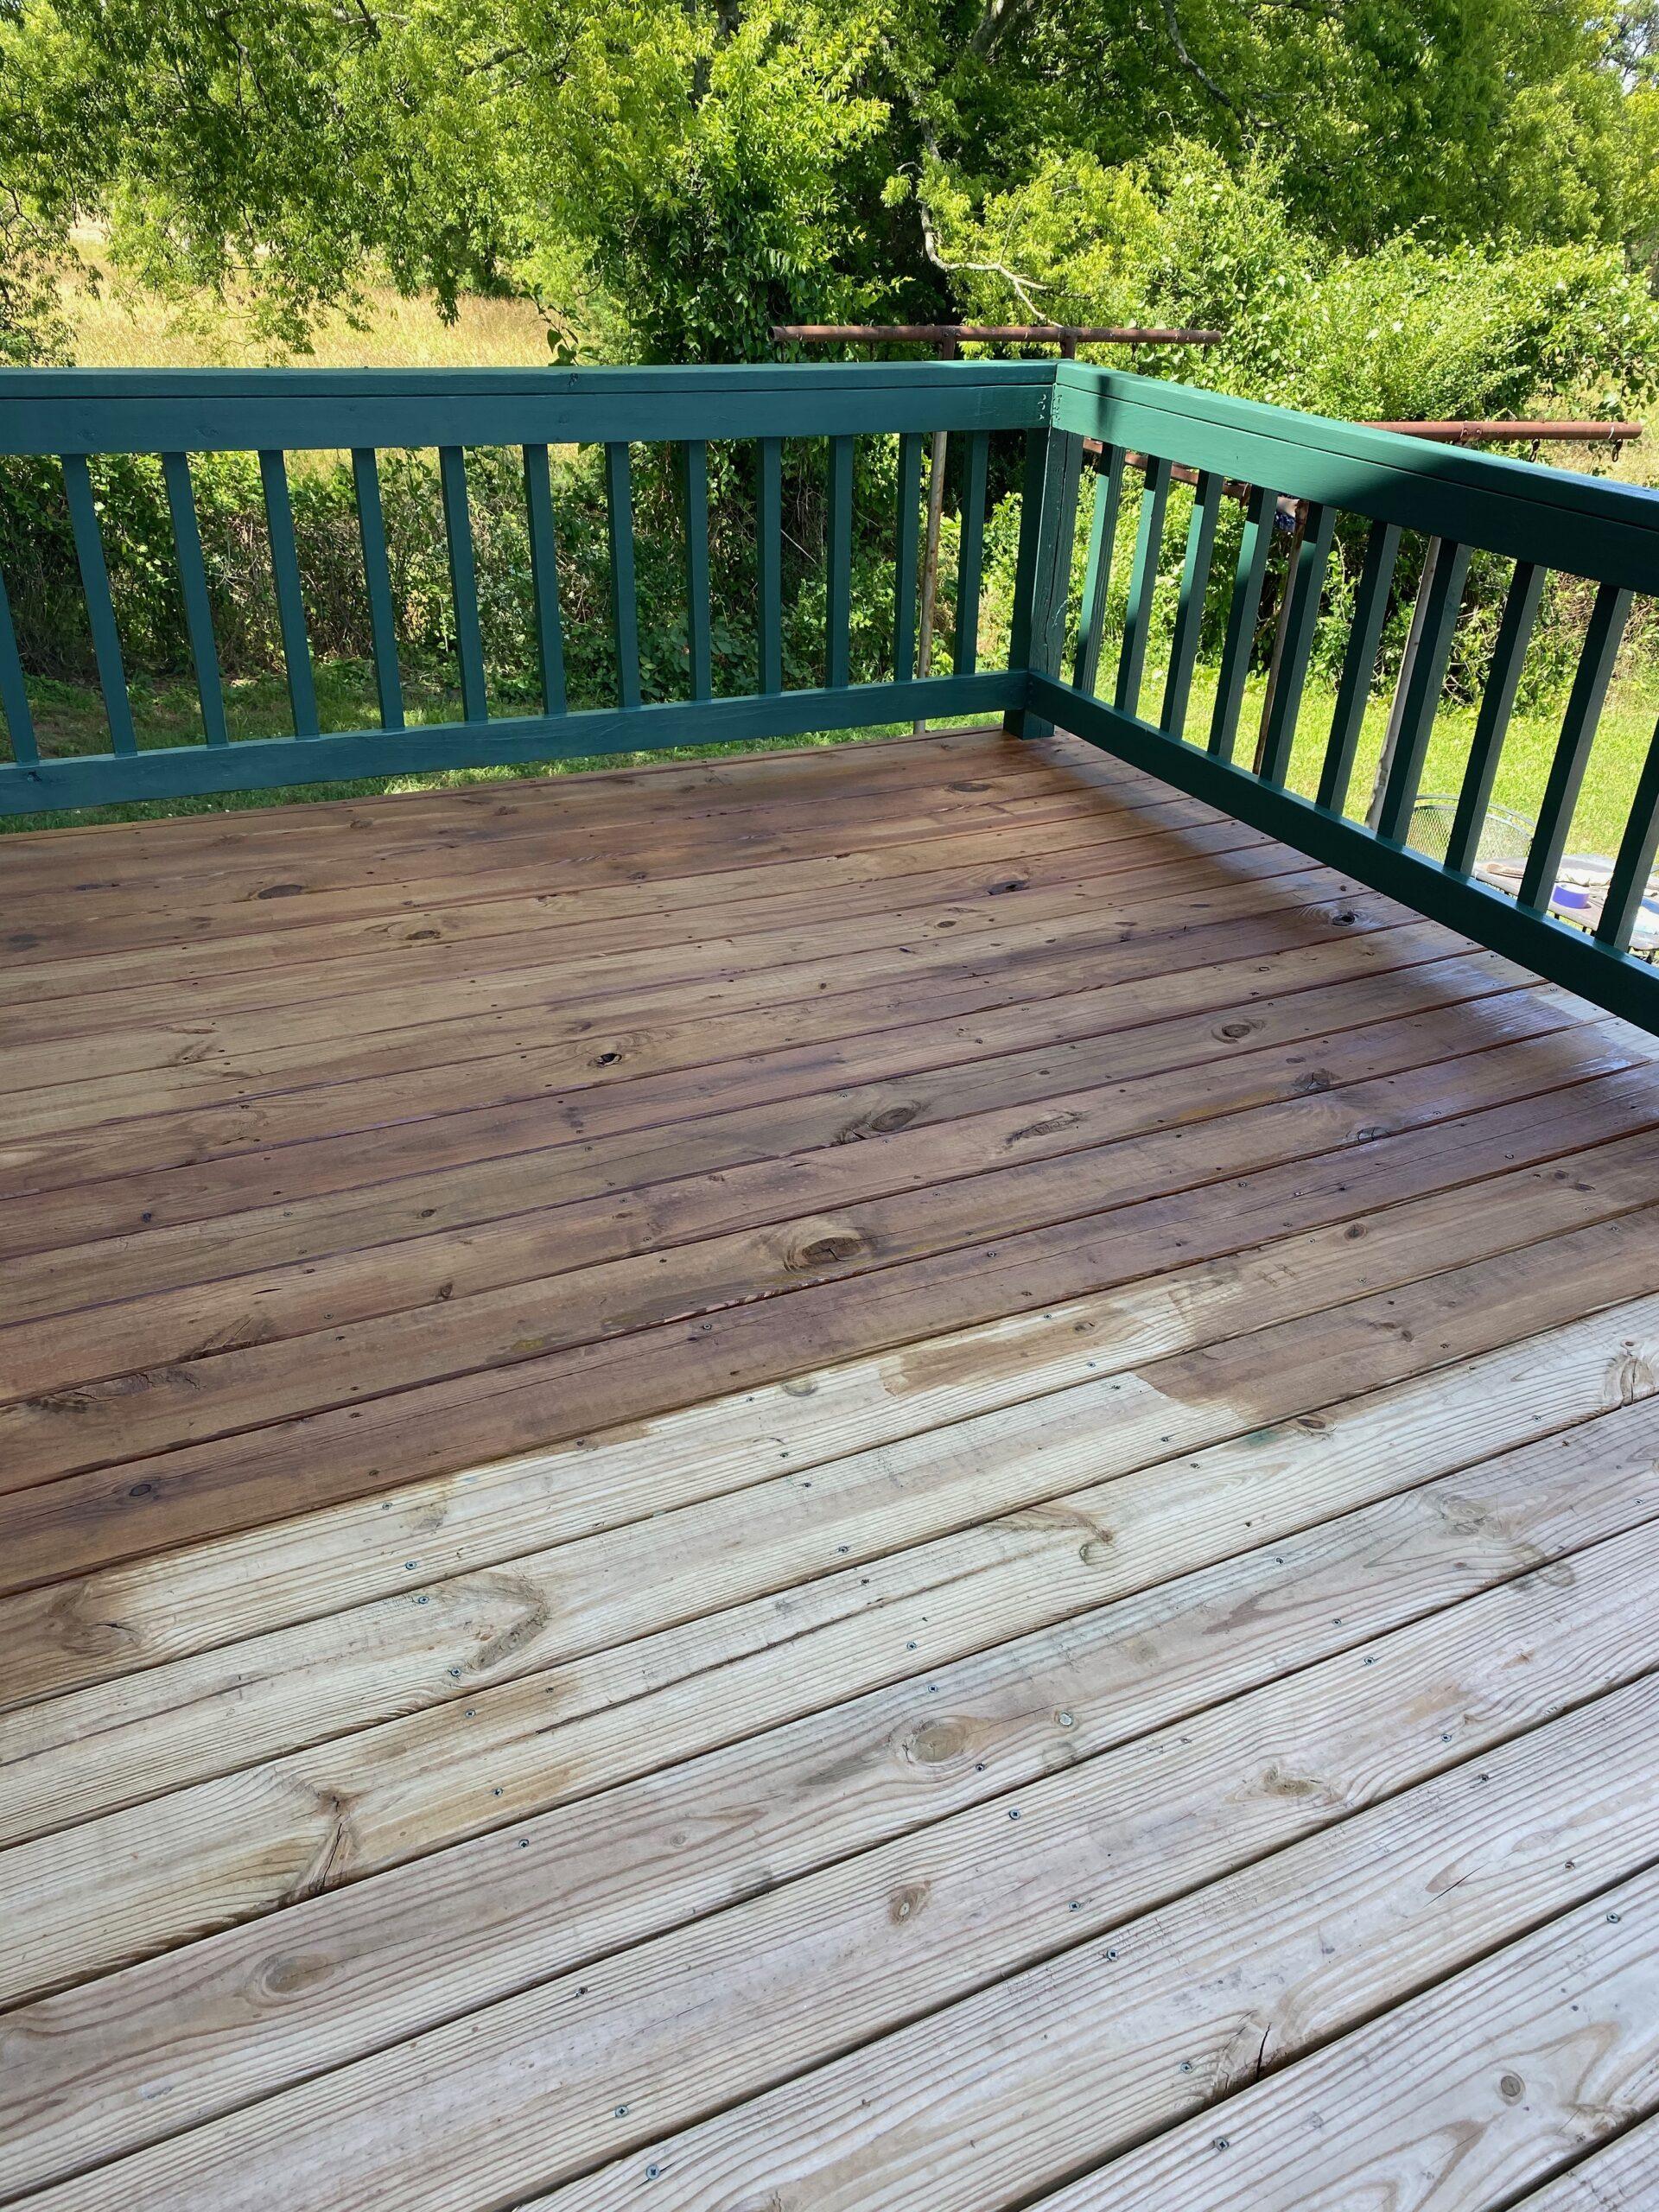
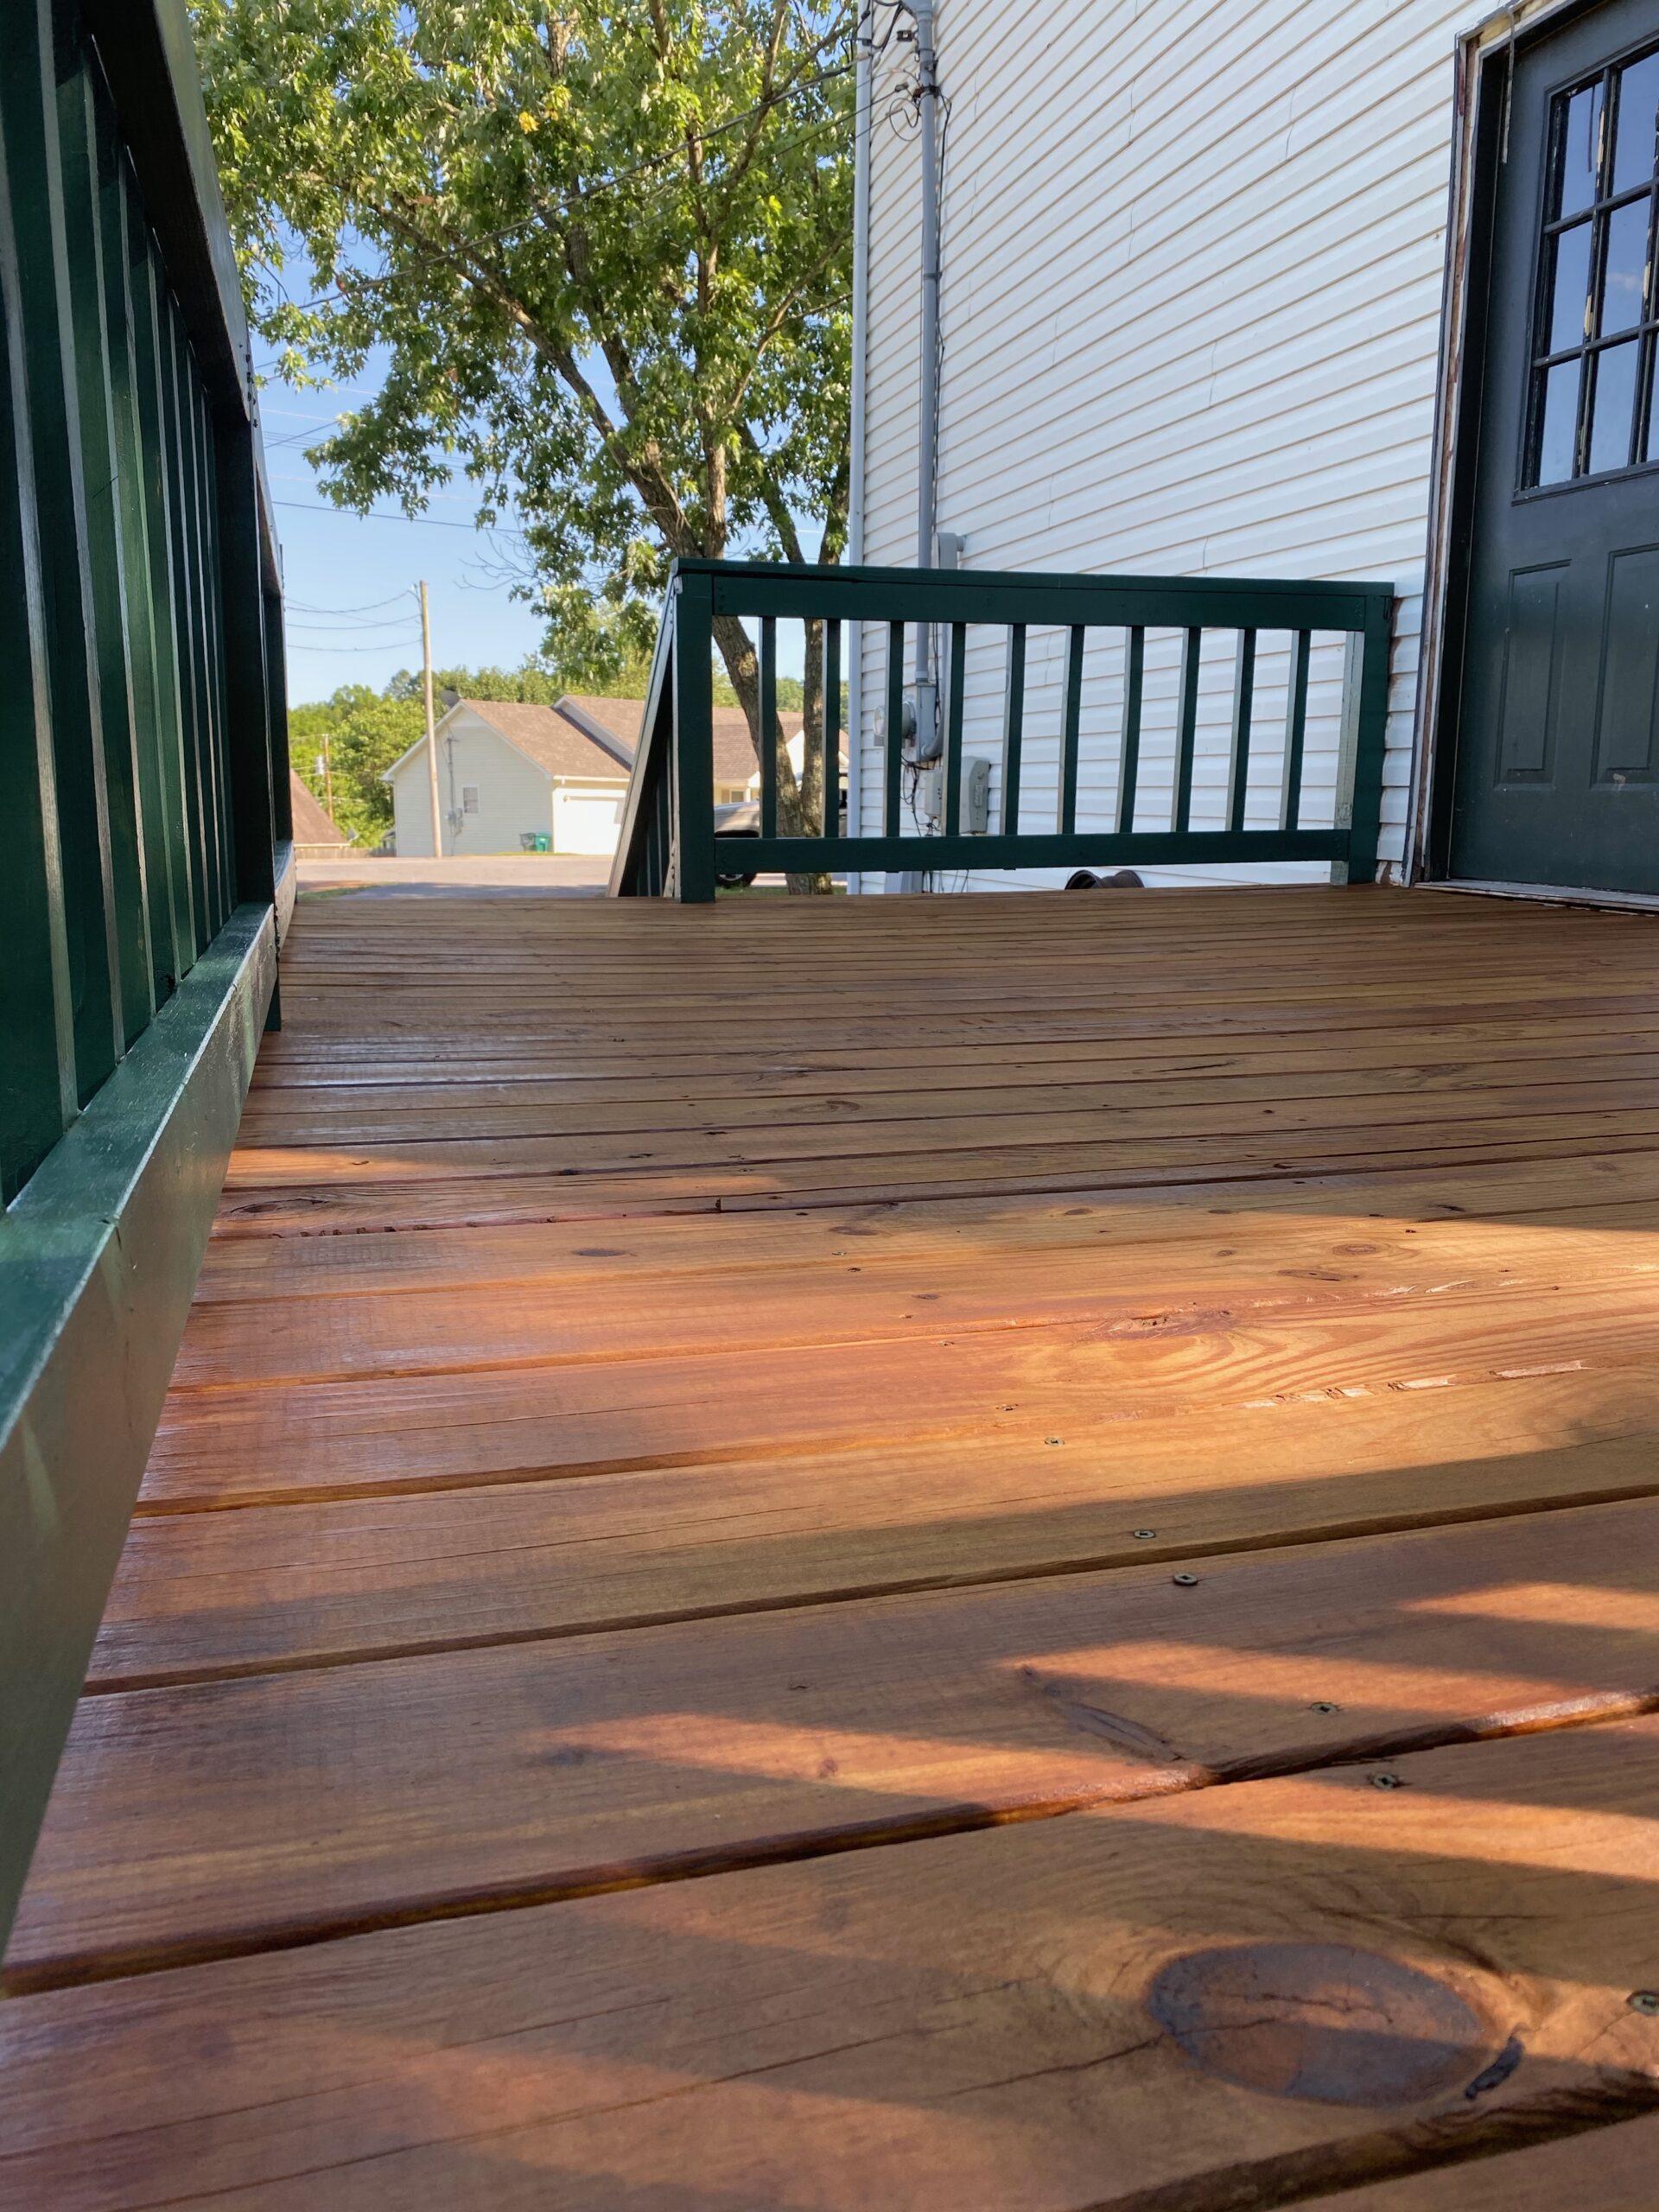
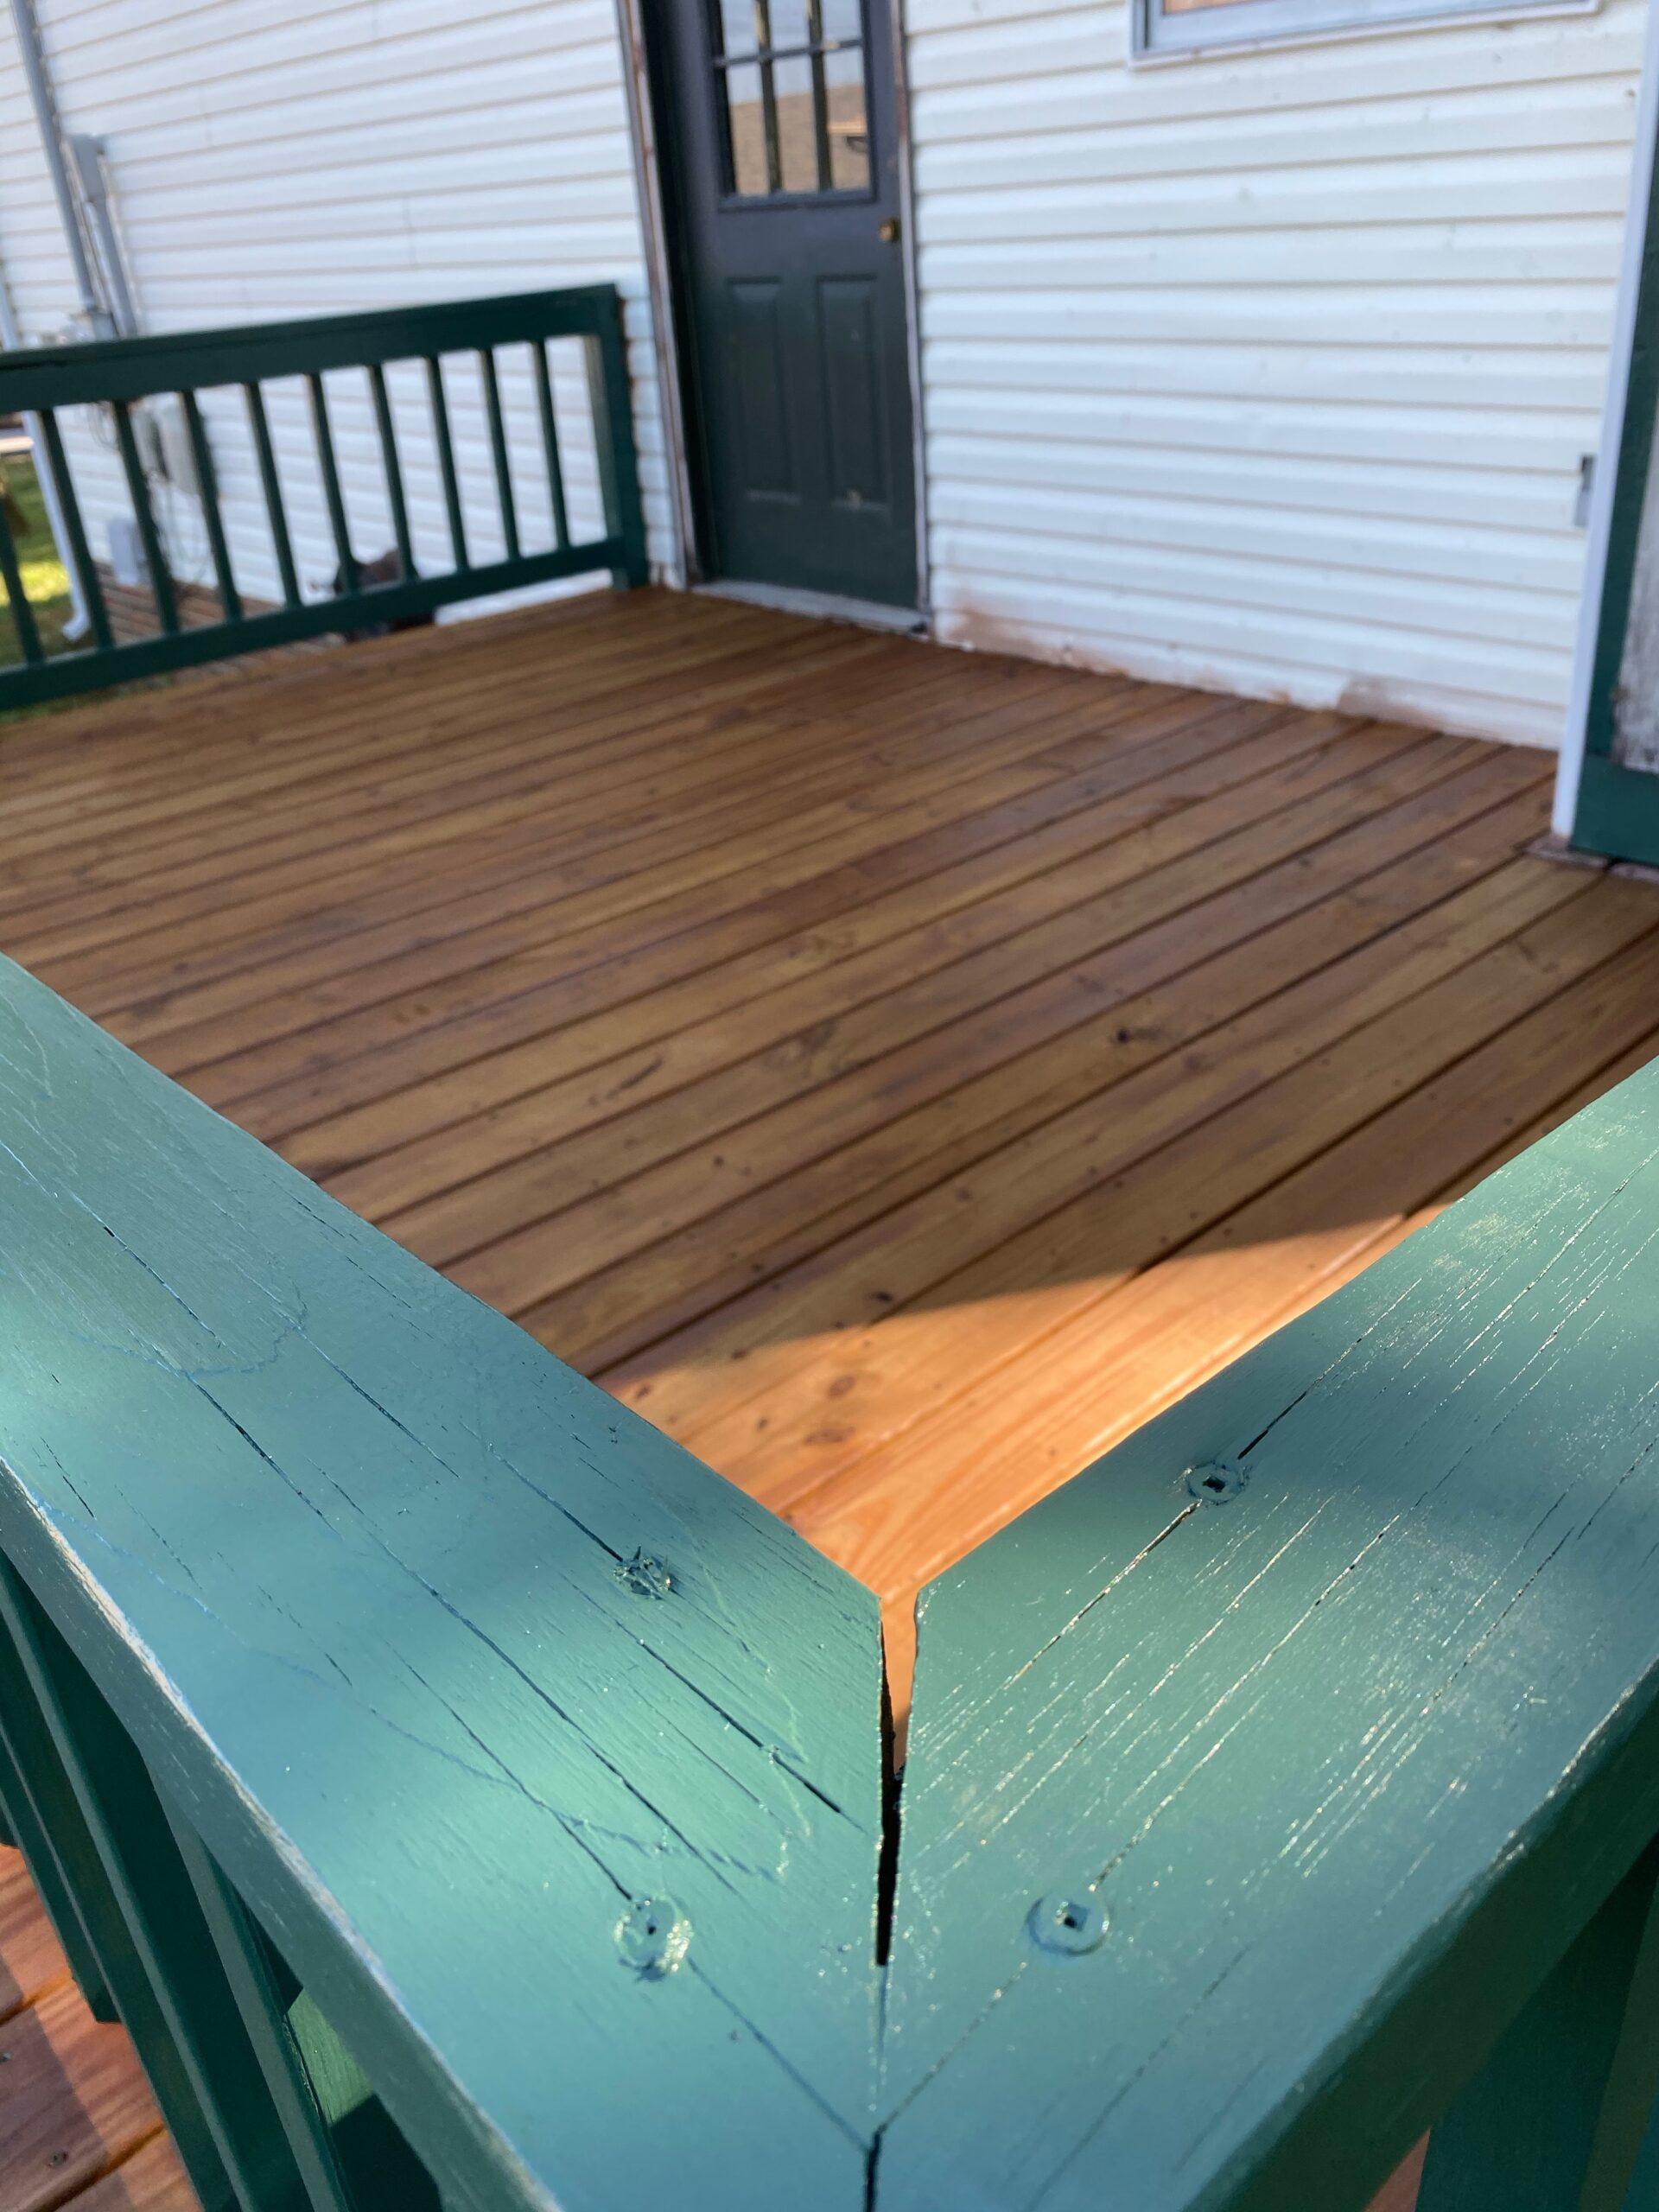
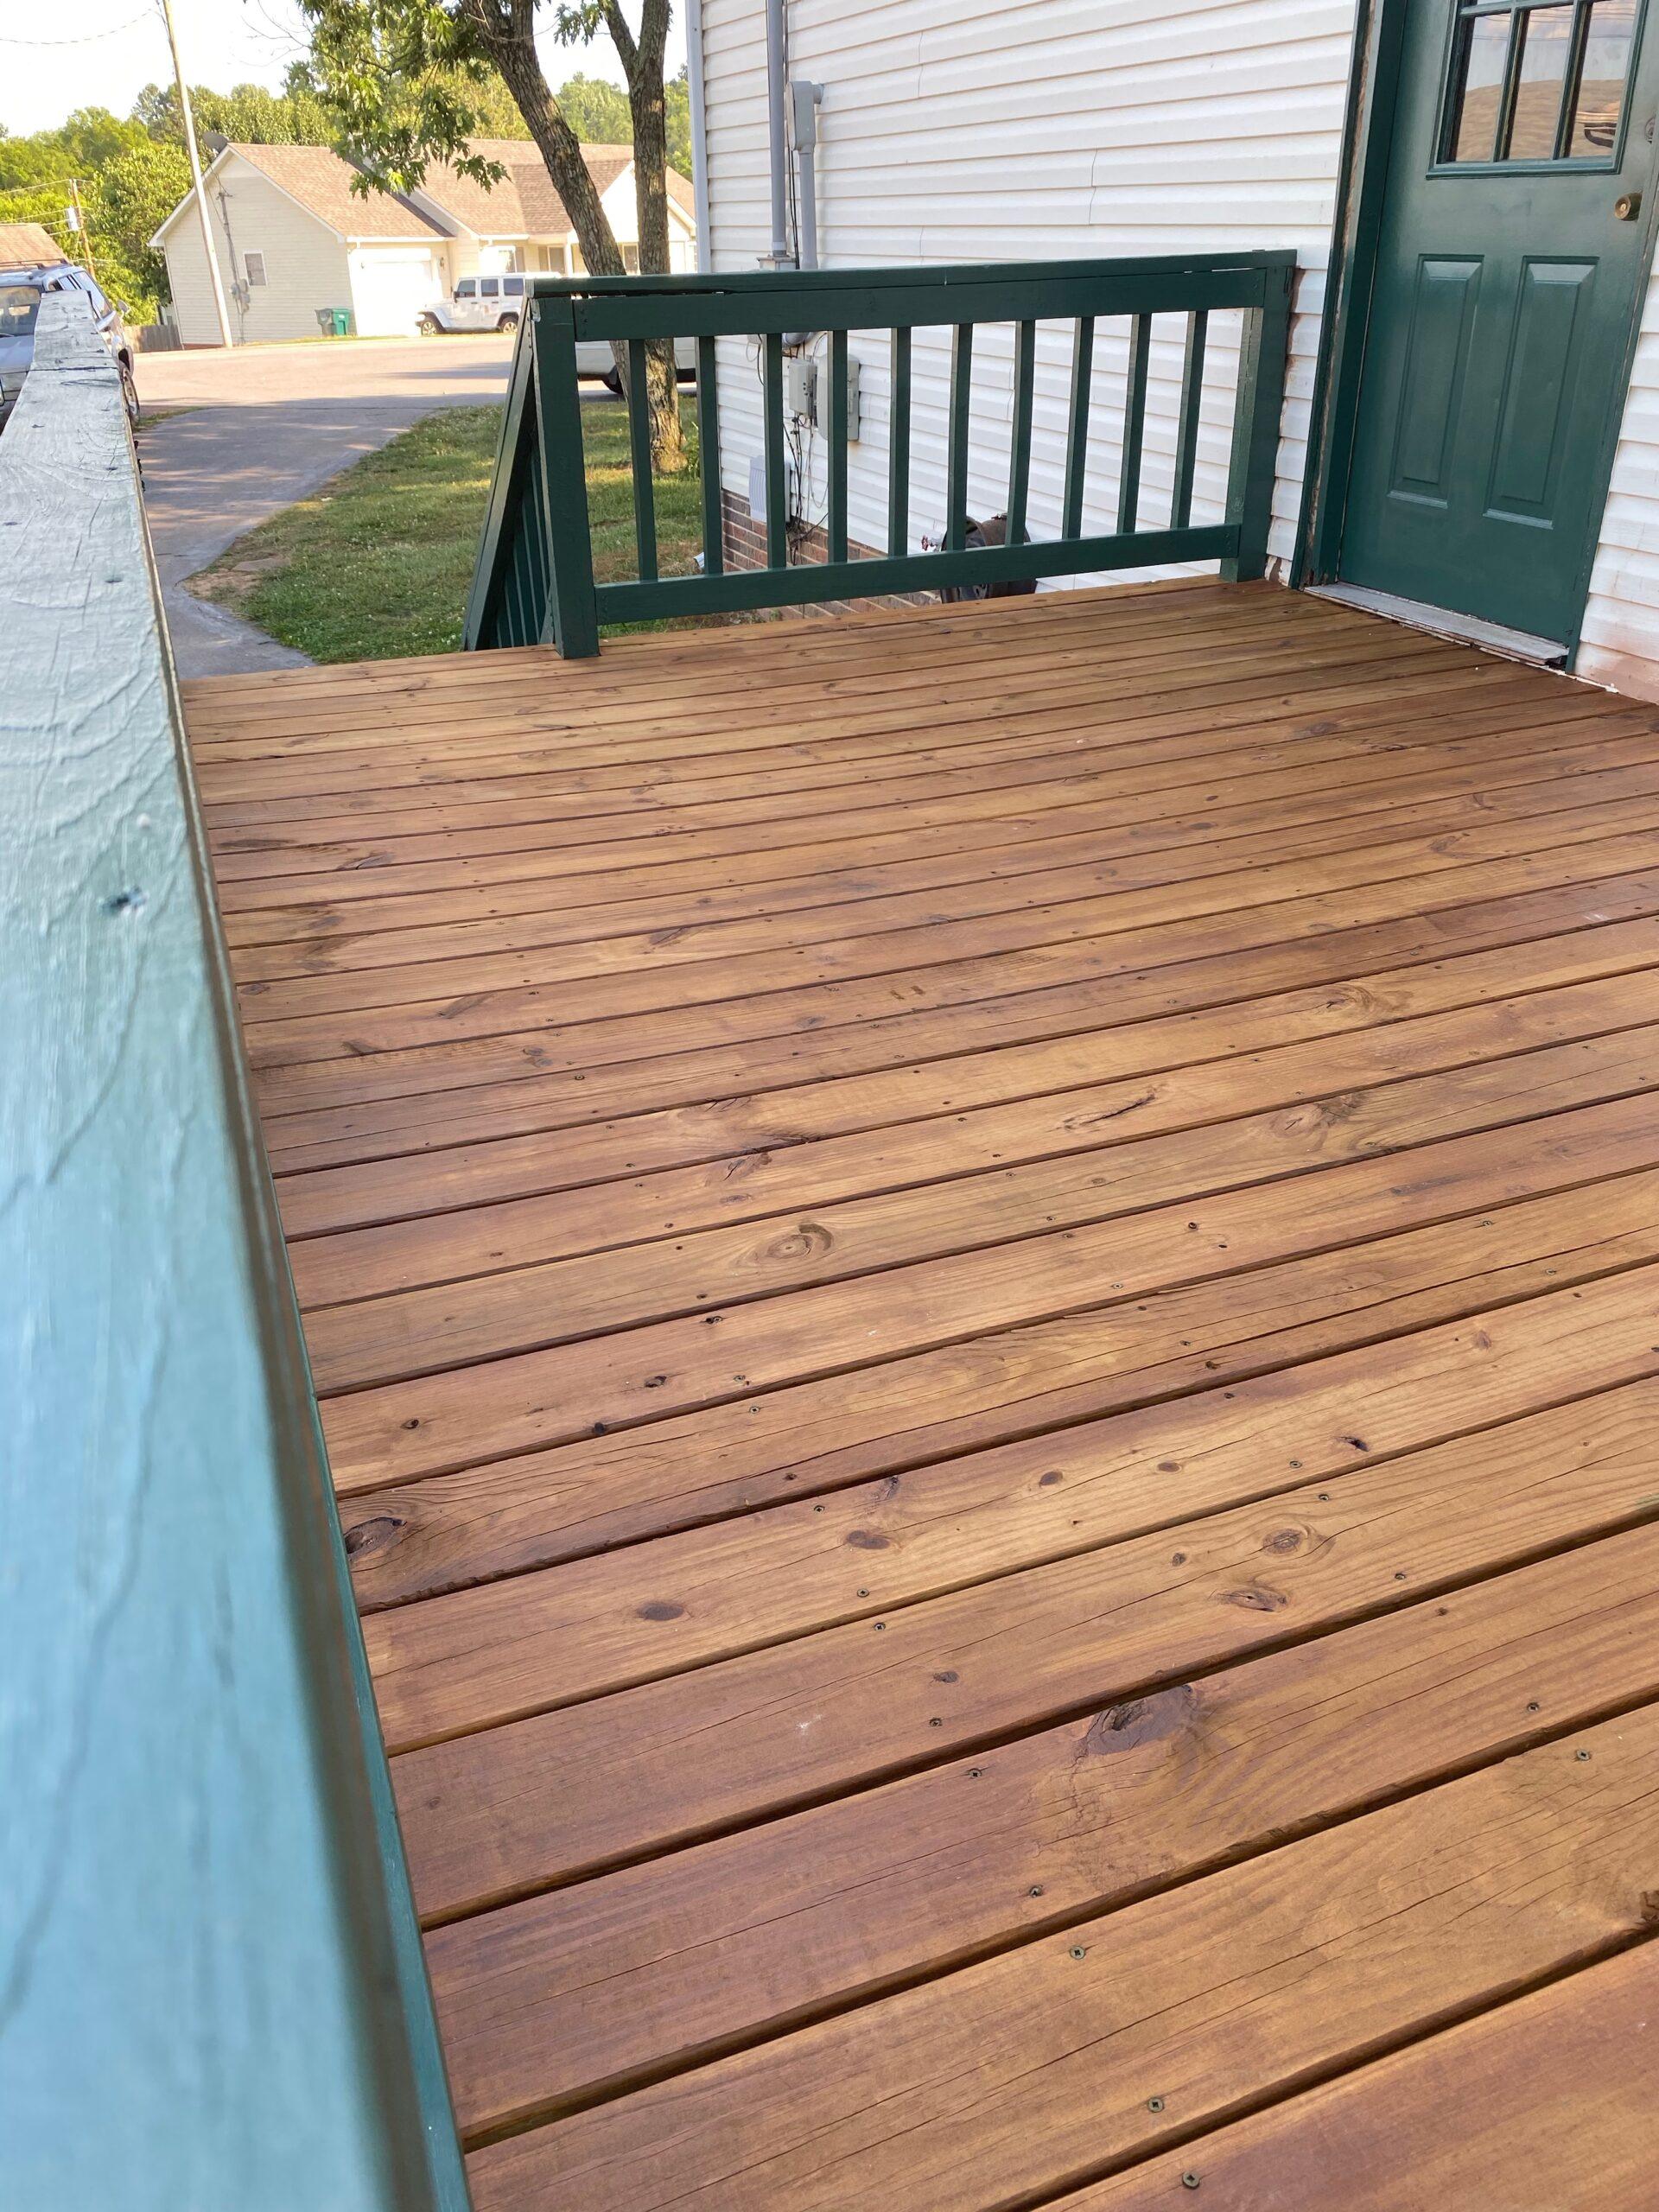
Making an Old Deck New Again with Deck Defense
By Danny M. Nichols
A Transforming Experience
Spring finally arrived. With continued rains in our area, much of spring silently slipped away before we realized summer 2020 was upon us and a project launched the year before needed to be completed. A house my wife and I own and currently used as a rental house was in dire need of renovation. During a short period in 2019 when the house was empty, we set about doing a facelift of the entire interior of the home. Walls were painted, some new fixtures installed and floors were sanded and refinished throughout the house.
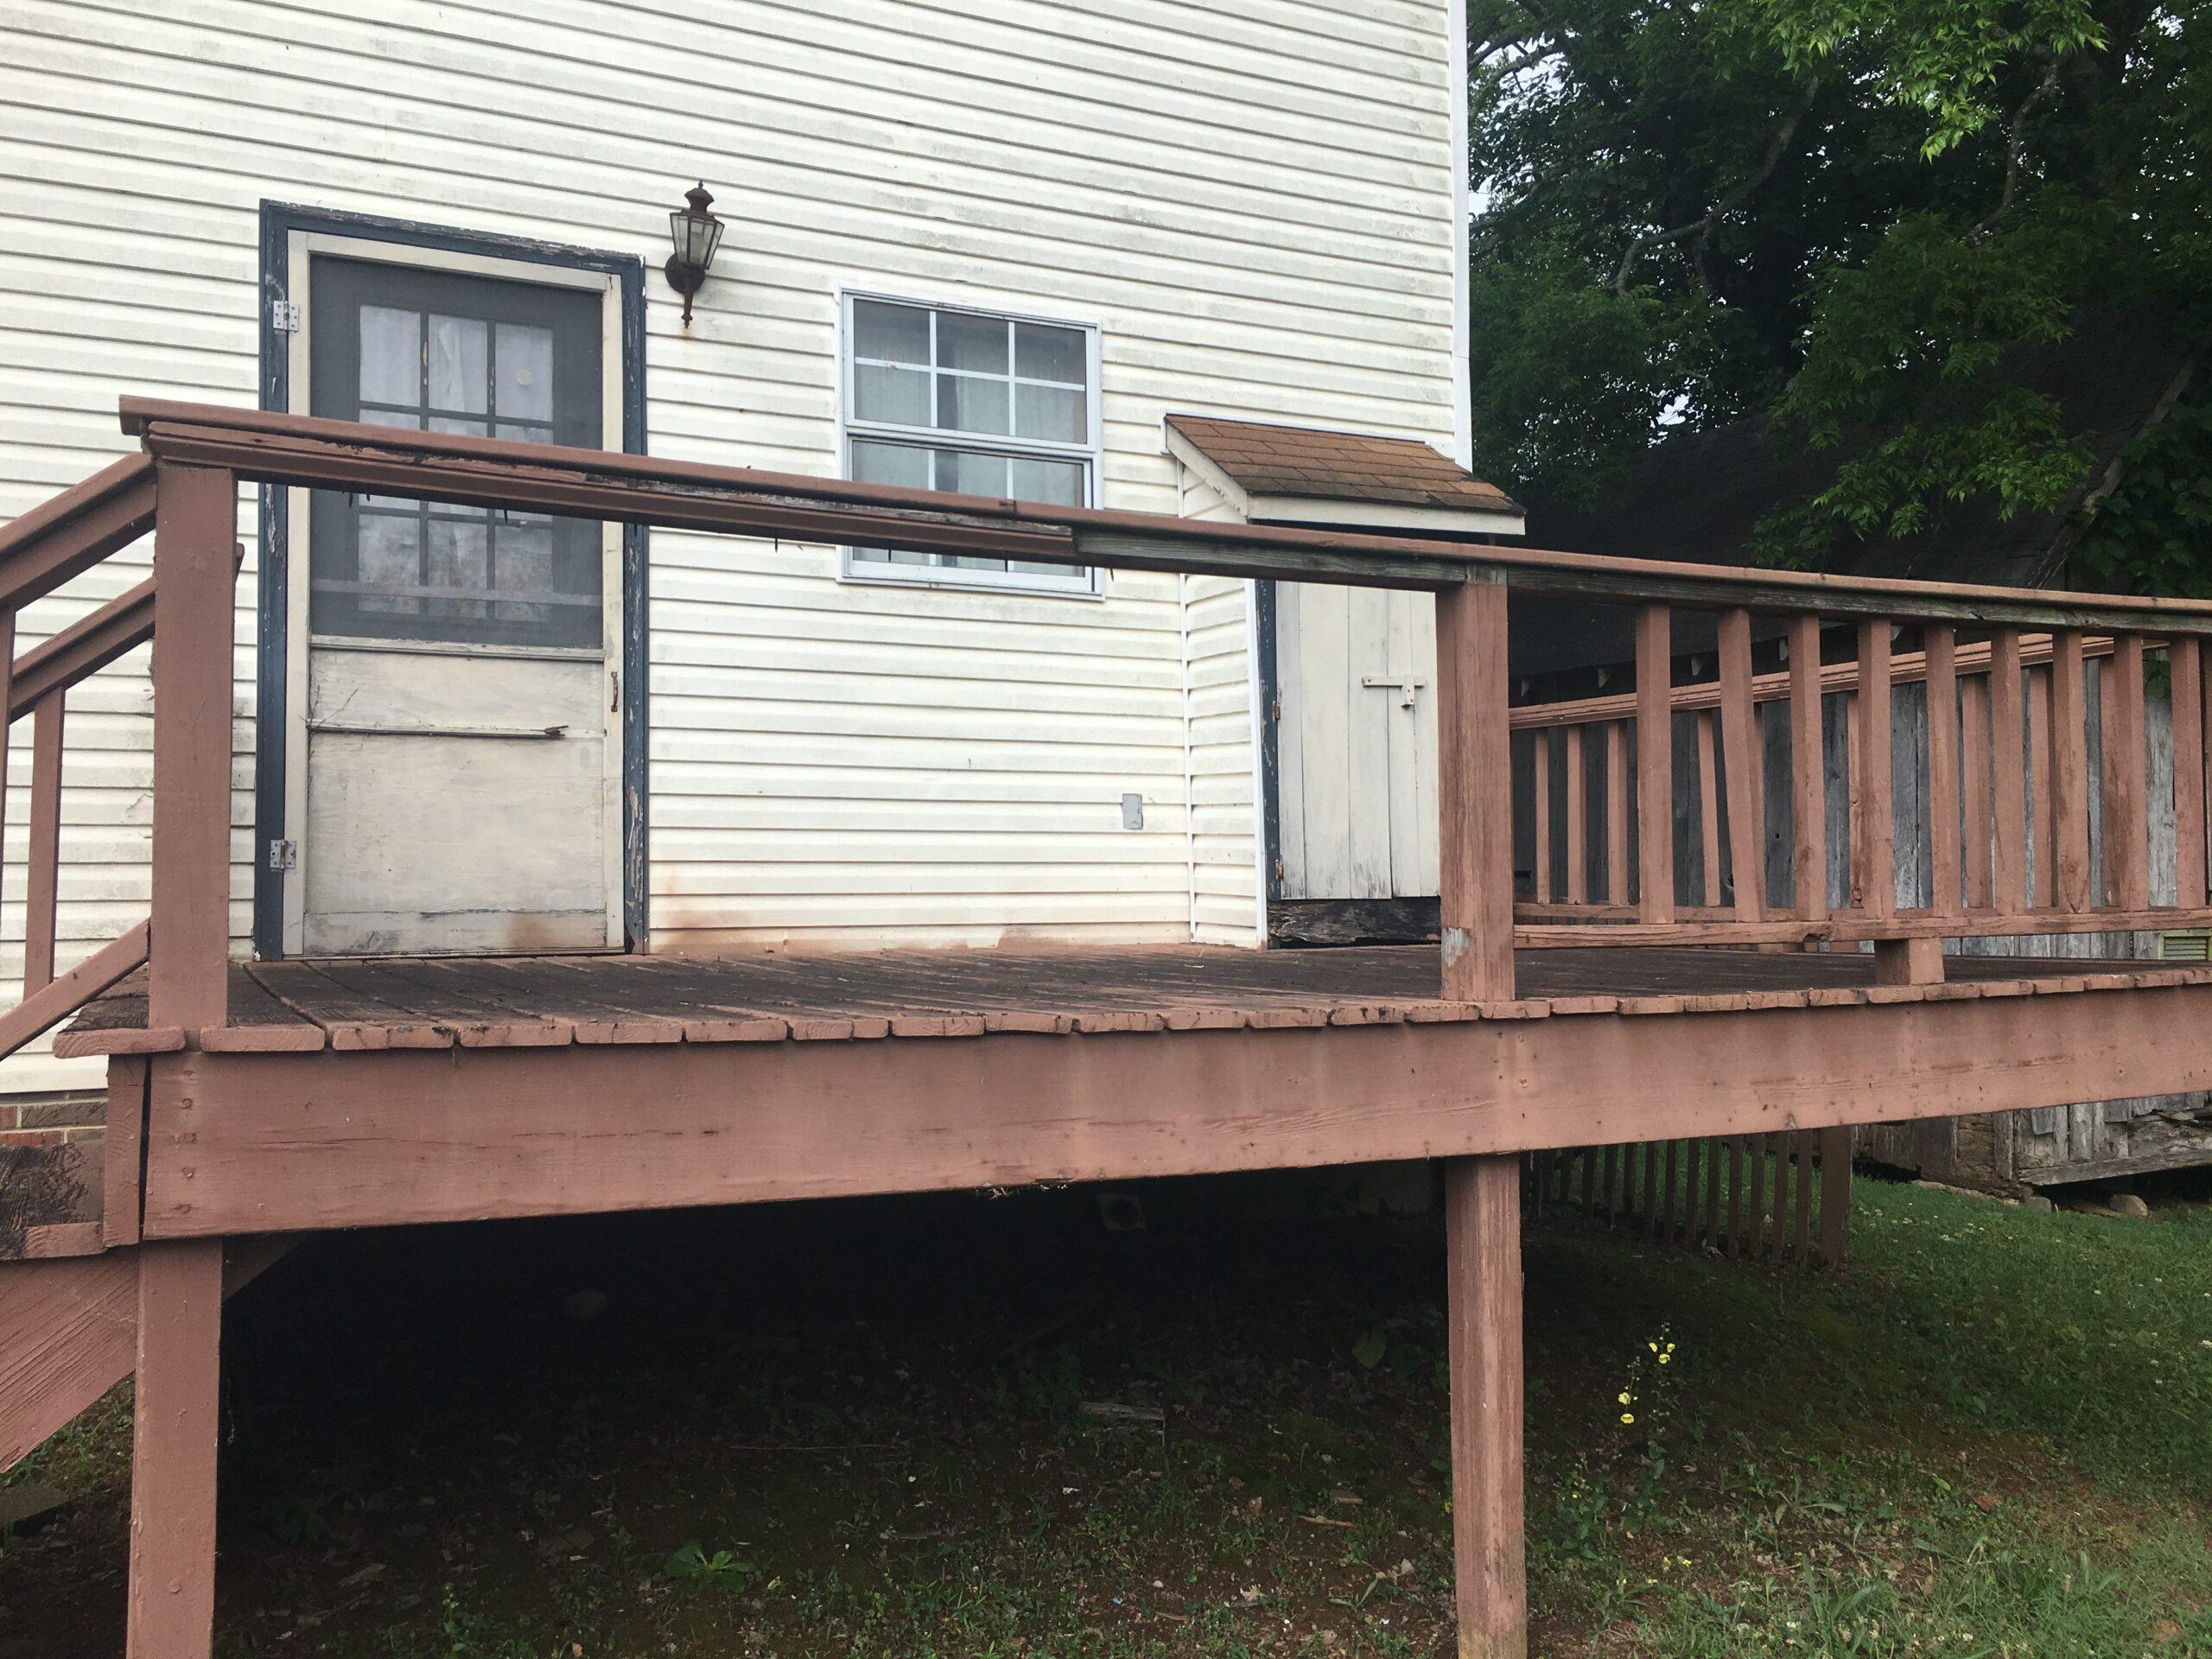
With the inside of the house finished and ready to go, a new renter moved in whose priorities did not immediately include the need or use of the wooden deck outside the kitchen door. The deck was built as an original feature of the house in 1990 and was much-used when my wife was raising her children there. Most of the outside woodwork of the home was in need of painting or replacing. To put it more correctly, it looked sad. We agreed to wait until the following spring to tackle the deck and front porch needs.
Assessment
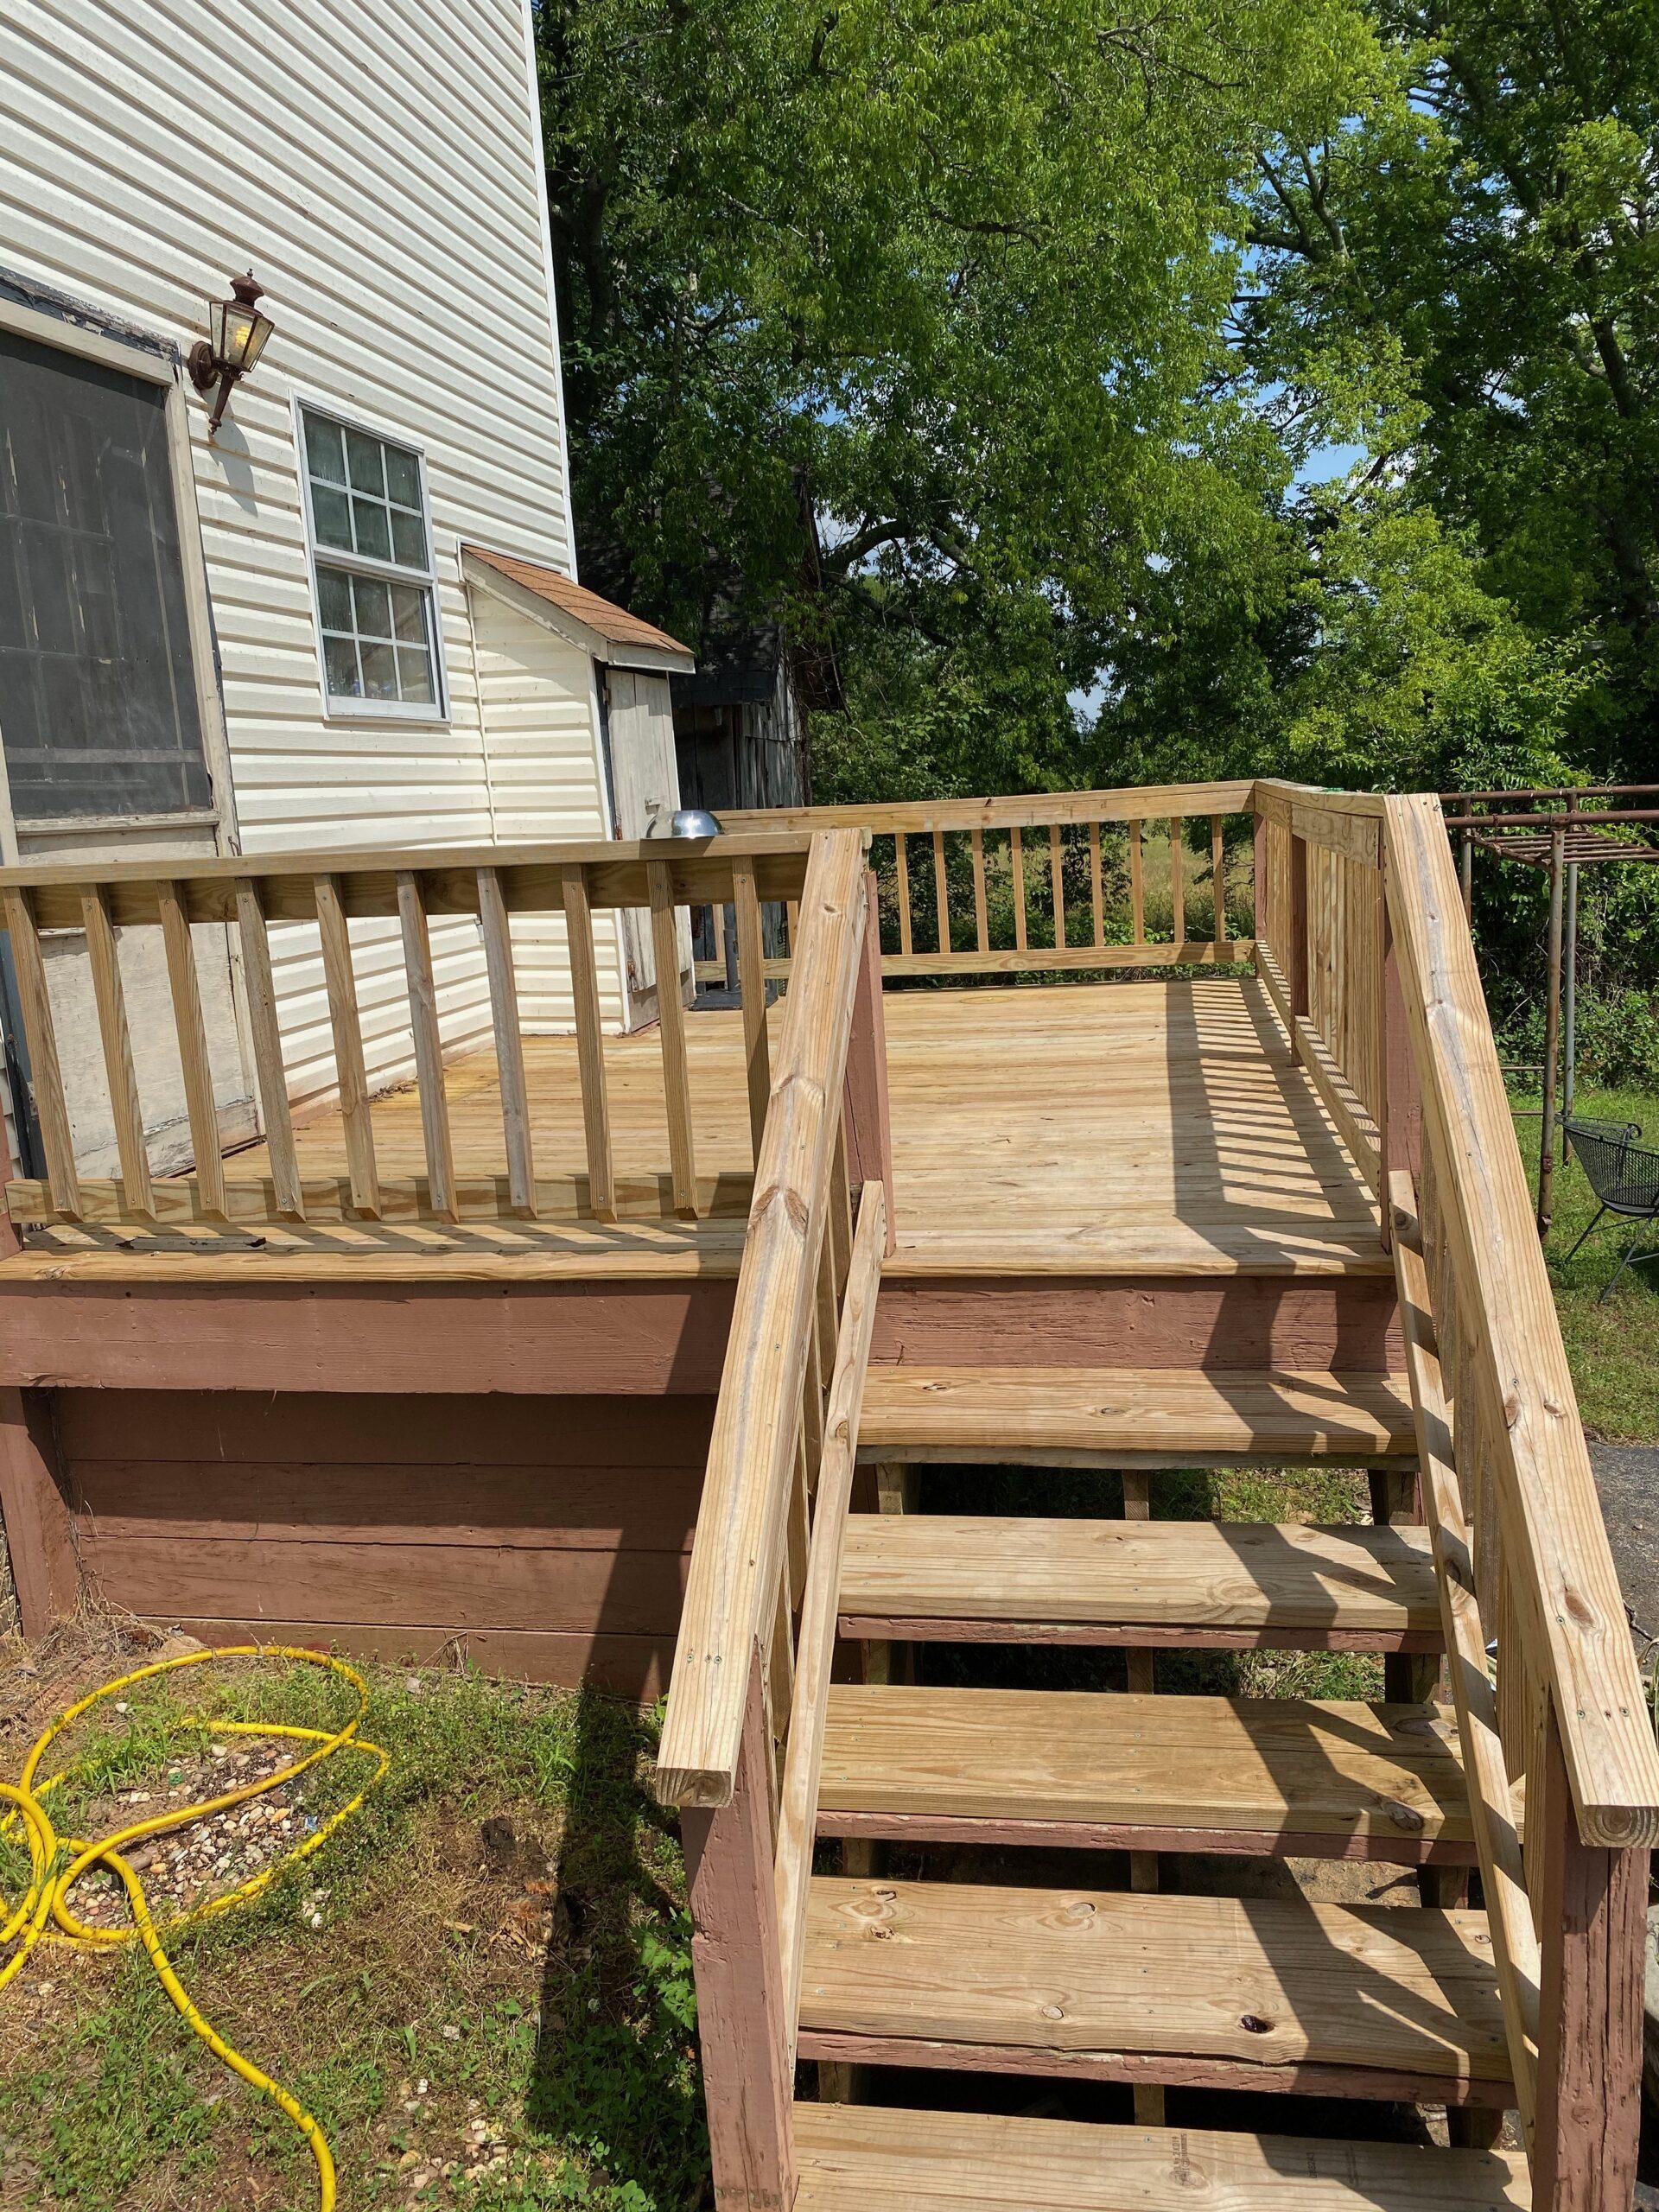
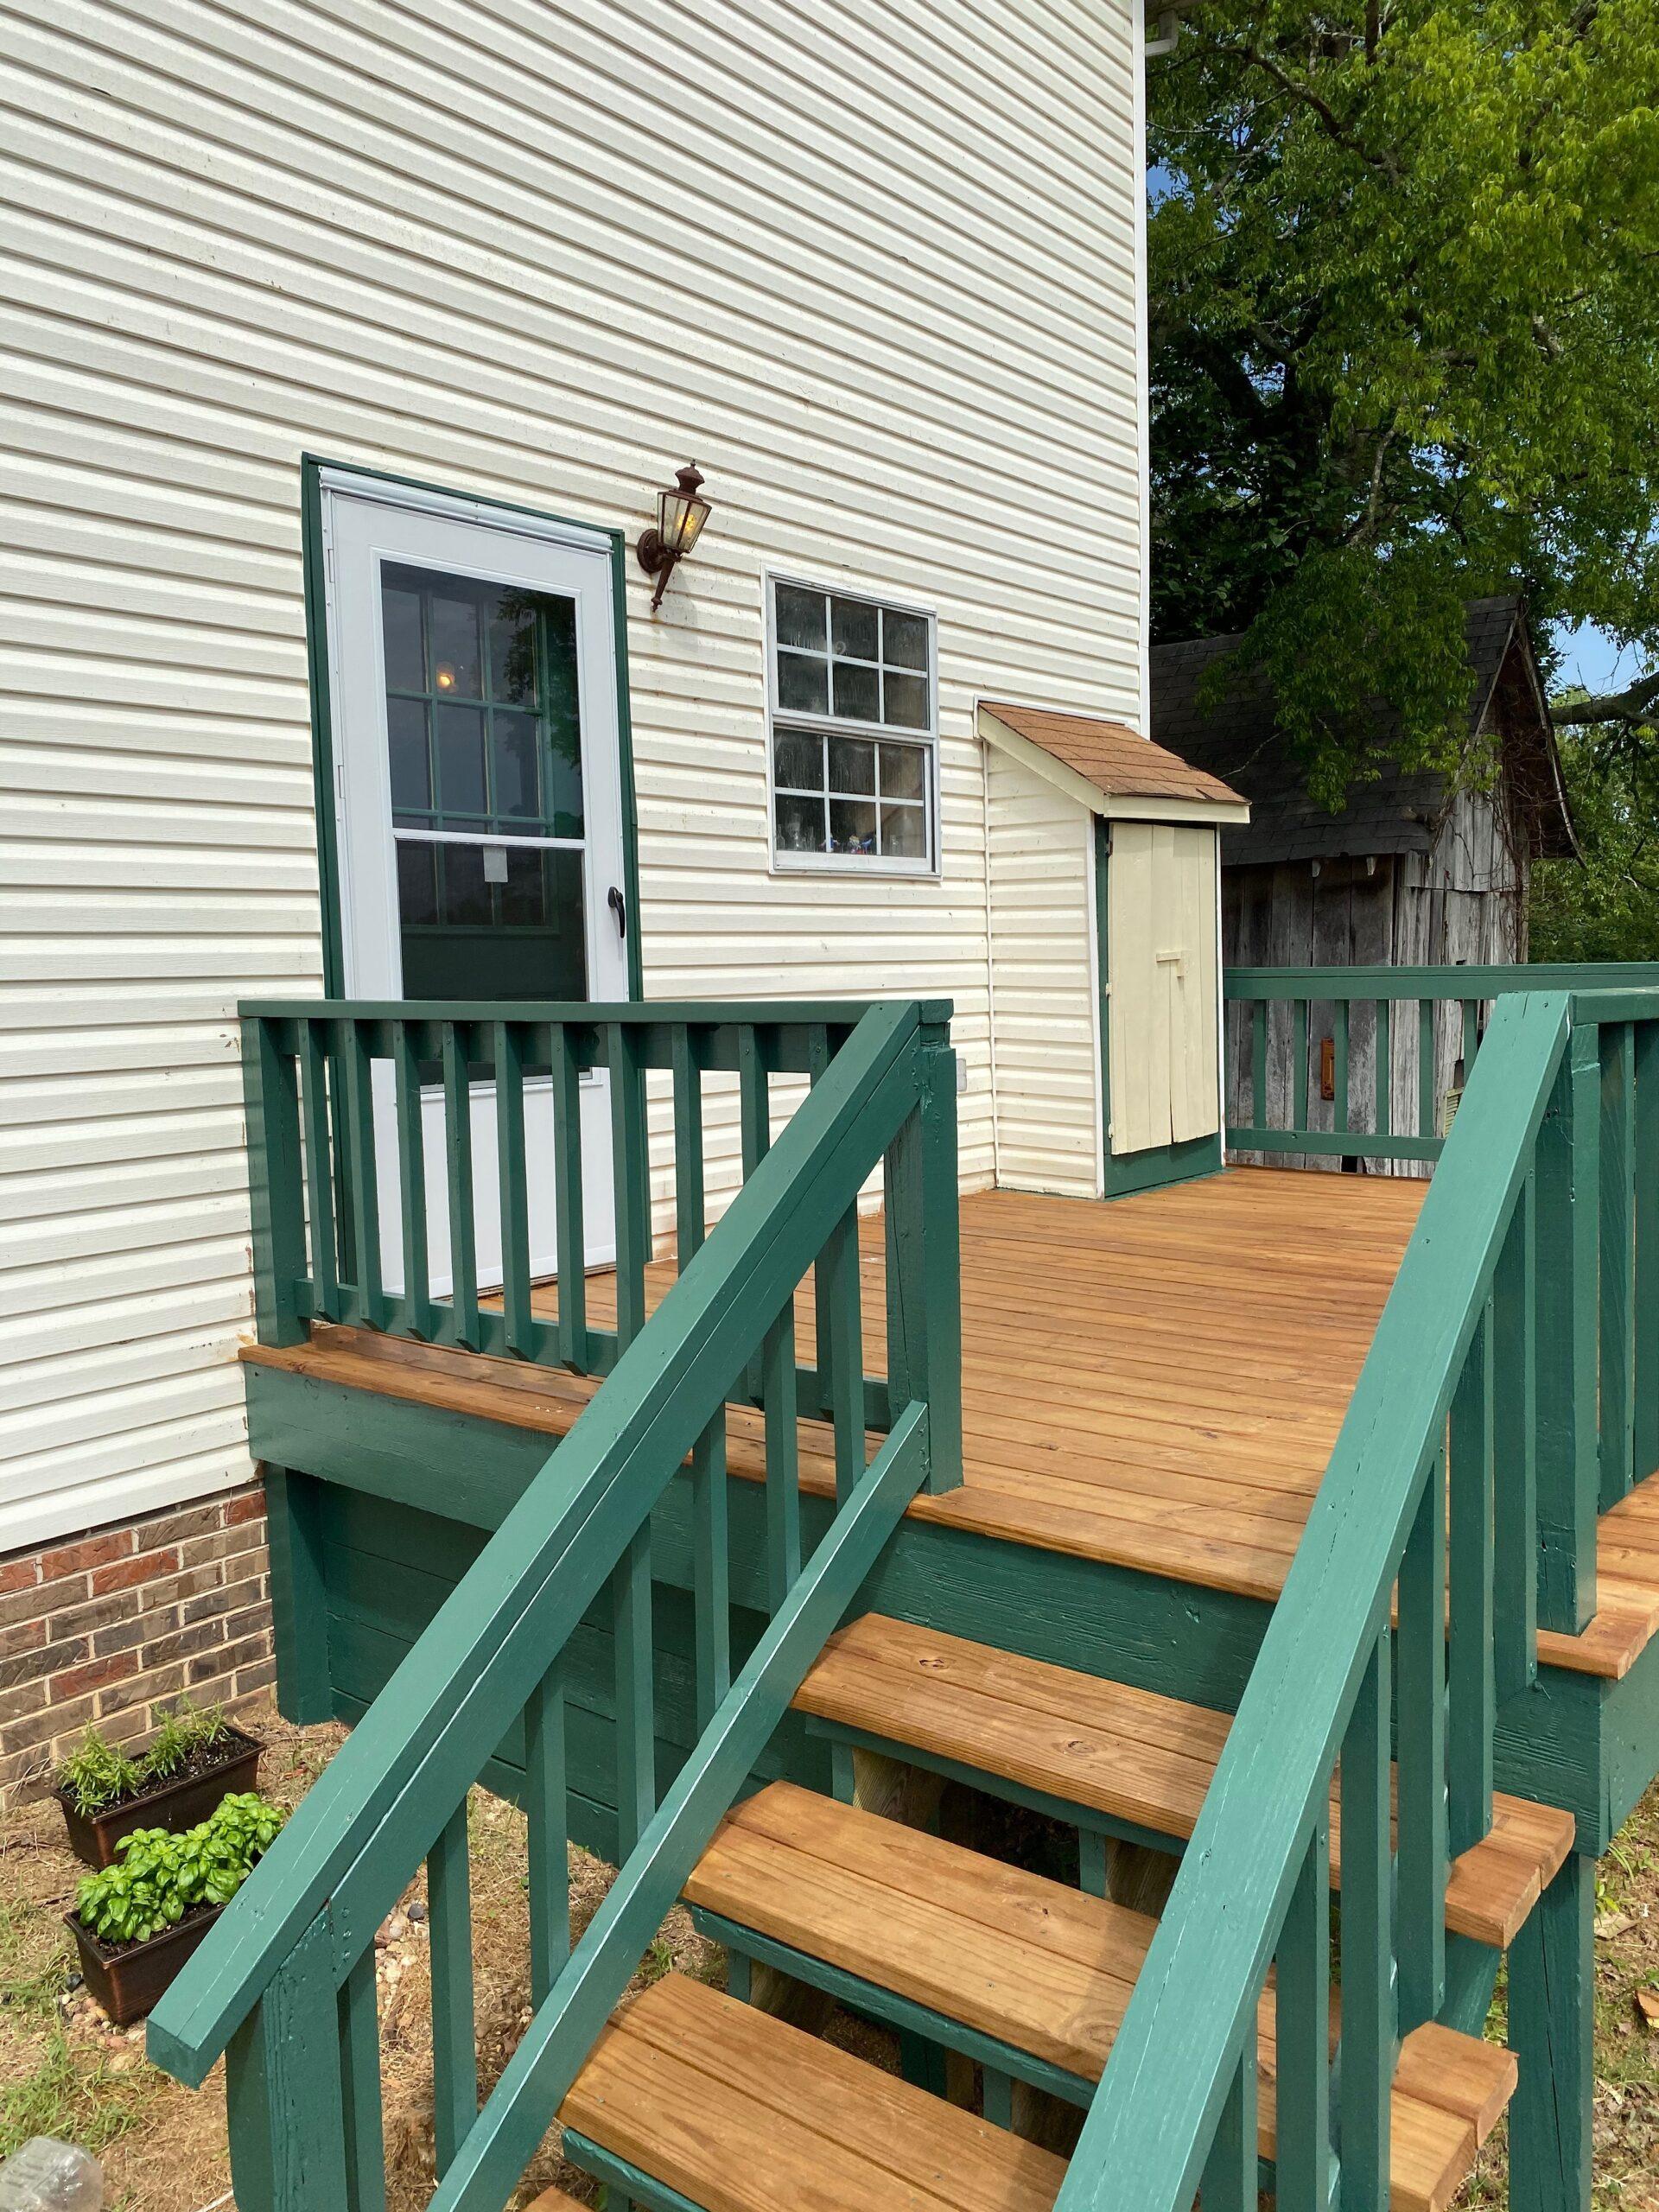
The front porch posts, gingerbread trimmings and door could all do with a fresh coat of paint. The wooden deck off the kitchen, however, needed a miracle. Floor boards had deteriorated as well as the steps, banister and railings. Only the treated 4×4 wooden posts and floor joists providing the underneath support for the deck were still holding up well. A new deck floor would have to be constructed along with new banisters and railing. And finally, a sealer with stain would have to be applied to the boards.
Action
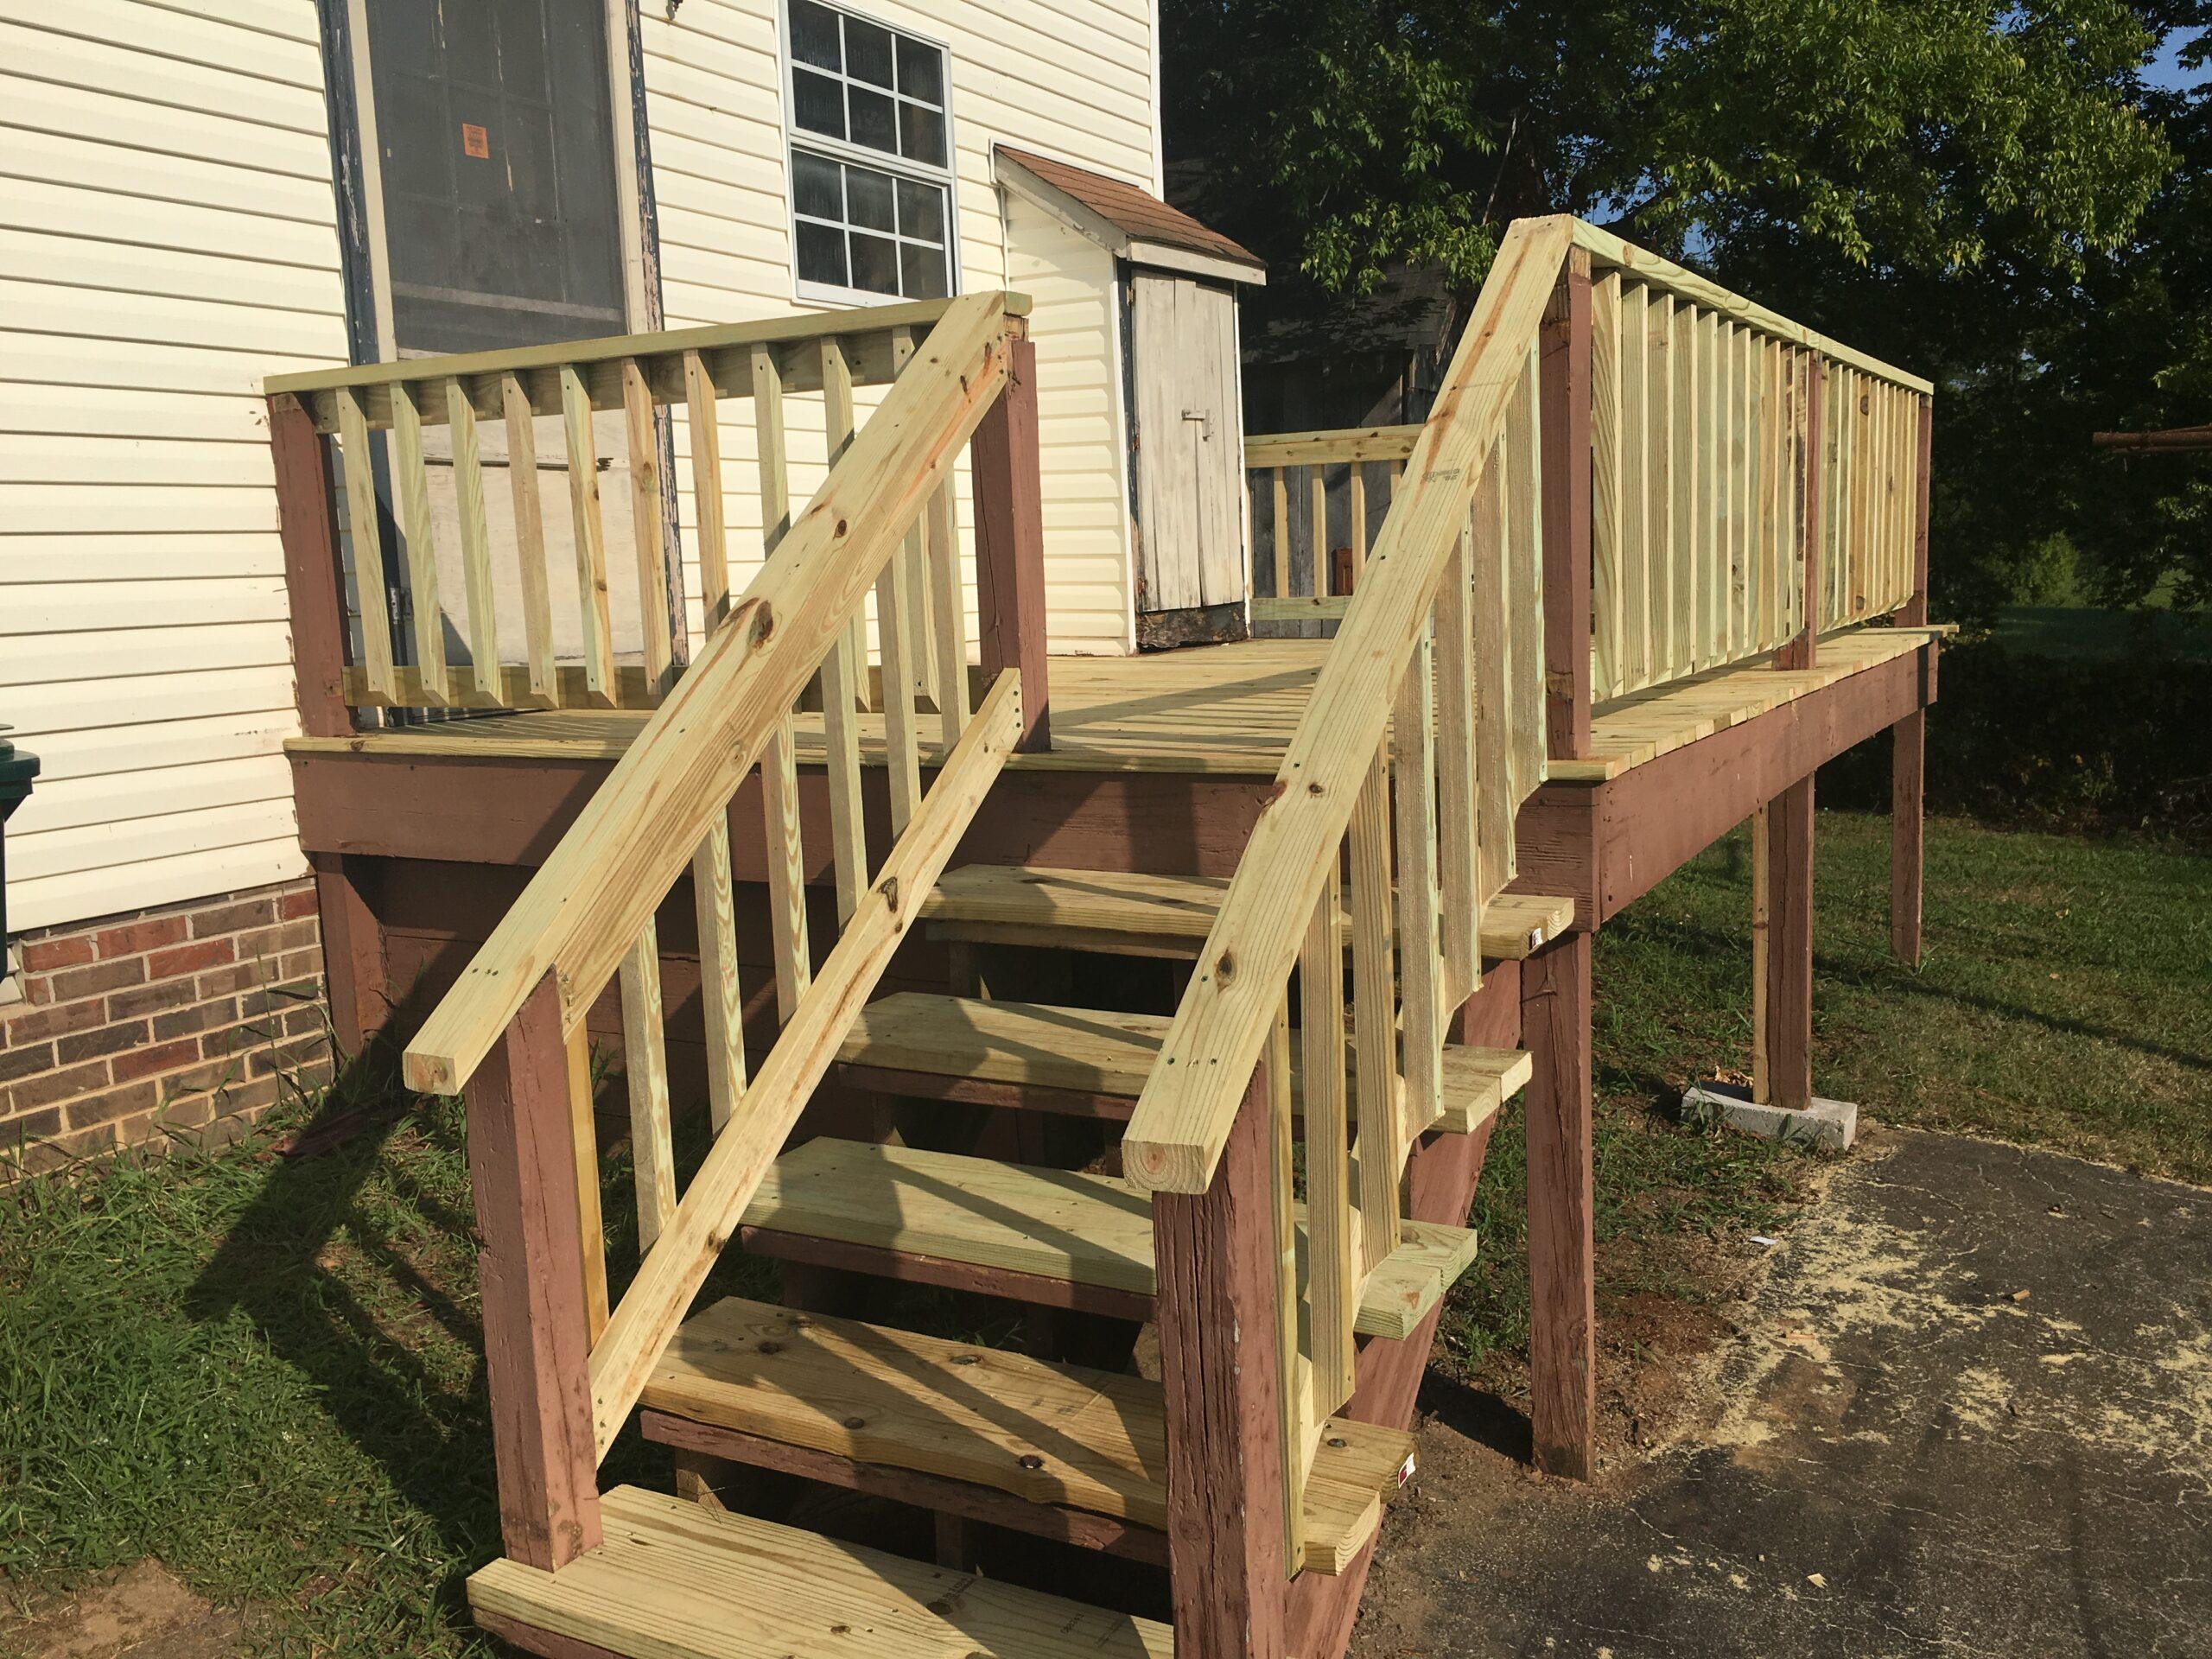
Off with the old and on with the new! Our first step involved moving all the old boards and railings. To our dismay and surprise, all the deck boards were nailed with 3” construction grade nails making them a bit difficult to remove. The upside was that it may well have been those nails that helped this deck survive the 30 years of its life!
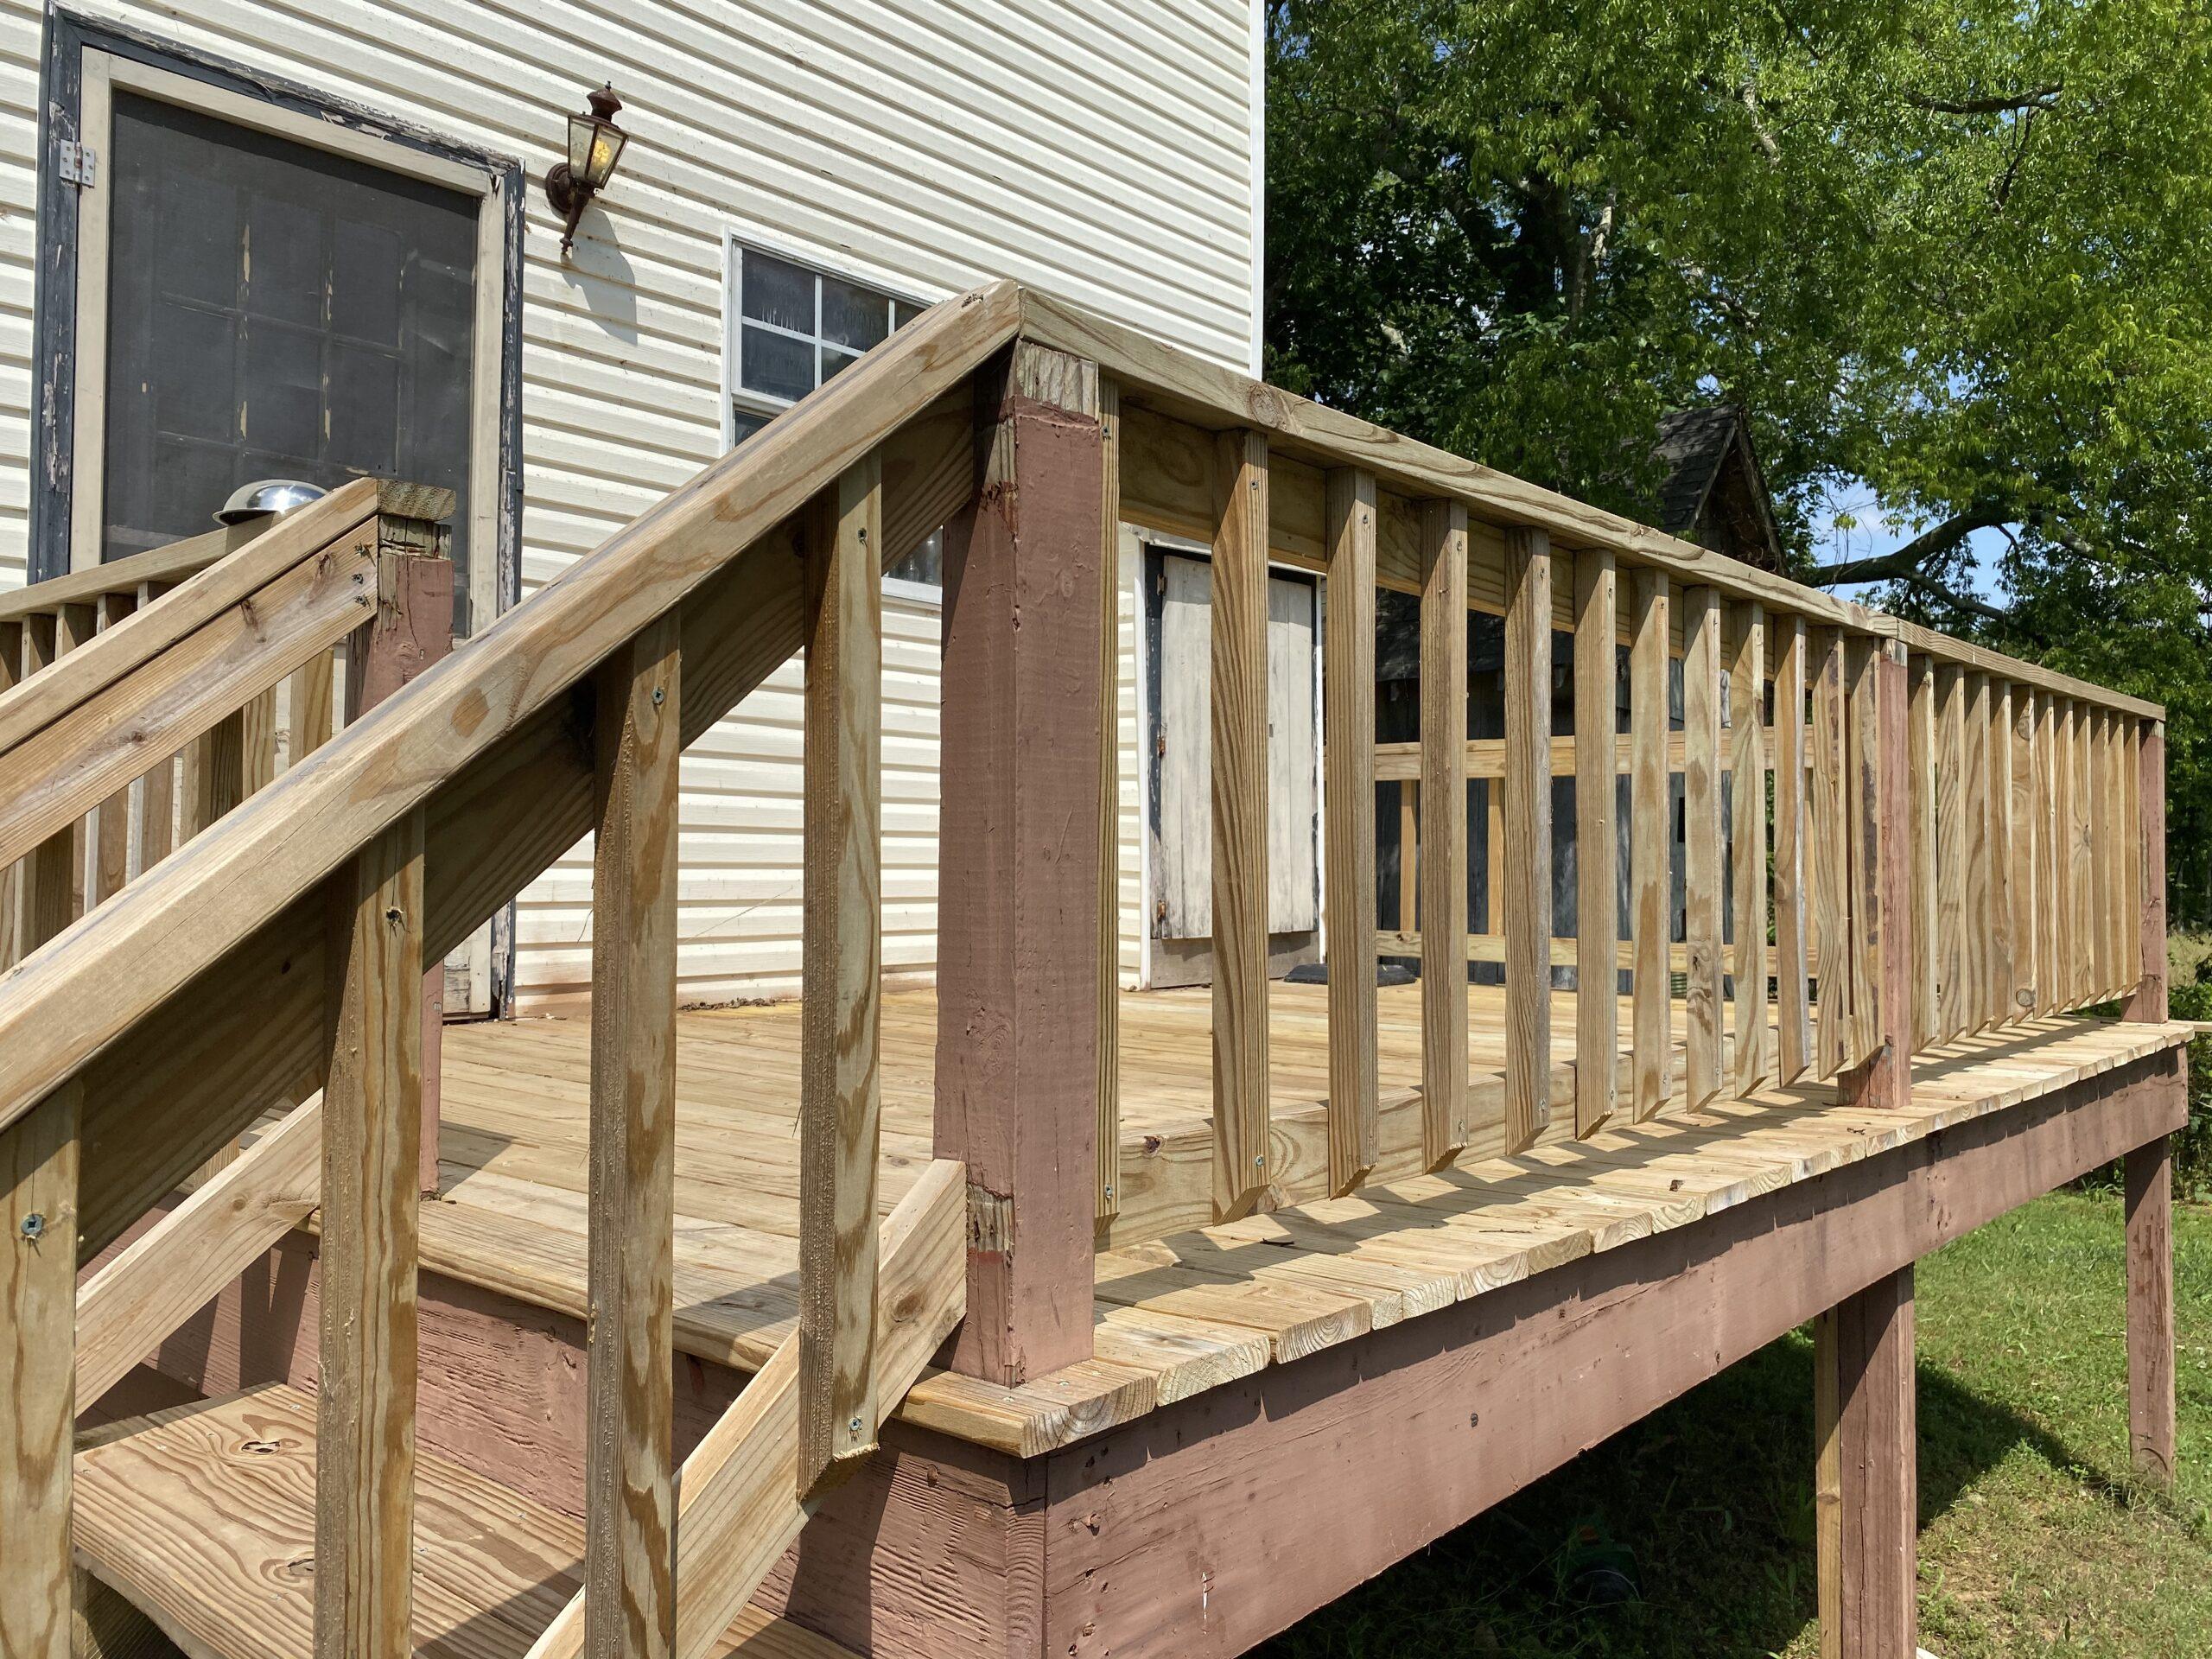
Once all the deck boards and railings were removed, we hired a carpentry service to install all new wood again.
Affixed in place during the fall and winter, the deck boards were allowed to dry thoroughly before attempting to stain and finish the floor. This provided us with an opportunity to search and compare the various stains and finishes available in the marketplace. Our desire was not to have to reapply a finish to the deck for a long time.
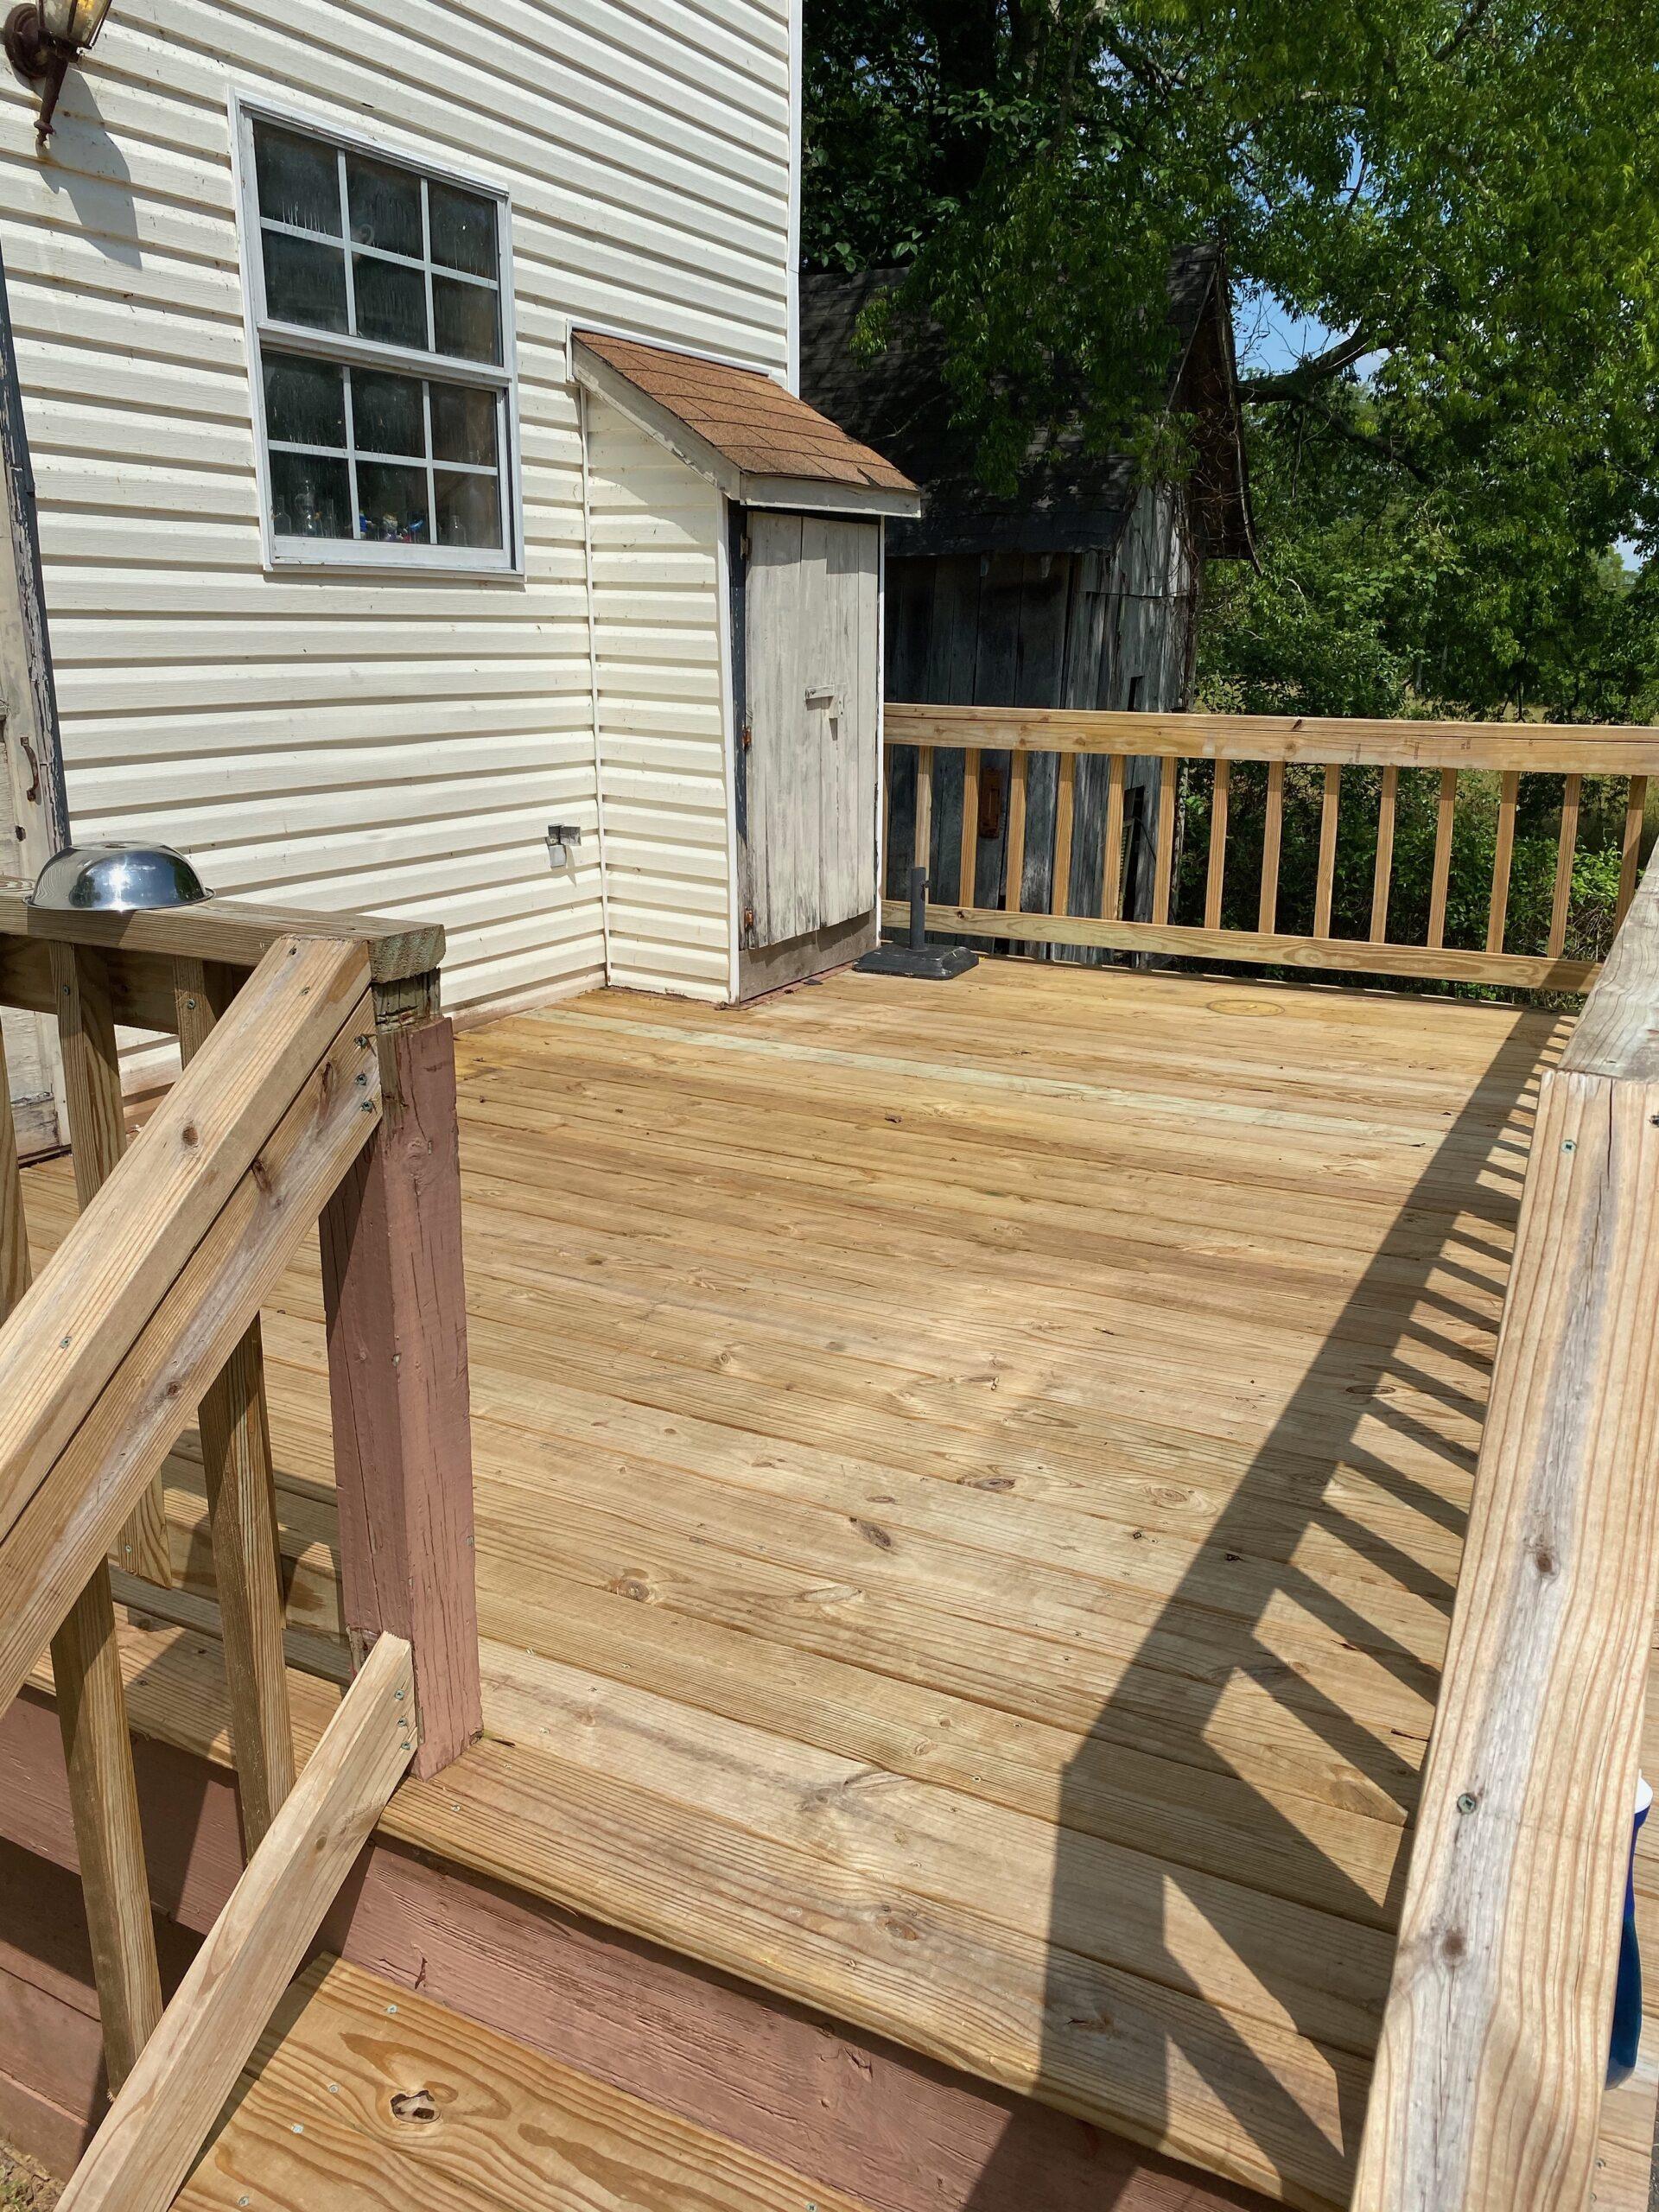
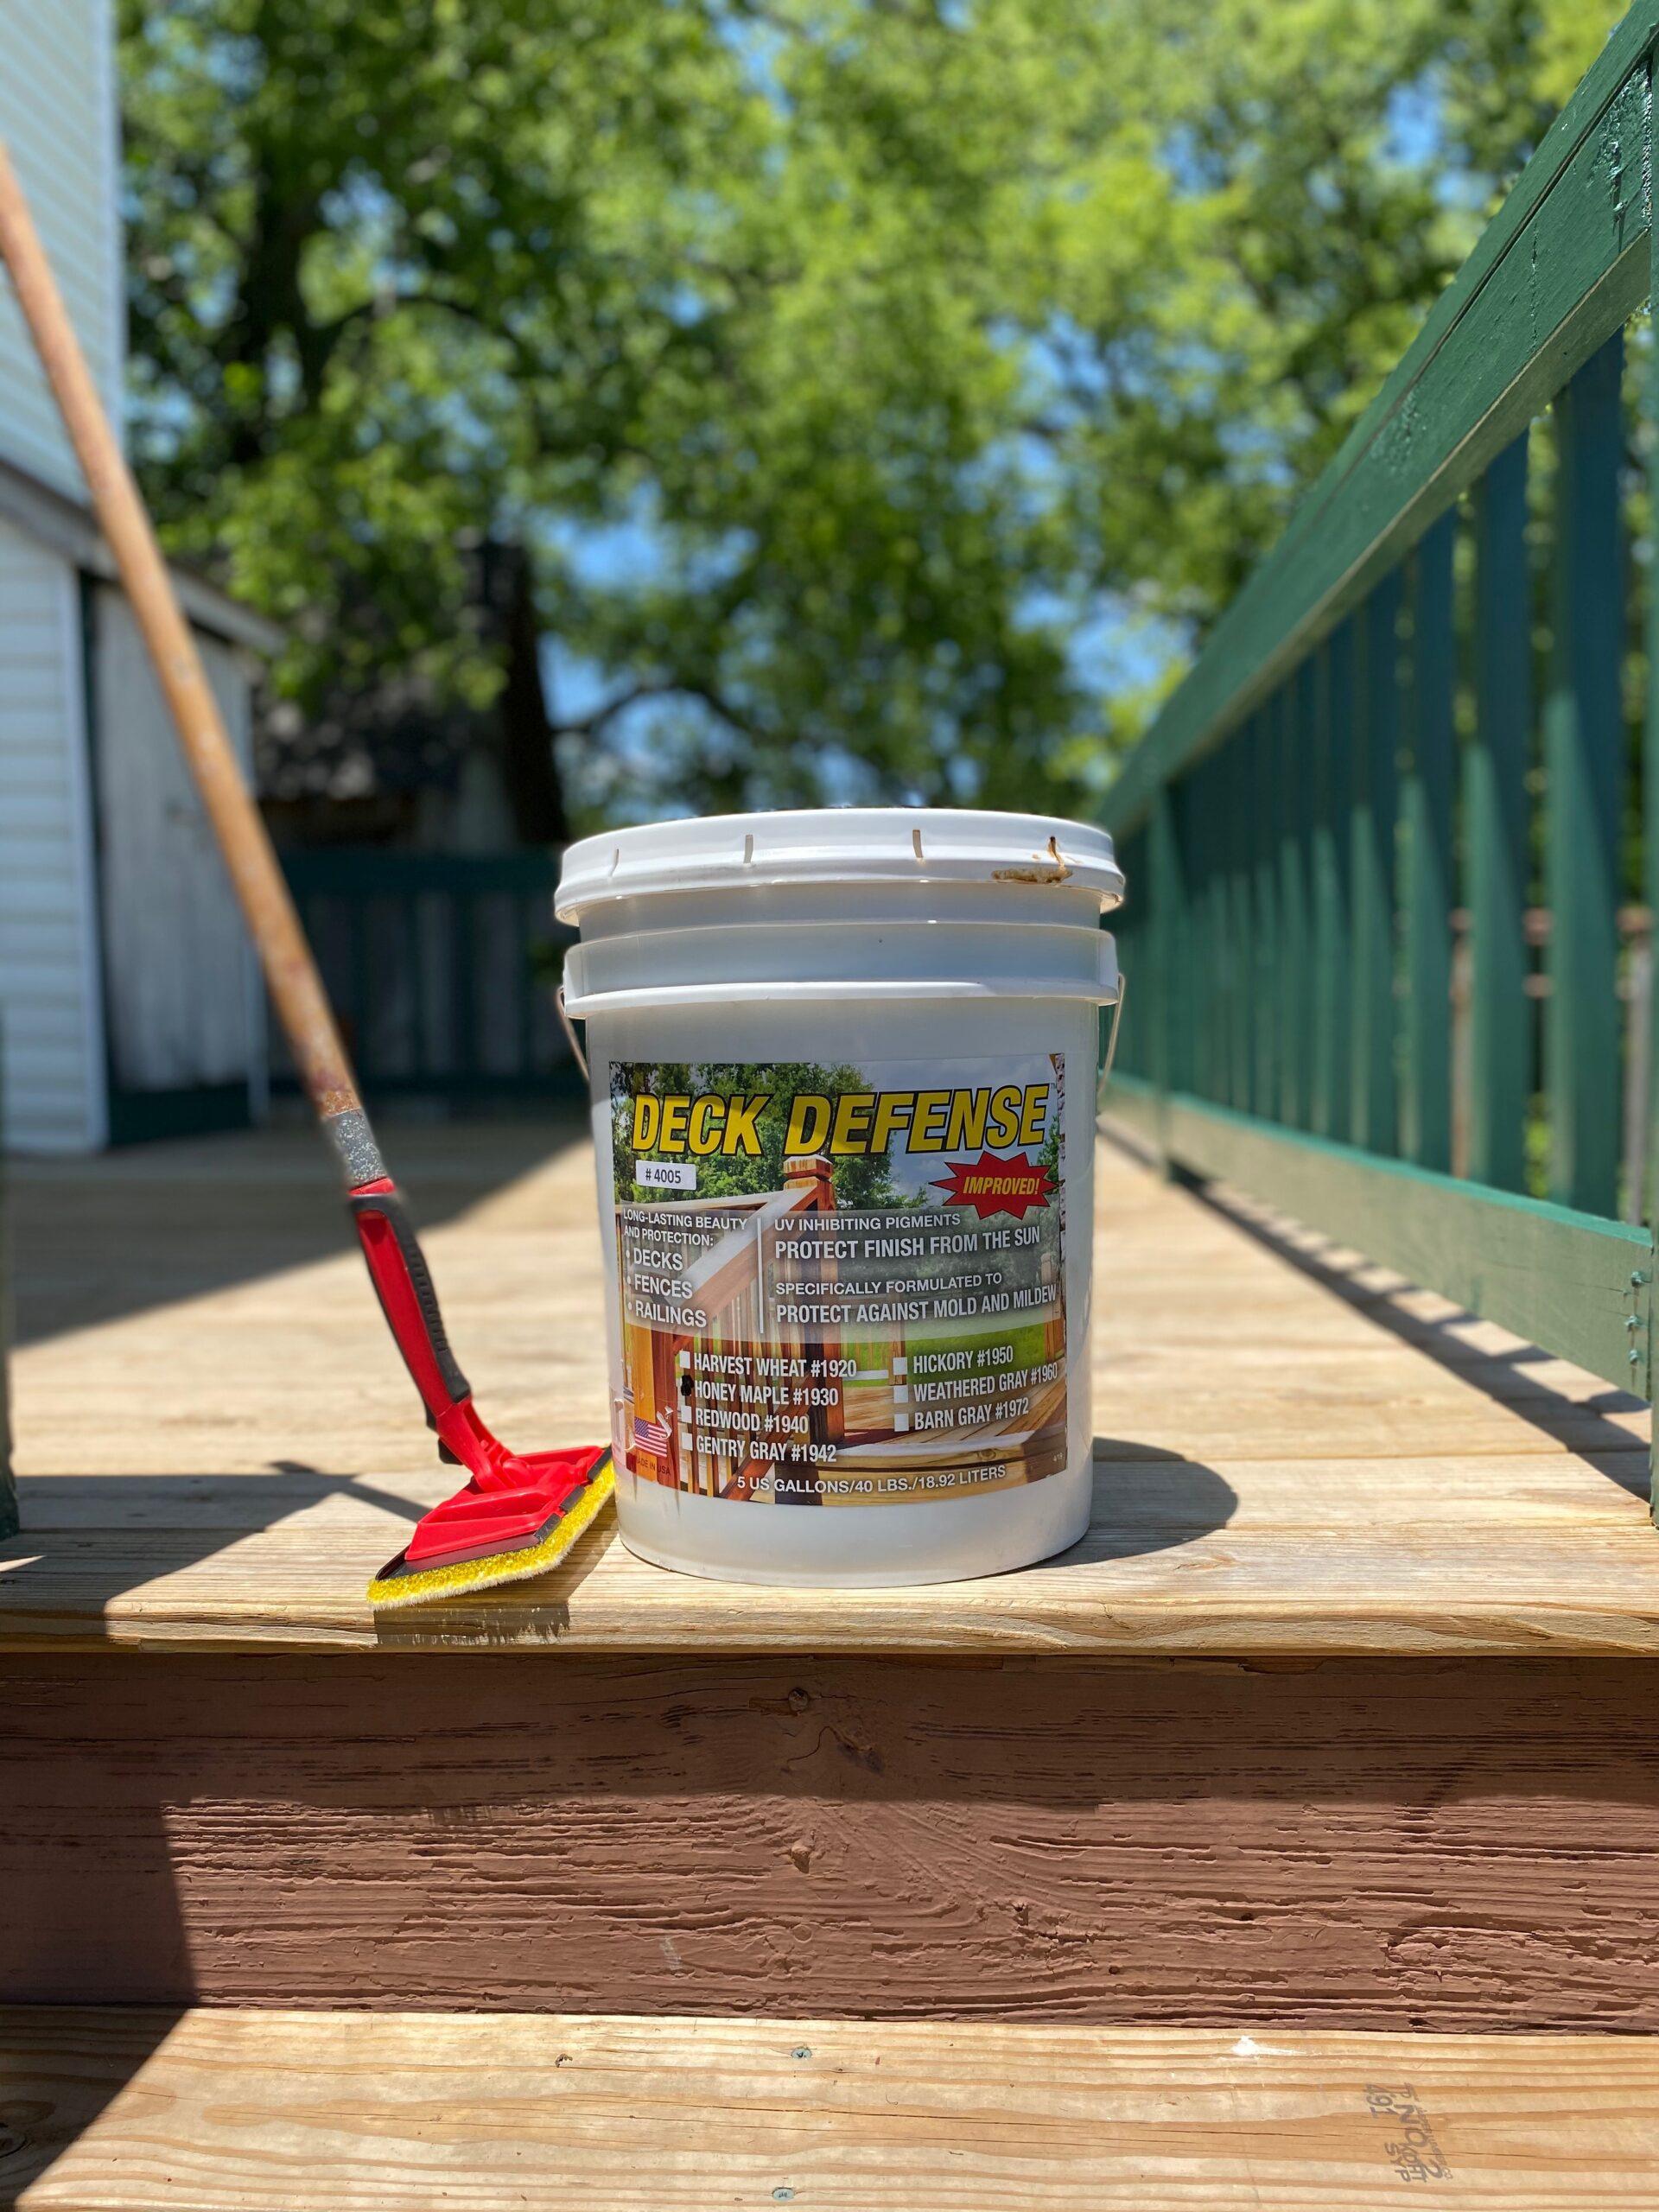
One product stood out among the many we looked at. Perma Chink Systems, Inc. makes a product called Deck Defense, which appeared to offer all the qualities we hoped for. It offered UV protecting pigments that protected it from the sun and was specifically formulated to protect against mold and mildew. Exactly what we were looking for!

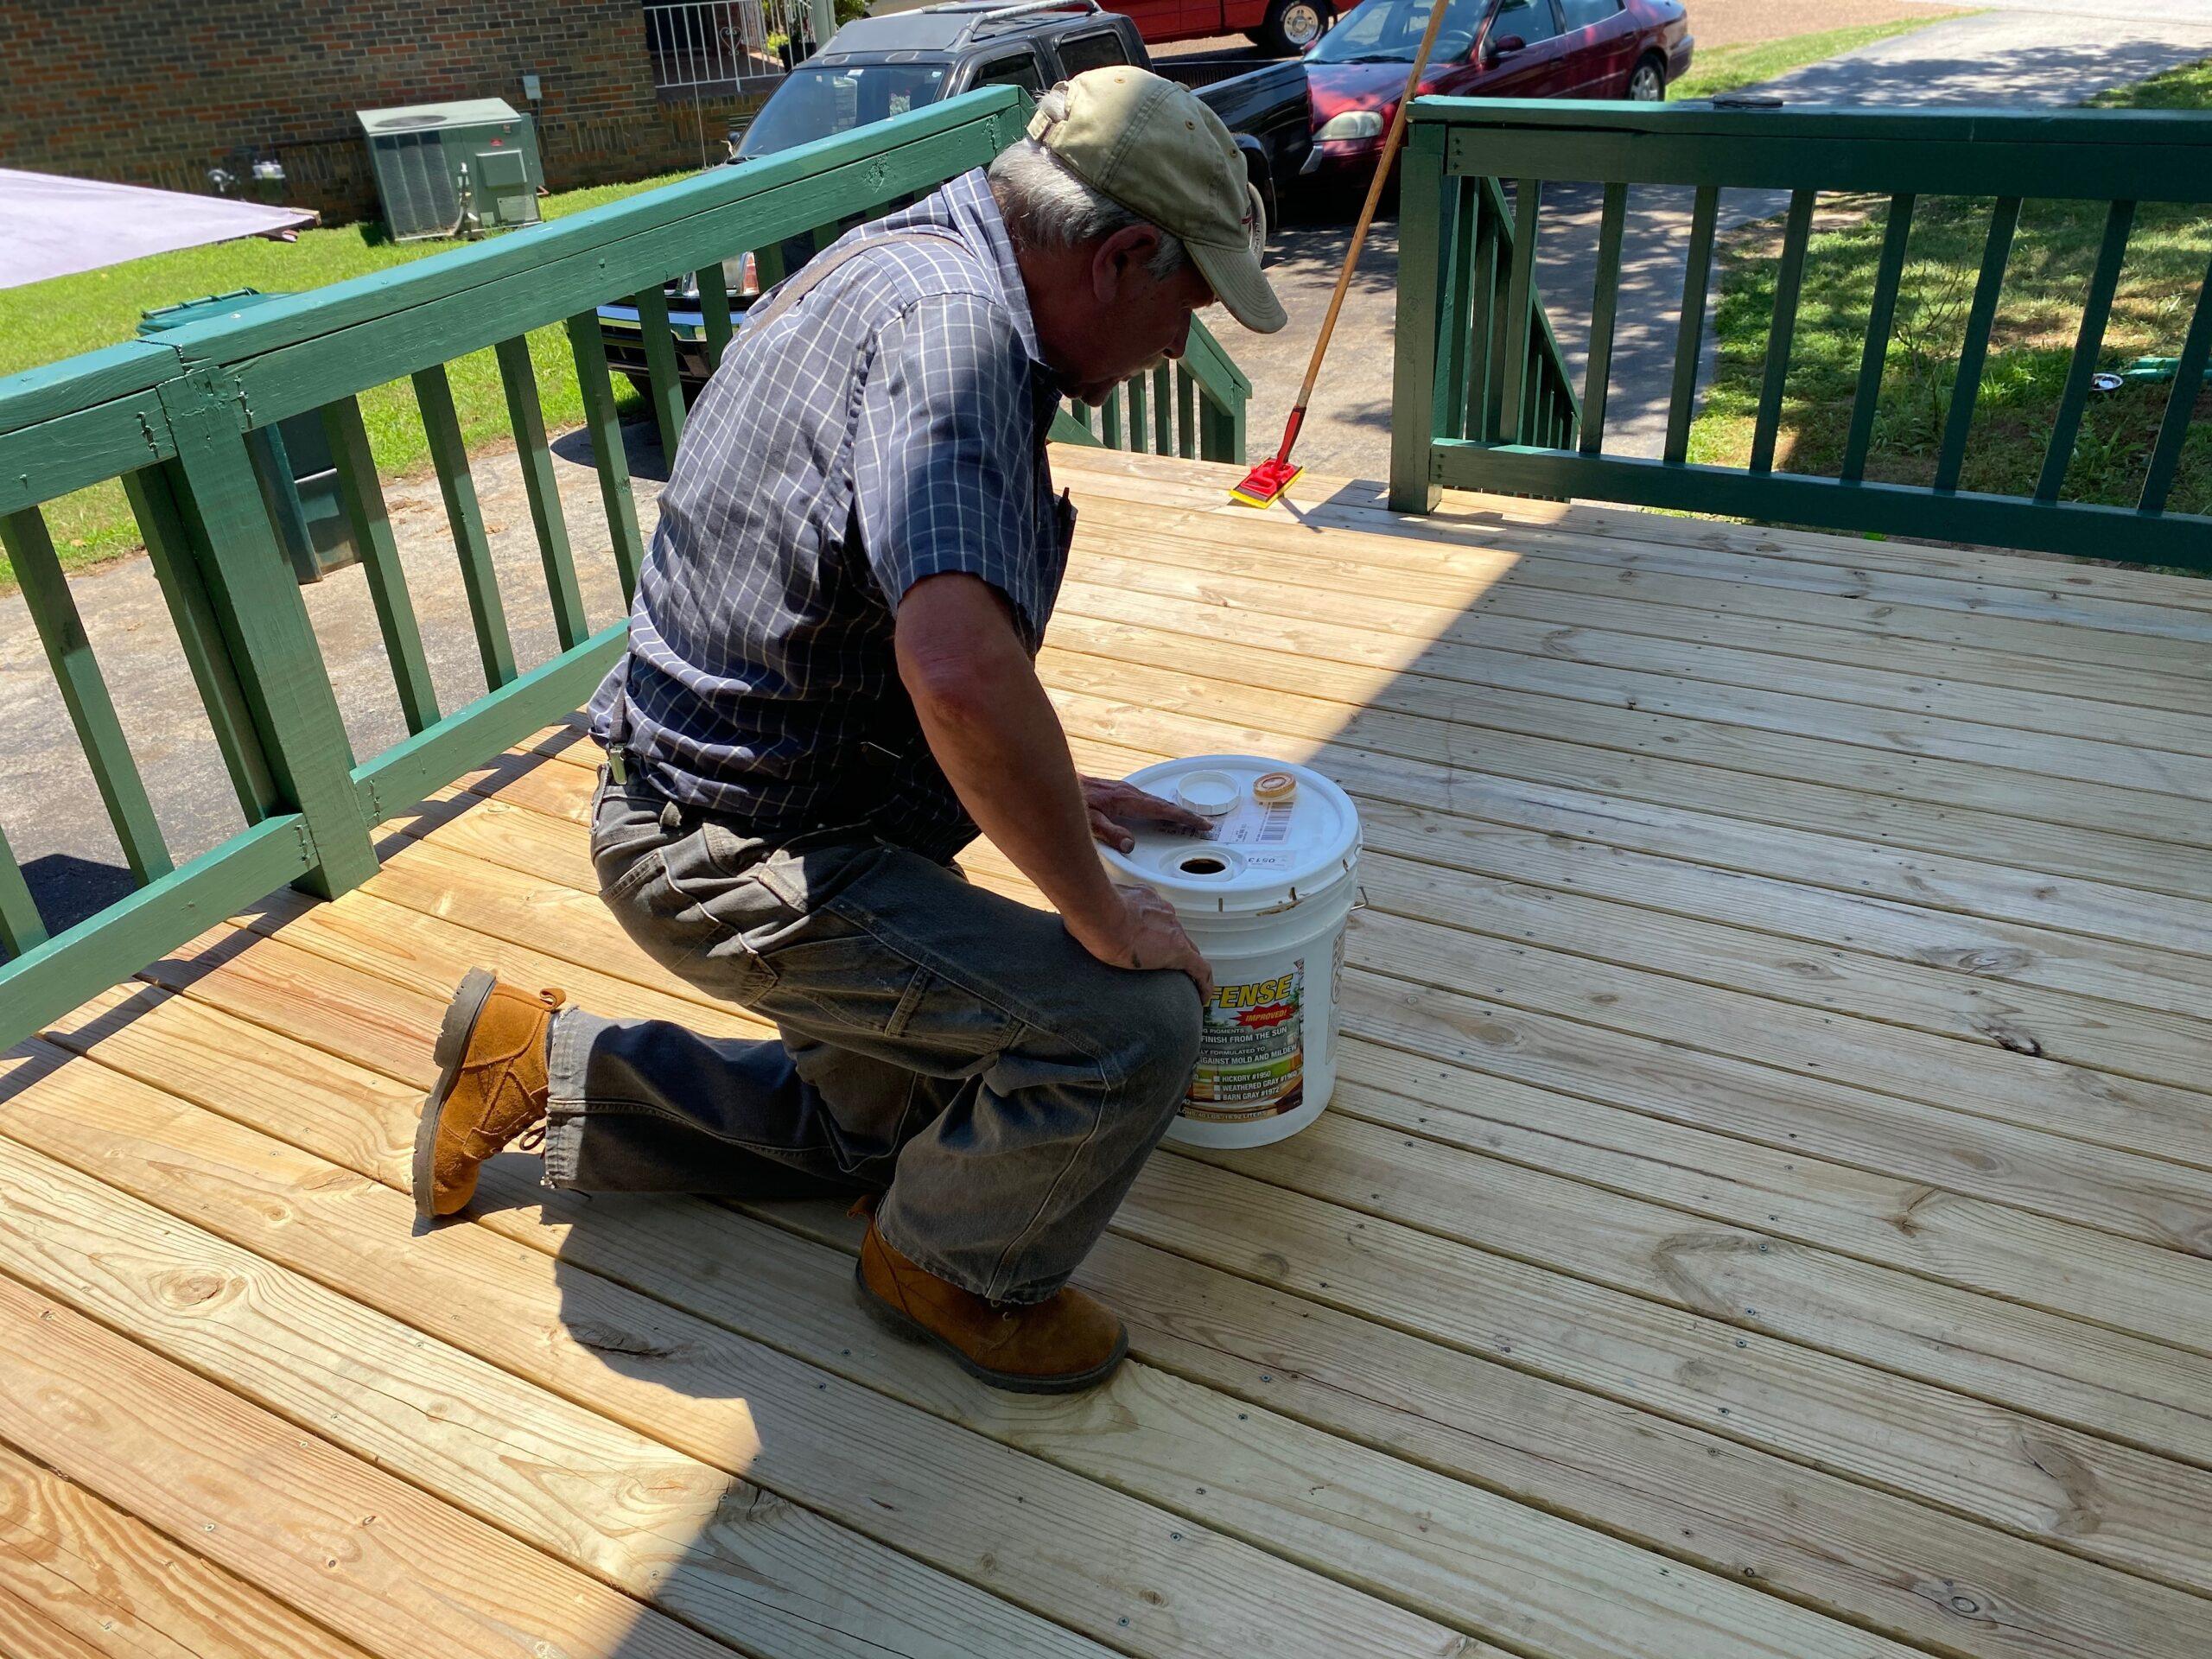
We were able to select from a wide variety of stain colors from their website. We chose Honey Maple #1930 for our stain. Other factors we found desirable was the clean-up could be done with soap and water, and the product is manufactured in the U.S.A. At 40 lbs. per 5 gallon bucket, it helped also that this product could be conveniently delivered to our front door.
Application
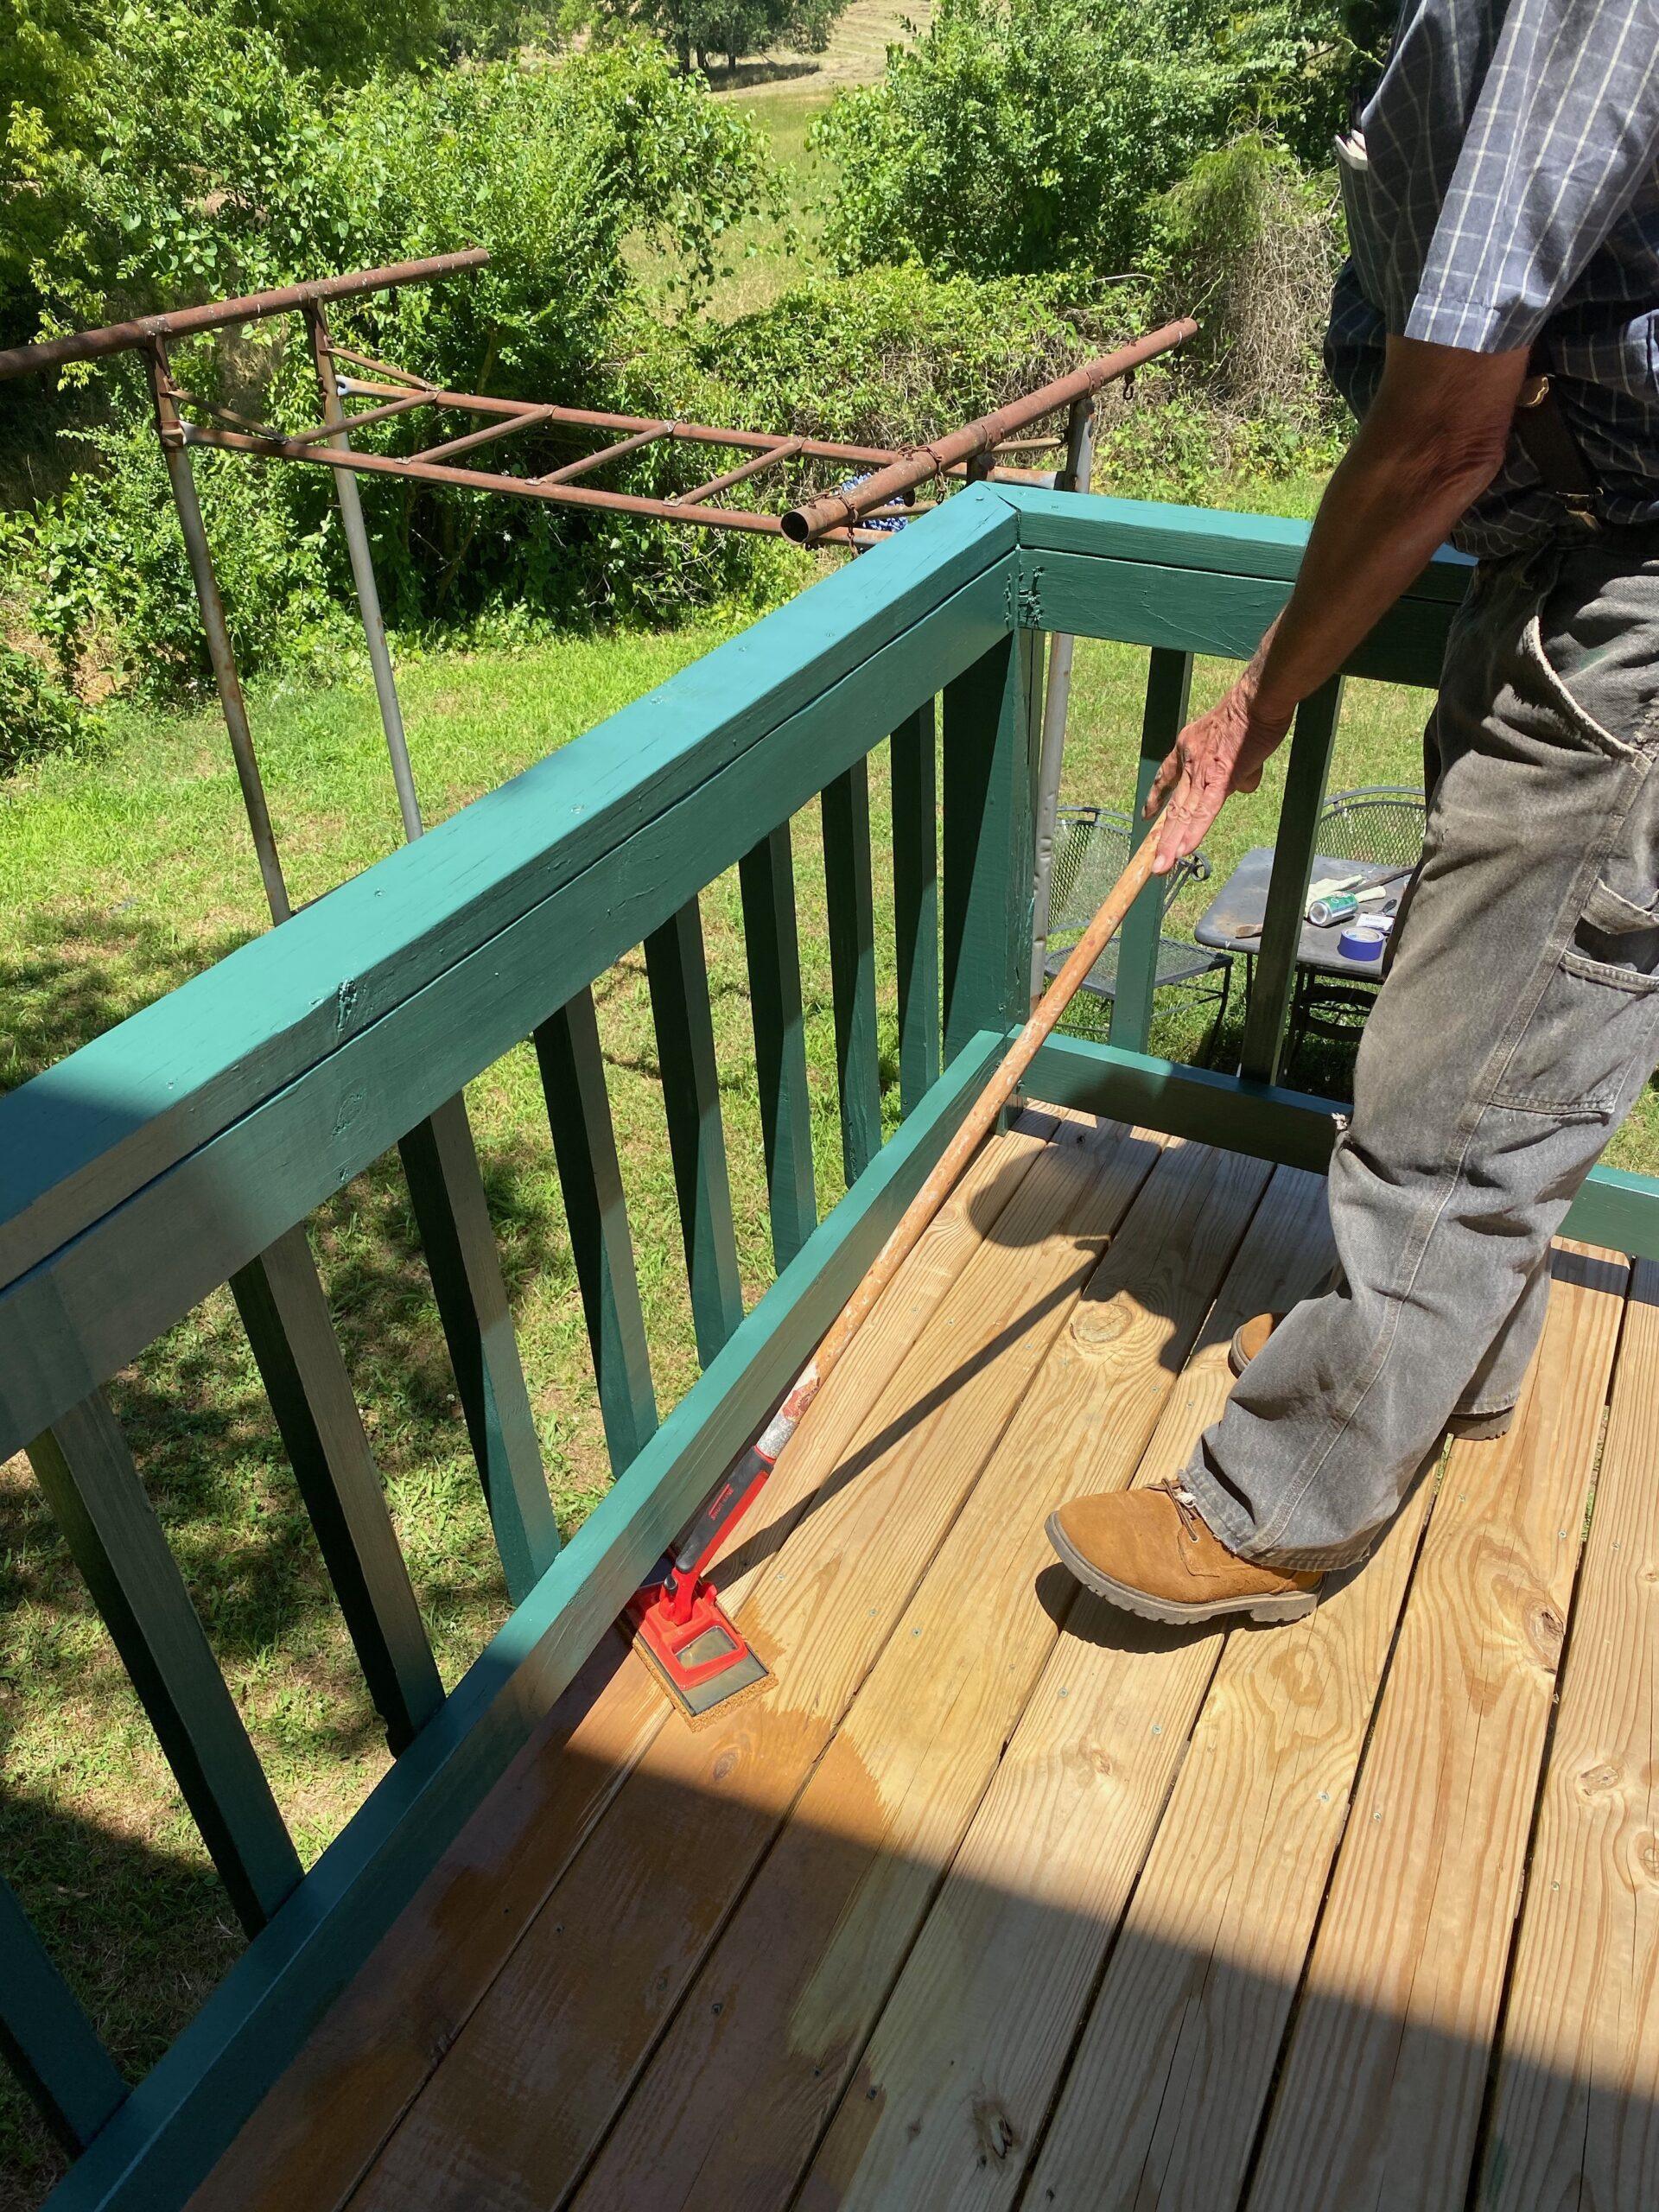
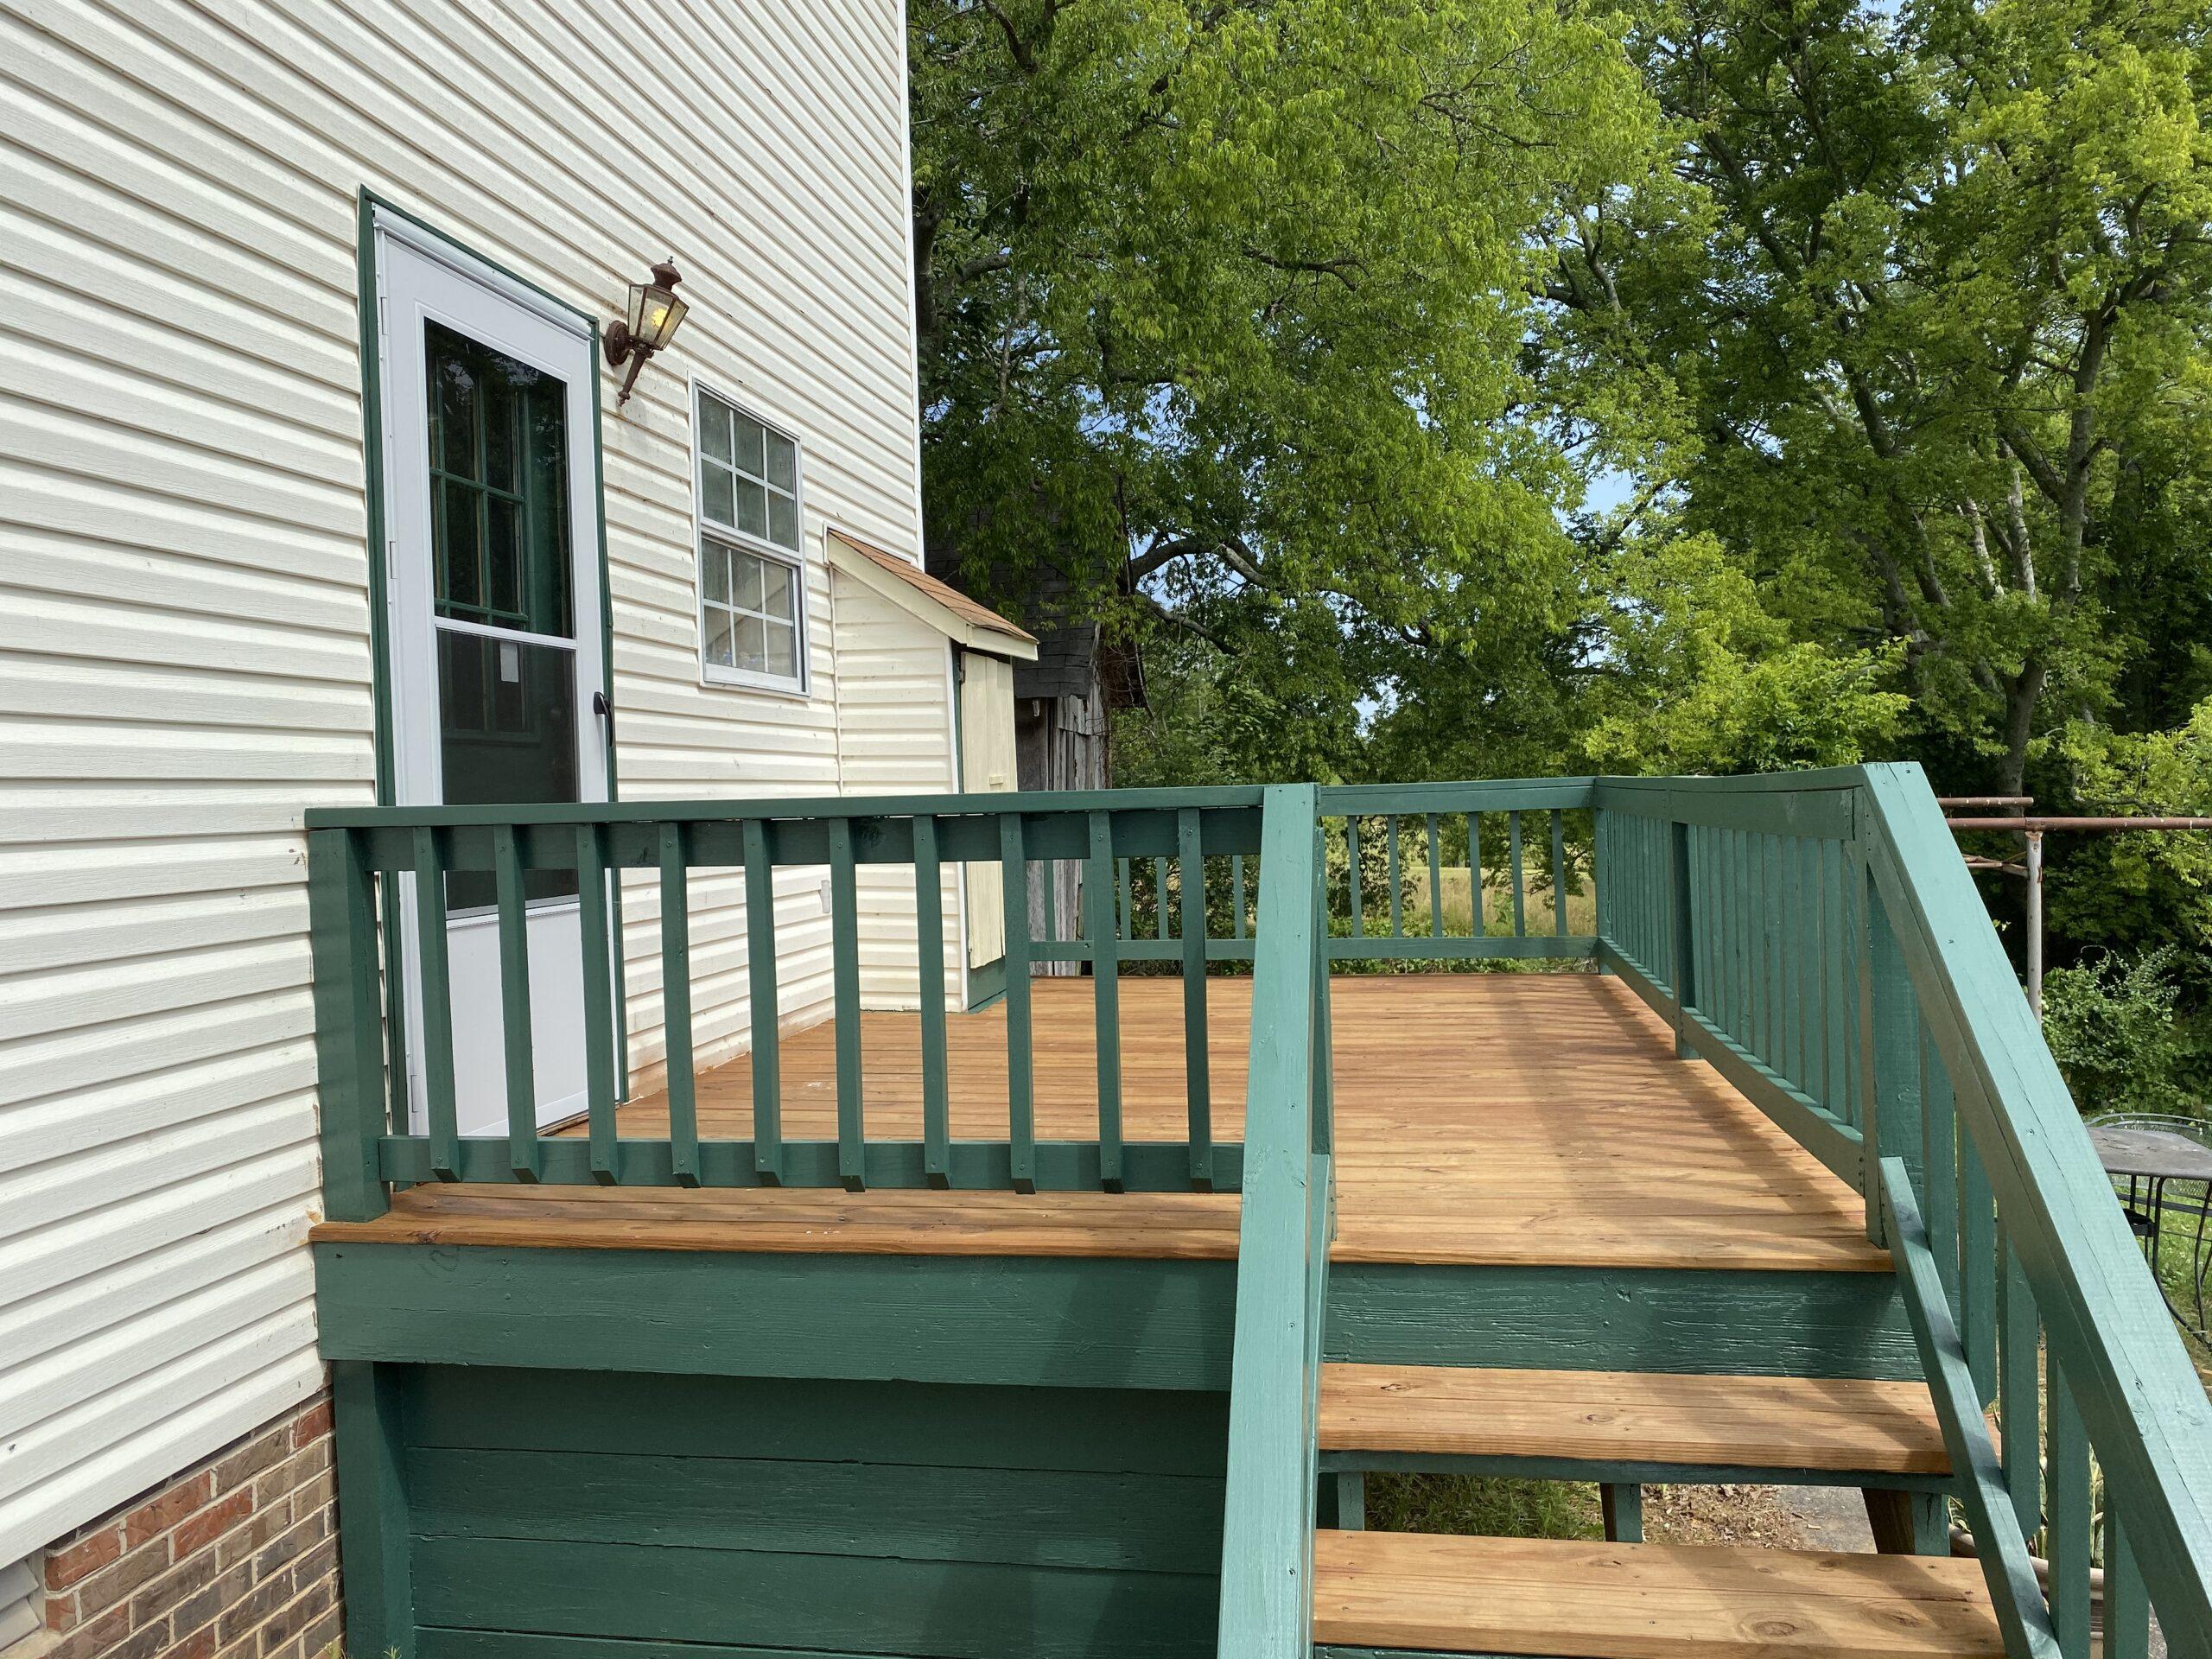
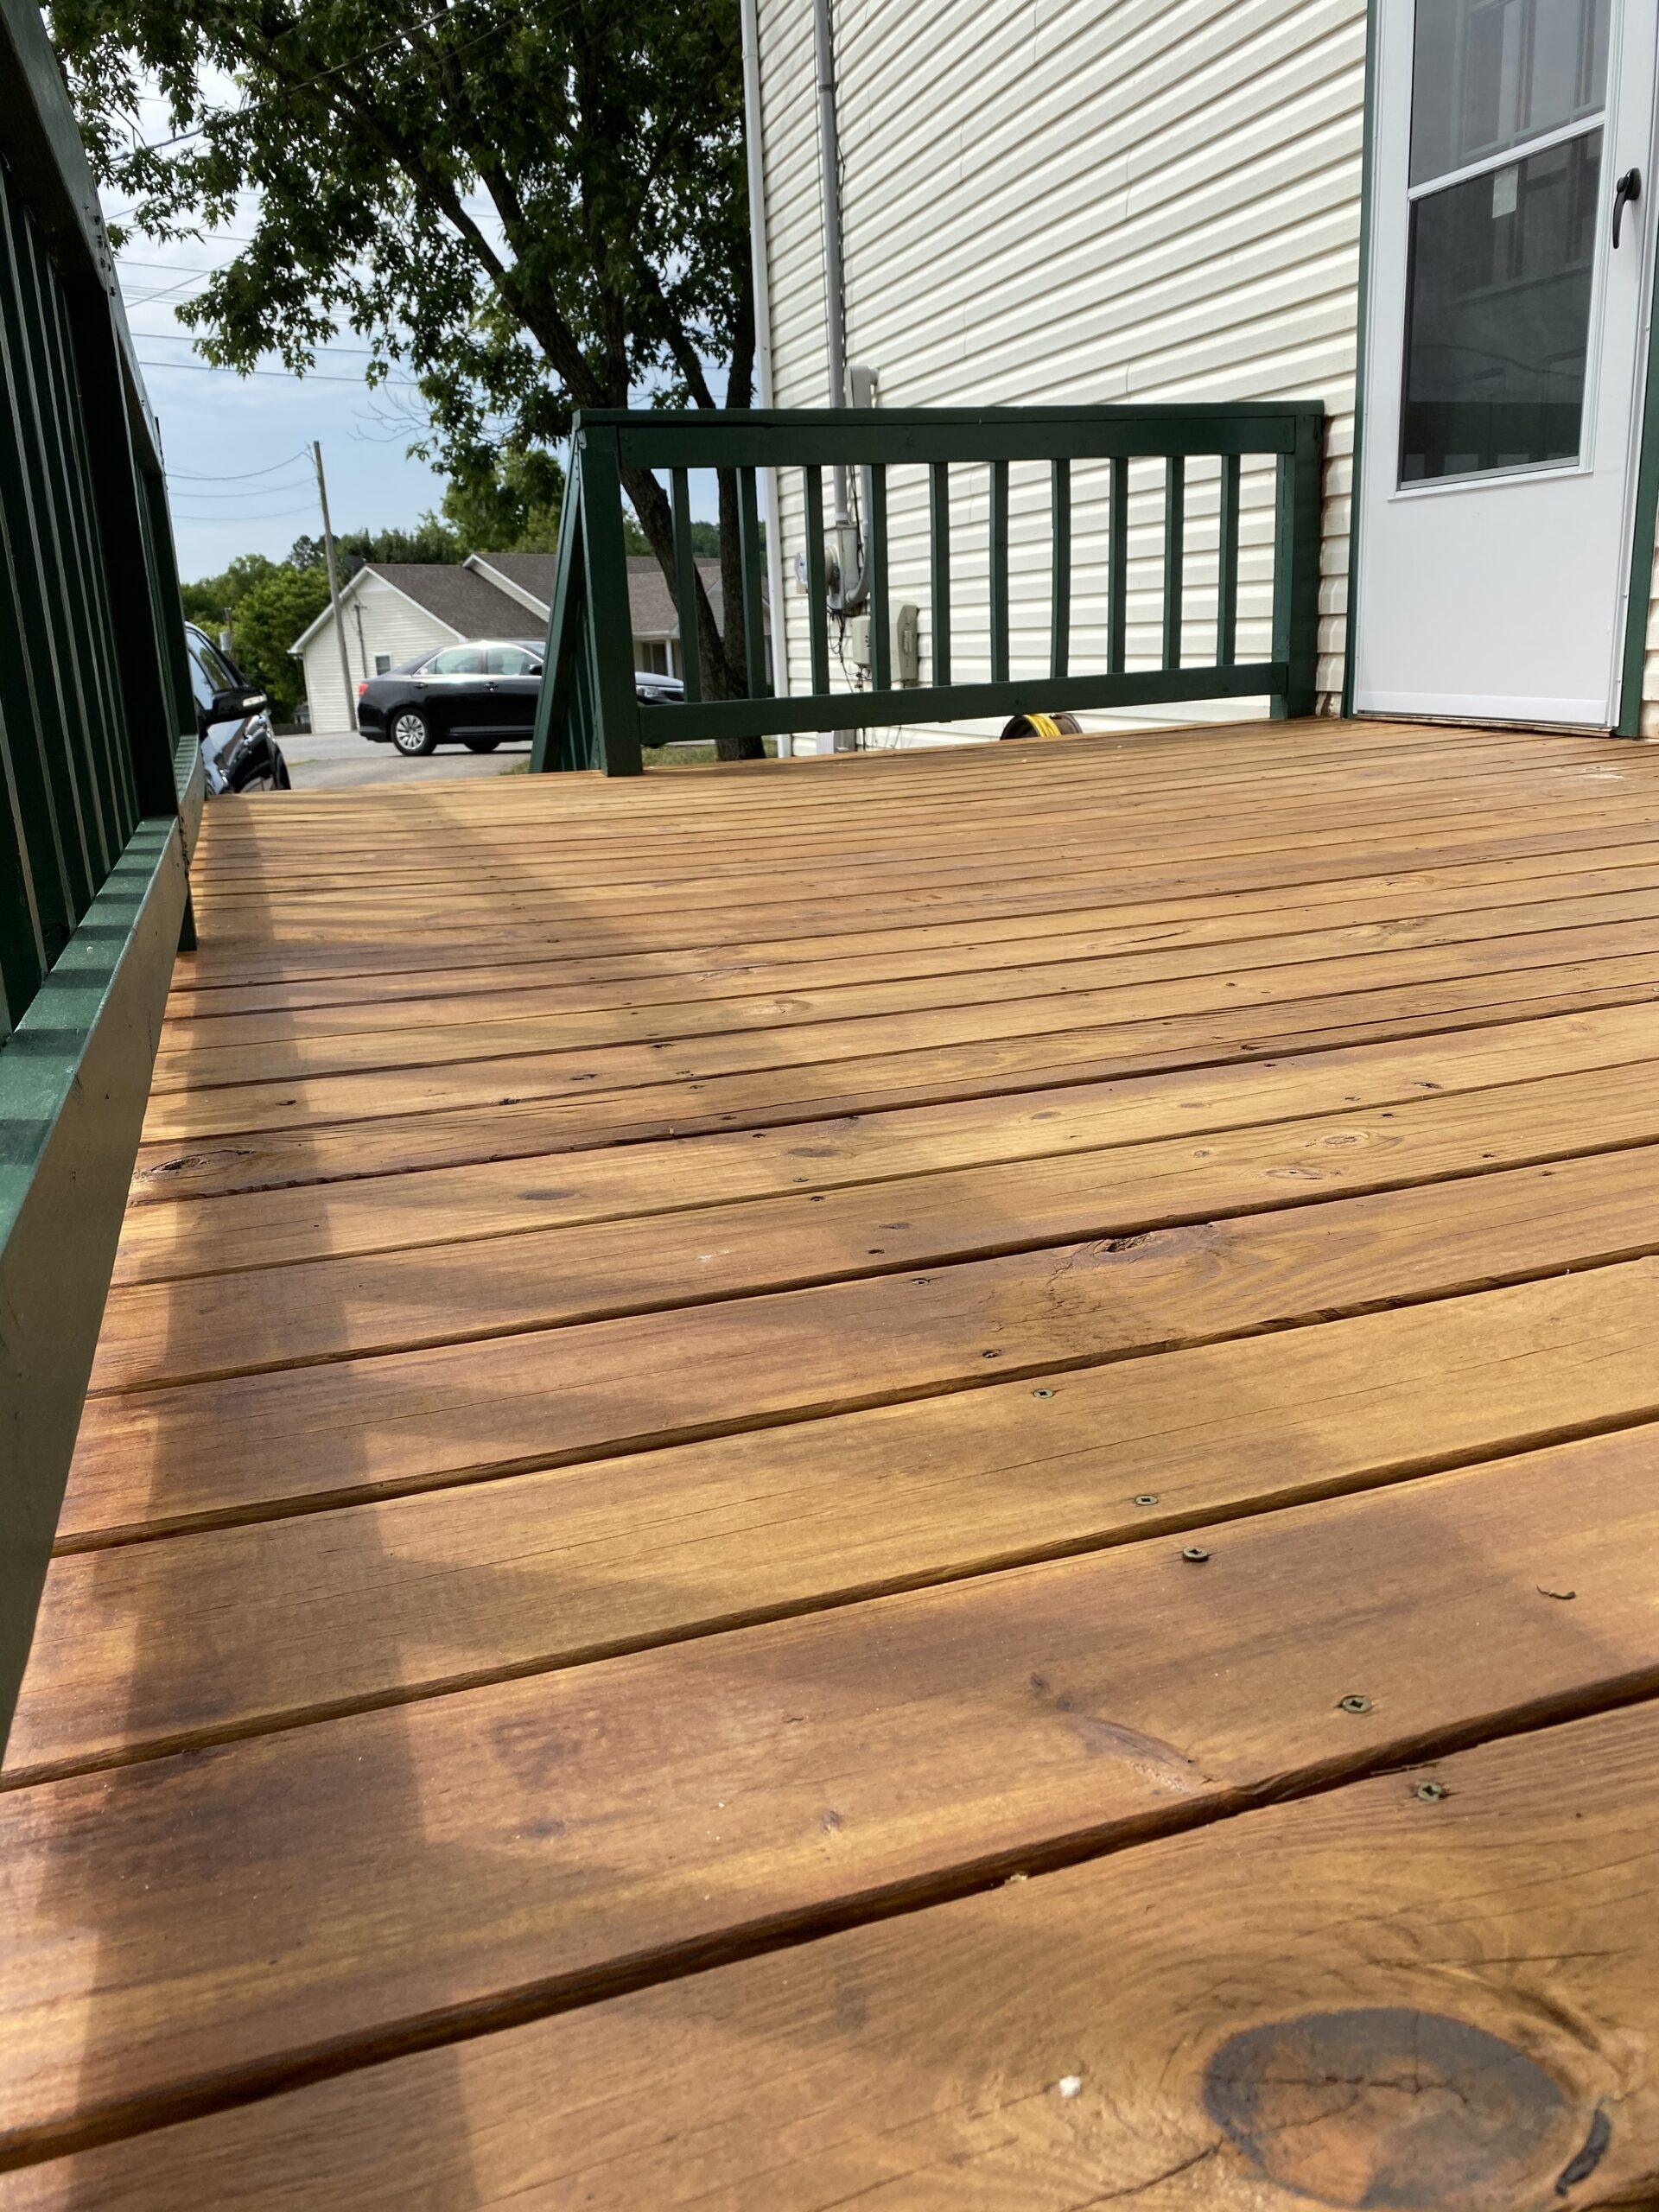
With help from a family friend, the project was coordinated with the painting of the railings, bannister, step riser and underpinning. Painting came first as we believed it would be easier to accomplish while saving the deck for the last step. Once begun, however, we were surprised at how easy the stain and finish could be applied.

We used a pad specifically designed for this purpose, and it worked very well. The stain was beautiful as it contrasted and blended the beige vinyl siding on the house with the dark green paint we selected for the railing and bannister. The staining process was far easier than that of painting.
In stepping back and looking at our work once the project was completed, we were in awe at the transformation possible when using well-chosen products and materials. We are very happy with the results.
Questions About Deck Defense?
Read our Deck Defense FAQs for more information about Deck Defense.


CHEMIST’S CORNER: Can All Wood Species Be Prepared the Same Way, Using the Same Cleaning Products?
The obvious answer to this question is NO. Although all wood species contain many of the same components – including cellulose and hemicellulose and minor amounts of extraneous materials – it is the wood extractives that differentiate wood species from one another. That’s why we developed Cedar Wash.
Understanding the Bleeding of Wood Extractives.
Wood extractives are compounds present in the softwood and heartwood of a tree that contribute to such properties like color, odor, decay and insect resistance, density, and flammability. When used for log homes, naturally occurring extractives in the wood can migrate to the surface and discolor paint and finishes (water soluble extractives) as well as create adhesion issues (oil soluble extractives) for many coating types.
The organic components of the extraneous materials are referred to as extractives because they can be removed by extraction with solvents without altering the cellulose/lignin structure of the wood. Extractives include tannins and other polyphenolics, coloring matter, essential oils, fats, resins, waxes, gums, and starch. Depending upon such factors as species and growing conditions, the total extractive content of wood substance may range from less than 1% to 30% in extreme cases.
Wood Species and the Level of Extractives
All wood species contain wood extractives; however, there are a handful of wood species that are characterized as extractive-rich woods. This group includes Redwood, Western Red Cedar, Walnut and Mahogany. The second group of wood species that also contains higher levels of wood extractives but less than extractive-rich woods include Southern Pine, Douglas Fir, Spruce and Cypress.
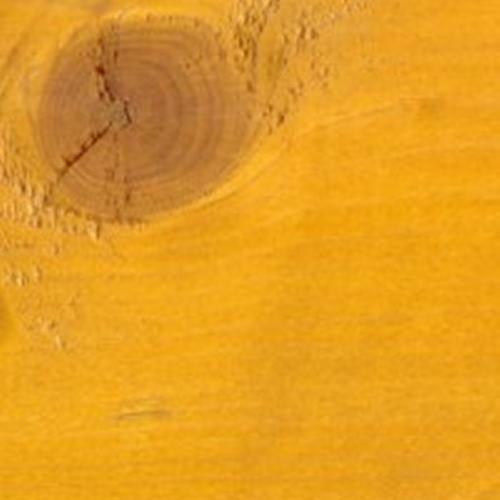
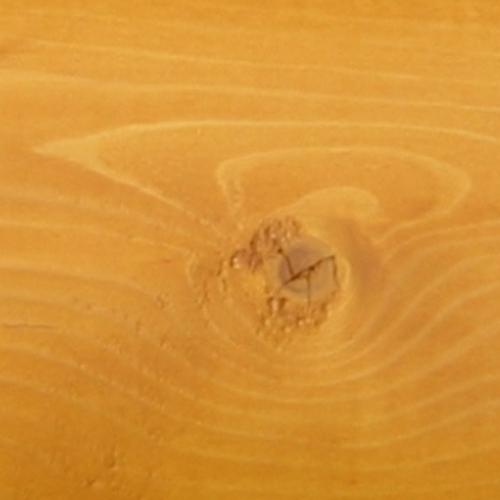
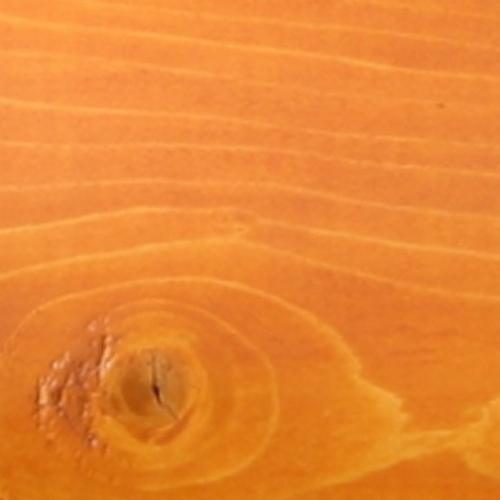
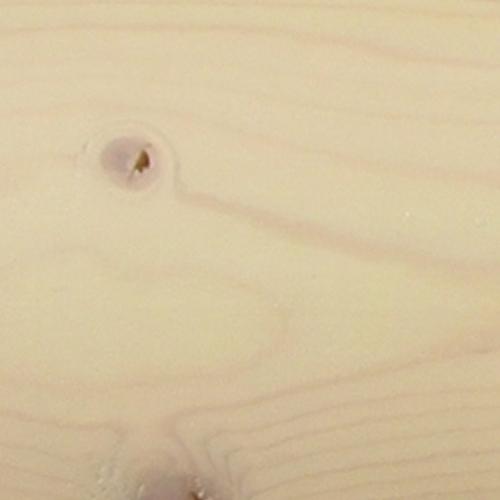
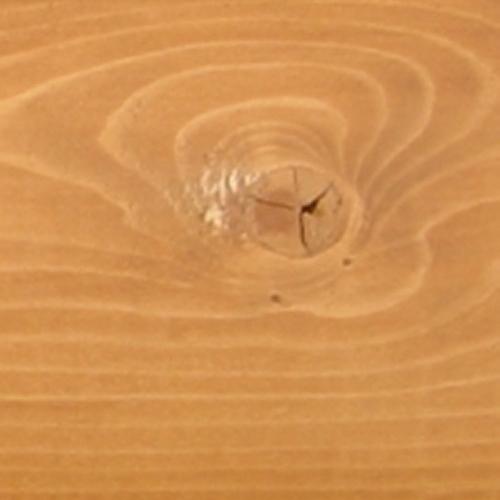
The percentage of extractives in trees is generally low, but a high concentration is found in knots and heartwood of the tree. Knot bleeding can occur when a knot contains an excessive number of extractives. In these cases, the extractives consist mainly of rosin, fats and turpentine, and these extraneous materials can make up as much as 50% of the knot by weight. The ratio of extractives can change with the season and weather (if the tree is stressed).

Extractives Affecting Wood Color
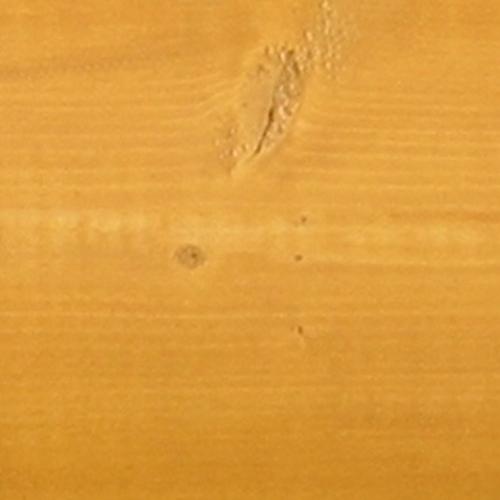
Staining or discoloration of wood may result from chemical processes that convert originally colorless or light-colored extractives into intensely colored products. Most of the “chemical stains” result from oxidation of certain wood extractives during air seasoning or kiln drying. Some resins can bleed out of the wood, as seen in pine wood. Sometimes the extractive can react with foreign material.
Using Cedar Wash For High-Extractive Wood Species
Cedar Wash is a wood cleaner with a high pH solution, which can dissolve, soften, loosen, or react with different types of extractives found in extractive-rich woods used in log homes. If a chemical is soluble in a liquid, it is easier to remove than a chemical that is only softened by that liquid. Being soluble is preferred as this means the particles are broken down to become so tiny we can no longer see them. Cedar Wash is designed to remove surface resin oils and high concentrations of water-soluble wood extractives such as sugar and protoplasm, in addition to dirt, grease, grime, pollen, and surface mold and mildew without harming the wood.
Cedar Wash was developed by Perma-Chink Systems as a Ready-to-Use cleaner specifically formulated for preparing the surface of wood species that contain high levels of wood extractives and resin oils. It is also safe for chinking and sealants.
- Easy to use, Ready-to-Use formula.
- Low environmental impact
- Designed specifically for Western Red Cedar, Redwood (Softwoods), Walnut, and Mahogany (Hardwoods)
- Removes resin oils and wood extractives from the surface of the wood

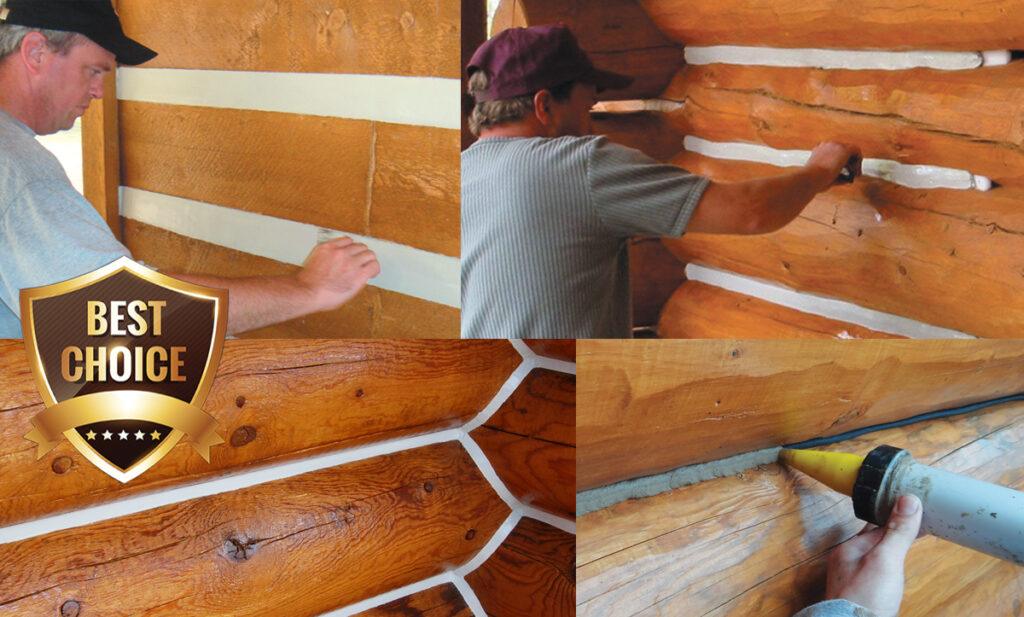
All our finish labels and application instructions emphasize the necessity for back-brushing during the application process. What exactly is “back-brushing,” and why is it so important? Back-brushing is the term we use to describe the process of working the finish into the wood and obtaining an intact, uniform film over the entire surface.
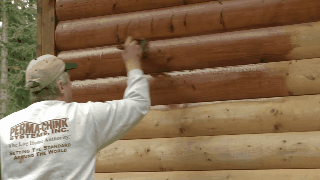
Back-brushing is typically used when applying stain with an airless sprayer; however, back-brushing is just as important if the product is manually applied with a brush. Although the directions for most log home stains call for a liberal first coat or flood coat, Lifeline™ finishes are designed to go on in thin coats, including the first coat. If applied too thick, the long-term performance of Lifeline finishes can be diminished. In other words, more is not necessarily better when it comes to applying Lifeline to your log home.
The first step in the process is to obtain a high-quality brush. A cheap, three-dollar brush from Walmart will not give you satisfactory results. You need a good quality brush like a Purdy or Wooster. For back-brushing logs, use brush preferably three to four inches wide. Using a narrow brush takes longer and may result in visible brush marks. If you plan to hand apply the finish with a brush and pail, you will use the same brush for both the application and the back-brushing.
The objective is to carry the finish to the surface with the brush and then to spread the finish out as far as it will go, making sure to work it into all cracks and crevices, and to uniformly distribute it over the area you are coating. This entails some vigorous back-brushing over the area that has finish applied to it. Lifeline finishes dry fairly quickly, so it’s important to back-brush as you go along and not wait more than a couple of minutes before you back-brush the coat.
We have formulated our Lifeline finishes to be most easily applied using airless spray equipment. There are two methods typically used to apply finishes with an airless sprayer.
The first method is to step back from a wall and use the sprayer to cover a larger area. This works well for a contractor with a crew since a large wall can be coated in a short period of time. This method requires at least two people, one spraying and at least one person back-brushing. When using this technique, back-brushing becomes important since the sprayer puts out lots of small droplets, which result in a lot of small dots of finish, not a uniform film. It takes back-brushing to convert these dots into an intact film, as well as to work the product into any cracks and fissures that are present on the surface.
The other method is to use the airless sprayer to carry the finish to the wall where it can be brushed out. The trick is to work on small areas at a time. Although it takes longer than spraying large areas at a time, a single person can use this technique to finish their entire home. The objective is to apply some finish on a one- to two-foot section of one or two courses of logs, and then brush out what you have applied as far as it will go. You don’t want to apply too much finish, and you need to be quick with the back-brushing to prevent stain from running down the wall. Just remember – A THIN, EVEN COAT is the key.
What’s the Difference Between Caulking and Log Chinking?
High-quality sealants help older cabins last for generations and give newer ones the rustic good looks many desire. Our sealants provide protection that will let them carry their historic styles far into the future. But when it comes to the language surrounding the sealant between logs, many people call chinking “log caulk.” Log caulk and log chinking are often used interchangeably, but these sealants are completely different. In fact, you should never, ever caulk a log home.
Caulking vs. Chinking
Caulk typically comes from a tube and is used to fill a small crack or seal edges along windows, trim, sinks, and bathtubs. This material is designed to be squeezed out in small amounts, then blend in and disappear. Caulks are completely waterproof, easy to apply, and easy to clean up. Today, there is an overwhelming selection of caulks including waterborne, oil-based, and silicone. Prices range from $2 for an 11oz. tube to $26 for the same size.
There are three main reasons why you don’t want to use a general caulk on a log cabin:
- Caulk is impenetrable. Wood is an organic material and internal moisture is an inherent quality of any log. A caulk will trap moisture, which leads to mold, rot, and unsightly stains.
- Caulk is not engineered to adhere to wood. Some turn hard and develop a cracked “alligator” skin appearance, or they separate from the wood entirely. In these scenarios, the sealant has failed, and water will get underneath, leading to rot and stains. When that happens, more water penetrates the log walls and rotting gaps become a haven for insects.
- Caulk is a low-quality product. Despite the spectrum of price points, caulks are essentially a bottom-line resin effective for a very narrow set of purposes. This does not include sealing your prized log home.
Chinking, on the other hand, is specifically designed for the purpose of sealing log homes, able to withstand the onslaught of environmental attacks and wood movement. Unlike caulk, which tends to be smooth and glossy, chinking has definitive texture that complements wood’s organic surface. Historically, chinking materials were made from what was regionally available. In Northern Europe, they used a special moss that did not cause log rot. Other places mixed horsehair or grass with mud or clay. Even today, it’s possible to purchase “log caulk” that has sand mixed with it to approximate a desirable rustic texture. None of these options are known for their effectiveness in withstanding movement and maintaining a proper seal over time.
In addition to offering the appropriate texture, our chinking is the kind of sealant a log cabin needs and deserves, and has four distinct qualities that sets it apart from caulk. For log homeowners, these qualities should be considered requirements when considering chinking.
- Log Home chinking must be breathable to let moisture escape the wood, while preventing new moisture from entering.
- Log Home chinking must have elastic qualities so it can move with wood’s daily and seasonal expansion and contraction.
- Log Home chinking must stick to the gap between the logs, even for log homes where the chinking remains invisible.
- Log Home chinking must resist the weather’s relentless tests — snow, rain, heat, and ice.
Chinking Superpower
Not only do our log sealants excel in the requirements that a high-performance chinking must possess, but we’ve devised a special formula with a distinct property. Our chinking sealants are thixotropic to provide exceptional peformance and fight environmental damage. A non-thixotropic sealant is prone to slumping and blistering, leading to issues that require a reapplication of the sealant and hoping the same issues don’t happen a second time.
Our thixotropic sealants stay exactly where the applicator leaves it, making them easier to apply with accuracy. In fact, we’ve spent years perfecting our formula to find the ideal balance between viscosity and thixotropic abilities. Our sealants can be easily pumped, squeezed, and applied by professionals and do-it-yourselfers alike. Professionals love our thixotropic sealants because they can get the job done right the first time.
We offer three types of sealants to accommodate different log home construction methods. Perma-Chink, our original elastic log home chinking, is designed for log gaps sized 1-inch or larger. Energy Seal has a more refined texture for log gaps less than 1-inch. Finally, Woodsman is a smooth and lightly textured log sealant that goes between stacked logs with no gaps.
All our sealant products come in an array of rich, earthy colors to complement any log home and work as an extra-strong, protective system with our wood stains and finishes. Perma-Chink lets your log home be permanently beautiful for your permanent enjoyment.
Guest post by Seth Murphy, papadiy.com
A home is more than just a shelter; it serves as our intimate sanctuary. The atmosphere within its walls profoundly influences our emotions, efficiency, and overall well-being. Central to cultivating a calm home atmosphere is the principle of tidiness.
Through consistent cleanliness and organization, we carve out a peaceful niche that rejuvenates our soul. By embracing straightforward daily practices, our living spaces can evolve into serene havens. In this article, which is shared courtesy of Perma-Chink Systems, we will explore straightforward routines that offer both a structured environment and mental clarity.
First, Take a Look at Your Bed
Your day’s first achievement happens in the bedroom. Making your bed might seem trivial, but this quick task offers instant gratification. It creates an immediate sense of order, providing a mental boost for tasks ahead. Moreover, it’s an inviting sight after a long day, beckoning with the promise of restful slumber. So, pull those sheets tight and fluff those pillows; starting right can set the tone for the entire day.
Put Items Where They Belong
Objects scattered around can quickly turn a home into a chaotic mess. Whether it’s a novel, a remote, or a hairbrush, always return items to their designated places post-use. Cultivating this simple habit can drastically reduce clutter. You’ll not only enjoy a tidy environment but also save precious time otherwise wasted on hunting for misplaced items.
Address Those Dirty Dishes
A mountain of dirty dishes can dampen anyone’s spirit. To sidestep this unsightly and overwhelming chore, attend to your dishes immediately after meals. It prevents residues from hardening, making washing quicker and less tedious. Plus, a clean sink and counter space are more inviting for the next cooking venture, ensuring the kitchen remains a space of creativity rather than stress.
Keep the Kitchen Clean
Beyond dishes, the kitchen requires some additional attention. Spills, crumbs, and residues can accumulate, turning your cooking space into a sticky mess. But fear not, with regular wiping of counters and the stovetop, you can easily keep this chaos at bay. This ensures not just cleanliness but also a hygienic environment for food preparation.
Dedicated Spots
The daily mini panic attacks when searching for keys or wallets can be nerve-wracking. Solve this by designating specific spots for these essentials. A tray by the entrance or hooks on the wall can serve as perfect drop-off points. This organizing method streamlines your exit routine and ensures these necessities are always within easy reach.
Embrace the Process
Organizing your home can be a rewarding yet daunting task, but with the right approach, it can be made much simpler. The first step is to schedule it and make time for this activity in your calendar, just like any other important appointment. Set aside specific blocks of time dedicated solely to organizing, ensuring you’re not rushed and can focus on the task at hand. Next, go through your belongings and decide what to keep, donate, or discard. Be thoughtful and honest about the utility and sentimental value of each item. Remember, less clutter means a more organized space.
Finally, take your time with the process. Organizing your home isn’t something that needs to be rushed through in a day. By spreading out the work, you can give each room and each category of items the attention they deserve. This methodical approach not only makes the task more manageable but also more effective in creating a harmonious and organized living space.
Decluttering
As the days pass, our living spaces often gather items that lose their relevance. This accumulation results in clutter that can feel overwhelming and suffocating. Engaging in regular decluttering acts as a therapeutic exercise, clearing out both our surroundings and our minds. While you’re in the process, delving into Feng Shui principles can be enlightening. By harmoniously arranging your space using these guidelines, you achieve more than just visual appeal.
Our homes are reflections of our internal state. By integrating these straightforward tidiness habits, we can nurture a living environment that soothes and rejuvenates. The beauty lies in realizing that maintaining a well-ordered home doesn’t require Herculean efforts. Small, consistent actions can ripple into significant transformations, leading to a relaxed and enjoyable home life. Embrace these habits and witness the calm it ushers into your daily existence.
For a full line of products to meet the needs of log home builders and owners, visit Perma-Chink Systems today!
COLOR CHOICES FOR LOG OR TIMBER INTERIORS
When it comes to log and timber homes, grays and browns are the biggest trending colors, as they offer the widest neutral tones. Gray has been the hot shade for the past several years in homes, from walls to floors.
True to its “neutral” title, gray really goes with almost any color. The key to a great match lies in coordinating the tones. Gray doesn’t have to appear in your palette as a color of the wall – it can also be found in a fireplace exterior, flooring, or on countertops. When you add gray to any room, be sure to consider other shades of gray that might already be there.
“To find the best shade, you need to consider which direction your room faces, what time of day you will be in there, the prevailing weather (even the hemisphere makes a difference), and last of all, the actual shade you like,” says Kate Watson-Smyth, who wrote the book on decorating with gray, Shades of Grey.
Our Lifeline Interior color collection can complement or contrast any paint you chose for your drywalls. Our interior grays combined with natural warm tones of wood will add a beautiful style to any room in your home. But grays aren’t the only option, and some people prefer other colors. That is why our standard library of color has the most colors available on the market, as well as virtually unlimited custom colors.


If you’re concerned that gray would be too cold for your space, beige colors or soft whites could be the answer. The easiest way to make a room feel bigger is by opting for lighter stains, particularly with gloss or satin finishes that create the appearance of even more space by relfecting light.
Keeping With The Trends
PCS designs eye-catching colors in many diverse tones that have the power to transform the entire ambience of a home. And the best part – you don’t have to mix anything – just order free samples to try, and then pick your colors.
And if you are looking to upgrade the wall paint in your house, The Property Brothers have some thoughts for you when it comes to paint colors.
On a “Condo Dreams” episode of HGTV’s Property Brothers: Buying and Selling, Drew and Jonathan Scott are not pleased when they see two colors gracing the walls in the client home – red and yellow.
“Yellow walls don’t really sell these days,” Jonathan quipped on the show, implying that Roseanne could likely fetch a better selling price if she repainted her walls a different hue. Perhaps an even worse offender than yellow, however, is red. At one point in the episode Jonathan warns that they have to “get rid of that angry ’90s red wall.” Read more about paint color choices.
Would you like to know what colors will be trending in the future? Better Homes and Gardens announces new color trends from the major paint companies.
No matter what color palette you choose, we can make custom color stains and finishes for you. Call 1-800-548-3554 or email techservice@permachink.com
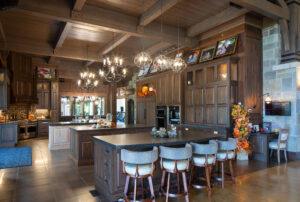
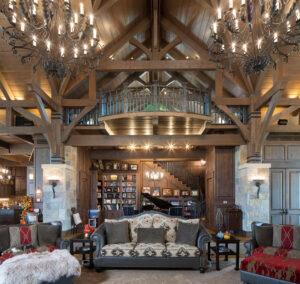
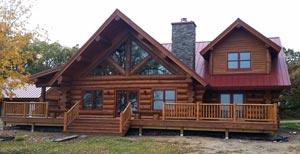
Photos by Honest Abe Log Homes
The most important thing that you can do to help maintain the finish of your log or timber home is to keep it clean. An annual washing with Log Wash™ will help prevent airborne contaminates, dirt, bird droppings, and sunlight from degrading the finish. While nothing can withstand the effects of the environment forever, keeping wood clean and maintained can protect it better and longer. How can keeping the surface clean prevent sunlight from injuring the finish? One of the features of our Lifeline Advance clear topcoats is that they reflect UV radiation.
If the surface is dirty and dull, it reflects less sunlight, and the absorbed UV light will eventually fade the color and gray the wood. So just like automotive finishes, the cleaner you keep your home, the longer the finish will last.
That being said, there will come a time when it may become necessary to do some touch-up work to the topcoat and perhaps the color coat, especially on the south and west walls. The question is, when and where should maintenance coats of finish be applied? The first thing to understand is more is not necessarily better. In other words, if the wall does not need another coat of stain or topcoat, leave it alone.
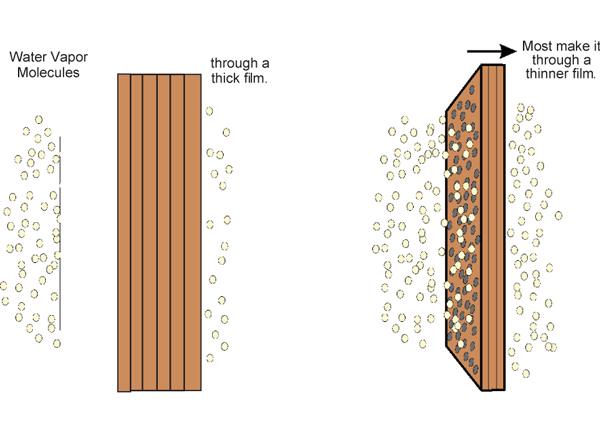
Advanced Breathability
One of the features of Lifeline finishes is the ability to breathe. This allows water vapor to escape from the wood while preventing liquid water from penetrating through the finish. Technically, we call this vapor permeability. If applied at the recommended application rates, one or two coats of stain, depending on the color system chosen from Perma-Chink Systems, and one coats of topcoat maintains enough vapor permeability to allow water that may enter the wood through cracks, checks and fissures to evaporate through the finish. However, each coat of finish that’s applied reduces the vapor permeability of the entire finish system by some percentage. The thicker that a coat is applied, the more it will reduce the vapor permeability. That’s one reason why we always recommend applying thin coats.
How Many Coats Of Stain Are Needed?
Multiple coats of finish can have the same effect as applying coats that are too thick; they can reduce the vapor permeability to the point where the finish can no longer breathe. The consequence of reducing the ability of a breathable finish is the risk of the finish peeling if water gets behind it (see technical tip Peeling Issues). Although occasional maintenance is an important factor in keeping your finish system in good shape, only apply additional coats where they are needed.
So what’s the best way to care for your home and extend the life of your finish system? If, after a washing with Log Wash, you see that the surface has dulled, apply a single coat of Lifeline Advance Gloss or Satin. A dull surface is a sign that the finish has eroded. If it shows signs of weathering or fading color, feel free to apply another coat of Lifeline stain to restore the color and a coat of Advance topcoat.
One or two additional coats will not adversely affect the vapor permeability. But while you are at it, you may be tempted to apply another coat of topcoat on those walls that still look good. Additional coats applied to unweathered walls are not necessary and can eventually lead to problems. If applied correctly, the film thickness of the unweathered walls is still optimal and the application of additional coats can decrease the vapor permeability to a point where peeling could become an issue. In other words, leave it alone.
Ongoing Finish Maintenance
As opposed to other manufactures’ finishes, we do not recommend applying additional coats of stain or topcoat on a yearly schedule. If two coats of stain and one coat of topcoat have already been applied, we recommend applying additional coats only on an “as needed” basis. But we strongly recommend a good cleaning with Log Wash at least once a year to keep your home looking great and extending the longevity of your finish system.

In the early 1980s Rich Dunstan, our founder and company president, had to come up with a company name. Although Perma-Chink Log Home Chinking was the only product manufactured at the time, he chose Perma-Chink Systems, Inc. The name was chosen because he had a vision of developing a full line of products to construct, clean, preserve, seal, finish and maintain the wood components of a log home. Over the years Rich has fulfilled his dream and Perma-Chink Systems, Inc. has become a systems company. No other log home related company offers the broad range of products that we do. However, this large product offering presents a challenge to our own salespeople. We expect them to achieve a high degree of expertise in a wide variety of different product lines. To reach this goal we devote hours of training so that they can knowledgably assist our customers.
Since we are a systems-based company, we have put together a family of products that work together and complement each other. We are often asked questions similar to, is our Energy Seal compatible with ABC Stain or can LIFELINE be used on a home that has been cleaned with XYZ Wood Cleaner? There are hundreds of small regional manufacturers of these products scattered across the country, with full disclosure of ingredients not always given. Since we cannot test all products, the compatibility of these with Perma-Chink products are unknown.
We make every effort to communicate with our customers that we do not sell individual products that can be used indiscriminately with products from other manufacturers. We sell a system of products that work together. When a customer chooses to step outside of our system, problems may develop that can be challenging to solve. Homeowners often understand our system concept better than some applicators/contractors. Over the years, some professionals have found a favorite local manufacturer they prefer for a cleaner, caulk or stain. Then a customer wants him/her to use LIFELINE Ultra-2. The home gets cleaned with XYZ Wood Cleaner, followed by LIFELINE Ultra-2 and Advance, with the home being sealed with AAA caulk. A month or so later we get a call that the wood under the stain has developed dark spots and the caulk is falling out of the checks. The applicator or homeowner comes to us for help because they believe the problem is a result of our product since they have been using the same cleaner and caulk for years.
We often have a difficult time determining the root cause of the failure since we do not know the compatibility of XYZ Wood Cleaner or AAA caulk to our stains. That is why it is important to obtain all your products from Perma-Chink Systems, a systems company, to avoid such problems.
The principle of utilizing our systems is that we have spent many years developing products that work, are safe to use and are compatible with one another. We pride ourselves on being the log home industry leader by constantly making improvements to our finish and sealant systems. We stay abreast of the latest developments in polymer technology and additives. This approach has kept us well ahead of our competitors. We have occasionally been criticized for making changes;however, those changes have resulted in better performance, increased beauty, and easier application of our products.
Another vision that Rich Dunstan had from the beginning of Perma-Chink Systems was to manufacture only products that were friendly to our environment. Yes, we were green when the definition of green was the color of grass. We started making water-based stains when 90% of the log home stains were oil-based. We also invented and introduced the first low toxicity borate-based wood preservative that could be applied to an existing log home. Over the years we have consistently considered the environmental impact of all our products and removed or changed those that did not meet our high environmental standards. This too is a part of our systems concept. Not only do our products work with each other but they also work to protect our environment.
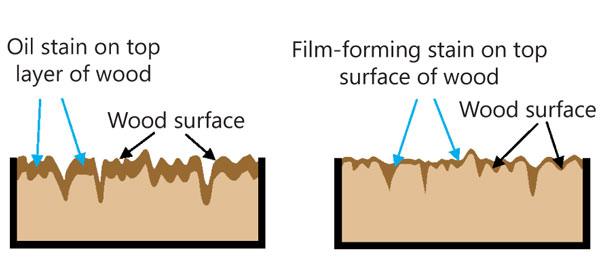
Many people do not understand how film-forming stains work and how they adhere to wood. Much of this misunderstanding relates directly to the term “stain.” In the past, staining wood meant that the wood fibers themselves became impregnated with color and that the color penetrated into the top layer of wood. Even today most oil-based stains work in this manner. Once stained, if the surface is rubbed or scratched, the color of the stain still remains since the solvents carry the colorants into the top layer of wood which make the fibers beneath the surface the color of the stain.
On the other hand, water-based stains like our Lifeline™ products do not actually penetrate into the wood fibers! That’s one reason we try to refer to them as finishes rather than stains. But since the term “stain” has been used for hundreds of years, it’s difficult to change the vernacular that defines the difference between oil-based and water-based products.
When we talk about the penetration of our products, we are referring to their ability to fill the microscopic voids, fissures and pores on the surface of the wood. This enables the film to adhere tightly to the wood’s surface. It’s this property that we call adhesion. However, if the film is scratched or rubbed off of the surface, the original color of the bare wood will be visible.
Why is this important? We’ve had customers call us thinking that the product we shipped them was defective because they were able to rub or scrape the film off and there was no color evident under the film. In their mind, the wood had not “taken the stain.” That’s because they had never worked with a water-based, breathable film stain before, and were used to seeing the results produced by a penetrating oil-based stain.
So how can we best explain how our products work? Most people are familiar with use and behavior of latex paint. It behaves quite similar to a water-based film forming stain in that if it is scraped off of the surface uncolored bare wood becomes visible. Our water-based stains behave in a similar way to latex paint. The benefit is that the protection offered by a film on the surface of the wood is far superior than that provided by a product that soaks into the wood leaving the surface of the wood exposed to the sun and weather.
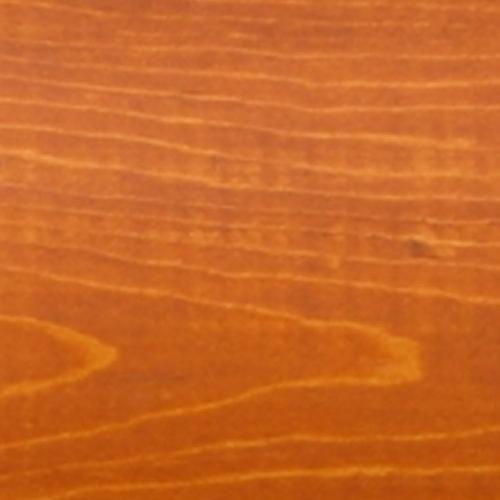
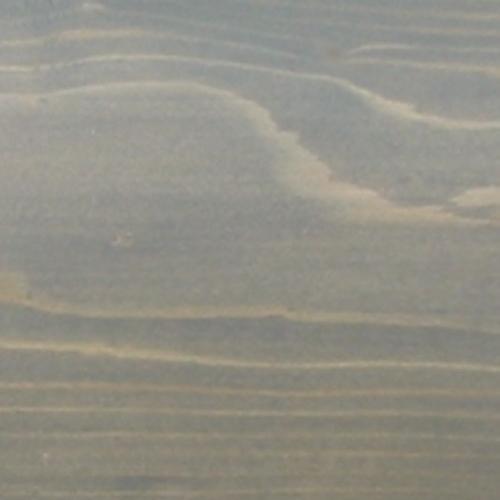
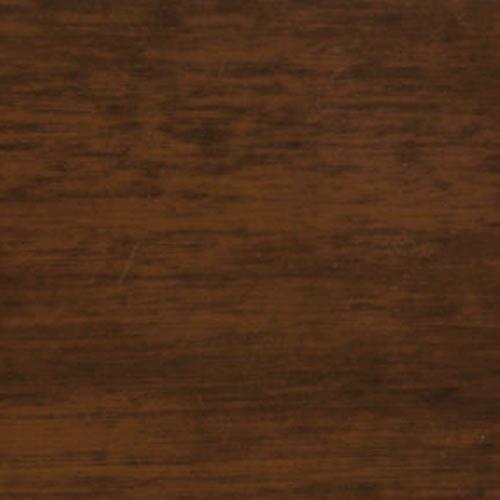
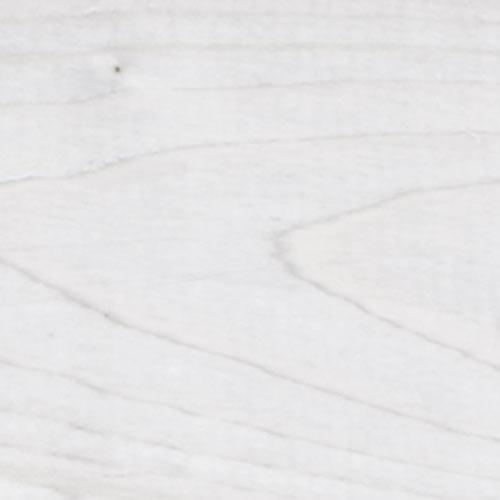
Microscopic Cross-Section of Wood Surface
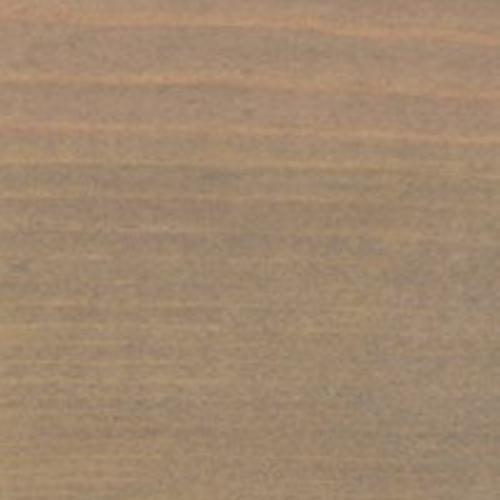
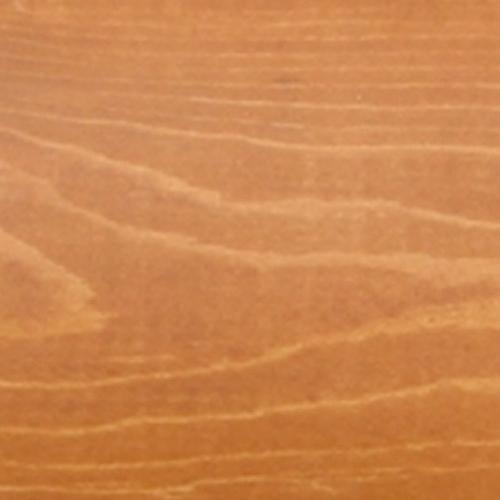
The wood surface absorbs an oil-based penetrating stain into the top layer of wood fibers, carrying the pigments along with it. The fibers themselves are thus “stained” with the pigments.
A water-based, film-forming stain sets on top of the wood surface and fills in many of the small cracks and fissures, resulting in a smoother surface; however, the wood fibers themselves retain their original color.
“Which of your products should I use to seal my log home?” is a question often put to us by prospective customers. Why do so many people refer to “sealing” a log home rather than staining or finishing? Nobody talks about sealing siding or trim on a stick built home. They are either stained or painted, yet sealing is the term used by many log home owners. As it relates to log homes the term “sealing” dates back to the early 1900s. Prior to then, most log homes were constructed using heartwood from old growth timber and left bare.
Since heartwood is resistant to insect and decay infestations, and the people who built log homes knew better than to not include porches or leave log ends sticking out beyond the roof line, the best thing for them to do was to leave the logs bare but keep them dry. That’s why so many of them survive to this day.
Sealers
Starting at the end of the 19th century, old growth timber was no longer readily available and people started constructing log homes using second or third growth timber that was mostly sapwood. They also stopped using many of the good construction practices of their ancestors, so problems with bugs and decay began to arise.
At around the same time, the petroleum industry began to develop, for the first time, affordable oil and tar products. Log home owners soon discovered that smearing some of these oil derivatives over their homes helped eliminate some of their insect and decay problems. In their minds, they had “sealed” the logs, and the term has stuck with us to this day. Up to the 1950s, unless the logs were painted, log homes came in two basic colors, black and gray.
So, are any of our Lifeline™ exterior finishes sealers? As the term relates to keeping liquid water from entering the wood, they all are. All of our Lifeline stains (Ultra-7, Ultra-2, Exterior, and Accents), as well as Prelude™ Clear Primer and Advance™ Topcoat, all act as water repellents to keep the underlying wood dry.
There is a misconception that our pigmented finishes alone do not act as water repellents and it’s the Advance Topcoat that seals the surface. That’s why many people call our Advance Topcoat a sealer, but that’s not an accurate description of the product. All of our stains are excellent water repellents. They may not bead water, but they provide a polymer-film barrier that prevents liquid water from penetrating into the wood.
Stains
Calling our pigmented finishes “stains” can also be a bit confusing. The term itself implies that the wood fibers are “stained” with the colorants contained in the products. However, in the case of film-forming, water-based finishes, the wood fibers are not impregnated with the colorants like they are when penetrating oil stains are used. If wood is painted with a latex paint, no one expects the paint to impregnate the underlying wood. So if you believe that your wood is not “taking” our Lifeline stain, it’s important to understand that our finishes behave more like latex paints than penetrating oil-based stains.
Since most people are comfortable with “stain” as a product that alters the color of the wood and still allows the grain to show, using “stain” is more accessible for customers (as well as when searching on the Internet).
Topcoats
Top coats are clear finishes that protect and cover the pigmented finish on logs, timbers, and other wood features. One of the most frequently asked questions we receive about our Advance Topcoats is why isn’t it included with the stain. The answer is that if we did, it would no longer be a topcoat. Topcoats play a specific role in protecting any finish system.
Take car finishes for example. The pigmented paint provides the color and helps protect the metal from corrosion. It is formulated to adhere to the primer and retain its color. The car’s clear topcoat is designed to protect the color coat from abrasion, dirt and sunlight and the only thing it has to adhere to is the color coat. Our Advance Topcoats play essentially the same role, to protect the color coats from the weather, sunlight, and dirt.
Although our stains adhere to bare wood, previously applied stains, and existing topcoats, it is not necessary for Advance to adhere to bare wood since it clearly states on the label that it’s to be applied only over an existing finish.
Although most topcoats on the market are just unpigmented versions of stains, Advance is specifically designed as a high performing topcoat with a unique set of characteristics that have yet to be duplicated by anyone else in our industry. One of the reasons Lifeline Advance outperforms all other topcoats is that it is designed for a very specific purpose and should never be applied to bare wood.
It’s time to close up remote and vacation cabins for the winter. For most vacation homes, the close-up process usually occurs after Labor Day, but we all try to squeeze out a few more weekends as the weather allows.
Depending on where the home is, the “living” season might be longer, or year-round, especially if the property doubles as a seasonal rental. If you’re lucky enough to live in a mild climate that doesn’t require much seasonal “changeover,” it’s still a good idea to inspect your home for potential issues. We have available information on Fall maintenance and landscaping tips to keep homes maintained.
For those homes that get buttoned-up for the winter, the folks at Cabin Life compiled a checklist of tasks to ensure a protected home for the duration of the winter season.
Preparing for Winter Checklist
(Adjust as needed for your climate and your frequency of winter use.)
Outside Duties
- Waterfront homes: Clean and store boats, dock ornaments, ladder, life jackets and ski equipment.
- Mow the lawn one last time (if you have a lawn at your place).
- Clean and winterize lawnmower and other gas-powered yard equipment.
- Rake and remove leaves within at least 30 feet from your cabin.
- Store fire pit decorations, emptied flower pots, drained hoses and sprinklers, and deflated water toys.
- Keep firewood more than 30 feet away from home.
- Look for air leaks around electrical wiring, dryer vents, pipes, windows and doors; then seal leaks with caulk or insulation to keep out cold air and pests.
- Insulate pipes in crawl spaces by wrapping them with heat tape or thermostatically-controlled heat cables; also open cabinet doors to allow heat to get to un-insulated pipes under sinks and appliances near exterior walls.
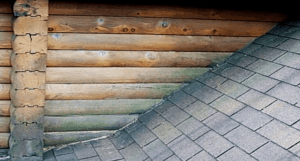
- Clean out gutters and inspect roof for shingles that are raised or cracked; leaking roofs and clogged gutters can lead to significant water damage.
- If your lake is prone to ice movement, take in dock and boat hoists. Remove hoist motor and electric line.
- Turn off outside pump breaker, hoist motor breaker, dock light breaker.
- If you are in the snow belt, store outdoor furniture, picnic tables and hammocks.
- Make sure your winter sports gear is ready to go. Snowmobile and ATV tuned up? Skis waxed? Where are those snowshoes?
Inside Duties
- Ensure that the power and water are in the proper mode for vacancy.
- Set thermostat at the appropriate temperature for the region. If you heat your place in the winter, set the thermostat no lower than 55 degrees; if you keep the A/C on when you are gone, set it to 80 degrees.
- Clean furnace filter to maintain an efficient heating and cooling system and reduce the risk of fire.
- If you are shutting off the refrigerator, leave the door cracked open to prevent musty smells from developing.
- Unplug computers and major appliances to protect them from power surges and lightning strikes.
- Pull shades, or cover furniture to keep it from being bleached by the sun.
- Put mothballs or dryer sheets near linens.
- Restock and store first-aid kit.
- Take out all perishable foods; store those that remain in air-tight/critter-tight containers. If you don’t heat the cabin in winter, carry out canned goods so they don’t freeze.
- Turn off dehumidifier and water heater.
- Close damper for fireplace. Seal box to prevent critters from entering cabin.
- If you don’t heat in winter, drain the pipes by attaching a hose to the lowest point in the plumbing, then blow out all water with an air compressor.
- Winterize washing machine; kitchen appliances.