Blog & News
Surviving the South Fork Fire
I wanted to share our experience and express my gratitude for your incredible products and support.
Hi! My name is Brent Kriegel. We own a log home in Ruidoso, NM, which we purchased in September 2020. In July 2021, we fully restored the exterior—sandblasting off the old oil-based stain and using 100% Perma-Chink Systems products for Prep, Stain, and Energy Seal. The results were fantastic!
South Fork Fire & Home Impact
Fast forward to June 17, 2024, when the South Fork Fire devastated our area. The fire, which was declared a national disaster, burned 17,000 acres and destroyed 21 cabins in our subdivision, including our guesthouse and carport.
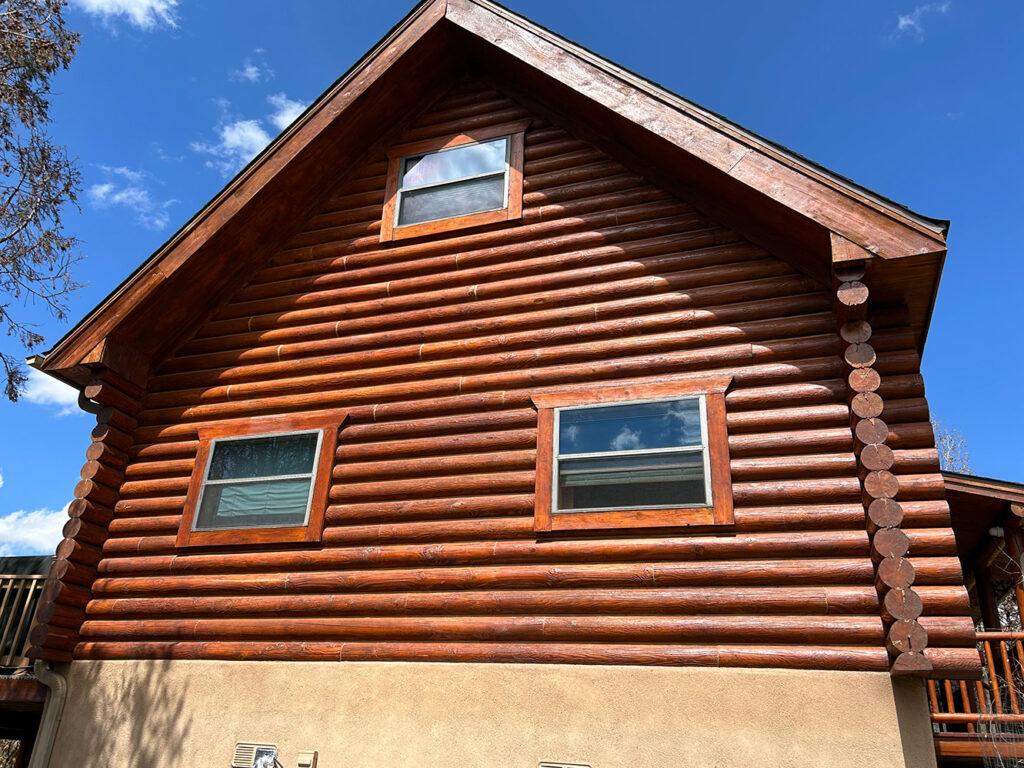
Amazingly, our log home—the primary residence—is the only structure still standing in our neighborhood.
The damage to our cabin was minimal:
We lost the first couple of steps to our front porch and a pier from the back porch.
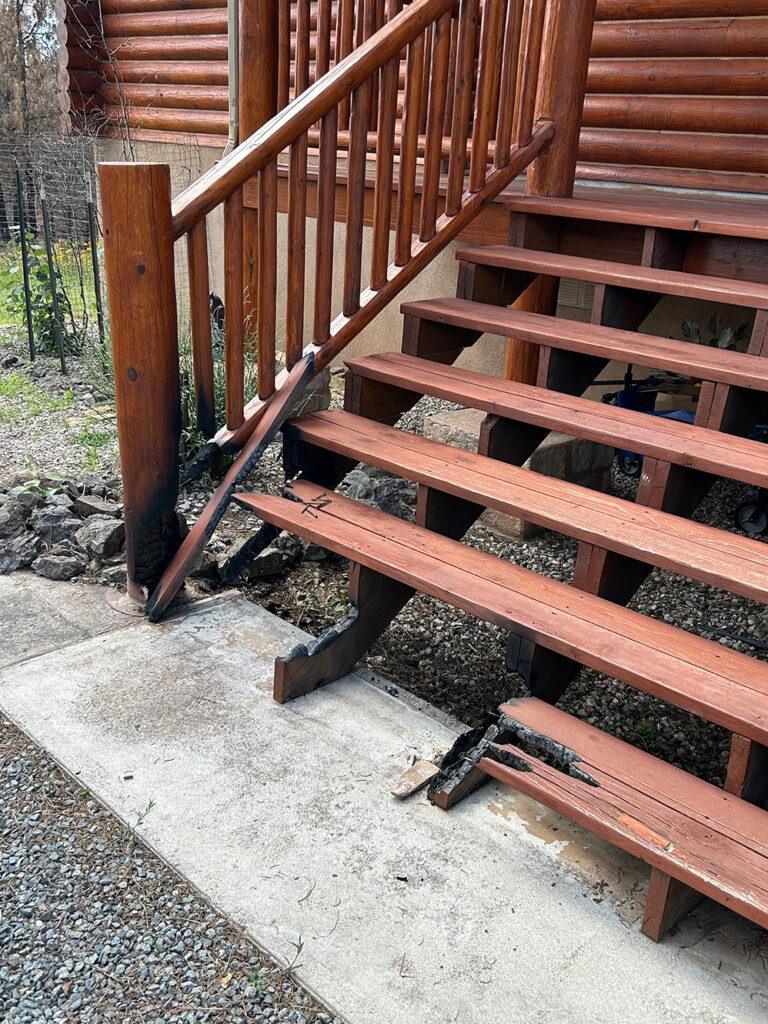
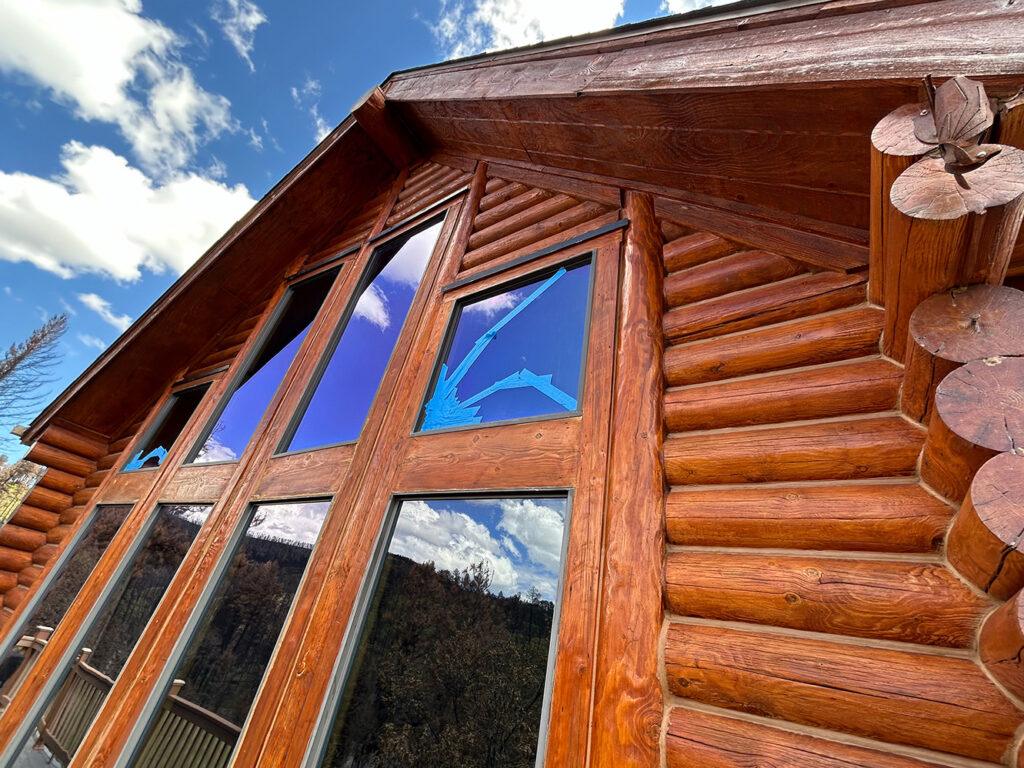
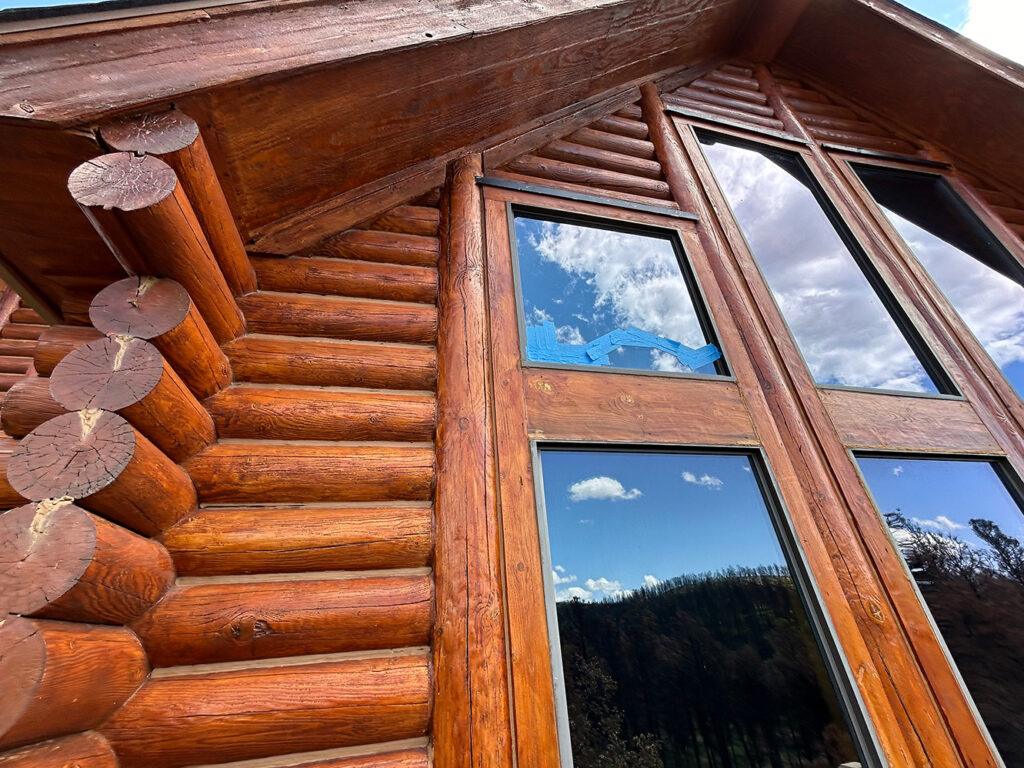
Six windows on the west side cracked from the heat.
Repairing the Damage
After utilities were restored, I connected with Dakota Zeman from Perma-Chink Systems for an inspection. We reviewed photos, FaceTimed for a closer look, and tested the exterior gloss. The solution was simple:
One coat of exterior gloss topcoat
Touch-up of the Energy Seal between the logs
The Completed Project
Four months later, we are back in our cabin, and everything is great. We experienced minimal smoke damage inside, which I credit to the Energy Seal sealant protecting between the logs. After applying a new coat of Lifeline Advance top gloss and fixing a few small Energy Seal areas, the cabin looks brand new again.
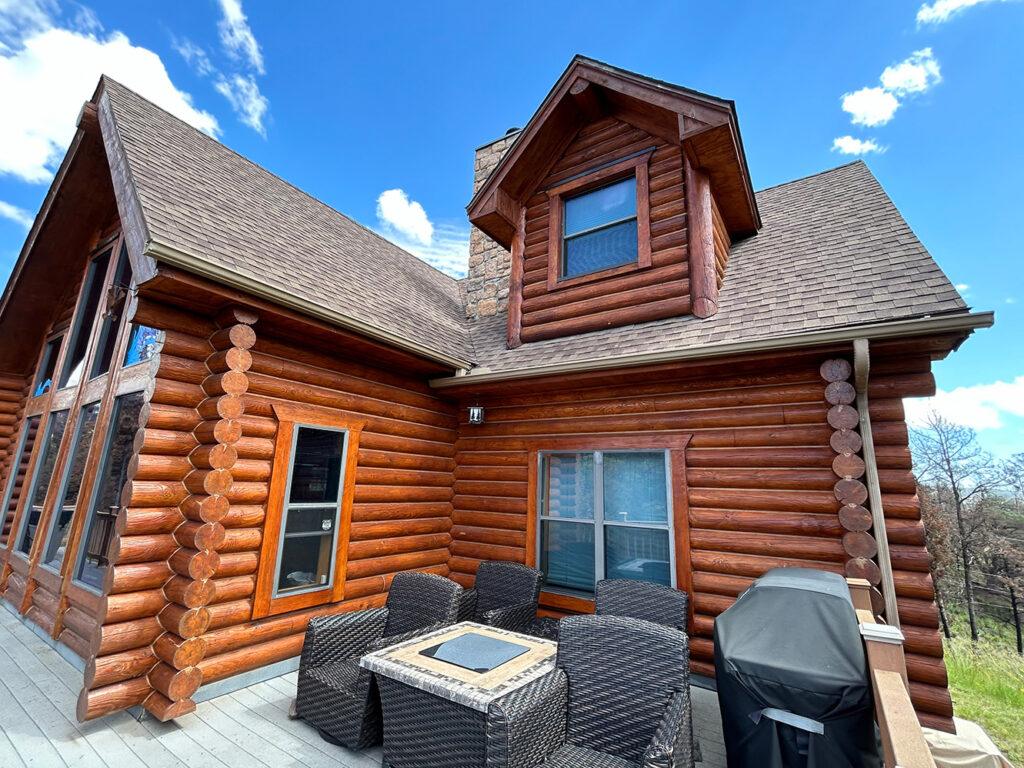
I’ve received multiple phone calls from locals, all asking how our cabin survived the fire. My answer is always simple:
“We are incredibly thankful—and I recommend building with solid logs and using Perma-Chink Systems products.”
Thank you and your entire team for your support during this difficult time.
Gratefully,
Brent K.
Ruidoso, NM
Closing Notes
We at Perma-Chink Systems thank Brent for being a great customer and we’re happy that the home was not severely damaged. As much as we would love to claim it, our products are not fireproof. Please mitigate fire risk by clearing around the home any flammable materials or foilage.
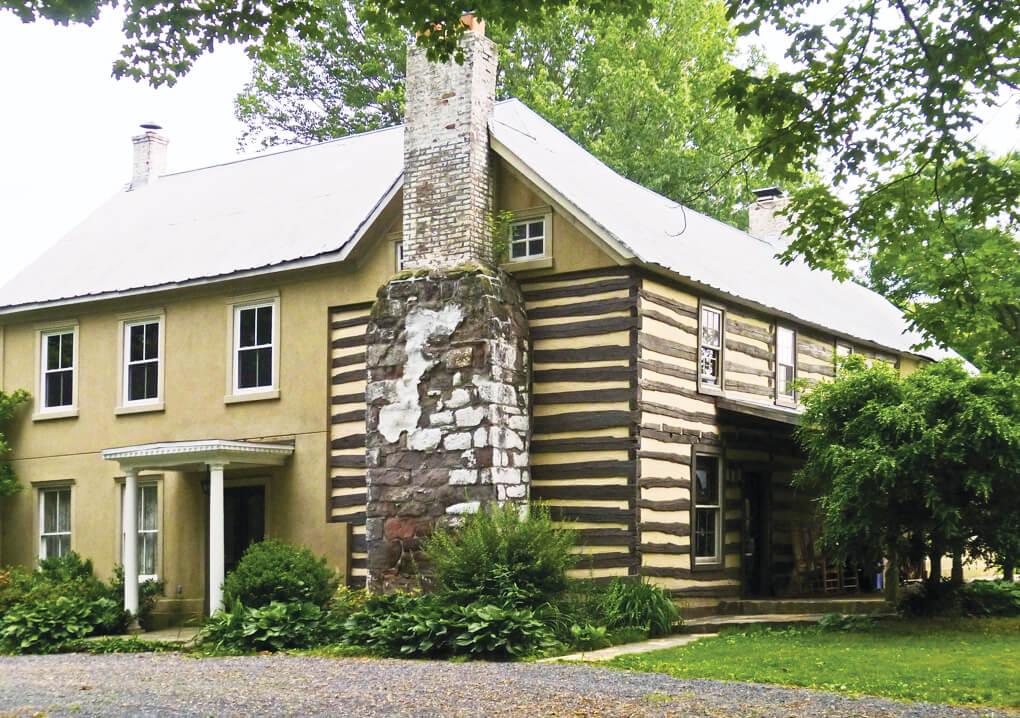
As our country was founded, established and expanded, log homes were prevalent across the colonies. President Abraham Lincoln was famously raised in a log home, and that home is still preserved today. Some of our greatest presidents came from humble beginnings and modest homes. What some people might not know is a log home constructed in 1808 was built on George Washington’s Farm.
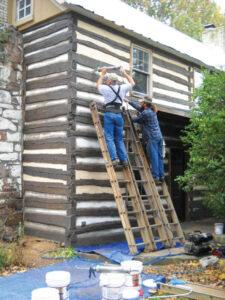
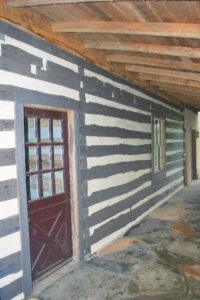
Perma-Chink Systems has the honor of being part of the restoration and preservation of the log home, remembering history as we do it. In honor of President’s Day, we take a look at the restoration of this log home on Washington’s Farm.
“When I stumbled upon Washington Farm’s log home, built in 1808, I knew the logs would need a LOT of restoration. Due to the historical significance of the structure I was determined only to work with the best in the country. Of all the contractors I contacted none of them were as prompt, courteous and knowledgeable as Mr. Pat Woody and his team. The pricing proposed was very reasonable and the work meticulous. I HIGHLY recommend Woody Wood Chinking to other historical log home enthusiasts without hesitation.”
– M. Boblitt
“We pressure washed the logs, then removed the exterior chinking, backer and insulation. We replaced the insulation and installed backing material. We then applied Lifeline Ultra-2 Stone Gray color to the logs. We applied Perma-Chink Sandstone chinking to the exterior. Finally we applied Lifeline Advance satin topcoat. Working on the job was myself, Chris Woody, my dad, Pat Woody, and our friend Nathon Foster.”
– Chris Woody, Woody Wood Chinking
For more information contact Woody Wood Chinking at 434-384-0515

When it’s time to restore your log or timber home – or you’re building new – choose the products used to preserve history. Perma-Chink Systems has the leading log and timber home care products from sealants to finishes to cleaners and more.

519 acres owned 1794-1799 by the First President
Thomas Sprigg, Jr., patented in 1725 as “Woodstock” 1,102 acres here, inherited in 1782 by Sprigg’s three granddaughters, Sophia, Rebecca and Elizabeth. Sophia married John Francis Mercer (later Governor of Maryland, 1801-1803.) in 1794. Nearly half of the property was conveyed to George Washington to settle a debt owed by Mercer’s father. Washington owned this land at his death in 1799.
Erected by Maryland Bicentennial Commission and Maryland Historical Society
Presidents have come from varied backgrounds, humble and not-so-humble. Take a look at former homes of Presidents in our article Presidential Birthplaces.
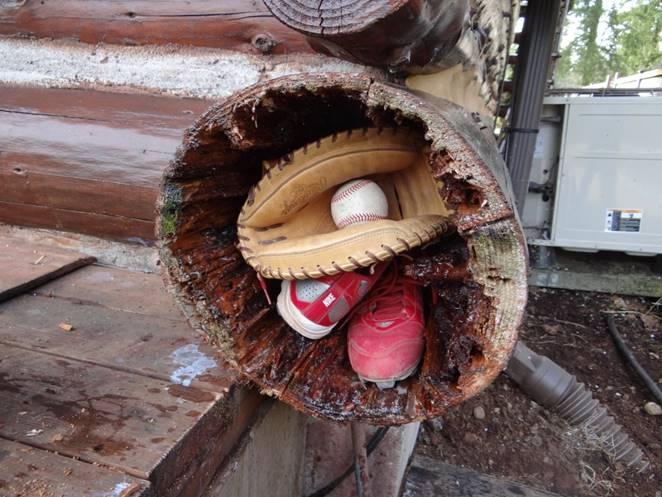
A hollowed-out piece of timber on your home might make a convenient storage space for sports equipment or toys, but it’s a problem. Before you panic and list your home up on Zillow or Redfin, let’s take a look at the situation.
What To Do When You Find Log Rot?
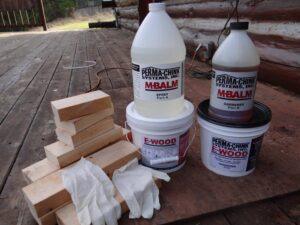
How much decay have you found? If it’s not halfway deep through the log, or less than a couple of feet lengthwise, odds are it can be repaired easily. M-Balm and E-Wood from Perma-Chink Systems are specially formulated epoxies designed to repair decay and soft spots in homes. Large voids can be repaired with filler wood like 2×4 boards to add some rigidity to the repaired section.
The biggest threat to log homes is decay damage, caused by moisture-loving fungi. The three basic categories of wood-destroying fungi are soft rot, brown rot, and white rot. Preventing rot begins with eliminating as much contact as possible with moisture, which breeds fungi. The best product that addresses moisture prevention is using borate preservatives, which destroy wood fungi and protect against decay. It also fights against wood-boring insects.
If you do discover decay in your logs during inspections, it can most likely be mitigated and eliminated without the need for a costly log replacement. If the decay does not exceed more than half the depth of the log, or only a few feet lengthwise, use M-Balm and E-Wood.
E-Wood epoxy has the ability to be cut, sanded, textured, and finished like real wood.
How To Repair Log Rot?
Jeff Kyger of Northwest Log Home Care showed us a decay issue and the resolution utilizing M-Balm and E-Wood to repair the log. While it is a handy storage space for sports equipment, the decay could have progressed deep in the wood and compromised the home. Jeff was able to repair the log decay damage with M-Balm and E-Wood.

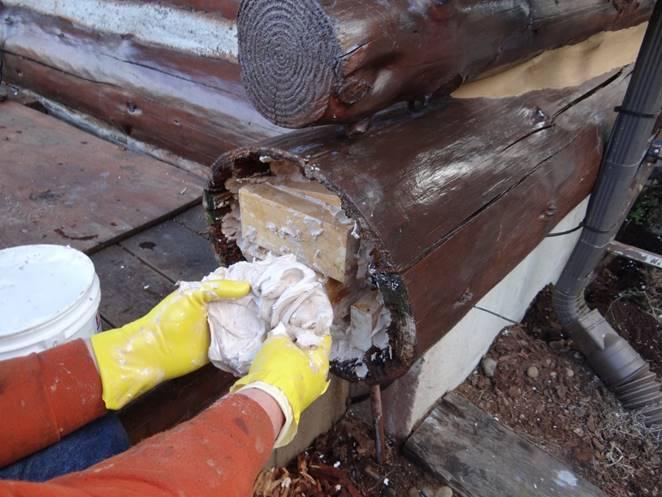
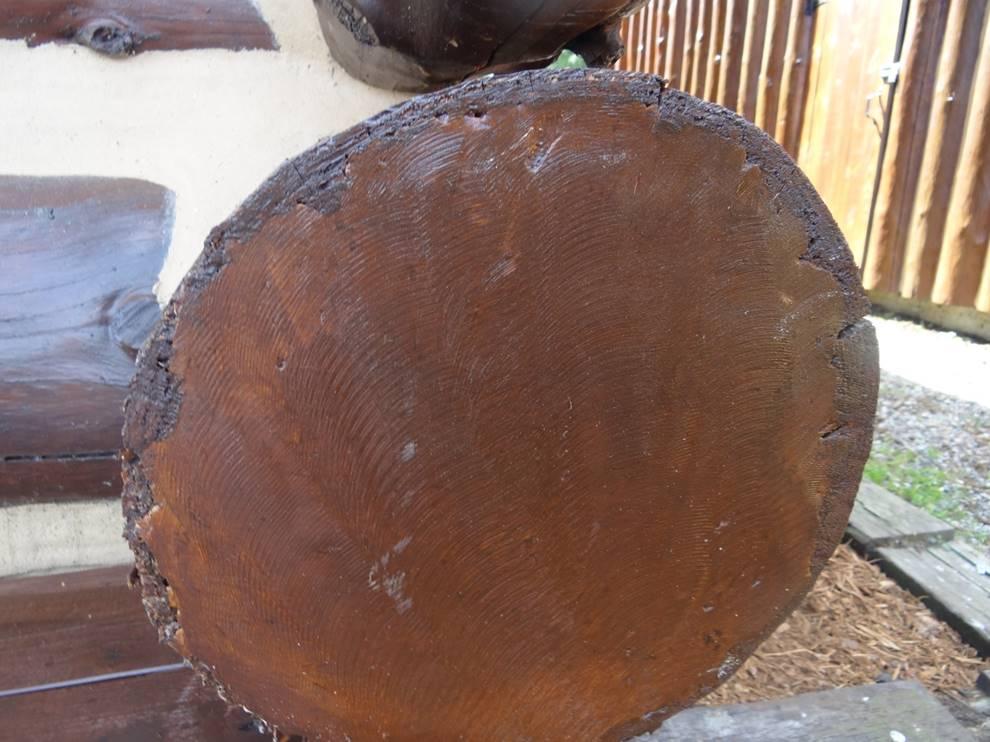
The first step in repair is to clean out the decay and get the log dry.
We recommend applying Shell-Guard RTU to the cleaned area to eliminate any possible decay fungi and prevent future infestation. Once the decay cavity has dried, coat the exposed wood with M-Balm to bond loose fibers and create a solid bonding surface area for the filler agent. M-Balm epoxy liquid penetrates deeply into porous wood, curing and hardening into a strong water-resistant mass that includes the original wood fibers and the epoxy mixture.
E-Wood epoxy can be stained with Lifeline stains during mixing or after application to match your log home color.
What About Small Areas of Wood Rot?
For small voids, use E-Wood Paste. E-Wood paste epoxy works excellent on window trims, small checks on log ends and other places where putty may be difficult to apply.
How To Find Log Rot?
Regularly inspect your home for rot and stop it from spreading and causing an expensive repair. We recommend annual inspections every spring season, where cleaning the home allows a focused look at your log home. With Perma-Chink System’s wood restoration products M-Balm and E-Wood, decay can be repaired and your home restored to like-new condition.
Check out our tech tip on repairing large voids, and our other Tech Tips for more in-depth instructions on maintaining and repairing your log home.
If you have any questions or need to order product, call us at 1-800-548-3554.
Energy Seal™ is specially formulated for sealing narrow gaps in log home joinery such as butt joints, window trims, door trim and corners. These gaps should be no larger than one inch wide. Energy Seal contains a fine aggregate that gives it a texture which enables it to more closely match the texture of wood and accept a stain, so that it will blend in with the stained wall color if so desired. Although it can be used in wider joints, we typically recommend using Perma-Chink® Log Home Chinking for wide chink joints.
When Should Energy Seal Be Applied?
The best time to apply Energy Seal is after the home has been cleaned and before the finish is applied. The wood surfaces will be fresh and clean and Energy Seal adheres best to bare wood surfaces. That’s not saying that it won’t adhere to stained and/or top-coated surfaces, but it adheres best to bare wood. Application to surfaces with a freshly applied oil-based stain should be avoided. For the least visible caulk lines choose a color that’s a shade lighter than the stain color you plan to use. It’s easier to cover a lighter color sealant with a darker color stain than it is to hide a dark colored sealant with a light colored stain. However, if you prefer the look of visible caulk lines, apply Energy Seal after you stain. Just be sure that the surface is clean and dry.
If you are going to be applying Lifeline Advance Topcoat, apply the topcoat after the Energy Seal. This results in a more even appearance to the sealed areas and helps them blend in with the rest of the wall. Furthermore, it helps keep the Energy Seal application clean and easier to clean when maintenance cleaning is required.
Using Backing Materials
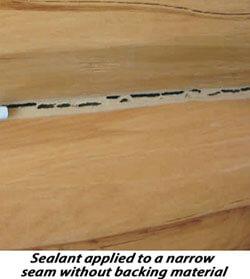
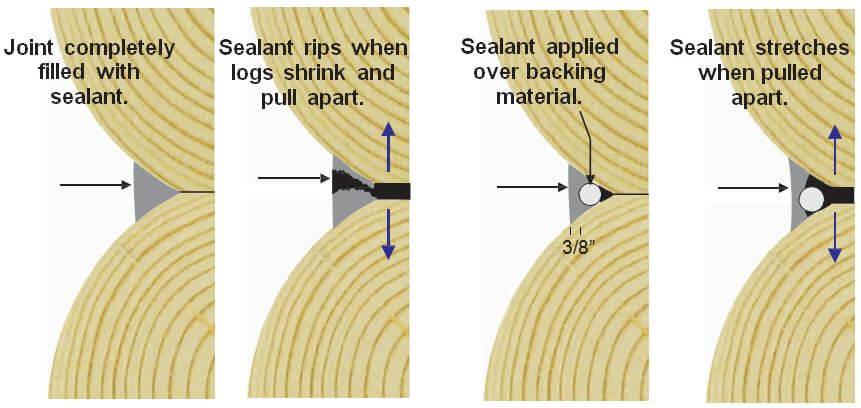
Backing materials furnish an even surface for the application of a sealant and make it easier to apply a uniform thickness across the joint or gap. They also provide two-point adhesion to ensure maximum elasticity and flexibility after the sealant has cured (they form a bond breaker in the center of the sealant band with adhesion to the wood at both sides). The use of improper or poorly installed backing materials can result in unsightly sealant joints and substandard performance. They are an integral part of the sealant system and should always be used whenever and wherever possible.
There are a number of products specifically designed for use as backing materials for sealants. For smaller gaps, joints and cracks the most commonly used material is round backer rod. It comes in a range of sizes and is relatively inexpensive. Since it is flexible it can be pushed into a crevice without needing to be nailed or stapled. Grip Strip is designed for sealing larger gaps. Similar in composition to backer rod, it is shaped like a trapezoid so it can be squeezed in between round logs although it can be used in a variety of situations. It provides a flat surface for chinking or sealing.
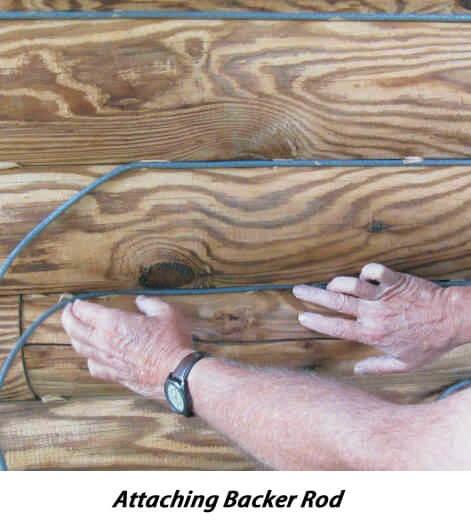
In situations where a joint, seam or gap is too small to insert Backer Rod you can hold it in place by applying small dabs of Energy Seal along the seam and then pressing the Backer Rod into them. The dabs of Energy Seal will hold the Backer Rod in place while a proper thickness of Energy Seal is applied on top. You can also use a narrow strip of water-resistant masking tape. You don’t want to use masking tape that wrinkles when it gets wet, since the wrinkles may show through the sealant. For extremely narrow seams an excellent option is to use pinstripe tape available at most automotive supply stores. The tape is vinyl; therefore, it’s waterproof and since our sealants do not bond to it, it makes an excellent material to use. Pinstripe tape is available in widths down to 1/8”.
Approved Backing Materials
- Grip Strip
- Backer Rod
- Log Gap Cap
- Expanded polystyrene (EPS) beadboard, foil-faced
- Polyisocyanurate board (Polyiso or R Max)
- Water-resistant masking tape or pinstripe tape
DO NOT USE
- Extruded Polystyrene (causes blisters)
- Polyurethane foam (Pur Fill, Great Stuff, Styrofoam)
- Blue Board, Pink Board or any other colored board (outgases and causes blisters)
- Bare wood or strips of bare wood (outgases and loss of elasticity, 3-point adhesion)
- Anything that you are unsure about check with Perma-Chink Systems before using it
The Role Backing Materials Play When Sealing a Seam
Round Logs
When deciding the width of a sealant joint between round logs a good guideline to follow is for the width of the sealant to be one-sixth the log diameter. For example, with six inch diameter logs 6” ÷ 6 = 1.0” wide sealant joint. The width of the backing material you require depends on the profile of your logs but you need to take into account that you will be applying a 3/8” thick layer of sealant over it and you’ll need at least ¼” top and bottom for adequate adhesion to the wood.
Squared Logs
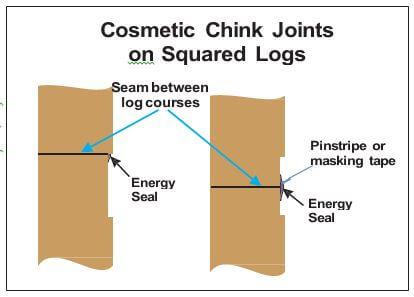
We rarely see squared log chink joints less than 2” wide, so Energy Seal or Woodsman is seldom used in these situations. However, for cosmetic chink joints less than 3/8 inches deep we recommend sealing the seam with Energy Seal and then applying Chink Paint over the entire joint. On the other hand Energy Seal is often used on squared logs for sealing corners, butt joints, widows, door frames and other areas where a visible chink joint is not desired.
Applying Energy Seal
The overall performance of any sealant system is dependent on the use of proper application methods. Any sealant must be applied in a manner that will allow it to stretch in order to compensate for log movement. If it is applied too thick, once it cures it won’t be able to stretch enough to compensate for the movement and it may tear away from the wood. Think of it like a rubber band. A thick rubber band will not stretch as far as a thin one. However if the rubber band is too thin, it will break when it is stretched. The same thing applies to sealants. If applied too thick, they can’t stretch and if too thin they may be weak and will tear when pulled apart. In the case of our sealants the magic number is an applied wet thickness of 3/8”. When cured this results in the best elongation with maximum strength.
Have the Proper Tools
Before you start have all of the tools that you will need at hand and be sure that they are clean and in good working order.
These may include:
- Caulk gun or bulk loading gun
- Rags
- Trowels and/or spatulas
- Plant mister with water
- Masking tape
Weather Conditions
Freshly applied sealants should be protected from direct rainfall for a minimum of 24 hours. Either watch the weather or drape a newly sealed wall with plastic film. Be sure to allow some airspace between the wall and the plastic to facilitate drying. Avoid applying sealants in direct sunlight or when the temperature is less than 40° F. In cold weather it’s important that the logs be free of frost and dew in order to ensure that the sealant adheres tightly to the wood. The best surface temperature range for easiest application and best results is between 50° F and 80° F.
Application
Cut the applicator or tube tip to the desired diameter of the sealant bead you want to apply.
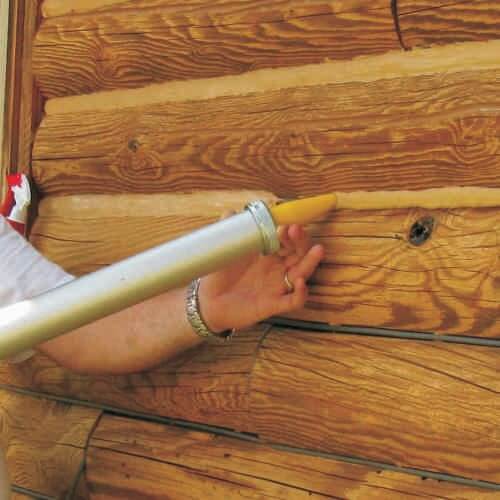
Step 1: Begin by holding the tip firmly against the seam or joint and apply a bead of sealant. You need to apply enough sealant to maintain a wet thickness of at least 5/16” and no more than ½” (target = 3/8”) across the entire seam or joint after tooling. Only apply as much sealant as you can tool smooth in about 15 minutes.
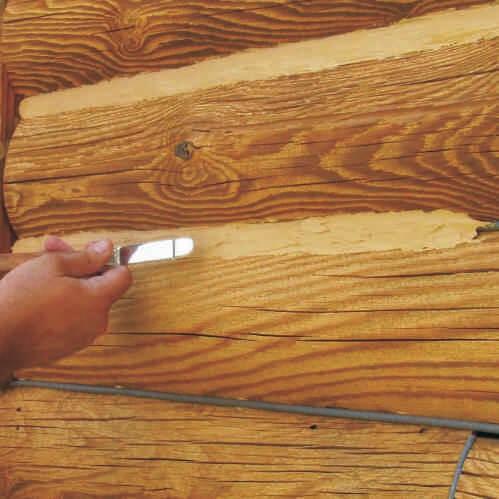
Step 2: Once the joint is filled trowel it out to approximately 3/8th of an inch thick across the entire joint. Do not spray it with water at this time! Make sure there is good contact between the sealant and the exposed edges of the wood. The most difficult areas to tool are corners. You tend to drag product out of the corners resulting in the sealant becoming too thin. You can occasionally check the thickness of the sealant using a toothpick to see if you are maintaining the proper thickness.

Step 3: Once the sealant is roughly in place and any entrapped air worked out of it, spray it with a light mist of water. Do not saturate the surface with water. If water begins to run down the wall, you have applied too much.

Step 4: Tool the surface smooth with a trowel or spatula. If you used masking tape to protect the surrounding wood be sure to remove it as soon as you are finished tooling and make sure that you have not left any lip on the top edge of the sealant that may catch water. If you have, tool it smooth.
Sealing Window & Door Frames
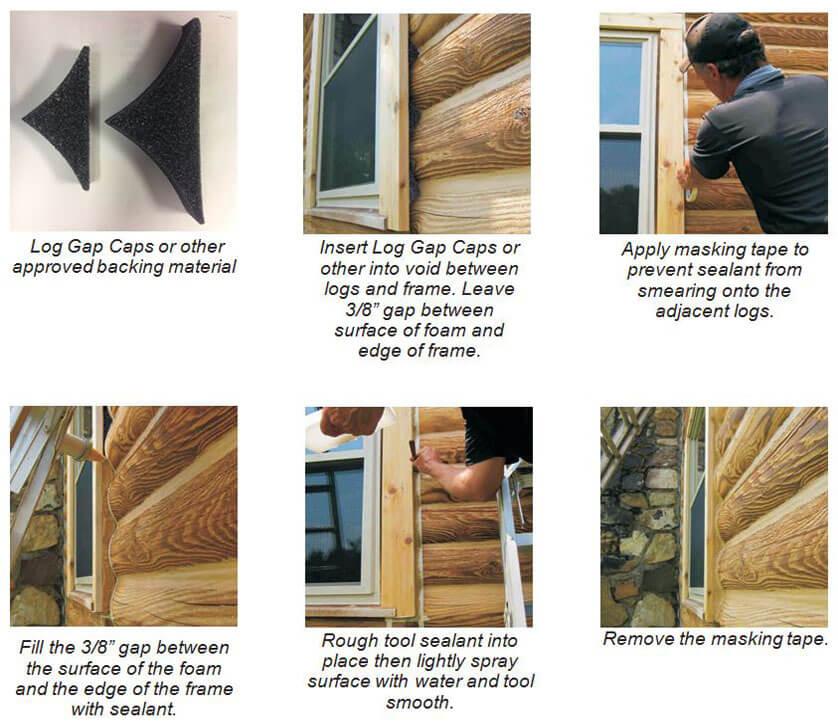
Clean-Up
If you get any sealant on the surface of the wood, be sure to wipe it off with a wet rag as soon as possible. If you allow it to dry it will be just about impossible to completely remove. Make sure to clean your tools and equipment with clean water occasionally during application. Dried sealant is difficult to remove from just about anything including clothes.
Drying and Curing
Drying time and curing time are two entirely different terms. In warm or hot weather, Energy Seal may begin to skin over in as little as ten minutes while a complete cure may take a couple of weeks. Cooler temperatures will slow both the drying time and curing process.
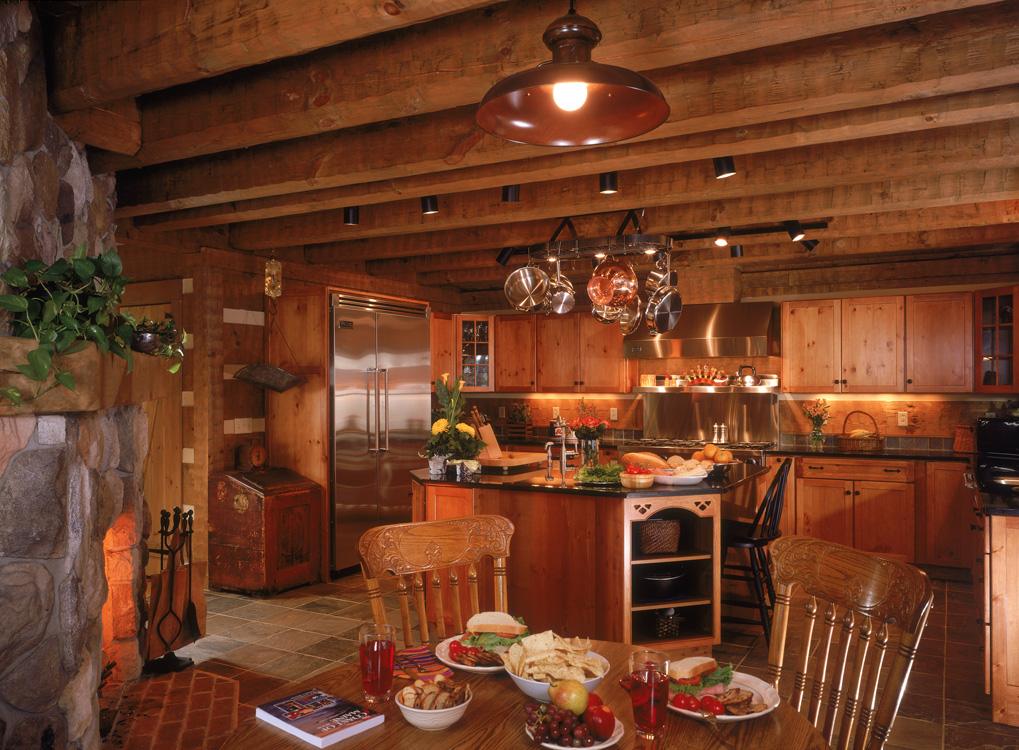
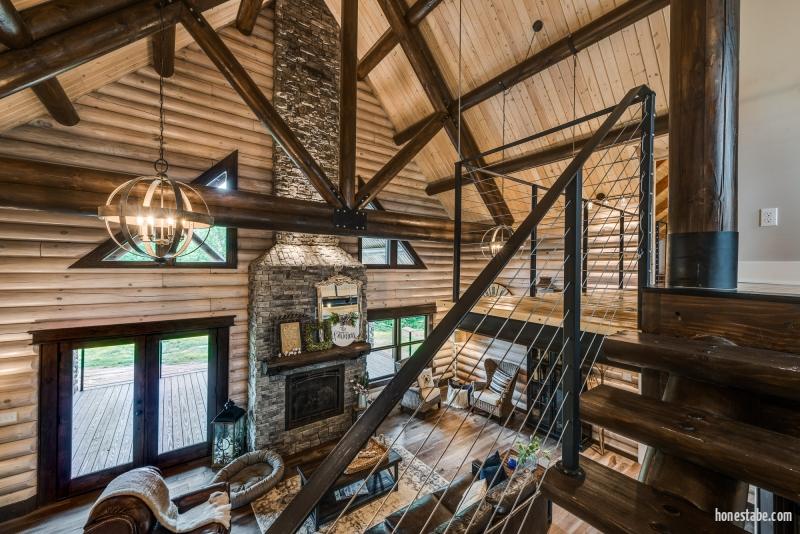
The inside of a home is where you do most of your living. As such, it’s important to take time to select the right interior stains and finishes for your log and timber home. You will achieve an interior that is visually pleasing and performs well for years when a proper stain is chosen.
Two Traits
When it comes to interior finishes, there are two phenomena that homeowners tend to overlook.
1. Surprising surface area. Interior walls and ceilings dramatically increase the amount of surface area that requires treatment. Generally there is about twice as much stainable surface on the interior than the exterior. You’ll be looking at the results of your interior stain for years to come throughout your entire home, so choose wisely.
2. Choices, choices, and more choices! During a new build, homeowners are faced with hundreds of decision points along the way, often with details unfamiliar to them. It’s common for homeowners to ask the general contractor (GC) for advice. Many GCs typically recommend a “safe” off-white color, but that doesn’t always translate well with the natural logs in a cabin. A GC wants to stay on schedule, but selecting your interior stain takes a little time. You can’t easily undo stain.

What’s Your Color?
When selecting the perfect interior stain for your log home, consider how you use your space and the atmosphere you want to create. Is your home filled with natural light? Do you lean towards cozy dark walls with a lighter ceiling, or do you prefer a bright and airy ambiance with lighter walls? Keep in mind that wood absorbs light, so a darker stain can make a room appear significantly darker than you might expect.
Next, think about the tint base. Do you favor shades of brown, red, gray, or perhaps a bleached look? Wood stain trends come and go, so it’s essential to explore your options and choose a tint that you’ll love for years to come. Remember, it’s easier to darken a light stain than to lighten a dark one.
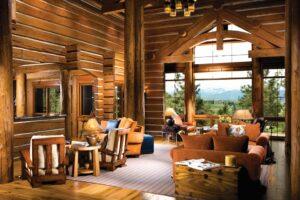
Distinct Needs
Not all interior wood is the same. Logs and heavy timbers are not like the wood of cabinets, moldings, and furniture. These smaller wood products are usually sprayed with nitrocellulose lacquer to protect them through a hard, shiny finish. Unlike cabinets, tables and trim, larger timbers and logs are more dynamic. If you try and put a similar lacquer on your interior log walls, the finish will crack and peel as these larger pieces of wood naturally contract and expand. A specialized finish for logs will ensure the interior looks the best for years to come.
Some homeowners wonder if the interior can go “au naturel” and keep the wood plain with no stain or topcoat. While interior logs may not be subjected to the same elements as their external counterparts, unfinished logs and timbers will absorb cooking oil and odors and collect dust, handprints, and water stains if not protected. Have you ever run your hand across rough-cut wood? The roughness of the wood is not very pleasant to feel. All those little crags and jags on the surface need to be covered in a light film; one that’s strong enough to be wiped down and protect the wood while remaining flexible enough to not crack as the log expands, shifts, and contracts over time.
Choose a stain that’s designed for the demands of a log home interior. Exterior stains contain higher levels of biocides and preservatives that you don’t need or want inside your home, especially where you’re eating and sleeping. This is also why you want to avoid an oil-based stain. Oil-based products have high levels of volatile organic compounds (VOCs), which are extremely unhealthy in enclosed spaces.

Smart & Attractive
Start with a stain that gives you the aesthetic and exact level of transparency you desire. Here at Perma-Chink Systems, we recommend using one of our Lifeline Interior stains, which come in a wide array of tones, including clear. After staining, add one or two clear coats of interior finish; Lifeline Acrylic or Sure Shine, a water-based poly finish. Both add enough film to protect your logs and minimize the roughness of logs so they can be easily wiped and cleaned. Lifeline Acrylic and Sure Shine come in gloss or satin. Sure Shine is strong enough to withstand foot traffic, and an excellent alternative to wood floors than smelly and caustic oil-based floor coatings.
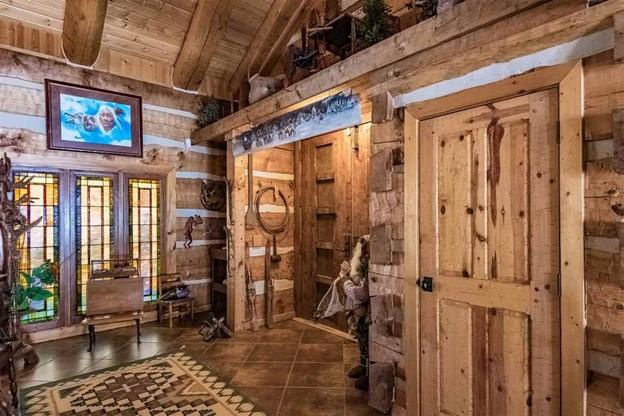
These stains also contain the right amount of UV protection to avoid “picture framing.” Picture framing is the shadowy discoloration that remains on the wall when you move a bookshelf or a picture. After all, your stain should let you redecorate your log home whenever you want! Perma-Chink interior stains and finishes will ensure that the inside of your log home is just as breathtaking and gorgeous as the outside.
To order free color samples, visit our online store here or call us to discuss custom colors at 1-800-548-3554.
What Makes A Topcoat Different?
There is a common thought out there that believe topcoats are just the regular finish without color added. However, our topcoats are completely different than our finishes because they do different things.
Lifeline Acrylic Gloss and Satin (G/S) and Sure Shine™ Gloss and Satin are totally different formulations than Lifeline Interior or any other finish. Lifeline Interior, Lifeline Accents, and Prelude™ contain a polymer system that offer some distinct adhesion advantages when applied to bare wood. Topcoats are designed to envelope those finishes, protecting the color and wood from environmental damage and everyday living.
Why Do I Need An Interior Topcoat?
When left exposed without a topcoat, interior finishes are more susceptible to dirt pick-up that may not be easily cleaned off. When topcoated with Acrylic G/S or Sure Shine G/S, the finish surfaces become much more impervious to dirt pick-up. The wood surface becomes more slick and smooth, enabling them to be kept clean with much less effort. And as mentioned earlier, the topcoat protects the finish from abrasions, dirt, water, and more. The bottom line is that Lifeline Interior, Lifeline Accents or Prelude are highly recommended to be topcoated with either Acrylic G/S or Sure Shine G/S to get the maximum protection for your log or timber home interior.
When Can I Apply A Topcoat?
The best time to apply a topcoat is when your log home has dry or seasoned logs. Whenever a house is over one or two years old, or you are sure your logs are dry, be sure to obtain samples of both Acrylic G/S and Sure Shine G/S. If Acrylic G/S does not result in the smooth, slick surface that you desire, try Sure Shine G/S. Sure Shine G/S is a water-based acrylic-urethane that builds depth and luster with fewer coats. However, polyurethane films are less breathable, so we do not recommend their use on logs that have not fully seasoned. If your home is finished in Acrylic, in the future Sure Shine G/S can always be applied over the Acrylic G/S if you want an exceptionally smooth, deep finish on your interior walls.
Can I Topcoat Over Bare Wood?
What if you don’t want a pigmented stain on your interior wood? Do you need to apply Prelude or Lifeline Interior Clear before applying Sure Shine G/S or Acrylic G/S? From a technical and performance standpoint, it does not matter which one you choose, although Prelude does include an additive called UV Boost that will help prevent the picture frame effect that occurs over time. Although UV Boost can be added to Interior Clear, Acrylic G/S and Sure Shine G/S, most people prefer not to spend more money than they need to, and using Prelude as a primer on bare interior wood will significantly decrease the amount of more expensive Acrylic G/S or Sure Shine G/S you will require.
How Can I Get Lifeline Acrylic or Sure Shine?
We’re glad you asked! You can order online at Store.PermaChink.com or call us at 1-800-548-3554. We’ll be happy to help get your started on protecting your home.
In loving memory of our late president Rich Dunstan.
In The Beginning
In 1980 my neighbor told me about building a log home in Eastern Washington. He said that he loved the home and the lifestyle but was disappointed wind constantly blew and cold, harsh winters meant there was no real effective way to seal the gaps between the logs. The house leaked air and heat and wind-driven rain came right through the walls.
He tried various caulking materials with little success. Caulking around a bathtub or sink was significantly different from ‘caulking’ literally miles of seams between logs in a log house. After a number of conversations and experiments, we discovered there was no readily available product that could seal the gaps, look like authentic chinking, and last more than a few months.
After months of trial and error it became apparent that if we were going to design a material that would be acceptable to our criteria, we would have to design it ourselves.
The product we were designing was to be a replacement for what was known in the Log Home Industry as “chinking” – the sealant that historically provided the seal between the logs. A chink is a gap – as in Biblical Times, “A chink in his armor’. Therefore, chinking is a material to fill a gap. Throughout the centuries of constructing dwellings out of logs, numerous methods were used to seal in between them. Early builders used pretty much anything they could get their hands on to seal the gaps – mud, straw and mud, cow manure, or mixtures of cement and mortar.
The Criteria For Crafting The Perfect Chinking
During our investigation we determined that in order to be a true solution, the sealant must meet the most important requirements:
- It had to be textured to look like authentic mortar chinking.
- It had to “look like it belonged there.”
- It had to be able to expand and contract to follow perpetual log movement. As logs dry out in the summer, they shrink in diameter – in the winter or rainy months they absorb moisture and swell, increasing in diameter.
- It had to adhere tightly to the logs and form a continuous, watertight seal that doesn’t separate from the wood.
- It had to be easy to apply in gaps up to 4 or 5 inches and not slump or wash out.
- And most importantly, it had to LAST for decades.
Common caulking materials were quickly ruled out. Everyone has seen thin caulking beads applied to exterior trim that invariably separate, peel off, flake, crack, and ultimately fail. No caulk could adhere to the wood well enough and could not be applied to the thickness and height required without slumping and running out of the joint. And all caulks had that smooth, artificial look that frankly looked like caulk! Okay for around the tub or sink, but not for my log home, thank you.
So, after months of experimentation and learning a tremendous amount of chemistry about polymers (the chemical building blocks of literally everything that we commonly call paint, plastic, vinyl, glue, etc.), we designed a unique sealant that met all the requirements.
During the design phase we located an innovative small company south of Seattle that manufactured synthetic stucco. They had the experience and the machinery that helped us scale up lab designs to large scale production. We began selling early product in 1981 and the first house we did was in Sun Valley, Idaho – in the middle of winter.
Going To Market
Soon after, we had a saleable product that met EVERY design requirement. I did a little market research and discovered that the largest part of the national log home market was in the eastern United States, particularly the Southeast. I also discovered that of the numerous styles of log homes, the three largest manufactures of dovetail-designed log homes were within 100 miles of Knoxville, Tennessee. I liked the dovetail design because of the nature of the structure, and the way the logs are stacked resulted in a chinking gap of up to 4 inches! In some cases, almost 25% of the wall area was chinking!
So, we set up a manufacturing plant in Knoxville. The timing was right because as soon as log home owners and manufacturers discovered that we could finally provide a dramatically better solution to one of the most significant and perplexing aspects of a log home – the business grew rapidly.

Solving Manufacturer’s Greatest Construction Need
Early adopters such as Hearthstone, Honest Abe, Stone Mill, and Appalachian Log Homes helped pave the way for essentially all others to follow. As a matter of fact, one of the earliest applications for any Manufacturer was Appalachian. Turns out they had a contract with the US Forest Service to build an outhouse. The location was remote, and the house needed to be completely assembled and transported via helicopter. Obviously, mortar chinking could not withstand that type of stress, so they tried Perma-Chink. That outhouse is still standing today and is weather tight – some applications simply CANNOT fail!
The development of synthetic chinking solved one of the most serious and vexing aspects of the log home industry. The chinking formulation is unique and specifically designed for log homes, and not simply ‘caulk with sand in it’ as others have offered.

George Washington’s Farm log cabin restored with Perma-Chink Systems log home sealants and stains.
Rick Denton, Honest Abe Log Homes President Emeritus said “Perhaps the invention of Perma-Chink kept Honest Abe in business, as well as every other log home company using a chinked product line.” Read his story here:https://www.honestabe.com/blog/perma-chink/
A Great Success From Fantastic Partners & Customers
What started out as an idea has literally revolutionized the entire industry. Worldwide, most log structures use synthetic chinking, and the largest supplier of the most authentic and highest-performing log home chinking is Perma-Chink.
We used the knowledge and expertise we developed in formulating Perma-Chink Chinking (remember the polymers?) to design the longest-lasting semi-transparent stain in the industry. The formulation is also unique, providing a ‘furniture grade’ appearance that outlasts any exterior stain on the market.
As history has shown, and something we take pride in, whenever a log home owner becomes aware of a concern, whether it be sealing, staining, or preservation or maintenance, we already have a solution.
Driven to Exceed Now & In The Future
We are humbled that Perma-Chink Systems has become the household name in the log home industry and is recognized for its high quality. Our products grace the log homes of such noted Americans as former President Jimmy Carter, clothing designer Ralph Lauren, movie star Tom Cruise, Olympic champion figure skater Kristi Yamaguchi, NASCAR champion Dale Earnhardt (read the story here) and thousands of great American homeowners.
Perma-Chink Systems has a slogan – “Simply Unmatched”. By crafting the best quality products and engaging in providing the best customer service, we will attain our goals and make great strides towards exceeding our customers’ expectations for years to come. To be “Simply Unmatched.”
Homeowners ask this question a lot, to make sure the home looks like how they imagine. The answer to this question depends mainly on which sealant is used and how you want your home to look.
Sealant Choice
If you’re using Perma-Chink chinking, we recommend staining your home first with a Lifeline stain of your choice, then seal the log gaps with Perma-Chink, and finish with Lifeline Advance Topcoat. The application of Advance will make the home easier to clean (recommended two times per year with Log Wash).
If you’re using Energy Seal or Woodsman, and you don’t want log gaps or the sealant to be noticeable, we recommend applying the sealant first, then apply your choice of Lifeline stain and topcoat. For the least visible Energy Seal lines, select a color that is a shade lighter than the stain color. If you like the aesthetics of visible lines, you can apply Energy Seal after the application of a Lifeline stain and before Lifeline Advance.
What If I’m just applying a new coat of Lifeline? Do I need to redo my chinking?
If you’re just applying a maintenance coat, or just want a new color for your home, you do not have to rip out your old chinking. You can either mask off the current chinking before staining, or you can use our Chink Paint to refresh the color after staining.
What about when to seal checks?
Another issue you will have is with upward-facing checks. These are the cracks in the wood that end up collecting water and lead to log deterioration. We offer Check Mate 2, a highly flexible sealant that will create a seal in the check, preventing water from entering the log. Checks can appear at any time as the logs age, it’s a natural occurrence.
If your logs have checks before you stain and seal your home, seal the checks now. Check Mate 2 will accept stain. Just make sure you select a Check Mate 2 color one shade lighter before staining.
Final Answer
The order which you apply stains and sealants varies on what you’re currently working with. For the best performance, we recommend stain first, seal second, and apply Advance Topcoat third. This will provide the best protection for your home.
You can read more about applying sealants in our Sealants Guide PDF.
Curious to Know What Makes Your Log Home Exterior Different From the Rest?
Perma-Chink Systems is dedicated to exceeding expectations, ensuring that our products reflect both our commitment to quality and our responsibility to the community. That’s why we go the extra mile to ensure our wood stains and finishes are crafted from the most environmentally friendly materials available. Our commitment to sustainability doesn’t just stop there—our products also deliver a refined, furniture-like finish that enhances the beauty of your wood. But unlike the furniture coatings, our finishes are designed to breathe to let the moisture evaporate from your logs.
LIFELINE stains and finishes from Perma-Chink Systems stand out for several reasons:
- Waterborne Formulation: Lifeline products are water-based, making them environmentally friendly and easy to clean up with soap and water.
- Breathability and Flexibility: These finishes form a breathable, elastic barrier that allows the wood to expand and contract with changing weather conditions, reducing the risk of cracking and peeling.
- UV Protection: Lifeline stains contain high-performance pigments and UV inhibitors that protect the wood from sun damage while highlighting its natural grain.
- Durability: The finishes are designed to be long-lasting, requiring minimal maintenance.
- Aesthetic Appeal: Lifeline stains enhance the natural beauty of the wood, providing a rich, vibrant finish that highlights the grain and texture.
- Safety: These products release no toxic fumes and are not flammable, making them safer to use.
- Ease of Application: Lifeline finishes are easy to apply and can be used over existing water-based stains, provided the surface is in good condition.
- Easy Maintenance: Lowest maintenance of any exterior wood finish.
LIFELINE stains are a top choice for log homes and wooden structures, blending protection with stunning aesthetics. One of the key considerations for log and timber homeowners is selecting the right stain color. While many stains may look impressive immediately after application, the real test is whether they retain their beauty over time.
With LIFELINE, you’re choosing a high-performance finish that maintains its vibrant appearance long after application. Engineered with cutting-edge technology, LIFELINEis the most advanced wood stain available for log and timber homes in the world.
Request your free sample today and see for yourself how LIFELINE can preserve the beauty of your home, even as the seasons change. Order free samples by calling your local store at 1-800-548-3554 or order from our online store here.
John Ricketson
Project Manager – Hearthstone, Inc.
www.hearthstonegeorgia.com
At every trade show, I get asked the same question: How long does Perma-Chink last? My answer has always been “I don’t know, we’ve only been using it for 37 years”[ed. note – as of 2019]. I built my log home in 1988 and used Tan Perma-Chink with Dark Honey Lifeline EX stain because I wanted a combination that was not too much of a contrast and the results were exactly what I had intended. The home has weathered and aged over the 32 years and I have re-stained it a couple of times, the last time being 8 years ago. The East side and North side required very little maintenance then, just a light cleaning with Log Wash and a renewal coat of Lifeline Advance. The South and West sides required a little more effort after cleaning due to exposure to weather and the sun. A refresher coat of Lifeline EX and Lifeline Advance Satin on the logs, gable end siding, and roof fascia got it to looking like new again.
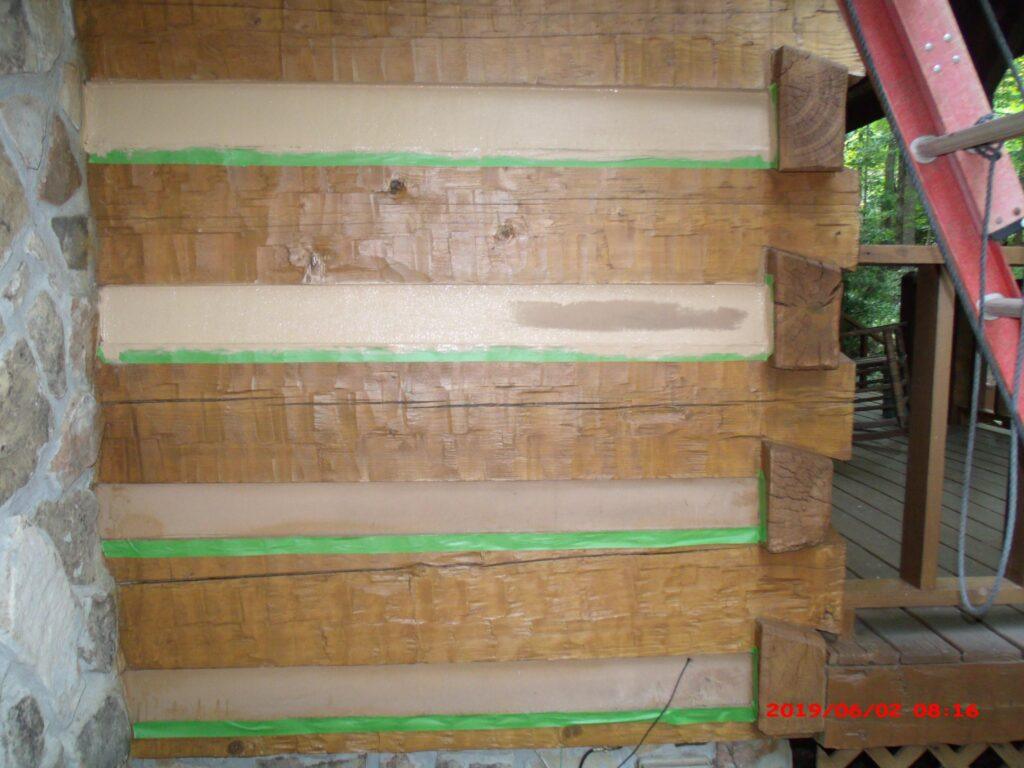
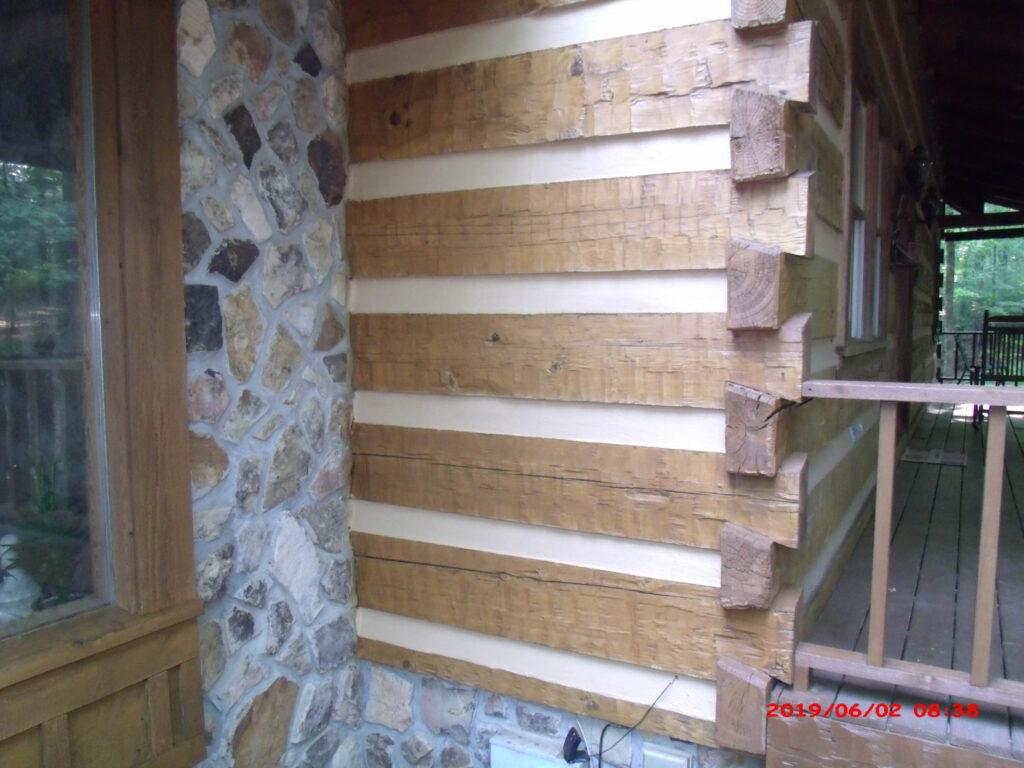
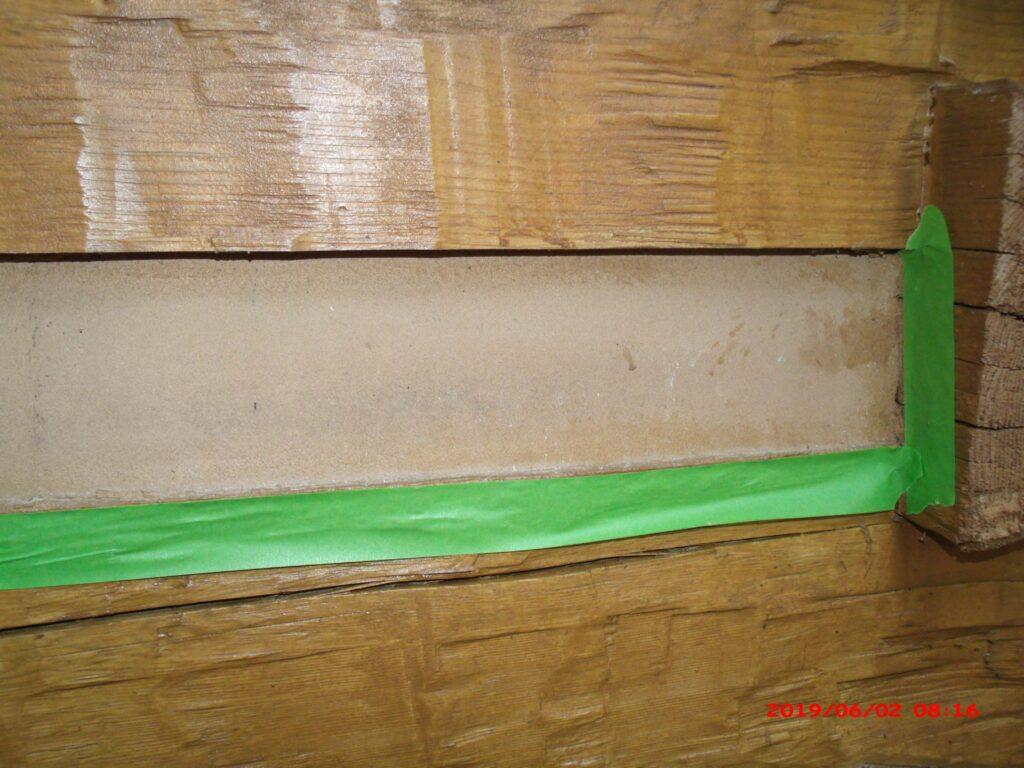
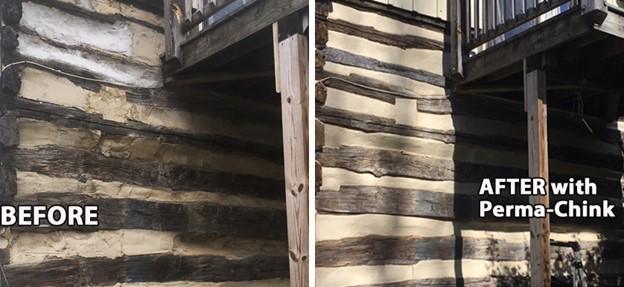
So, after 31 years, I took a close look at a log wall that has been exposed on the Southwest side, where it get as much abuse from the elements as possible, and here is what I found: Out of eight horizontal runs of Perma-Chink, only one showed any indication of age. This was course number 5 and is the one directly under the 32′ tie log that runs above the fireplace, where the interaction of the stonework to the log wall can sometimes cause the log to ‘hang up’ and not fully settle. This was confirmed by looking at the dovetail corner notch, where there had been some separation. Even though Energy Seal was not yet available, the caulking originally used there was still in good shape and there was no danger of air or water infiltration on the dovetail notch that sloped away from the home. Even with all of that, the Perma-Chink separation was less than 1/16th of an inch, and in that one run only, the other seven runs were still providing a perfect airtight and watertight seal.
The surface seemed to be slightly faded, so I got out my Frog tape and taped the lower edges of the chink spaces (because I am not as meticulous with a brush as most people) and proceeded to refresh the surface of the chinking with Chink Paint. Twenty minutes later, the surface on that wall was like new and I am looking forward to answering the question again at the next trade show with: “I don’t know, we’ve only been using it for 37 years and if you want to refresh the color or change the color, a little Chink Paint will quickly get your home as good as new.”
Why Perma-Chink Sealants Are the Best Choice for Your Log Home
Sealants play an essential role in our daily lives, from the windshield of your car to the bathtub, and even your windows. They keep water out, prevent air leaks, and ensure your home stays comfortable and protected. But not all sealants are created equal, and when it comes to log homes, the right sealant can make all the difference.
Everyday Examples of Sealants
You may not realize it, but sealants are all around us:
- The windshield of your car is held in place with a sealant to keep water out.
- There’s a bead of sealant around your bathtub to prevent water from seeping behind tiles.
- Your windows are sealed with a special material to stop cold air, rain, and drafts from entering your home.
If you take a close look, you’ll notice that sealants vary in texture, flexibility, and performance. The best sealants are those that remain flexible and durable across a wide range of temperatures, sunlight, and environmental conditions. And this is where Perma-Chink Systems really shines.
Why Choose Perma-Chink Systems Sealants?
So, why do homeowners choose Perma-Chink Systems sealants for their log homes? Here are three key reasons:
- Keep the Elements Out: First and foremost, Perma-Chink sealants provide a reliable barrier that keeps water, air, and insects where they belong—outside your home.
- Attractive Appearance: Our sealants are designed to blend seamlessly with the natural look of your log home, offering an attractive finish that complements your decor.
- Proven Performance: With a reputation for long-lasting durability and superior performance, Perma-Chink products are trusted by homeowners and professionals alike to deliver reliable, long-term protection.
Why Sealing a Log Home Is Different
Sealing a log home presents unique challenges. Logs are naturally irregular, and when stacked on top of each other, gaps can form between the logs or around window and door frames. These gaps allow cold air, water, and even bugs to infiltrate your home. That’s where Energy Seal® comes in.
Energy Seal: The Ideal Solution for Log Homes
Energy Seal is a textured, acrylic polymer sealant specifically designed for log homes. It provides a flexible, durable seal that adapts to the natural movement of logs as they expand, contract, and shift with changing weather conditions. Here’s why Energy Seal stands out:
- Flexibility: Energy Seal’s flexibility allows it to maintain a tight seal as logs twist, turn, and shift with the seasons, ensuring that gaps don’t reopen over time.
- Water & Air Tight: It creates a resilient, water- and air-tight barrier, preventing moisture infiltration and keeping drafts at bay.
- Texture for a Natural Look: The textured surface of Energy Seal serves two purposes:
- Flat, Non-Shiny Finish: Once cured, Energy Seal doesn’t have the shiny, artificial look of typical caulking. Instead, it achieves a natural, matte finish that blends seamlessly with your logs and stain.
- Better Stain Adhesion: The textured surface also allows Energy Seal to accept stain more effectively, ensuring it blends in and virtually disappears when you stain your log walls.
Pro Tip: Staining Over Energy Seal
If you plan to stain over Energy Seal, here’s a helpful tip: choose a stain that’s slightly lighter than the color you intend to use for your logs. It’s easier to cover light-colored Energy Seal with a darker stain than it is to cover darker sealant with a lighter one.
Seal in Comfort, Save on Energy
By sealing your log home with Energy Seal, you’re ensuring long-lasting protection against the elements while also boosting your home’s energy efficiency. Don’t let gaps and cracks waste your energy and money—choose Perma-Chink Systems sealants for the best in performance, durability, and aesthetics.
Let us help you keep your home snug and energy-efficient this winter.
The RHEOLOGY of Perma-Chink
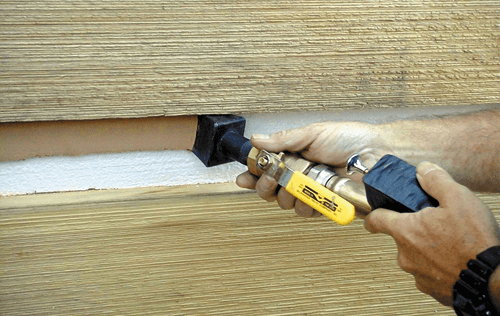
Theoretical aspects of rheology – a branch of physics – deal with understanding the relation of the flow and deformation behavior of material and its internal structure.
The rheology additives in Perma-Chink help ensure that the polymer properties meet specifications for the end use (texture, product film properties) and product quality.
Rheological properties of Perma-Chink
- Greatly improved low shear (as in standing after application) results in high viscosity to prevent slumping
- High shear (as in pumping ) decreases viscosity to make the product easier to apply and tool.
Tips On Applying Perma-Chink
Some people think that Perma-Chink sealant is just like any other caulking product on the market, so they apply and finish it with the same methods. Typically, silicone caulking can be smoothed just by running a damp finger along the bead of caulking. Using that method with Perma-Chink will give you less than desirable results. To get a smooth, clean finish with Perma-Chink, spray the sealant liberally with water then tool it with a metal spatula or similar. It may seem counter-intuitive to apply water to smooth it, but it’s the best method. Unlike smooth caulking, the texture in Perma-Chink (and Energy Seal) needs more water to maintain a smooth finish. And it’ll be much, much easier.
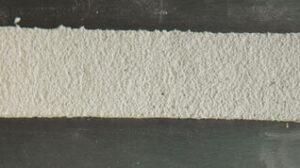
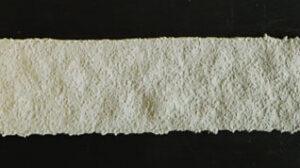
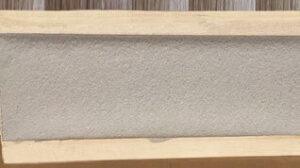
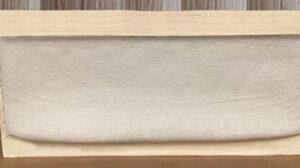
*Substrate conditions such as substrate outgassing, volatiles in the wood and backing materials can contribute to formation of blisters.
Want to learn how to apply log home chinking? Download our Sealants Application Guide here.
MOBILE LOG CABINS (or PLUG & PLAY TRADITIONAL LOG HOME)
By Dan Waring, British Log Cabins
Mobile homes…Traditionally an ugly metal box, BLC have taken the parameters defining the mobile home and delivered a beautiful alternative LOG CABIN!
Developed in response to an increase in the popularity of ‘Log Cabin Holidays’ our Mobile Log Homes include everything. The entire building is prefabricated off site in our log building yard on a specially designed rolling chassis.

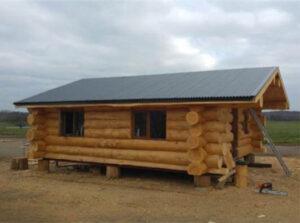
The building comes complete including a kitchenette, bathroom suite, LPG boiler, radiators, log burner and all internal finishes.

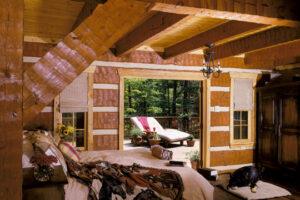
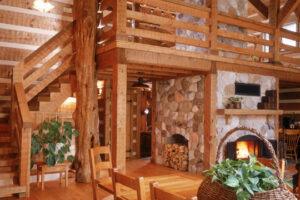
All that is required on site is a concrete slab and waste and water connections – they really are a plug and play, traditional log home!.


Log building as a construction method and art form has been around for centuries. It’s origins were in Eastern Europe and Scandinavia. As a trade it has a long established history. The often romanticized vision of a cozy, traditional log cabin in a holiday area is now a reality.

As a mobile home, The Nook is not only completed to a very high standard in both design and construction and very well insulated but it is also VAT free. The mobile home is delivered in two halves and re-joined on site. This reduces the impact of onsite construction works.
If you want a mobile home log cabin within your garden to be used as an extra room in addition to the main house then you will not need planning permission unless you live in a conservation area.
Mobile cabins are a great idea if you are thinking of starting or expanding a holiday business . The cabins are of high quality, and provide a wow factor that normal static caravans do not.
To find out more about The Nook, visit British Log Cabins website https://www.britishlogcabins.com/mobile-log-cabins

