Library
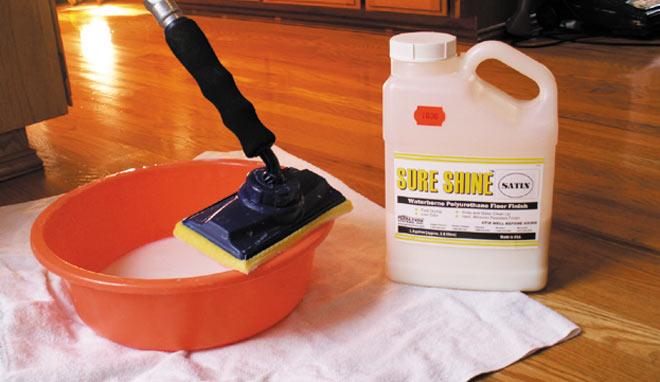
Sure Shine™ Gloss or Satin is a water-based, urethane-acrylic, interior clear finish for application on both horizontal and vertical surfaces; however, the application of a urethane-acrylic finishes is a bit different than those based on acrylic latex polymers. For example, our pigmented Lifeline™ stains and Advance and Acrylic Topcoats should be thoroughly mixed and brushed out as far as they will go. This may include vigorous back-brushing. However, this technique does not work when applying Sure Shine and its proper application is a bit different than any of our other finish systems.
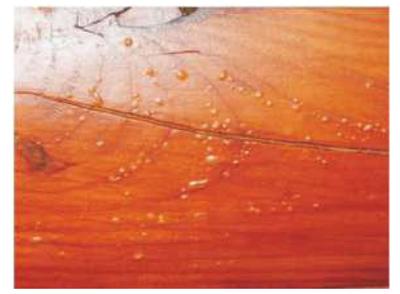
Being a urethane-acrylic hybrid, Sure Shine is very susceptible to air entrapment. That’s why the label states to gently stir Sure Shine using a paint paddle or stick and not to shake or agitate the container as this creates foam that may result in air bubbles within the finish. Vigorously brushing Sure Shine will also entrap air resulting in a rough surface with lots of visible air bubbles.
For best results, Sure Shine should be applied with a good quality brush or pad using slow strokes. It can also be applied with a High Volume Low Pressure (HVLP) sprayer, but only spray small areas at a time and slowly back-brush. Since Sure Shine dries fairly rapidly, back-brushing must be accomplished within a couple of minutes of application. If it begins to dry, back-brushing will leave striations in the finish that will have to be sanded out if a smooth surface is desired.
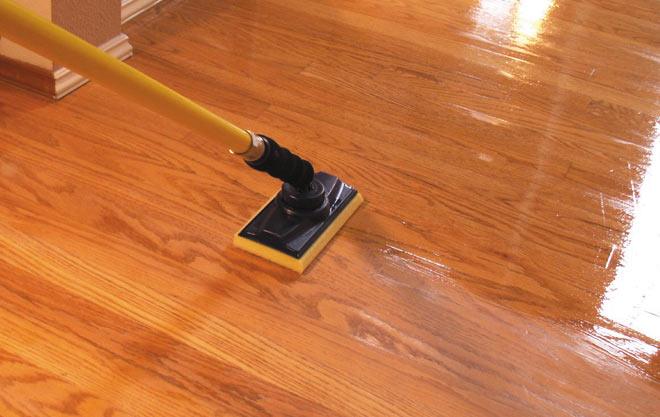
Another application tip about Sure Shine relates to sanding. Typically, the application of a water-based finish directly to wood has a tendency to raise the wood grain; therefore, the first coat of Sure Shine may not be completely smooth. Allow Sure Shine to dry for 1-2 hours before sanding is attempted. Lightly sanding with sandpaper (180 grit or higher) or a buffing brush to remove all of the small bumps, ridges, and other imperfections. If the film is just the slightest bit soft, sanding will generate little pills of finish and make a mess of the surface. Once the first coat is sanded smooth, subsequent coats of Sure Shine can be applied without sanding between coats.
If you want a smooth, deep lustrous finish on your interior wood surfaces, Sure Shine is hard to beat. And remember that Sure Shine can be applied over any of our interior finishes including Lifeline Acrylic Gloss and Satin.
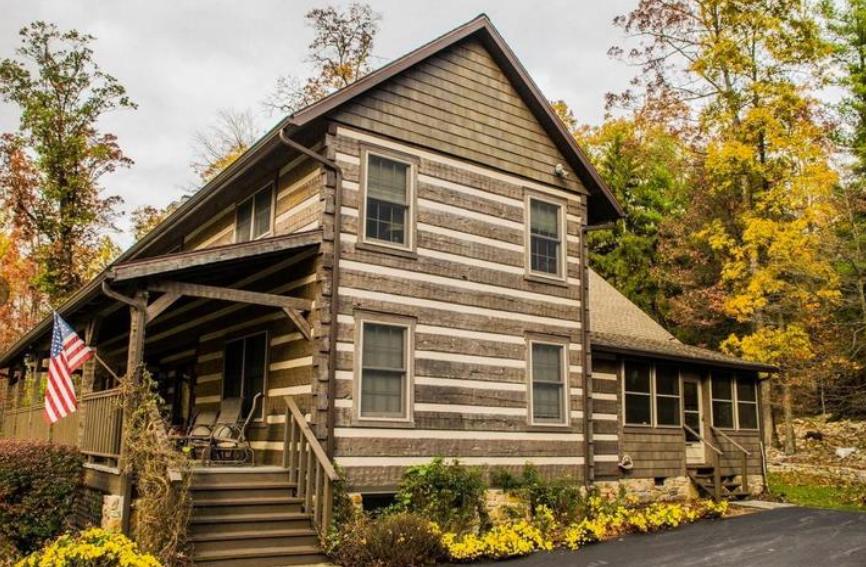
Have you ever considered the impact that landscaping can have on the well being and beauty of your log home? Let’s look at some things around your home that can significantly affect its health.
Trees
In summer months trees located close to your home can help provide shade which may lower your air conditioning costs. But if any branches are touching your roof they can provide pathways for insects and rodents to enter your attic and eventually your living space. It’s best to keep tree branches at least three (3) feet away from your walls and roof. This distance will discourage creatures like gray squirrels and roof rats from investigating your attic and help prevent carpenter ants from taking up residence inside your home.
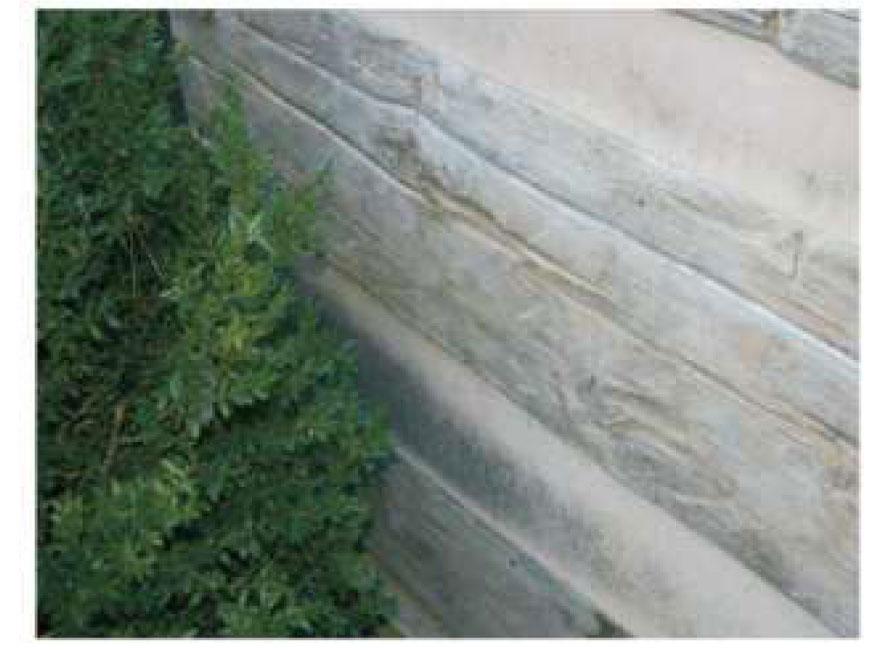
Shrubs and Hedges
The next things to consider are shrubs and hedges planted next to your foundation. Over the years you’ve probably let them grow too large, and they may be getting close to your log walls, or even worse, actually touching the logs. In addition to keeping the logs damp, shrubs and hedges can actually wear the finish right off of the wood. You need to trim them back, if for no other reason than they are hiding the beauty of your home. There should be at least two (2) feet of clear space between any plants and shrubs and your foundation or log wall. This allows air to flow over the logs which helps keep them dry and free from insects, mold, algae and decay.
Plants and Grass
It’s quite common to see plants and grass planted right up against foundation walls. Even though they may not be in contact with the logs, they still provide a lot of moisture to the surrounding area and water is the enemy of wood.
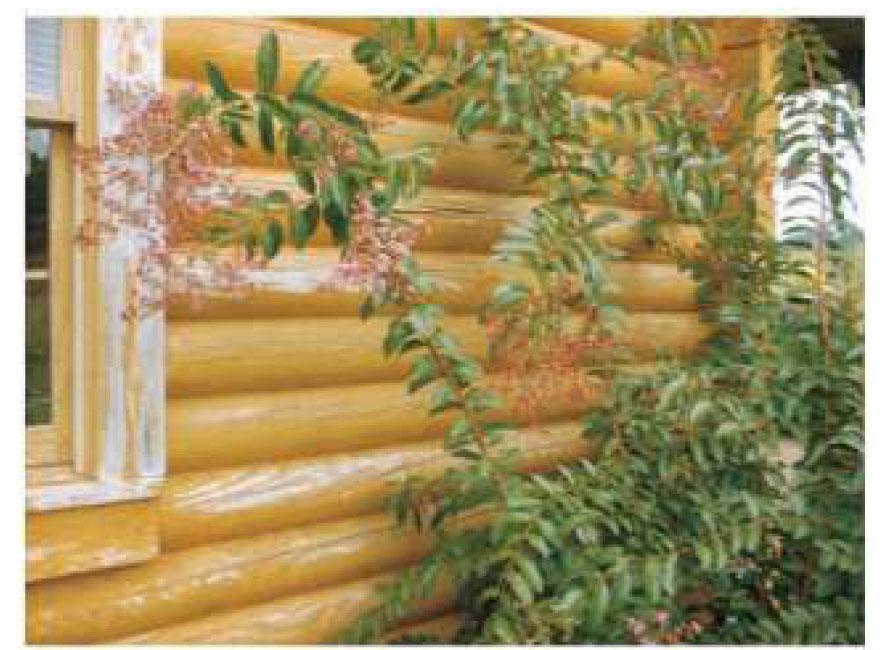
Mulch
If you have flower beds around your home you probably use some type of mulch to keep the weeds down. The most commonly used types of mulch are shredded wood or bark, bark nuggets, or pine straw. All of these types of organic mulch materials attract a wide variety of insects including termites as well as wood decay fungi. In addition, over the years the decayed mulch builds up bringing the soil level closer and closer to the bottom course of logs.

Fall Landscaping Tips
To prepare for fall and winter seasons, here is a checklist to make sure your home and yard looks great. Here are our recommendations regarding landscaping around log homes:
1. There should never be any plant life growing within two (2) feet of the foundation, log, or siding wall. Any existing plants or branches within the two-foot zone should be removed or cut back.
2. The best way to maintain an adequate clear space between your landscaping and home is to lay down a two to three foot wide band of landscaping fabric or perforated plastic around the base of your foundation and cover it with two to three inches of river pebbles or crushed stone (not wood or bark mulch). This will help keep the foundation area dry and you will be surprised how it will reduce the number of bugs you’ll see inside your home.
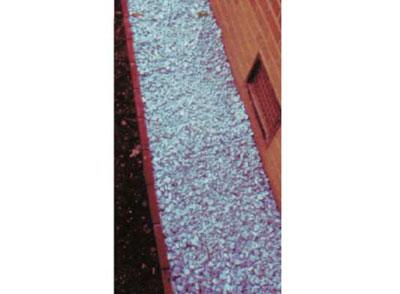
3. Make sure that your sprinkler heads are not spraying water onto the logs or foundation walls.
4. Take care of your lawn by overseeding, applying fall-specific fertilizer and weed control, and don’t forget to water your lawn (for areas where there’s no rain or snow).
5. Prune and trim trees and shrubs. Since blooms are done for the year, now is the time to cut them down.
6. Don’t forget to winterize sprinkler systems and related items. Don’t forget about outside water timers, too (I may or may not have experience forgetting to bring my timer inside one winter, and it may or may not have frozen and failed).
7. Plant trees, shrubs, and bulbs in October. This allows them to acclimate to their new home without the stress of a hot summer.
8. Rake leaves and clean-up other debris, composting what you can.
9. Place mulch around newly planted trees, but away from the trunk as this invites pests.
PCS Clear Shield™ Gloss or Matte is a water-based, acrylic latex, interior clear finish for application on both horizontal and vertical surfaces; however, the application of PCS Clear Shield™ is a bit different than our pigmented Lifeline™ stains, and topcoats. Whereas our stains and topcoats should be thoroughly mixed and brushed out as far as they will go, this does not work when applying Clear Shield.
PCS Clear Shield is highly susceptible to air entrapment. That is why the label states to gently stir it using a paint paddle or stick and not to shake or agitate the container as this creates foam that will result in air bubbles within the finish. Vigorously brushing PCS Clear Shield will also entrap air in the finish. For the best results, PCS Clear Shield should be applied with a quality brush or pad using slow strokes.
Another application tip about PCS Clear Shield relates to sanding. Typically, the application of a water-based finish directly to wood tends to raise the wood grain; therefore, the first coat of PCS Clear Shield may not be completely smooth. Allow the first coat of Clear Shield to completely dry before sanding is attempted. It should be dry in approximately 1-2 hours. Lightly sand with sandpaper (180 grit or higher) or a buffing brush to remove the small bumps, ridges, and other imperfections. If the film is just the slightest bit soft, sanding will generate little pills of finish and make a mess of the surface. Once the first coat is sanded smooth, subsequent coats of PCS Clear Shield can be applied without sanding between coats.
Final Note, do not apply PCS Clear Shield to freshly milled lumber as this can result in cracking of the finish as the lumber dries.
If you want a smooth, deep lustrous finish on your interior wood surfaces, PCS Clear Shield is hard to beat. It can also be applied over any of our Interior finishes including Lifeline Acrylic™ Gloss and Satin.
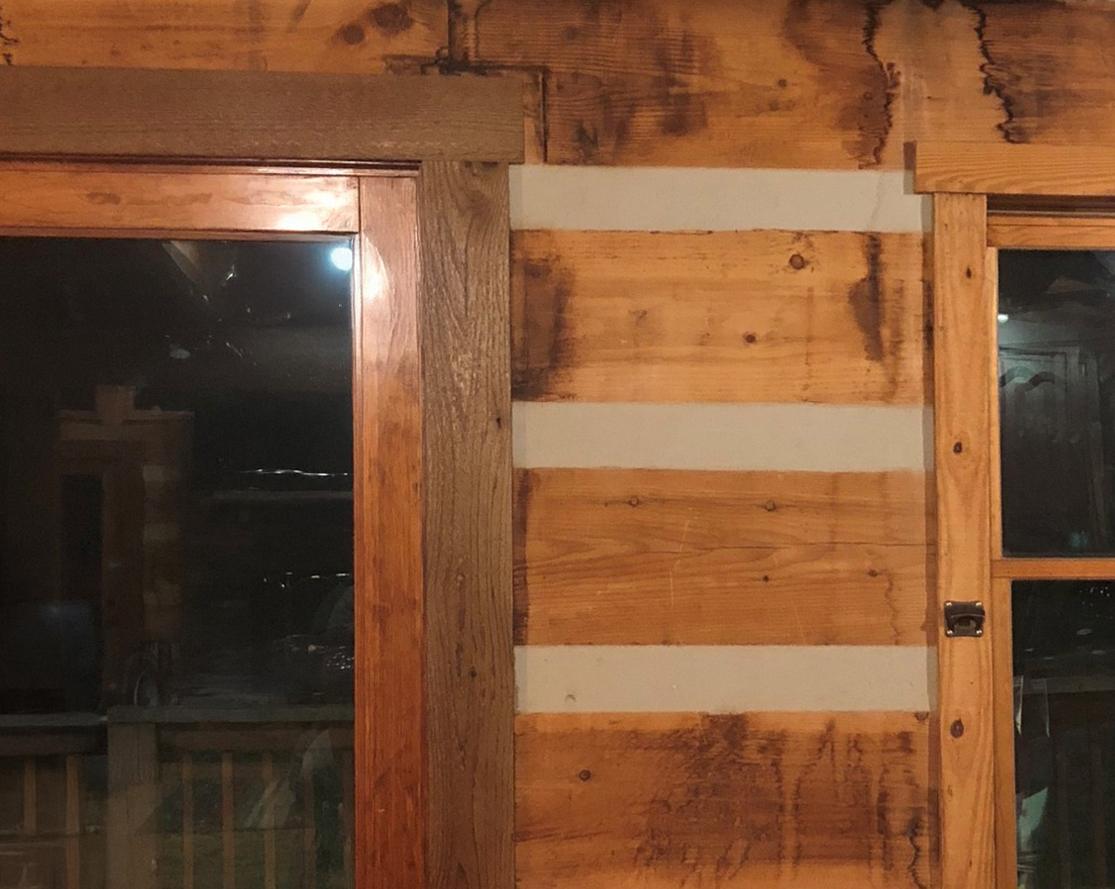
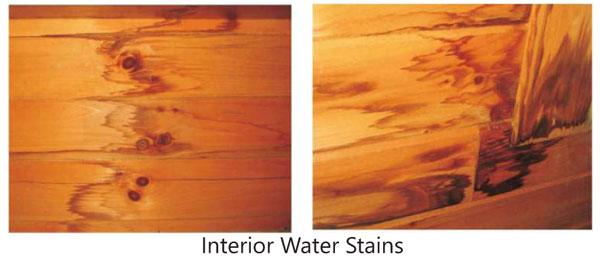
Some of the most challenging discolorations on log home walls, or any wood surface, are water stains. They can run the range from light brown to jet black, and can appear on both interior and exterior surfaces.
How do water stains form?
All wood contains a number of components that are grouped under the category of “water-soluble extractives.” In other words, they can dissolve in water and as the water within the wood evaporates, they can be carried along to the surface.
Generally, if wood is exposed to water for only a brief period of time, the water does not get a chance to penetrate deep into the wood and dissolve these water-soluble components. However, if the wood is exposed to water for days, weeks, or months, the water can pick up a high concentration of these components and deposit them on or near the surface of the wood.
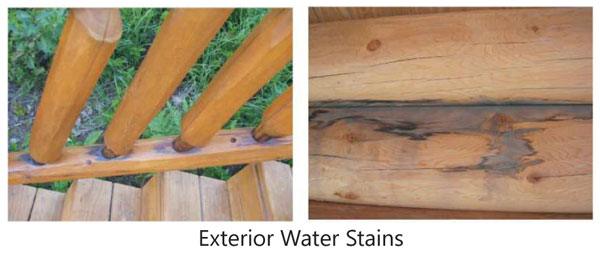
Exterior water stains typically occur around log checks, fissures, and other openings that collect rain water. The water soaks into the wood and as it evaporates out of the wood, it brings along the colored extractives which can then become visible on the surface. In some cases, water-soluble tannins may react with minute particles of steel on the surface, forming dark iron tannate stains.
This process may occur on bare wood or under an existing finish. Interior water stains typically develop during construction before the home is sealed or from an ongoing water leak. They can be particularly ugly and may cause a lot of distress.
Getting Rid of Water Stains
As previously stated, water stains can be just on the surface or they can go deep into the wood. The first step in determining a course of action is to find how deep the stain goes into the wood. Remove about a 1/16” thick sliver of the discolored surface with a sharp knife, and if the discoloration comes off with the sliver, the discoloration can usually be sanded off or treated with products like Log Wash™, Wood ReNew™, or Oxcon™.
Since there are a number of components involved with water stains it’s impossible to predict which product will work best. We recommend starting with Log Wash and if that does not work, move to Wood ReNew, and finally Oxcon.
The problem is that even these products don’t always work; sanding may be the only solution. If the discoloration goes deep into the wood, still visible after the sliver of wood is removed, it will be virtually impossible to either sand or chemically remove the water stain. In this case there are only two options: replace the discolored wood or hide the stains.
Hiding Water Stains
Although Perma-Chink Systems manufactures and sells transparent and semi-transparent finishes, some of our colors are fairly heavily pigmented which gives them some hiding power. On interior bare wood surfaces, Butternut is a good choice, since it is very close to the color of bare white pine. It may take several coats depending on the darkness of the discolorations.
If a colored stain is going to be applied later, it would be a good idea to apply Prelude™ over the entire wall once the water stains are hidden to even out the absorption of the stain and obtain a uniform final color. For hiding very dark discolorations, one or two coats of Kilz® primer will hide virtually anything. Kilz is available in both water and solvent-based formulations, but only comes in white. However, it can then be coated with our colored stains and although it may not result in an exact match with the rest of the wall, it will definitely look better than the dark, visible water discolorations.
The best way to hide exterior water stains is to use a dark-colored finish like Walnut, one of our gray-colored finishes, or our wheat-colored finish. If this is not to your liking, you can try using the same hiding procedures as stated for interior stains, but on exterior walls the opaque finished areas tend to be more pronounced than on interior surfaces.
If you live around trees, and many people do, you probably have carpenter ants around your home. Carpenter ants are typically large ants, although the size of the workers can vary in a single colony. Finding a few carpenter ants in your home each week is not necessarily a sign that you have an infestation. Foraging ants roam far and wide looking for food and an occasional ant trapped in a sink or bathtub is quite common. If there are trees close to your home, ants can fall or be blown off the trees onto your roof. They may end up trapped within your home during their journey back to their nest.
Carpenter ants do not eat wood. They get their name from their habit of hollowing out wood in order to make a suitable nesting site. In addition to wood, carpenter ants will happily nest in Styrofoam (EPS) panels and other types of insulation. A good indication of a carpenter ant infestation within a home is the presence of numerous foraging ants, especially in the kitchen or bathroom. Water attracts carpenter ants as much as food and moist wood around leaky pipes and drains provides an ideal environment for nesting ants. Another sign of an infestation is the presence of large winged ants in late spring and early summer.
Most carpenter ant colonies start outdoors in a tree cavity. After a few years, the colony grows and expands its foraging territory. If suitable conditions are found within a nearby home, satellite colonies can become established in voids, moist wood or foam panels within the home. These satellite colonies contain workers, older larvae, pupae, and when conditions are right, some winged reproductive ants. Once a satellite colony has become established within a structure the potential for additional satellite colonies dramatically increases.
Control of a carpenter ant infestation starts with a complete and thorough inspection. Useful inspection tools include a flashlight, a thin bladed screwdriver for probing the wood and a stethoscope, if you have one. Since carpenter ants are most active at night, the best time to perform an inspection is after dusk. Two things to keep in mind during your inspection, find the voids and follow the water. Although carpenter ants are usually found in wood, any dark, damp cavity can provide a suitable nesting site. Carpenter ants make a noise like crinkling cellophane as they move about and a stethoscope makes them much easier to hear and locate. Tapping a suspected nest site excites the ants and you should be able to hear their movement.
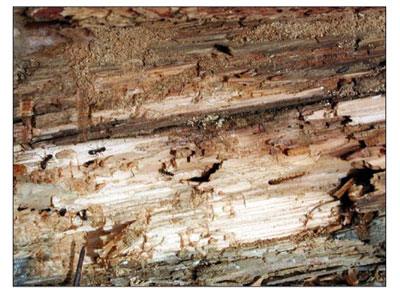
When carpenter ants burrow into wood they generate sawdust, or frass, that can pile up beneath the site of their activity. Carpenter ant frass looks like tiny wood shavings and will often contain bits and pieces of dead insects. Look closely at all of the wood directly above any frass piles for signs of any openings. Probing the wood with a thin bladed screwdriver can reveal hollowed out nesting sites.
In addition to food and a nesting site, carpenter ants require water. That’s one reason they prefer to nest in damp wood. A moisture meter is a great tool to have for discovering actual and potential carpenter ant nesting sites as well as finding decay prone areas. Some pretty good moisture meters can be found on eBay or Amazon.com for less than $30. A moisture reading of over 20% is an indication of some type of water problem that needs to be corrected.
Controlling Carpenter Ants
Correcting roof leaks, faulty plumbing, and water penetration into log walls are the most important steps for long-term carpenter ant control. Even after the leaks have been repaired, enough moisture may remain to sustain a carpenter ant infestation for many months. The application of a contact pesticide directly to the nest is not the best way to control carpenter ants. Most contact pesticides are highly repellent which causes the ants to scatter. This creates the potential for additional satellite colonies to become established in other areas of the home. In addition, contact pesticides do not impart any long term residual protection to the wood.
After a few months the carpenter ants may return to the site of their original nest. A better way to control a carpenter ant infestation is to treat the infested area and those areas subject to infestations with a borate such as Shell-Guard®, Shell-Guard RTU or Armor-Guard®. They are all effective pesticides for preventing carpenter ant infestations. Armor-Guard is best used as a dust in wall voids and other areas as preventative measure. Along with the use of a borate, you can try using a granular bait such as Amdro Ant Block around your home. It will help reduce the population of carpenter ants as well as other ants. Carpenter ants are not easily eliminated and you may wish to call a professional in to take care of the problem.
If you live in or near the woods, you probably have a variety of rodents that also occupies your surrounding area. Most rodents like to gnaw on wood and if your log home is accessible to them it may become the target of their gnawing activity. Although field mice occasionally work on the exterior of a home, most of their effort is devoted to finding a warm place to spend the winter. If you seal up all of the potential entrance points, especia lly around the foundation, you will prevent their taking up residence inside your home. Just remember that they can squeeze through unbelievable small openings so you need to do a thorough job.
Squirrels and Porcupines
Almost all of the log home wildlife damage we see is the result of gray squirrels. However, flying squirrels are commonly found in many parts of the country, and they, too, can cause wood damage. But since flying squirrels are extremely shy and nocturnal, they are rarely seen. Squirrels chew on wood for two basic reasons, they are attempting to get inside where it’s nice and warm, or they are trying to extract salts that may be contained in the wood. This problem is most common on wood that has been bleached or borate treated since the sodium salts contained in bleach and borates provide essential nutrients to these animals. If this is the case, in addition to trapping or elimination, there is another method that may help prevent them from damaging your home. Go to your local co-op store, buy a salt lick and place it where it is accessible to these animals. The salt lick will supply the mineral nutrients they require, and it is a lot easier for them to obtain what they need from the lick than it is by chewing on your home. Porcupines too have a ravenous appetite for salt and this method may work for them as well.
Some people have reported success in preventing animals from chewing on their wood by coating it with a repellent containing Bitrex, a very bitter substance added to many household products to prevent small children from drinking them. One product specifically designed for this purpose is Ropel® available from Nixalite of America, Inc. Information is available online at www.nixalite.com/ropel.aspx or call them at 888-624-1189. Never attempt to add any of these type products to a stain or topcoat, they are not compatible with many types of finishes. They are made to be applied on top of a dried finish, not mixed in with it.
Occasionally animals will gnaw on a home just for the fun of it. In these cases, trapping and relocation may be the best and only solution.
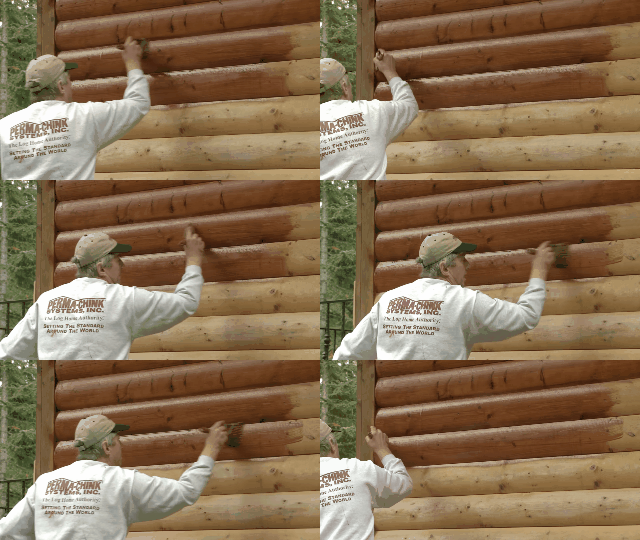
What exactly is “back-brushing” and why is it so important? Back-brushing is the term used to describe the process of working the finish into the wood and obtaining an intact, uniform film over the entire surface. Typically used when applying stain with an airless sprayer; however, back-brushing is just as important if the product is manually applied with a brush.
Back-Brushing Benefits:
- Forces stain to penetrate the surface and seep into small fissures/cracks
- Evenly distributes applied stain over all surfaces, allowing for a smooth, uniform final finish
- No lap marks
- Very efficient, saves time and delivers beautiful results

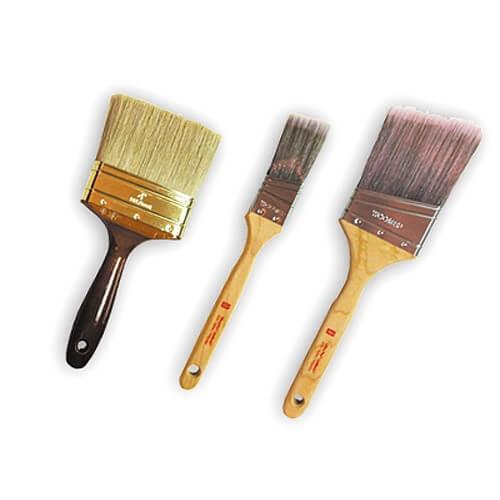
The first step in the process is to obtain a high-quality brush. A cheap, three dollar brush will not give you satisfactory results. You need a good, quality brush like a Purdy or Wooster. For back-brushing logs, use a fairly wide brush, preferably 3” to 4” wide. Using a narrow brush takes longer and may result in visible brush marks. If you plan to hand apply the finish with a brush and pail, you will use the same brush for both the application and the back-brushing.
IMPORTANCE OF QUALITY STAIN BRUSHES
When applying water-based finishes like those in the Lifeline™ family, use brushes made from synthetic nylon/polyester, or blends of bristle and polyester. These brushes are durable, so they’re great for staining rough surfaces. They maintain their stiffness when exposed to water and are easy to clean. You don’t want to use a 100% natural bristle brush for applying a water-based coating, as natural bristles absorb water. You’ll end up with a limp brush that won’t work very well. Also, rough surfaces will quickly wear out a pure bristle brush.
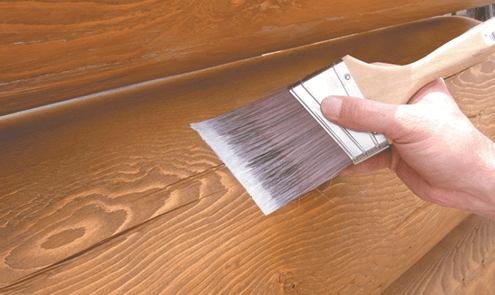
Ever since the industry started moving away from oil-based coatings, brush manufacturers have designed brushes specifically made for the application of water-based stains and clear coats. Since transparent stains are typically much less viscous than paints, if you use a normal paint brush, the brush won’t hold much product and you’ll end up having to constantly dip the brush after just a few strokes. Use the largest brush suitable for the surface you are coating. You’ll probably need small brushes for narrow surfaces like frames and trim, but when coating logs and siding, larger brushes carry more finish; there will be less dipping to refill the brush, and fewer strokes to cover the surface. Larger brushes also do a better job when back-brushing a surface that has had a finish applied with an airless sprayer.
Perma-Chink System has all the needed tools to get your job done right. Check out our line of brushes here.
PROPERLY USING YOUR BRUSH
Never press too hard on your brush. Stains and topcoats should be applied with the tips of the brush, not the sides. Don’t try to load too much finish on your brush. A heavily loaded brush will result in more drips and runs. Lifeline finishes are designed to go on in thin coats, including the first coat. If applied too thick, the long-term performance of Lifeline finishes can be diminished. In other words, more is not necessarily better when it comes to applying a Lifeline finish to your log home.
If your brush becomes messy, don’t be afraid to stop and occasionally wash it out. One of the advantages of using quality brushes is that they can be repeatedly washed without harming the brush.
CARE AND MAINTENANCE
If properly cleaned and maintained, a good quality brush will give you many years of good service. If you take a break even for just a few minutes, rinse your brush out with clean water and shake out the water. If you are through for the day, thoroughly wash your brush with a mild soap or detergent, shake or spin the water out and return the brush back into its original storage sleeve, it will help retain the brush’s shape while it dries.
QUALITY STAIN + QUALITY BRUSH = BEAUTIFUL HOME
Order Free Samples Now
We often get asked if it is acceptable to apply our Lifeline™ finish systems over an existing oil-based or petroleum stain. It would be nice if there was a simple yes or no answer to this question, but there is not. It depends on a number of factors, including how many coats have been applied, how long the stain has been on the walls, and which oil-based or petroleum stain is present on the wood surface. In general, it is ALWAYS best to remove an existing competitive finish before applying Lifeline.
All too often a homeowner has no idea what is on the walls, let alone how many coats were applied. What they do know is that they want to apply something on top of what’s already there to avoid the cost and effort of stripping the surface down to bare wood. This approach is very risky, especially with a water-based, high performance film-forming finish like Lifeline.
Let’s look at some of the individual parameters that have to be dealt with and addressed.
Appearance
Perma-Chink’s Lifeline stains are transparent finish systems. This means that any discolorations or residual pigmentation that remains on the wood will show through our finish systems. With few exceptions, our finishes have little or no hiding power. Once our Lifeline system has been applied, it essentially locks the surface of the wood in place. If you are dissatisfied with the final look and appearance, it can be quite costly and time consuming to remove the finish, address of the discolorations, and refinish the wood surface.
Adhesion
How much residual oil still remains in the wood and is it enough to interfere with the adhesion of Lifeline stain? These are questions that are just about impossible to answer. Yes, a small test area may quickly determine that there is a problem, but if a problem does not show up within a few days there is no way to tell what may happen over a period of several months or years. We have seen several issues that were directly attributed to the prior application of oil-based or petroleum stains. Peeling occurred around checks and micro-fissures because they had been flooded with an oil-based product during the initial staining process, and although most of the oil had evaporated from the surface of the logs, the checks had retained enough oil to reduce the adhesion of a water-based film.
Blisters
When several coats of an oil-based or petroleum, penetrating stain have been applied to a wall within the course of a few years, the underlying wood can become so saturated with oil that it may take a long time for it to evaporate. When a homeowner finally decides that it is time to change to a quality finish like Lifeline, pressure washing with just water, or even a mild detergent, may appear to remove most of the residual oil and colorants, and give the appearance of a prepared surface for the Lifeline finish. The wood may look clean and bare, but in reality the old oil carriers may still be in the top layer of wood. With the application of the first coat of Lifeline, these oils are now trapped in the wood and serve as a vapor barrier. Yes, our finishes breathe water vapor, but oil molecules are much larger and can’t make it through the film.
Now weather comes into the equation. If the days stay cool and cloudy until the entire finish system is applied and has time to cure, there’s a good chance that nothing of consequence will occur. But if the sun comes out and heats up the wall while the finish is still soft and pliable, the oils contained in the wood will begin to evaporate, creating blisters in the finish. This can occur after the first coat, second coat, or even after the entire finish system has been applied. One thing that these types of problems have in common is that they typically show up within a week after application.
If you plan to apply Lifeline after having applied a penetrating oil-based stain, what is the best way to minimize the chance of forming blisters? The product to use in these cases is S-100™ Finish Remover. S-100’s formulation includes a strong and aggressive detergent package that will help make the residual oils water soluble and easier to remove and wash away from the wood surface.
Once the finish is removed using S-100, allow the surface to remain bare for a couple of months to allow any remaining oil to evaporate. When you are ready to stain, wash the surface with Log Wash™, allow it to dry and apply the first coat of Lifeline.
For the best performance and long lasting beauty, Lifeline™ finishes should only be applied to bare wood surfaces or an existing Lifeline finish that is still in good condition. To remove an existing finish, there are basically three options: pressure washing along with a chemical finish remover, media blasting, or sanding.
Media Blasting
Although we rent and sell the Blaster Buddy™ and furnish crushed recycled glass blasting media, we usually advise do-it-yourself homeowners to use chemical finish removers along with pressure washing because the process can be easily accomplished by an average homeowner. And since it is less susceptible to surface damage, chemical finish removers result in a more attractive finished surface.
However, when performed by an experienced professional, media blasting can effectively and efficiently remove the most stubborn existing finish. We do recommend that you first inspect a home that has been media blasted before making your final decision about which method of finish removal you want to use.
Media blasting consists of using corncob grit, walnut shells, glass beads, baking soda, dry ice, or recycled crushed glass to abrade the finish off the wood. We prefer crushed glass since it is very efficient, relatively inexpensive, and does not impregnate the wood with organic material that can later mold. Plus it is very safe for the environment.
Once a home has been media blasted, there are two steps that are often overlooked but need to be followed:
Step 1: Blow off as much dust and debris as possible using compressed air.
Step 2: Wash the wall down with a two cups per gallon Log Wash™ solution no more than seven days prior to staining. It is not necessary to use a pressure washer, a garden hose will do. Clean from the bottom up and rinse from the top down. Rinse well and allow the wood to dry before applying a color coat or Prelude™ Clear Wood Primer.
This removes all of the loose wood fibers and dust that may still be remaining on the surface and ensures better adhesion of the finish to the wood.
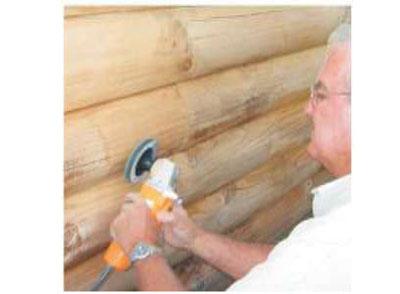
Sanding
Sanding can effectively remove an existing finish, but it is time consuming and a lot of work. The use of sanding disks rather than sandpaper can save you both time and money but you need to be careful not to create swirl marks in the wood. When sanding exterior surfaces, never use anything finer than 80 grit.
Water-based film forming finishes require some wood texture for good adhesion, especially on exterior surfaces. Osborn™ Buffing Brushes work great for removing raised wood fibers (feathers) that may have resulted from aggressive pressure washing but they are not suitable for removing finishes.
A sanded wall is not clean! Always wash down sanded walls with two cups per gallon Log Wash solution no more than seven days prior to staining. It is not necessary to use a pressure washer, a garden hose will do. Clean from the bottom up and rinse from the top down. Rinse well and allow the wood to dry before applying the first coat of finish.
Using a Chemical Finish Remover
It is always best to use finish removers supplied or approved by Perma-Chink Systems. Never use finish removers containing potassium or sodium hydroxide. They disrupt the chemistry of the wood and can lead to discolorations appearing under the finish. Before purchasing any finish remover be sure to obtain a sample and test it on your existing finish to see how well it works. Finish removers do not dissolve finishes; they only soften them enough to allow the finish to be removed with pressure washing.
Tools & Equipment
Before you start have all of the tools that you will need at hand and be sure that they are clean and in good working order. These may include:
- Paint brushes
- Paint scraper
- Stiff nylon brush (never use a wire brush)
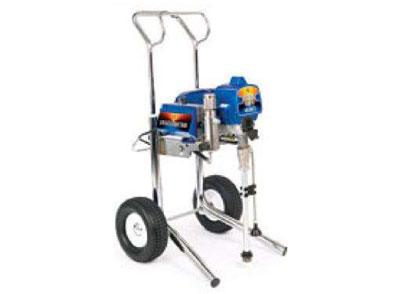
- Airless sprayer*
- Wet and dry rags
- Water hose
- Gas powered pressure washer with an output of 2 to 3 gallons per minute (gpm)
- Tarps
- Recommended safety equipment such as eye protection and rubber gloves
Note: Most quality airless spray equipment will handle our S-100™. On the other hand, for applying StripIt®, you will need a professional grade airless sprayer with an output of at least 0.54 gpm. In either case, there are a couple of minor modifications that have to be made before using them. The first thing is to change the tip to a 0.021 tip orifice. We stock universal 521 tips in case you cannot find one locally. If a smaller diameter orifice tip is used, it will take longer to apply the proper amount of finish remover and the tip may become clogged. In addition, since a small orifice produces a fine mist there is a greater chance of wind drift onto surfaces that you may not want to strip.
Once the stripping process is completed, it’s of utmost importance to replace the 0.021 tip with a 0.015 or 0.017 tip for applying our stain and topcoat. The second thing is to remove any sprayer strainers, screens and/or filters. Our finish removers are somewhat thick and viscous, so having to pass through screens and filters will impede the flow of product through the sprayer and may eventually clog it up.
Preparation
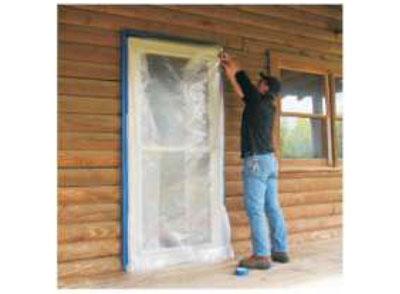
Before you start be sure to remove downspouts and cover or mask off any areas that you don’t want to strip. Finish removers will soften both stains and paints. You may wish to protect window and door trim with plastic sheeting. If you do get some finish remover on an area that you don’t want to strip, immediately wash it or wipe it off with a wet rag. If you have a deck or porch floor that you want to protect it’s best to cover it with a tarp. Although neither S-100 nor StripIt is highly toxic to plant life, it is best to either cover plants or wet them down prior to starting then rinse them off when stripping is complete.
Application and Removal
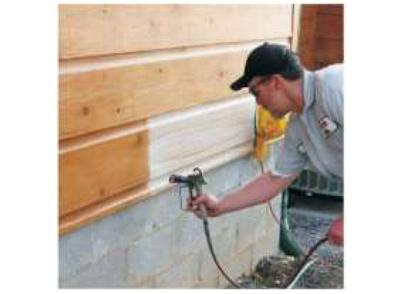
Step 1: Thoroughly read the label and be sure to wear the proper safety equipment and eye protection. Starting at the bottom of the wall, apply the finish remover with a brush or airless sprayer according to the directions for use. Be sure to follow the directions pertaining to the application rate; if applied too thinly the finish remover may not work and you will have wasted your time and money. Be sure to give the product time to work. On hot dry days, work on small sections of a wall at a time so that it does not dry out.
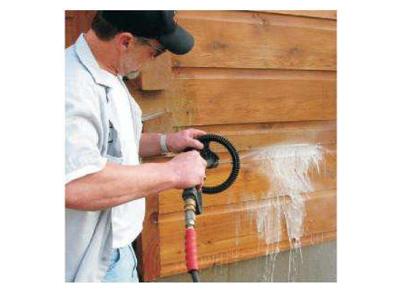
Step 2: Allow the finish remover time to soften the finish. It may take 30 minutes or several hours depending on the existing finish, product and temperature. If you see that the S-100 is beginning to dry, mist it with a light spray of water. For drying StripIt apply another coat on top. In colder weather conditions it may take many times longer for the finish to soften than it does in warm or hot weather. On cool days you can apply the finish remover to the entire wall late in the afternoon or early evening and leave it on overnight. Neither S-100 nor StripIt will damage the wood or cured Perma-Chink sealant, even with prolonged contact.
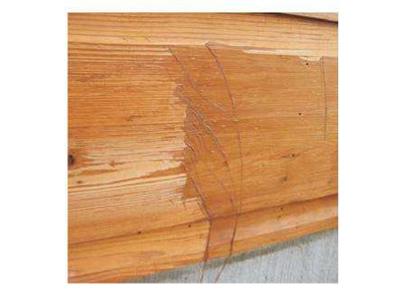
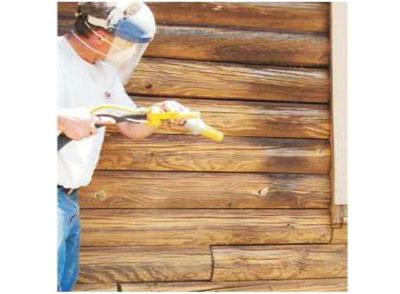
Step 3: Once the finish has softened, use a pressure washer to remove the chemical stripper along with the finish. The use of a 15-degree fan tip works well. Start at the bottom of the wall and work up. You don’t want to wash away the chemical stripper from those areas you are not ready to strip. Hold the pressure washer wand at a 30- to 45-degree angle from the wall. The objective is to “peel” the softened finish off of the surface, not blast it off with a lot of water pressure. This will help avoid gouging the surface and severe feathering. If there are some spots of remaining intact finish, try scraping them off with a paint scraper or a stiff nylon brush before they dry.
Step 4: Once the entire wall is completed, begin the rinsing process starting at the top of the wall and work your way down. Rinsing off all remaining chemical residue and bits of loose finish is very important for the long term performance of the new Lifeline finish system.
Step 5: If after rinsing there are still remnants of finish remaining on the wall, repeat the process until all of the existing finish is removed. It is not necessary to reapply the stripper to the entire wall. Only use it on those areas that need it.
Step 6: Once the entire wall is completely bare rinse the entire wall starting at the top and work your way down. Allow the wall to dry before making your final evaluation.
Step 7: If pressure washing the wall has feathered the surface you may wish to lightly sand it or use an Osborn Brush to remove the feathered wood fibers. Never use sandpaper or Osborn Brushes finer than 80 grit on exterior surfaces. Sanded or brushed surfaces MUST be washed with two cups per gallon Log Wash solution and the surface allowed to dry before the first coat of finish is applied.
All homes have pests. Log and Timber frame homes have specific pests that like to chew up wood, or burrow inside. For many pests, Perma-Chink Systems offers specific products to treat the wood, aimed at preventing damage from pests.
We have a collection of videos covering common home maintenance tasks specific to log and timber homes. Below are our videos, which are also available on our YouTube channel.

