Blog
Designing a Fortress of Protection for Your Log Home
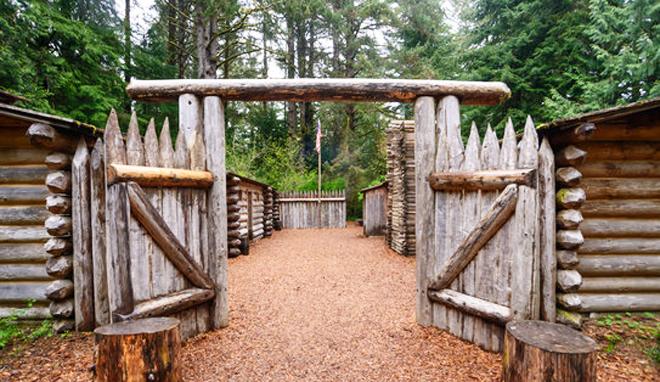
When I was growing up, I was fascinated with forts. I would often get together with friends from the neighborhood, and we would combine our resources and construct some rather elaborate fortresses. To test our handywork we would end our session with a great battle to decide whose fort was superior. Fast forward nearly forty years and I am still helping design forts! At Perma-Chink Systems the forts we are building are designed to protect your home against the forces of nature such as sunlight, wind, rain, dust, insects and microorganisms. Let us take a closer look at what our fort looks like.
Protection From The Start

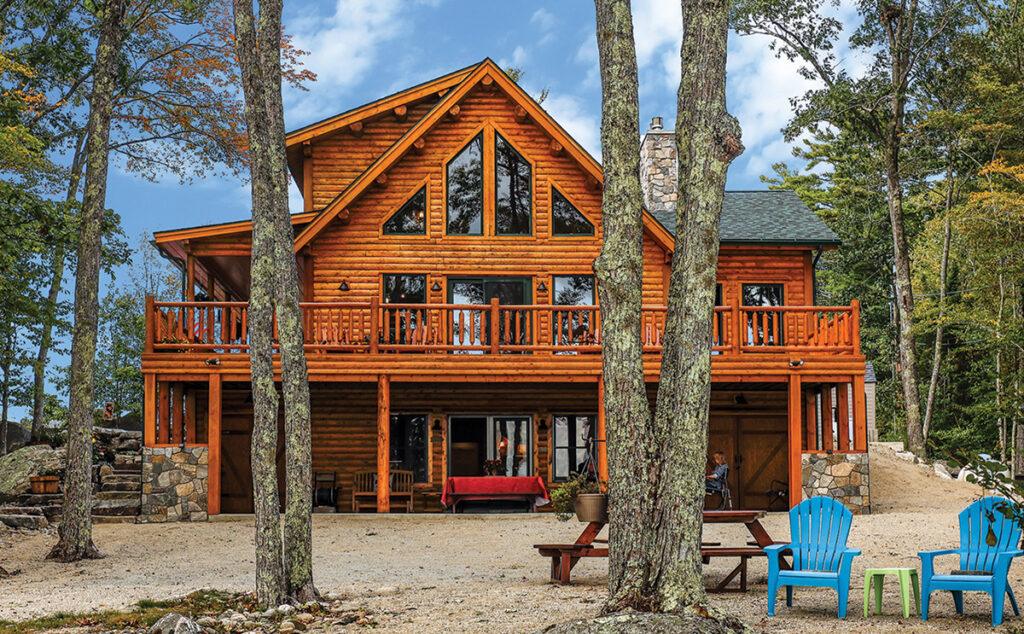
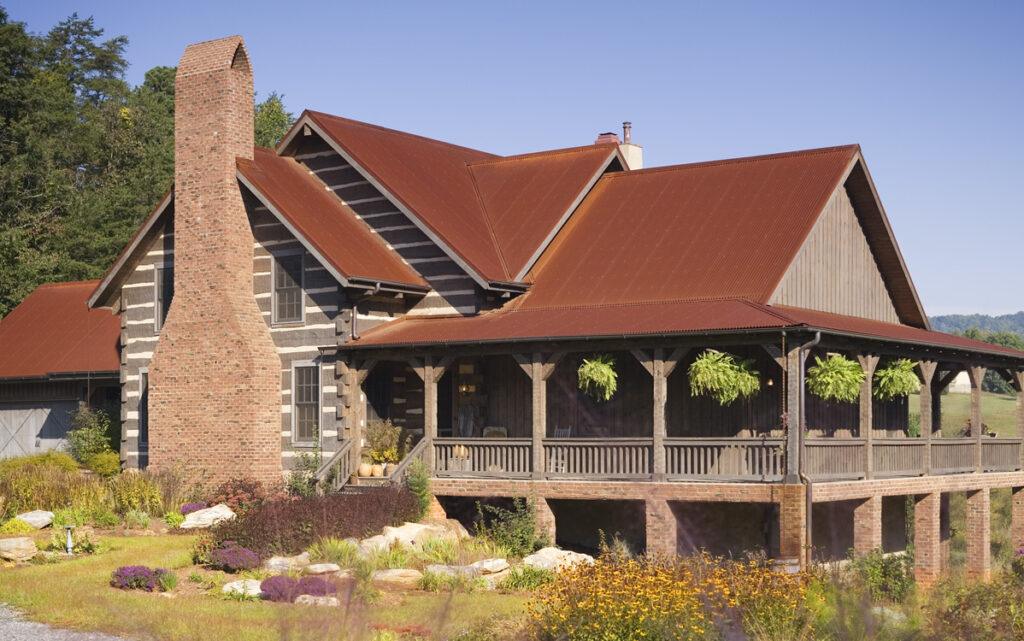
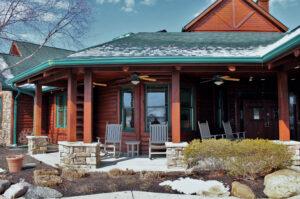
We have advocated for many years that the protection of your log home starts with a smart design. For example, many modern log home builders use large overhangs and wide porches to help shield the home’s walls from dangerous radiation from the sun. Let your roof help protect your walls. Planting trees that can help shade your home not only reduces energy consumption, but also helps to prolong your finish system.
Protect From Insects and Ultraviolet Damage
Protecting your home from wood destroying insects is something we have also incorporated into our “fort” design. Bare wood logs or siding can be treated with anyone of our safe, borate-based wood preservatives such as Shell Guard™, Shell Guard RTU™ and Armor Guard™. These products are designed to provide a protective shell of defense for log homes. If a wood-ingesting insect such as a termite or Powder-Post beetle passes through this protective barrier, they are in for quite a nasty surprise. The borates work to interrupt the insects natural digestive cycle, making it difficult – if not impossible – for the organism to process food. These products, while destructive to wood-ingesting insects, pose little danger to humans.

Perma-Chink offers a full line of stains with numerous color choices and benefits. For example, our stains such as Lifeline Ultra 7™, Ultra 2™ and Exterior™ have ingredients designed to protect the wood surface from algae and fungi (mold). In addition, we also have ingredients that work to shield the lignin in your wood from photooxidation. Lignin provides structure and support for the cell walls in wood. If it is destroyed by harmful ultraviolet (UV) radiation, then your coating could delaminate from the wall more easily. Furthermore, our stains also contain UV absorbers designed to filter out harmful radiation. Our colorants also add another level of protection for your finish system. In general, darker tone stains provide a higher level of protection than lighter, honey-tone colors. Choosing a slightly darker tone will act as a shield to help protect your wood more completely and provide more longevity and less color shift.
Protect With Industry-Leading Sealants
Our business was founded forty years ago with a great solution to existing chinking. Back at that time, many folks used concrete between the logs to fill in the gaps. When the logs changed dimensionally this created cracks and open places for water to get in and damage wood structures. Perma-Chink™ seals between the logs and moves with your log home keeping a tight seal that keeps water and insects out. For smaller joints of less than one inch, we also sell Energy Seal™ and Woodsman™ which are great products for sealing around windows and doors.
Protect With The Finishing Touch
The next defensive layer in our “fort” is the topcoat. Our Lifeline Advance Satin™ or Gloss™ has several purposes. First, it provides a hard surface making it more difficult for dirt and debris to collect on the wood and sealant surfaces. Secondly, it contains both UV absorbers and UV stabilizers. Often when you UV light strikes a system it produces harmful free radicals that can be destructive to a coating system. The UV stabilizers are designed to terminate free radicals so they cannot continue their destruction. The UV absorbers act as a shield keeping the dangerous UV light from penetrating deeper into the system. Finally, it works to keep your coating system sealed. If water remains on surface for long periods of time, it can allow microorganisms to grow and multiply. Water will sheet and evaporate relatively quickly with the topcoat present.
Finally, regular cleaning of your home will help keep your home looking beautiful well into the future. Buildup of dirt and debris can provide a foothold for fungi and algae to grow, decreasing the longevity of your finish system. To aid in this annual cleaning, Perma-Chink provides a safe cleaner called Log Wash™ which does a fantastic job removing these unwanted contaminates from your log home.
Protect By Moving Forward
As you can see, we have many layers of defense built into our fortress. The forces of nature are powerful and unforgiving at times. Over the years we at Perma-Chink have gained tremendous respect for what it can do to damage your home. We have learned a great deal over these last forty years and have adjusted tactics where needed to counter our foe. Let us put our experience building forts to work for you. Please visit our website at www.permachink.com to learn more about our products and how they can help you protect your home.
Occasionally we get a call from someone whose home has a gray aged patina that appeals to them. They typically want to apply some type of clear water repellent to seal and protect their home, but they don’t want to remove the grayed wood. The gray color is an indication that the surface wood has been photo-oxidized by ultraviolet (UV) light and the wood fibers have lost their integrity.
The application of any film-forming finish over grayed wood presents a problem since the finish will not adhere to the degraded wood fibers. It would be like trying to paint over a rusted metal surface. Within a few months the paint begins to peel off; consequently, the same thing can happen with a film-forming log home finish applied over grayed wood. With this in mind, we never recommend applying any of our stains or topcoats over gray, photo-oxidized wood.
Gray Color Choices in Lifeline Stains

Although there are solvent-based products that can be applied to grayed wood surfaces they only last about six months or so. If you truly want to protect your home, you will have to remove the grayed wood, and if you like the gray look, use one of our gray colored stains. If you are not willing to clean the surface down to bare wood, the best recommendation we can give you is to leave the surface alone but make sure that all chink joints, checks and other places that may allow water entry are well sealed.
Log Homes in Gray Colors

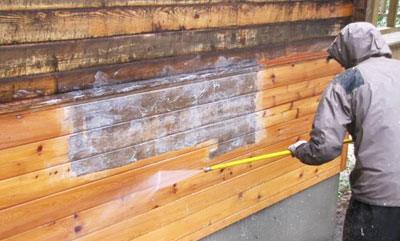
Pressure washing (also referred to power washing) is the function of using highly pressurized water to remove mildew, mold, dirt, pollen, UV graying, etc. You’ll hear different recommendations whether or not pressure washing your logs is the best cleaning method.
Generally speaking, pressure washing is the quickest and least expensive choice.
One fallacy is that you’re saturating and “damaging” your logs with water as a result of pressure washing. This simply isn’t true. On hard, sound, rot-free logs, you’re only introducing water into the top fibers of the wood.
The time it takes to pressure wash and the results generated are often directly associated with the type of finish being removed as well as how many coats have been applied. While some older, obsolete linseed based oil stains are more difficult to remove than newer products, practically everything can be removed with proper pressure washing techniques and good finish removers. Some of these older type products will often need S-100 or StripIt stripper applied first in order to soften the bond to the wood.
Condition of Wood Surface
Traditionally, newer, recently peeled logs have a greater surface hardness and can withstand highly aggressive pressure washing (if needed) easier than a log wall which has been fully exposed to direct sun for 20 years. You might notice your upper and lower fascia boards have aged and darkened at an accelerated rate compared to your logs. Because these areas are often made from softer (i.e. pine) wood, they are more likely to absorb water leading to more prominent mildew growth. These areas can easily resemble new wood once cleaned.
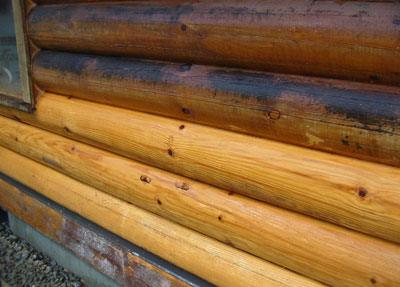
Pressure washing of new constructions can also easily remove the UV graying of the logs that can start occurring just weeks after the logs are stacked, particularly if exposed to direct sunlight.
In addition to log and wood sided structures, other areas where pressure washing can be utilized include driveways, stone walkways, pool decking, stone walls, fencing, gutters, downspouts, roofing and other areas. Concrete slowly builds up a browning/green appearance over time which usually consists of grease, dirt, mildew and algae which can easily be cleaned.

Pressure washing can be done in practically any temperature and weather conditions, although chemical strippers, which are often applied prior to cleaning, work much better in warmer weather.

Whether you hire a professional or undertake the project yourself, pressure washing with wood cleaners from Perma-Chink Systems can bring back the beauty of your logs, preparing them for a fresh coat of stain and protective clear topcoat finish.
By Jeff Kyger
Northwest Log Home Care
www.northwestloghomecare.com
Pressure washing (also referred to power washing) is the function of using highly pressurized water to remove mildew, mold, dirt, pollen, UV graying, etc. You’ll hear different recommendations whether or not pressure washing your logs is the best cleaning method.

Generally speaking, pressure washing is the quickest and least expensive choice.
One fallacy is that you’re saturating and “damaging” your logs with water as a result of pressure washing. This simply isn’t true. On hard, sound, rot-free logs, you’re only introducing water into the top fibers of the wood.
The time it takes to pressure wash and the results generated are often directly associated with the type of finish being removed as well as how many coats have been applied. While some older, obsolete linseed based oil stains are more difficult to remove than newer products, practically everything can be removed with proper pressure washing techniques and good finish removers. Some of these older type products will often need S-100 or StripIt stripper applied first in order to soften the bond to the wood.
Condition of Wood Surface
Traditionally, newer, recently peeled logs have a greater surface hardness and can withstand highly aggressive pressure washing (if needed) easier than a log wall which has been fully exposed to direct sun for 20 years. You might notice your upper and lower fascia boards have aged and darkened at an accelerated rate compared to your logs. Because these areas are often made from softer (i.e. pine) wood, they are more likely to absorb water leading to more prominent mildew growth. These areas can easily resemble new wood once cleaned.
Pressure washing of new constructions can also easily remove the UV graying of the logs that can start occurring just weeks after the logs are stacked, particularly if exposed to direct sunlight.
In addition to log and wood sided structures, other areas where pressure washing can be utilized include driveways, stone walkways, pool decking, stone walls, fencing, gutters, downspouts, roofing and other areas. Concrete slowly builds up a browning/green appearance over time which usually consists of grease, dirt, mildew and algae which can easily be cleaned.
Pressure washing can be done in practically any temperature and weather conditions, although chemical strippers, which are often applied prior to cleaning, work much better in warmer weather.
Whether you hire a professional or undertake the project yourself, pressure washing with wood cleaners from Perma-Chink Systems can bring back the beauty of your logs, preparing them for a fresh coat of stain and protective clear topcoat finish.
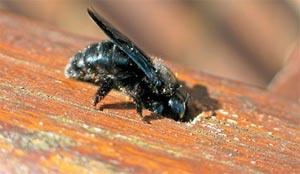
Every spring we get lots of calls about carpenter bees drilling into logs, fascia boards, eaves, decks and other unpainted wood surfaces. Carpenter bees are big black solitary bees that look similar to bumblebees but have bare, shiny backs whereas a bumblebee’s back is hairy. Unlike honey bees that reproduce in hives, carpenter bees drill into wood in order to lay their eggs. Their holes are perfectly round and about 1/4 inch in diameter.
Although carpenter bees prefer hardwoods such as cedar, redwood, or cypress, they happily attack pine and most other species of wood. Even pressure treated wood is not immune from carpenter bee attack. As the bee drills into the wood, coarse sawdust may be seen coming out of the hole and piling up beneath the hole. Since it only takes a couple of hours for a carpenter bee to drill a hole a few inches deep, lots of holes can appear over a fairly short period of time.
Most carpenter bee activity occurs in early spring when male and female bees emerge after spending the winter in old nest tunnels. Once they have paired and mated the female bee drills into a suitable site while the male stays nearby to ward off intruders. Male carpenter bees often frighten people with their aggressive behavior but since they have no stinger they are essentially harmless. Females have a stinger but only use it if molested.
Once the initial hole is drilled through the surface, the bee will make a turn and excavate a tunnel along the grain of the wood. This tunnel, which may run for several inches, becomes the cavity where the female deposits her eggs. Several eggs are laid in individual chambers separated by plugs of pollen on which the larvae feed until they emerge as adults during the summer months. In addition to making new holes, carpenter bees also enlarge old tunnels. If left unattended for several years, serious damage to a wood member may result.
In late fall activity may again be seen as both male and female carpenter bees clean out old nest cavities where they stay over winter. Since carpenter bees tend to migrate back to the same area from which they emerged, it is important to implement some control measures in order to prevent logs and wood members from becoming riddled by these bees.
Prevention
Although carpenter bees prefer bare wood or distressed wood, they will attack wood that is stained. Painted wood surfaces, on the other hand, are rarely attacked since the bees must see or feel the grain of the wood in order to recognize it as wood. One of the most effective measures for preventing extensive carpenter bee damage is to fill old or empty holes with Energy Seal. Carpenter bees are attracted to existing holes. Be sure to treat the hole before you fill it since live adult bees will drill right through the caulk on their way out.
One way to keep carpenter bees from drilling into wood is by spraying pesticides that contain either cypermethrin, deltamethrin, or bifenthrin (Ortho Home Defense Max) onto wood surfaces. When it comes to carpenter bees, these products act more as repellants than contact poisons. However, the effectiveness of these applications is only about three to four weeks, so the treatment will have to be repeated every so often. Pesticides should only be used during the periods of peak activity in the spring and perhaps again in late fall. Be sure to follow label directions and read and understand any precautions that must be taken when using these products.
A few years ago we requested information about the effect of our gloss topcoat on reducing carpenter bee activity via survey. Out of over 20 responses by letter, phone and e-mail, only two reported any penetration of the gloss topcoat by carpenter bees. One home went from 20 to 30 holes the previous year down to 2 this past year and the other went from over 20 holes to 4 holes. This confirms our suspicion that the Lifeline Advance Gloss exterior topcoat appears to provide a finish to the wood that carpenter bees do not find very attractive. That is not saying that the gloss finish repels carpenter bees. It does not. Although bees would occasionally land on the gloss topcoat, they just did not drill through it. So why is that? Well, let’s be clear that the Lifeline Advance Gloss topcoat is not a pesticide nor does it have any pesticide properties. It appears to form a coating on the surface of the wood that carpenter bees are reluctant to drill through. Why? It could be the glossy look or that the hard, slick finish does not appeal to them, so the bees will search for another target. Many other online “How-To” documents related to carpenter bees describe the actions of carpenter bees on bare or distressed wood. That stands to reason that well-maintained log homes with stain and a solid topcoat should dissuade most carpenter bees from nesting inside logs.
Another possible solution, with hit-and-miss results, is a bee trap specifically for carpenter bees. Much like a minature bird house, the bee trap invites the carpenter bees inside, and they get trapped in a glass jar. In the past we offered these types of traps, and the results weren’t 100% positive. You can find bee traps online, both DIY plans and for purchase.
Treating Carpenter Bee Holes
Any carpenter bee holes you can reach should be treated and plugged since existing holes attract more carpenter bees. The way to treat an existing hole and tunnel depends on the time of year, and if bees are present at the time of treatment. If the female is drilling away when you find a hole (you can see sawdust coming out or hear her working inside) spray a contact pesticide like wasp and hornet spray into the hole. She will quickly back out and die. Immediately fill the hole with wood putty or Energy Seal. You need to treat the hole even if it appears empty since the bee may be resting and, if left alive, will drill back through the plug you’ve just inserted.
If you find carpenter bee holes in late spring or early summer it’s difficult to tell if there are bee larvae developing in the tunnels. The best thing to do is to run a length of flexible wire into the tunnels in order to break through the pollen plugs separating the chambers. Then spray a pesticide into the hole and seal it up. The same thing should be done on holes found in the fall or winter to kill any bees that may be over-wintering in the holes. Just remember to plug the holes since they will attract more carpenter bees come spring.
Several people told us that although they sprayed a pesticide into the holes, carpenter bees later emerged, in some cases even after the holes were plugged. How can this happen?
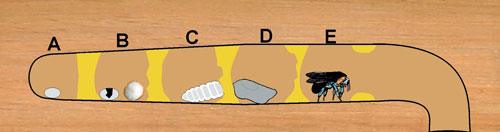
If we take a look at a cross section diagram of a carpenter bee gallery we can see how. After drilling out a four to five inch long gallery, the female carpenter bee lays an egg in back of the gallery then places a plug of pollen she has gathered to form a chamber (A). She continues doing this until there are four to six egg chambers in place. After a few days the egg hatches and a small white grub emerges (B). The grub feeds on the pollen plug for a few weeks (C) until it is ready to pupate (D) and change into an adult bee (E).
If you look at the way the gallery is constructed, you can see why spraying a pesticide in the hole may not kill all of the developing bee larvae. The pollen plugs prevent the pesticide from getting to the rear chambers. So, before you spray any pesticide into a carpenter bee hole be sure to run a stiff wire all the way to the back of the gallery to break through any pollen plugs. That way all of the larval chambers will be exposed to the pesticide.

How To Create Dust-Free Log Homes
We decorate our log and timber homes for not only holidays, but seasons, too. And after Thanksgiving and Christmas, putting away all those decorations revealed one of the most annoying things about homes: dust.
Dust gets everywhere. It’s never-ending. We have terms for giant amounts of dust called dust bunnies. It makes us sneeze – constantly. It’s ridiculous! No matter what it used to clean the dust, it returns!
Minimizing Dust Tips
The good news is there are ways to lessen the amount of dust. BobVila.com compiled 20 easy ways to keep the dust level in your house to a minimum. And in addition to the usual advice of keeping furnace/HVAC filters clean, vacuuming with HEPA filters, air purifiers, and wiping down surfaces, there are some other cleaning methods and ideas to keep the dust at bay. One of my favorites is limiting the number of textiles in your home. Like throw pillows. If your spouse or partner love a lot of pillows, that’s not the best thing to limit dust (approach this topic with caution! Ha!).
While the list of dust-limiting methods are quite useful, most only address the issue after the dust is inside the home. What about preventing dust from entering the home to begin with? For instance, having open windows may help bring in fresh air, it also allows dust in the form of pollen, spores, pollutants, etc., to enter the home.
Preventing Dust
One key to limiting dust in a log home is making sure your home is completely sealed. We know the amount of sealing a log home needs, based on the number of logs, sizes of log gaps, amount of windows and door frames and so on. However, there exists the chance that some nooks and crannies might get missed or damaged throughout time.
The quickest method to find where dust can enter the home is performing an energy audit. Infrared cameras can locate and identify areas where outside air can penetrate. Learn more about energy audits here.
The most likely areas of air gaps are the nooks and crannies of joints and building material transitions. For instance, doors and windows. Sometimes the seal isn’t as solid as one would hope. That’s where our Log Gap Cap pre-cut foam comes into play. Paired with Energy Seal or Perma-Chink sealant that matches your current sealant, this combo effectively closes up your home around doors and windows. Read more about Log Gap Caps here.
And finally, make sure vents and the foundation seams are sealed and properly finished. Not only will this help keep your home sealed from outside dust, but also keeps bugs and pests from infiltrating your home.
Dust will always be around, but there are ways to mitigate how much, which should give you more time to enjoy your home.

Lifeline Ultra-7 turns ten in 2021!
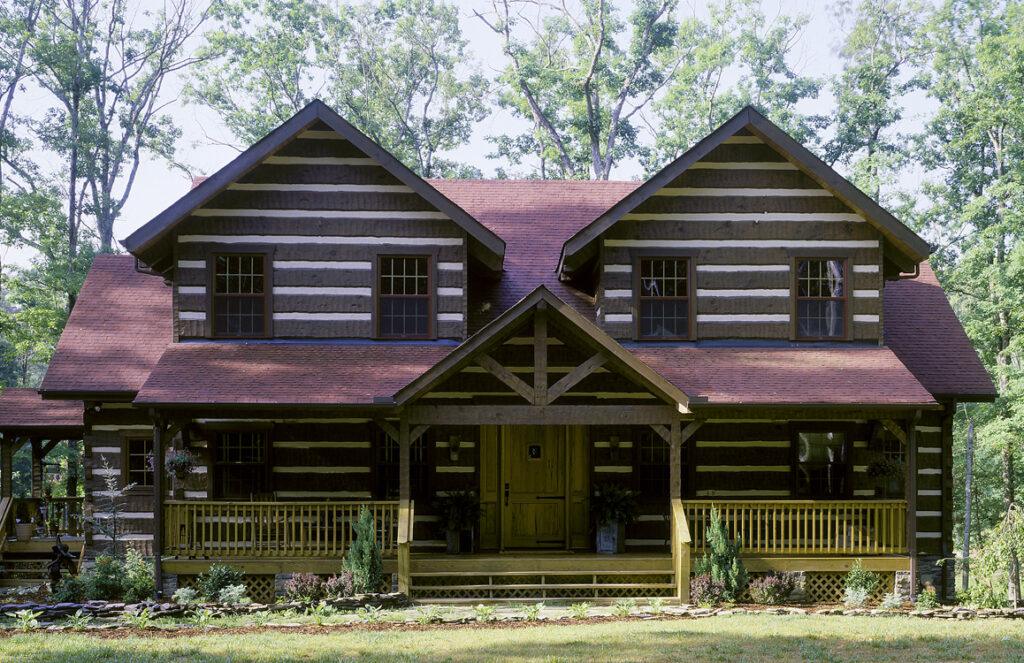
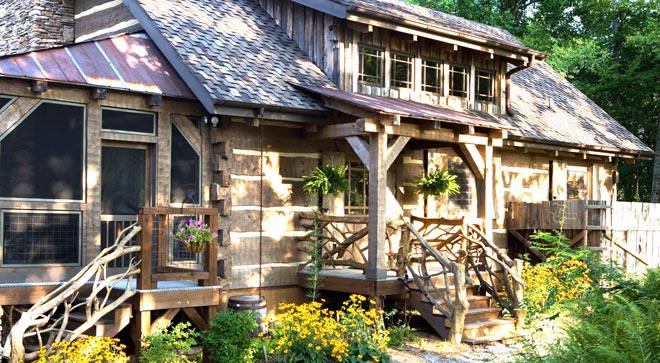
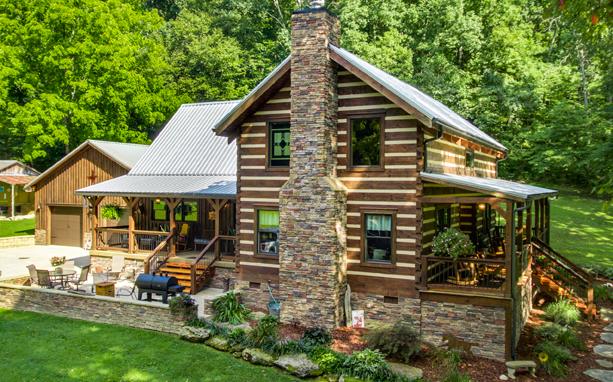
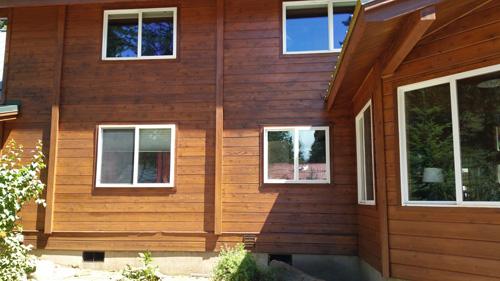
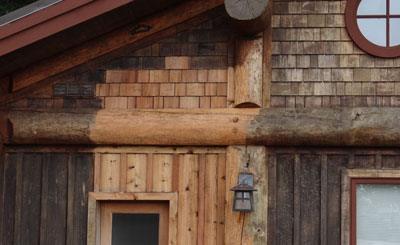
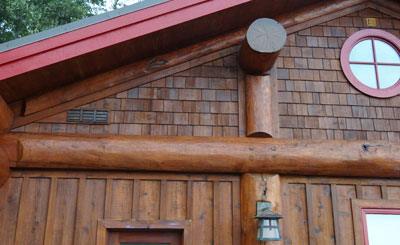
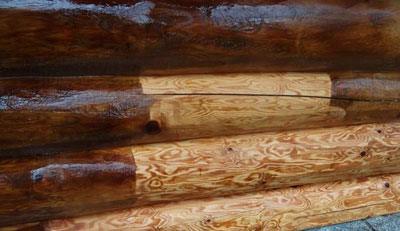
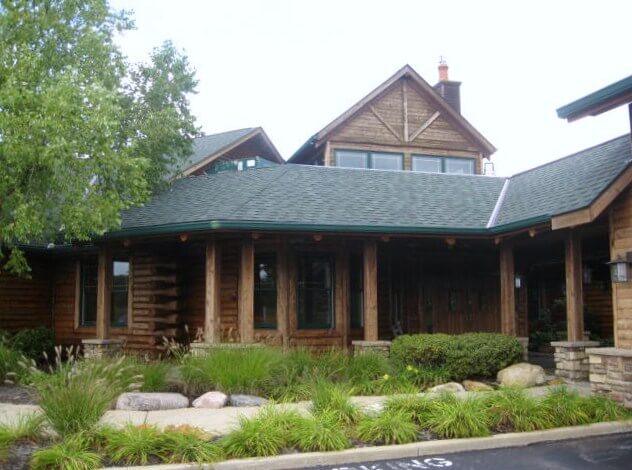
Introduced ten years ago, Lifeline Ultra-7 quickly became the premier finish for log and timber homes. Upon introduction, Ultra-7 improved coverage rates and added even more color options for the Lifeline family. Today, the best-selling Ultra-7 remains the go-to finish for exceptional longevity and color retention for log and timber homes. Paired with Lifeline Advance topcoat, Ultra-7 keeps your log home looking beautiful for years and years.
Wayne Bell of Log Home Care finished this project ten years ago in Avon, Ohio.
Before:
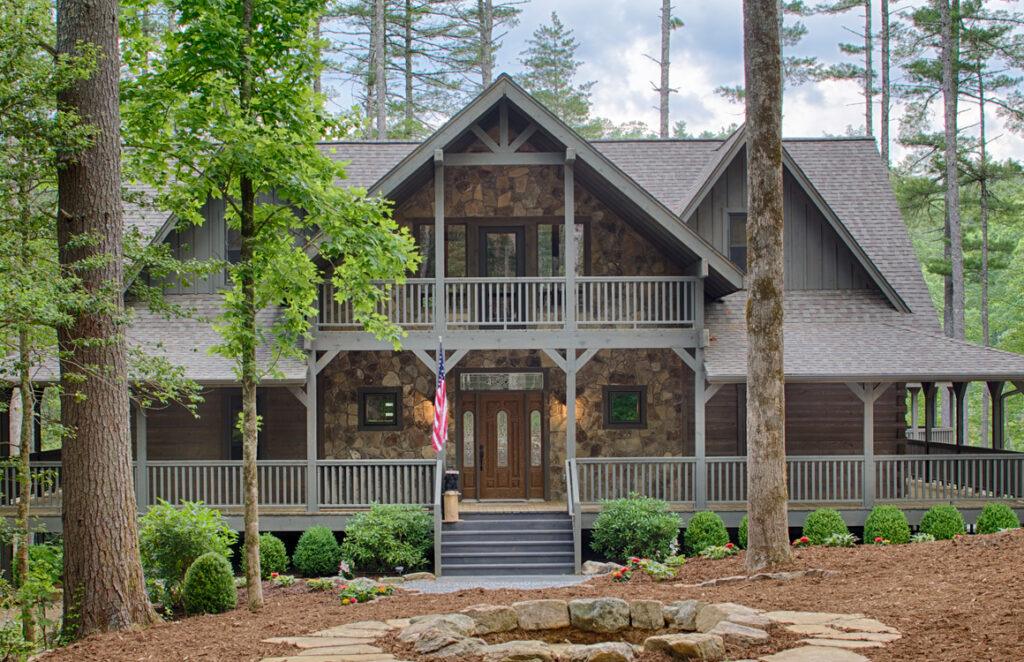
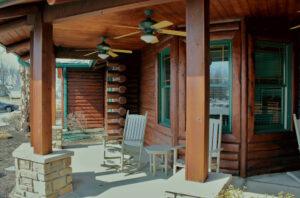
After, Front Porch:

After, Front Porch Up Close:
After, Wide Shot of Wrap-Around:
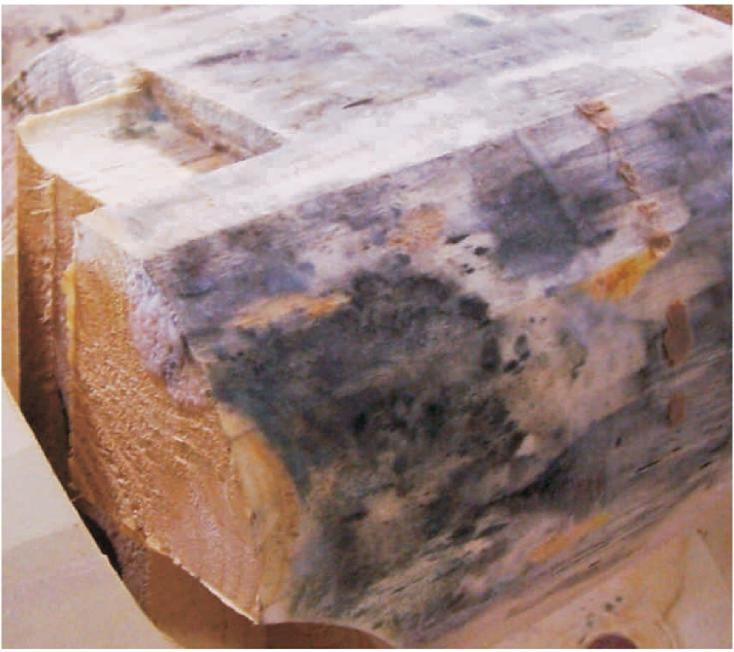
Mold and mildew (actually another name for mold) are colonies of living organisms that can grow on the surface of many materials including wood. Their color may range from white to black with just about every color in between. If the discoloration is green, it is most probably algae, a plant, since molds and mildews do not contain green chlorophyll. Like most living organisms, molds require air, water and a food source for survival. Bare wood is quite susceptible to mold growth since the porous surface provides lots of places for spores to germinate and many of wood’s nutrients are available as food. This is especially true for newly harvested wood that still contains a high sugar content. In addition, bare wood absorbs water, thus supplying the moisture these organisms require.
Combating Different Molds
Although it is fairly easy to remove mold from bare wood surfaces (Wood ReNew does an excellent job), preventing its growth on green logs in particular can be somewhat of a challenge. Thanks to the internet, one popular misconception is that borate treatments will prevent the growth of surface molds on wood. This is NOT TRUE! Although the presence of borates will inhibit the growth of some types of surface molds, there are other types that actually thrive on borate treated wood. Borates are quite effective against wood decay fungi, but surface molds are very different from decay fungi and it takes other methods of control to prevent their growth.
Best Methods to Prevent Molds
When it comes to preventing the development of mold on wood, the best and most effective approach is to provide a dry environment. Molds cannot survive in dry conditions so if the logs are stored under cover with lots of air flow around them chances are that mold will not grow on them. But as we all know there are occasions when ideal storage conditions may not be practical so in those cases how can the formation of mold be prevented. There are some chemical treatments that can be applied to bare wood that will kill existing mold colonies and prevent the growth of mold for several months. One of the more commonly used products is didecyl dimethyl ammonium chloride, commonly referred to as DDAC. It works well and several years ago we used to sell a brand of it named Britewood XL. However, one downside of DDAC is that it is corrosive to skin.
Another chemical used for killing and preventing mold growth is chlorothalonil. At low concentrations it is commonly used for preventing fungal growth on peanuts and potatoes as well as being a fungicidal additive to paints and stains. Sostram Corporation makes a chlorothalonil product named CLORTRAM that inhibits surface mold and stain causing fungi growth. Neat chlorothalonil is very toxic to aquatic life.
Mildew-X
Although there are several other products available for controlling mold, the last one we will cover is Mildew-X. Mildew-X is a dry film preservative that prevents mold and mildew growth on interior and exterior surfaces naturally. Mildew-X is exempt from FIFRA registration.
So, is there a role that a Perma-Chink Systems product can play to prevent the growth of mold on bare wood other than one of our complete finish systems? If a manufacturer or contractor wants to protect their logs at the mill or on the job site during construction, they can apply a coat of Prelude that has been dosed with Mildew-X or an equivalent product that is labeled for adding to water-based paints or stains. This will help prevent the growth of mold on top of the Prelude film. The limitation of this combination is that it must be applied to a fairly clean surface since it may not kill all of the mold colonies that are already present. However, it offers some definite advantages over those products that just eliminate and prevent mold. First, since Prelude contains UV Boost, it will help prevent surface graying due to sun exposure. Second, the Prelude film will keep the surface cleaner during transport and construction. And third, it will help regulate the drying process which to some degree should lessen initial checking and fissuring. We already have some manufacturers using this system and they are quite pleased with the results.
Applying and tooling Perma-Chink or Energy Seal sealant you need the right tools to make the job easier and quicker. Depending on the job and type of sealant needed, you have a few decisions to make regarding the tools and accessories you’ll need for the project.
Starting Out On The Right Foot
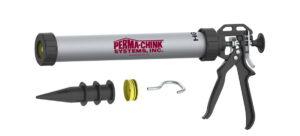
Having the right tools at hand is critical for a good chinking job. The most popular tool for applying Perma-Chink or Energy Seal is the bulk-loading gun. This tool is available in two sizes, the 20oz. and 30oz. capacity and operates by pulling sealant straight from the pail.
For contractors who have been applying sealants for years, the tools selected have been time tested. Contractors expanding work or new to the trade might want to know all the available options for the job. And since everyone has a different preference on tools, Perma-Chink Systems offers multiple products to get the job done.
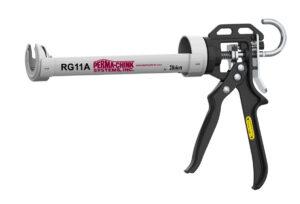
1. The Albion Bulk Loading Caulking Gun
This is our most popular tool for applying Perma-Chink or Energy Seal. It is built to meet the demands of serious professionals, utilizing rugged, heavy-duty all steel drives and lightweight aluminum barrels to reliably dispense a wide range of materials.
Available sizes 20oz. and 30oz.
- Professional Quality
- Efficient 12:1 Drive Ratio
- Lightweight Aluminum Barrel
- Double Grip Plates for Long Life
- No Spanner Wrench Needed!
- Barrel Rotates for no-stop application
- Kit includes 3 nozzles, one spare piston and a steel ladder hook-pull
2. Smooth Rod Style Caulking Guns for applying Perma-Chink, Energy Seal, Check Mate 2 and Woodsman
Great for professional use where bead consistency, control and clean up save time and money. A simple push of the recoil releases all pressure on the plunger and instantly stops the flow of sealant. To remove the tube, press the lever and pull back on the rod to expose the entire tube and slip it out of the gun.
Available in sizes for 11oz. tubes and 30oz. tubes
- Professional Quality
- Smooth Rod for reliable dispensing
- Efficient 12:1 Mechanical Advantage Drive
- Convenient Thumb-Release for no run-on caulking
- Full size handle for comfortable dispensing
3. Cordless Guns with a State-of-the-Art Performance, Portability and Control
How Fast is Fast! A Cordless Gun can dramatically decrease the amount of time on a chinking job.
Available in sizes for 11oz. tubes and 30oz. tubes AND 20oz. bulk
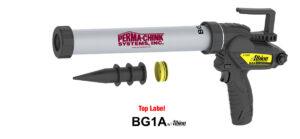
- Powerful – 400 lbs. of Dispensing Force
- Fast – Dispense 11oz. Cartridge in 16 seconds
- Lightweight Aluminum Barrel
- Long Lasting – 12 V Lithium-Ion Battery
- Control – Variable Speed Trigger with Maximum Speed Dial
- Auto Reverse for No-Drip Dispensing
- Comfortable rubber over molded handle. Swivel barrel
- Fast 30-minute recharge. Battery Fuel Gauge
- Ladder pull hook
How Bulk Loading Guns Operate
Simply insert the 2-inch wide cylinder into the pail and fill the gun by pulling back the plunger, which draws the product from the pail into the body of the gun. After wiping the threads clean and screwing on the end cap with plastic cone nozzle, you’re ready to apply the product. To make your job easier, quicker and much cleaner with less product waste, the gun-compatible follow plate can be used (highly recommended). This 9.5” round metal plate has a 1” rubber gasket which allows for the tapered shape of the pails.
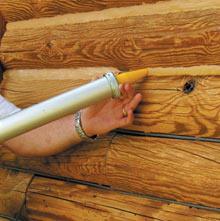
Basic Instructions on how to Tool Perma-Chink Sealants
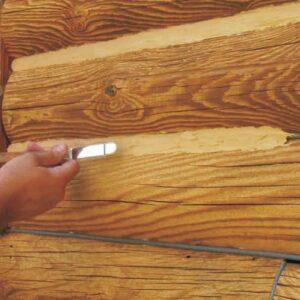
Smoothing your sealant you have just applied from the gun is not nearly as important as making sure you have really good contact to the top and bottom log, with no air trapped under the sealant.
To move the sealant into position for proper adhesion and to smooth out bumps is what we refer to as “tool” or “tooling.” The best tool we recommend is a bent trowel that’s about the width of the chink joint. The bent trowel makes it much easier to avoid trowel marks in the sealant as it dries and cures. Along with a trowel, you’ll want to have a plant mister or squirt bottle filled with plain water. Perma-Chink Systems offers a variety of stainless-steel trowels ranging from ¾” to 4-inch wide with both rounded and squared off tips in our Tools & Dry-In section.
Anytime you tool the chinking, spray a little water on it first. You want enough water to allow a smooth motion with the trowel, but not so much it pools and runs all down the logs. The water prevents the chinking from sticking to your trowel and gives a nice, smooth surface free of bumps and edges. Make more smoothing passes after you have created good adhesion to those logs to remove any tooling marks. All of these passes are a very light pressure, with ½” to ¾” of the tip of the knife being used. Depending on the appearance you are looking for, you may leave your sealant line as smooth or as rough as you would like.
Recommended Videos


Hope this helps! Check our Tools and Dry-In section on the website to find all the items needed to get you started on your project! And if you need more information, our professional sales representative is standing by at 800-548-3554 or send us an e-mail to techservice@permachink.com
Click here to view the Log Home Sealants Application Guide

Why Log Boss
Why should you use the Log Boss over what you are currently using? That is a question we are often asked when we are showing these fasteners to potential customers.
We looked a several options that were in use for fastening the logs and timbers together. The search turned up various way builders were putting things together. The old way was the use of long spiral nails that were driven in with a very large hammer, which was very tiring – especially if you had to install the nails every foot or so for the whole house. Also, lag screws were used by builders to assemble logs together. The lag screw installation requires pre-drilling and drilling a countersunk hole for the head to go into. It also required the use of a large electric impact drill to effectively set the lag screws, or a large ratchet along with a very strong person to complete the installation.
To better serve the builder/customer, there must be something better. The fastener we were looking for had to add value to the customer, and this can be accomplished in multiple ways. The best fastener we found lessens the biggest costs – reduces labor cost, speeds up the installation process, and reduces the need for specialized tools. You also must have a product that performs and meets the expectations of the user, and to do this, Perma-Chink Systems chose the Log Boss log and timber fastener to meet the demanding needs of builders and contractors.
Log Boss Design Benefits
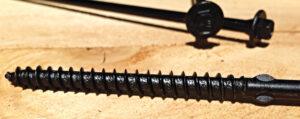
The design of the fastener is very critical to overall performance and ease of use. At the request of many of our customers, we’ve redesigned the head for better counter-sinking and uses a 5/16” hex head driver. The wings reduce the friction between the wood and the shank, clearing out the splinters created as the fastener pulls down into the wood. This reduces the torque required to set the fastener into place. Reducing the torque decreases the strain around the wood fibers, which increases the holding power of the wood fibers between the threads. The result is much greater pullout values by eliminating thread strip out.
One of the most outstanding features of the fastener is the ‘wings’ above the threads. The goal was not to disturb the thread holding value but to drive the fasteners into timbers with less torque requirements. The wings act as a reamer, allowing the shank to rotate much easier with less friction in the log. Without wings, the wood fibers bind up on the shank, seizing it to the point it becomes almost impossible to complete the required depth. It also often results in fasteners breaking off just above the threads, which adds wasted time to the project.
Another great feature of the Log Boss is the special rust-resistant coating applied to all fasteners, reducing the chances for rust to discolor the logs during extended exposure times on the jobsite. There is also a special lubricant applied to the fastener to aid in driving operations. Log Boss can be driven with an 18-volt cordless drill, but for best results we recommend the use of a ½” low rpm drill for optimum driving performance.
Log Boss fasteners are packaged in jobsite-friendly containers that resist damage from abuse and moisture. All sizes below 14” are packaged in plastic pails containing 250 fasteners and a drive bit.
Picking The Correct Log Boss
Now, how do you determine what size fastener that you need to use and what are the basics?
First, it is important to follow the log manufacturer’s recommendations as to the placement of the fasteners. The length of the fastener is critical to achieve the best performance. The selected fastener length must allow the threads to pass entirely through the first log, and thread into the second. The reason behind this is simple: in the event log movement happens, the log must be anchored to the bottom log, with the head providing pull-down pressure on the top log. It matters not if the screw is a little longer than you need, but make sure the threads will pass clear through the first log.
If you encounter a knot while installing the fastener, you will need to apply more torque to seat properly. It is a good idea to back the fastener out and move it over a little to avoid the knot. Another event that sometime occurs is the fastener may follow twisted grain and come out the side of the log.
So, if you want a fastener with maximum holding power and superior strength with less work, Log Boss is the answer. These fasteners were specifically designed by Perma-Chink Systems for the construction of log and timber structures. Their 3” long thread provides the grip necessary for pulling even the most difficult logs into place while the larger shank diameter increases the overall strength and pulling power.
Log Boss Benefits
Pre-drilling is not required
No washer needed. Drive it one time and forget it!
Flat head design easily counter sinks with maximum pulling power
Replaces the need for spikes or lag bolts
Lubrication coating speeds set time
Large threads prevent stripping out
Teflon® coating exceeds FM 4470 corrosion standards
Ask us for a complete line of wood-to-wood, code-approved fasteners for decks, ledger boards, and large timber applications.

As we settle into the holiday season, the cozy winter time, and potentially longer COVID-related lockdowns, the number of days inside the home can be overwhelming. Already approaching a year of COVID, our time in the home may raise our cabin fever or children if it hasn’t already.
But not to worry! There are things we can do to alleviate the time cooped up inside for the whole family. Country Living offers 25 activities to change up the routine, including classics like making your own Play-Doh! Check out their list here.
One snow-bound winter my family gathered around the fireplace and we listened to classic radio shows on cassette. My imagination became a powerful force to bring 1930’s radio show The Shadow to life during that cold December.
Today’s Parent has an impressive 87 activities, ranging from cardboard dollhouses to tye-dyed t-shirts. A lot of crafts are involved, to help kids learn motor skills. And of course, baking- but haven’t our waistlines had enough baking? You can read the long list of activities here.
Other activities may not seem as fun as making forts or throwing a dance party, but they can be greatly rewarding if more indoor living is in our future. Renovate interior, organize the kitchen “junk” drawer (I have 2!), go through your books and donate or share the ones you’ve read, and general “de-cluttering.” This is also something you can do in your digital life – unsubscribe to unwanted emails (not ours, though!), delete unnecessary emails, or clean up your digital photo albums.
Lastly, don’t forget about traditional card and board games. Some have found their way online, or are online only, and that greatly increases player pools. Many online games have chat features that allow interaction between friendly opponents. Codenames is one game that has online gameplay with others – learn more at https://codenames.game/.
Which Log Home Sealant Should I Use?
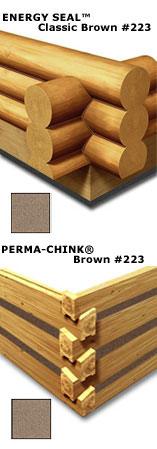
We are asked this question very frequently about our two biggest selling log home sealants. Both of these sealants were formulated to weatherproof joinery in log and log sided buildings. Our simplest answer is that in general, Perma-Chink should be used in applications where the seam width is one inch or wider and Energy Seal is a better choice in sealant seams that are narrower than one inch or where joinery was not intended to have chinking applied to it. However, this answer is overly simplistic when you consider the variety of log profiles and joinery types and many different surfaces that come together to make up a finished log structure.
What is the Difference?
Perma-Chink is our original log home sealant (and the company namesake). It was formulated to look like the concrete mortar that was typically used on full-log construction at that time. It is the original elastic log home sealant. Today Perma-Chink is available in eight different colors, some of which look like concrete, the others are various wood tones.
Energy Seal was formulated at the request of our customers at a much later date. These customers had homes that were usually built with log profiles that did not use chinking, but required weatherproofing some time after they were finished and in use. Because the application surfaces were never intended for a sealant application, they don’t have proper geometry that includes a caulking well to allow for sealant and backing material installation. Consequently, we formulated Energy Seal to have higher elongation performance. Energy Seal comes in a wide selection of 12 colors for customers who would prefer to conceal the sealant or even to match the chinking on their log home.
Energy Seal is a Better Choice in the Following Situations:
In general, Energy Seal is a better choice for very demanding, narrow seam application where more stretch is required in a narrow sealant seam. It is also the best choice if you would like the sealant to blend in with the wood surface and not be easily seen. Energy Seal is an excellent choice for use in sealing around doors and windows, butt joints, corners, and junctions between log walls and other surfaces such as beams, rooflines or framed walls.
Perma-Chink is a Better Choice When:
Many log homes are designed, manufactured and constructed with chinking an integral part of the building envelope. Perma-Chink is the clear choice in this situation. Additionally, Perma Chink is ideal to use when sealing up the junction between wood walls and concrete, brick or stone features like fireplaces, stone accents and walls.
Additional Information:
Energy Seal is lightly textured to reduce shine and reflectance and to help it accept stain when you prefer to blend the sealant in with the surrounding woodwork. Perma Chink’s heavier texture mimics the look of concrete mortar.
We have additional special purpose sealants. Check Mate 2® is specifically formulated to seal checks in your logs. It has very high elasticity for the dry season when your checks open up and it compresses very well when the environment gets damp and those same checks close back up. It is available in clear and six colors to match your wall color.
For more information call Perma-Chink Systems and consult our Sealants Application Guide to gain your best understanding of how and where to apply any of our sealants to get the highest possible performance out of them.