Blog & News

From Worst to First With Perma-Chink!
By John & Elaine Judsky
Suches, GA
Perma-Chink Customers Forever
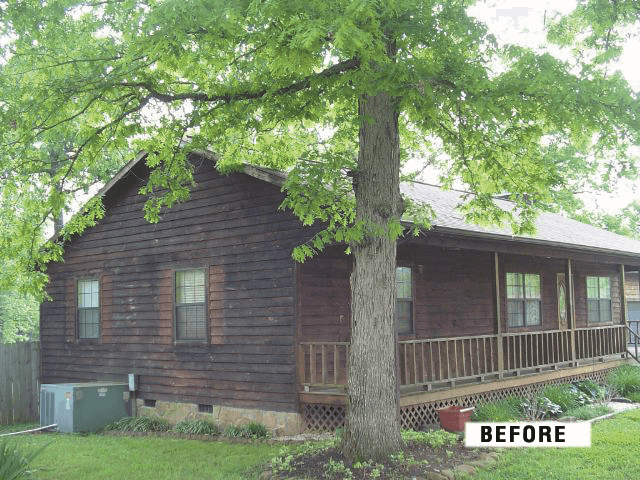
I’ll admit the hard truth. I neglected the exterior of our log cabin in the North Georgia mountains. For years. It was ugly, and we needed restoration.
We had used Perma-Chink products on the interior of our new cabin back in 1999, with Sure Shine on our floors and the Lifeline Interior on our walls. They are holding up well and looking good after 16 years.
But the exterior was a mess from our neglect and from using an inferior product. We used the product recommended and provided by our log manufacturer. It shall remain nameless here because it was an oil-based jug of junk.
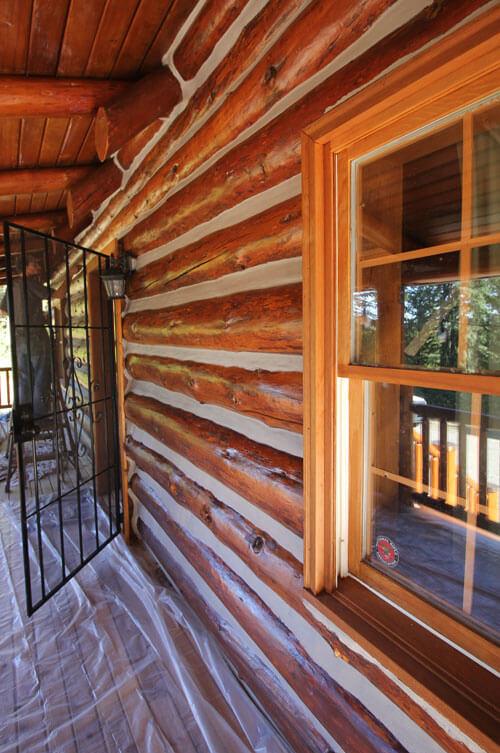
This past summer I finally had the time and money to redo the exterior, and there was no question in my mind I was going to use Perma-Chink products. We attended a workshop in Knoxville and learned lots of good tips and info. The logs looked dirty, faded and had no water resistance. I went ahead and sanded the few spots that needed that much care. The S100 finish remover did a great job removing what was left of the old finish. The Wood ReNew made the logs fresh and bright again. Then the Log Wash prepared a good surface for the application of Armor-Guard preservative followed by two coats of the Lifeline Ultra-2, followed by the Lifeline Advance Gloss.
I also used Log End Seal for the logs & Woodsman for caulk touch-up. Our deck and porch floors were treated with Deck Defense. Every single product seemed high-quality and gave the advertised results. The water-based products are a dream to work with and clean-up is easy. All the products used together truly are a log home finishing ‘system’.
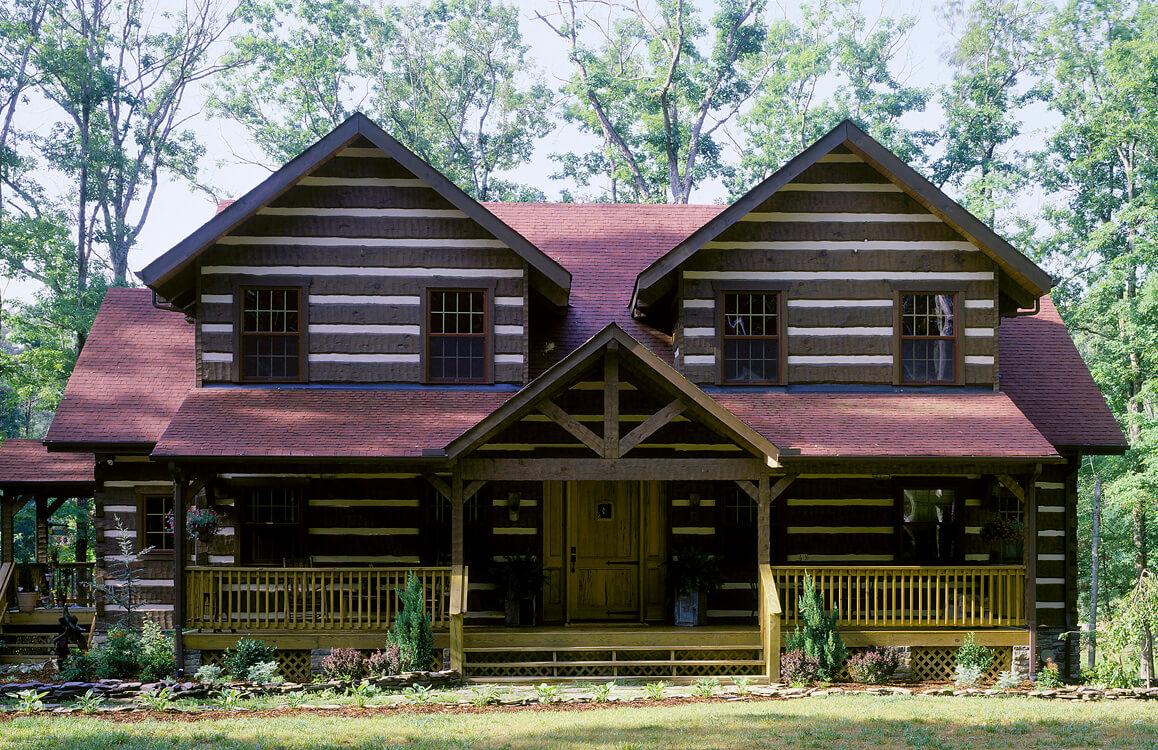
Now we have a home with a beautiful finish that looks brand new! My wife says that it looks like we are living inside a piece of fine furniture. The true beauty of the logs is shining through, we have a home we are once again proud of and we could not be more pleased. It was a lot of hard work, but the results are amazing.
I highly recommend Perma-Chink products to all those who want to preserve their logs and want a beautiful home. Their products are not inexpensive, but definitely worth every penny! If you do it yourself or hire it out, make sure you educate yourself on all the excellent how-to’s and advice on the website and make sure the directions are closely followed.
My final advice: You CANNOT go wrong with Perma-Chink.
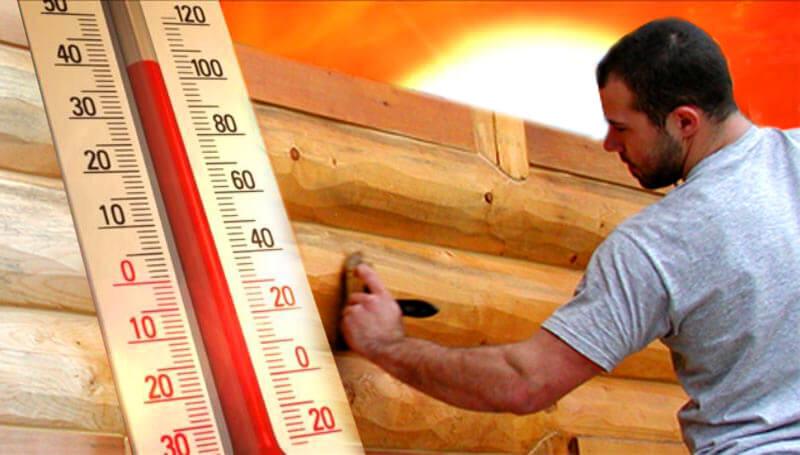
Some DIY homeowners assume that hot weather simply means that the log finish freshly applied on their log home will dry faster. While this is true, there are circumstances when stained log surfaces dry too quickly. Once the finish is on the wall, it does not really matter if it gets hit by direct sunlight a few hours later. It’s the surface temperature during the application process that’s critical.
How Hot is Too Hot to Stain My Log Home and Deck?
A general rule of thumb is that stain can be applied when the outside temperature is between 40°- 90°F. However, temperature for application is based on the surface temperature of the logs, not the temperature of the air. For instance, a wall in the sun can be 10-25 degrees hotter than the surrounding air.
Can I Stain My Log Home in Direct Sunlight?
It’s best to avoid staining in direct sunlight, especially during the hot summer months. The heat causes the stain to dry out too quickly which prevents it from brushing out properly, resulting in brush marks, lap marks, and inadequate adhesion.
What Part of the Day is Best for Applying Finish to My Log Walls?
For exterior log walls, start as early in the morning as possible, after any dew has evaporated. As the sun rises and areas of the house become shaded, work around the house staining the shaded areas as the sun moves East to West.
What Happens When You Apply Stain to the Log Surface Hotter than 90 F?
- Water-based stains cure by the proper evaporation of water, leaving behind the pigments and protective coating. When water evaporates too rapidly, the ingredients/pigments will not disperse evenly for best adhesion.
- Brush marks and lap marks may occur, resulting in an uneven look of the finish.
- Uneven thickness of the stain coat on the surface will result in blotchy appearance.
Will Humidity Affect the Drying Process of the Stain on the Logs?
The best drying will occur when the relative humidity is 40% to 70%. The ideal temperature for staining is 70 degrees with humidity around 50%. To eliminate dew and condensation on logs that can create uneven sheen, allow approximately 2 hours for the coating to dry before sunset.
PRO Tips for Applying Stain to Log Homes in Hot Weather:
- Work or move around the house to avoid the sun as much as possible. Work in the shade when possible.
- You must keep a “wet edge” at all times. This means a lot of stain on the tools and working fast to avoid lap marks.
- Use heavy duty brushes that hold a lot of stain. Professionals typically use 4” high quality brushes. They are heavy and bulky when loaded with stain. Invest in quality brushes.
- Always “box” your stain and make sure it is completely mixed. Colors can slightly vary from one pail to the next. Use another bucket to mix gallons (like a 5 gallon bucket). Be mindful of the stain in your bucket and keep it closed when taking breaks.
- Buy a laser temperature measurement tool and monitor surface temperatures throughout the job.
- Avoid staining when humidity is extremely high or right after a heavy rainstorm. Stop working if temperatures exceed the limits.
- If in need of a professional help, visit our Find A Contractor tool and choose log home contractors near you.
By Lee Denman, Intensified Wood Restoration
There are essentially two types of log home stains available on the market today:
| Film-Forming FinishesOil-based (Alkyd) Log Home StainsLatex-based Log Home StainsAcrylic Latex-based Log Home StainsVarnishes for Log Homes | Penetrating FinishesOil-based Semi-transparent Log Home Stains |
What are the PROS and CONS of each of these types of log home finishes?
1. Oil Based (Alkyd) Log Home Stain
PROS: Wood grain visibility, UV Protection, Non Porous, Easy application, longer open times.
CONS: Trap Moisture, Brittle, Can’t Breathe, Weather Quickly, Coat build-up over time, Blistering occurs if moisture is present behind finish, High Maintenance.
2. Latex based Solid Color Log Home
PROS: Breathable, Flexible, Durable, High UV Protection, Porous, Easy application, Low maintenance, Long life, low odor.
CONS: Won’t prevent decay if conditions are favorable, Short Shelf Life.
3. Semi-Transparent Acrylic Latex based Log Home Stain
PROS: Breathable, Flexible, Durable, High UV Protection, Wood grain visibility, Porous, Low maintenance, Long life, low odor.
CONS: More difficult to apply than oil based stains and solid color stains, fast drying times.
4. Log Home Varnishes
PROS: Allow for natural look of logs.
CONS: High maintenance, prone to Cracking, Peeling and Blistering, Requires recoating every 1-2 years, Partial UV protection.
5. Oil based Semitransparent Log Home Stains
PROS: Penetrate into wood, Wood grain visibility, Breathable, High UV protection.
CONS: Perform best on rough sawn, weathered, or course textured wood. Compatibility issues with most log home sealants due to waxes found in most penetrating finishes. Don’t have a furniture grade finish look (dull), must apply second coat before first coat dries in order for stain to penetrate wood. Vapor barrier, non-breathable.

What types of log home stains work the best?
So we have all this helpful information on the types of log home stains but which log home stain is the best? It is hard to say which one is the absolute best because there are many factors that ultimately decide how well or long a log home stain will perform. Some of these factors are:
- What season the logs were cut (winter cut logs only)
- Proper surface preparation
- Environment surrounding building
- Moisture content of logs
Of all these factors none is more important than proper surface preparation of the logs before applying a log home stain. If the surface of the logs has not been prepped properly none of these log home stains will perform as they state they will. This is why it is important to only hire a qualified log home restoration expert to work on your log home! They will have the knowledge and expertise to work with the products available in the current log home market. This will ensure your investment is protected well into the future.
While we can’t say which log home stain is the overall best, we can recommend which type of log home finishes we feel perform exceptionally well and keep maintenance costs down throughout the years. This only holds true if proper surface preparation is kept in mind before and during any finish or sealant application. In our opinion, film-forming, latex based waterborne log home finishes such as Perma-Chink Systems’ Lifeline is best bang for your buck!
While Perma-Chink Systems finishes aren’t the cheapest out there they seem to require the least amount of maintenance based on our 25+ years of experience restoring log homes and log cabins of all sizes and shapes. They also offer an unmatched 5 year warranty on their log home stains when applied properly and maintained accordingly.
Lee Denman is the founder of Intensified Wood Restoration Company
Perma-Chink Systems Free Samples
Want to try Perma-Chink Systems products? Order free samples online here.

There are two kinds of wood – wood that is rotten, and wood that one day will be rotten. This statement may seem a bit extreme, but it is a fact. Wood is a product of nature and its nature is to return to the earth in a natural process. As professional log home contractors, it is our job to ensure that wood used in the construction of log homes lasts for many years.
Borates have been used to preserve wood for many years, and because people have lately become more concerned with the toxicity of products used in their homes, it has steadily grown in popularity. We will discuss the use of borates to preserve log homes in detail.
What are borates and how do they work?
Simply put borates or borax are naturally-occurring water-soluable salt-like acids. They are about as toxic as table salt to humans and pets but kill wood-consuming insects like termites, powder-post beetles, and old house borers. More importantly, it kills the wood destroying microorganisms that cause rot.
Rot in log or conventional homes causes hundreds of times more damage to homes every year than damage by insects.
For borates to be effective, they must be actually eaten by an organism. Borates are not effective against carpenter bees because they do not actually consume wood – they just chew it. Interestingly enough, consuming borates does not instantly kill termites or other wood destroying insects. It does however kill the bacteria in their digestive system. These bacteria actually help the insect digest the cellulose fibers that make up a piece of wood. Without these bacteria, the insects die of starvation. Funny how nature works.
Borates
Borax, also known as sodium borate, sodium tetraborate, or disodium tetraborate, is an important boron compound, a mineral, and a salt of boric acid. Powdered borax is white, consisting of soft colorless crystals that dissolve easily in water.
Borax is a component of many detergents, cosmetics, and enamel glazes. It is used to make buffer solutions in biochemistry, as a fire retardant, as an anti-fungal compound, in the manufacture of fiberglass, a texturing agent in cooking, as a precursor for other boron compounds, and along with its inverse, boric acid, is useful as an insecticide.
Types of Borates
Perma-Chink Systems markets four different forms of borates for the purpose of preserving wood. TimBor is sold as a powder that is mixed with water on-site and then sprayed onto wood. PenaShield comes pre-mixed and is Ready-To-Use. Bora-Care contains the highest concentration of borax with glycol added to deepen penetration into wood and must be mixed with additional water on-site. The Concentrate is usually used in extremely wet or rot-prone conditions or on active rot or insect infestations. Cobra-Rods are made from borax and copper which have been compressed and heated to form a glass-like rod of borax which is inserted into holes drilled in rot-prone areas like porch posts. Cobra Rods are so effective that they are now inserted into all new utility poles installed in the southern U.S.
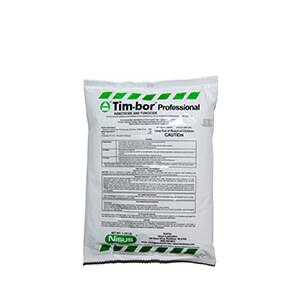
Tim-Bor®
Sold as a powder that is mixed with water on-site and then sprayed onto wood.
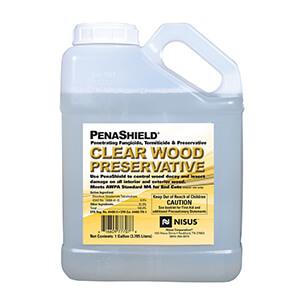
PenaShield®
Comes pre-mixed and is Ready-To-Use.

Bora-Care®
Contains the highest concentration of borax with glycol added to deepen wood penetration and must be mixed with additional water on-site. It is usually used in extremely wet or rot-prone conditions, on active rot, or insect infestations.
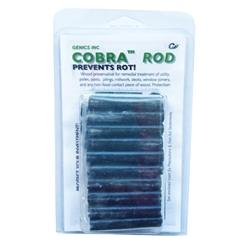
Cobra-Rods®
Made from borax and copper, are compressed and heated to form a glass-like rod. The rods are inserted into holes drilled in rot-prone areas, like porch posts. Cobra Rods are so effective that they are now inserted into all new utility poles installed in the southern U.S.
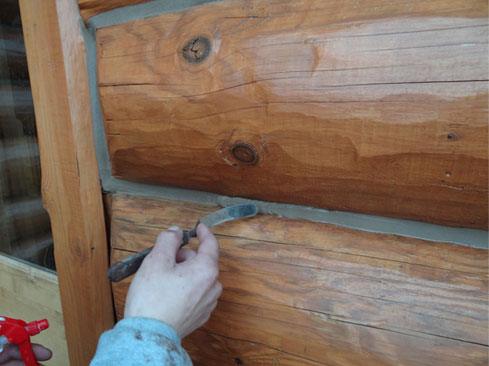
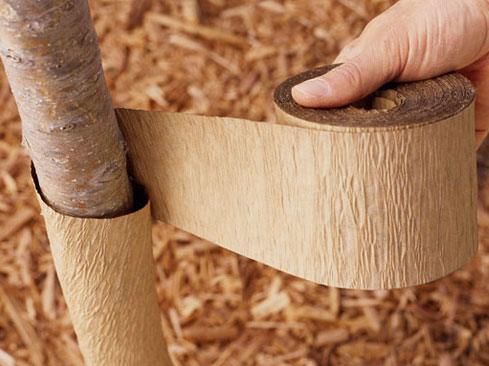
When most homes are constructed, the logs are clean and smooth with very few checks, or cracks, in the logs. During the first few years, these checks open up, expand, and deepen. Many checks extend to the center of the log – much deeper than any topical application of borax can effectively reach. These exposed deep checks CAN and DO collect water. Over time, this will cause the log to rot. It is very important to include the application of borates into checks during any and all maintenance work done on a log home prior to a maintenance coat of stain, clear coat, or caulking.
Special and Unusual Applications
I have used borate treatments over the years in many other special and unusual applications that I will list below.
For antique log homes – Owners of antique log homes have spent a lot of money purchasing old logs, timbers, and siding because of their unique appearance. They love that silvery-gray rough texture inherent to old timbers. They are very reluctant to remove this look in order to properly apply a protective waterproof coating that would protect these logs from rot.
An alternative for this unique and growing segment of the market is to simply treat the exposed logs every year with borates. The treatment must be done every year because borates are water-soluable and rain will eventually leach the product out of the wood.
The borates will not change the color of the wood and it is almost impossible to over-apply.
For additional protection against insects inside new homes – During initial construction, spread powdered Tim-Bor into open stud wall cavities and on the floor where base cabinets are to be located. Then close up the stud walls and install the base cabinets. The borate powder will stay in those locations forever and kill all roaches and ants that come in contact with Tim-Bor.
Now, I told you earlier that insects must consume the product to be effective and that is true. Insects can crawl through the powder without being harmed. However, ants and roaches belong to a group of insects which constantly groom themselves to stay clean – or a clean as a roach or ant can be. To stay clean, they lick their legs and other body parts. When they do, they consume the borate and will die.
For log replacement projects – I highly recommend a thorough treatment of all replacement logs and log siding with liquid borates and Cobra Rods. The chances are that homeowners who have not maintained their homes in the past will probably neglect them in the future.
A more permanent treatment today will lower your liability in the future as a contractor. An even better plan would be to have replacement logs pressure-treated with borates. There are probably more companies that provide that service, but I do know that Appalachian Log Structures, Lok-N-Logs, and Sisson DuPont Carder will pressure-treat logs for use in log replacement. They all also produce many different log profiles. If I were to replace a log on a customer’s home that was pressure-treated, I would have no problem extending a lifetime warranty on that log – a good selling point for log home contractors.
For active infestations – I have successfully used borates against insects that are actively living in isolated spots on structures. In the pictures below, powder-post beetles infested barn wood on my porch. I injected borates into the actual holes using a syringe made for injecting marinade into food.
Any plastic syringe will work when held tightly against the hole to inject the liquid.
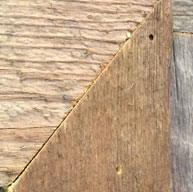
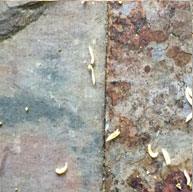
I treated these holes one afternoon and found them dead on my counter-top the next day. I may have simply drowned them, but that was a year ago and they have not returned.
The same type of method can be used in isolated areas of rot or termite damage using – believe it or not – a bulb-type turkey baster or cheap ketchup squirt bottle. Simply drill angled holes into the wood on the upper part of the log (you have to drill to get the product into the wood past the existing water-proof stain on most logs) and insert the bottle or baster full of borate solution into the hole and walk away for a couple of days. The liquid will slowly soak into the log and saturate a large section of log. If the product simply flows quickly into the log, then you will probably be facing a log that is too far gone and it may need to be re-faced or replaced. Once the product is deep in the log, it will soon kill the rot or termites.
I recommend Bora Care for this procedure as it has the highest concentration of borates. Remove the delivery device and add a Cobra Rod as extra insurance and longevity.
For log railings – Log railings exposed to the weather are a maintenance nightmare. They are very difficult to maintain a stain coating on because they develop checks on the upper curvature of the rails which gather water. However, when located on a raised deck or stairway, they can be downright dangerous. How many homes have you visited a homeowner who warns you not to lean on the railing during your inspection of the home?
Think about it – the only thing between you and serious accident is a rotted handrail! Many state codes now require pressure-treated handrails.
These things are a serious safety problem – and this warning does include cedar or redwood which last longer, but also rot.
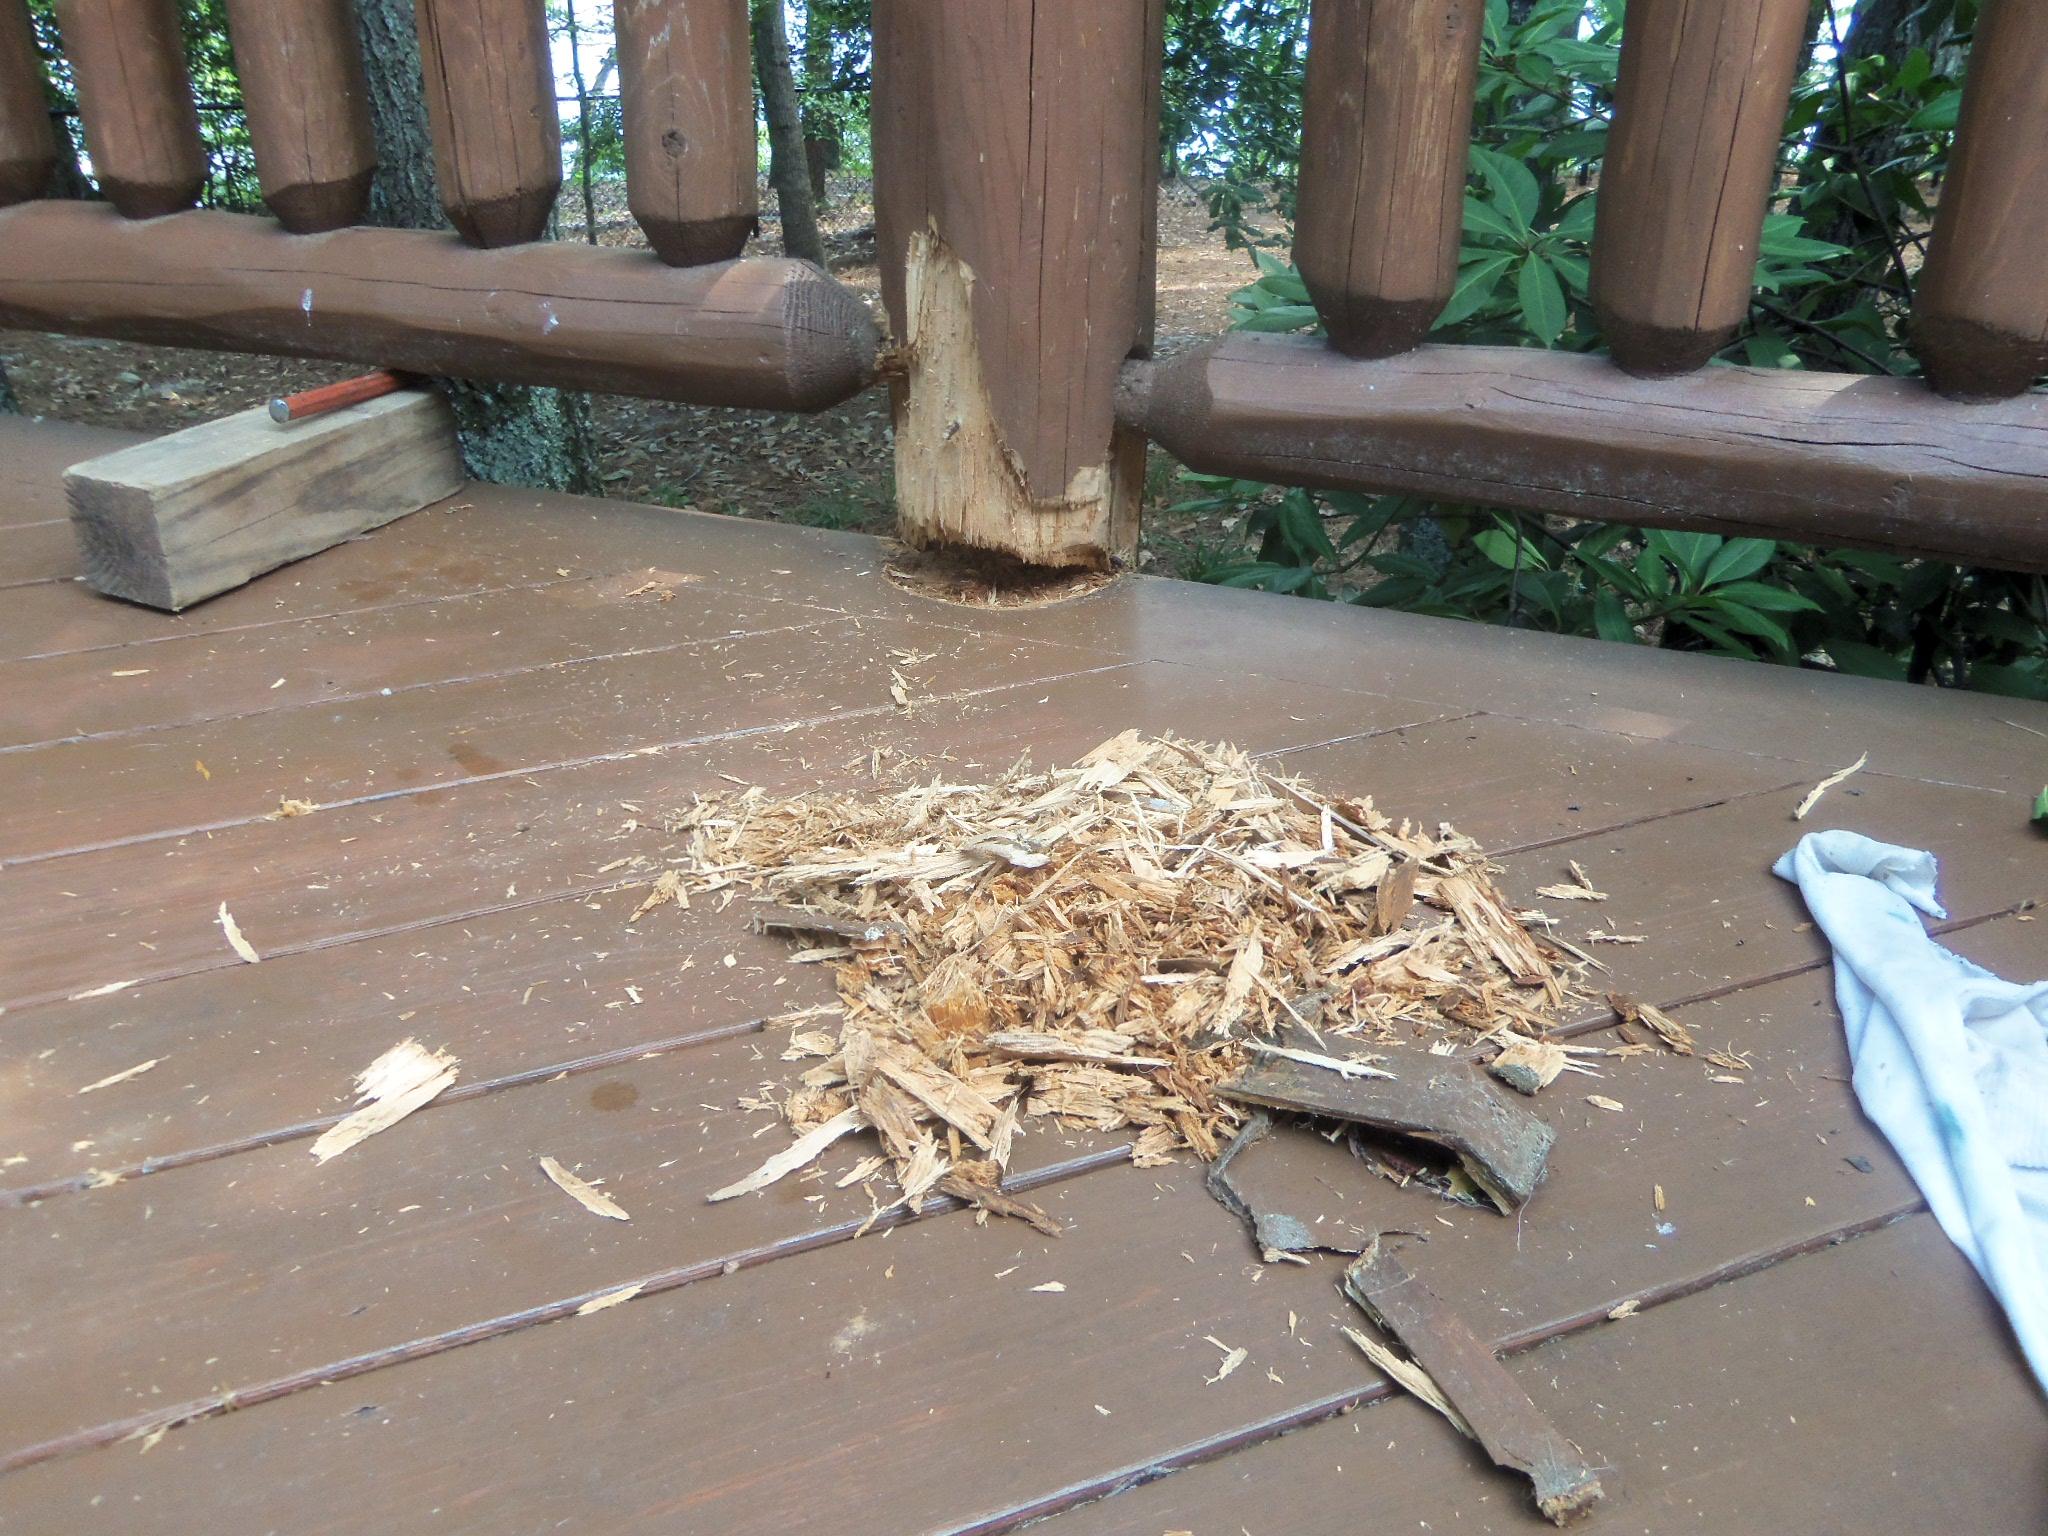
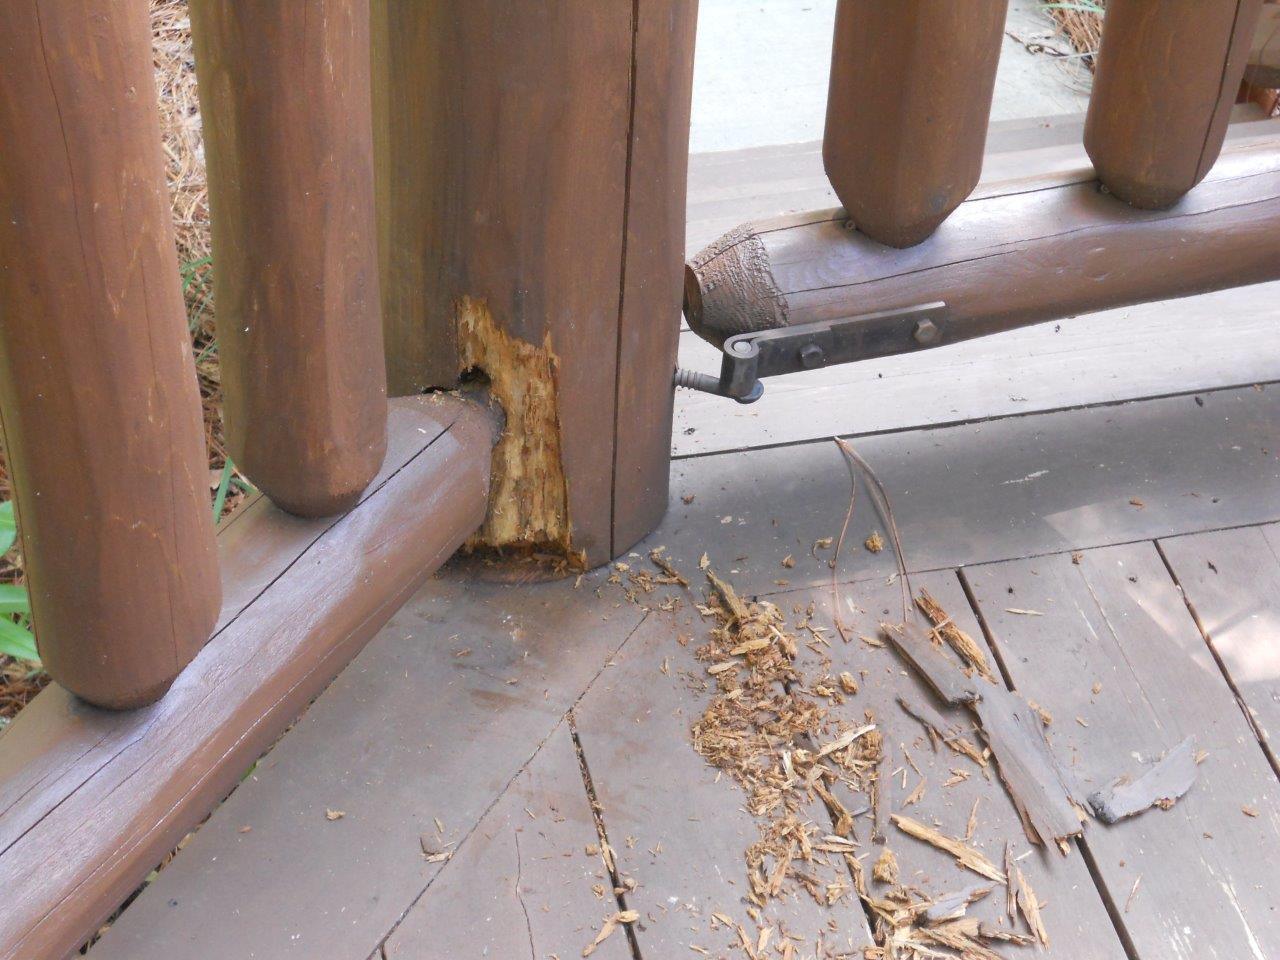
If you are at a new home site, you can treat new hand rails as they are assembled by drilling a hole into the end of each spindle and inserting a Cobra Rod. The borates and copper will dissolve into the surrounding wood and protect against rot. I would also soak all the components in one of our other liquid borate products. A pain, but better than an accident.
If you have more questions, please contact us 1-800-548-3554.
Please visit Perma-Chink’s How-To Tips for more detailed application information on the use of these products.
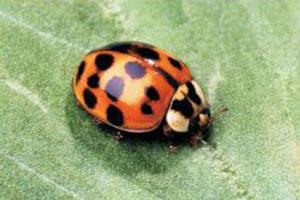
In many areas of the country when cool, fall days arrive, Asian lady beetles (ladybugs), Harmonia axyridis, and boxelder bugs, Boisea trivittatus, congregate on exterior walls. They typically choose the south and west facing walls since these walls are the warmest. Once on the wall they look for nooks, crannies and other dark openings where they can hibernate over the winter. Log checks, gaps between butt joints and corner openings provide ideal wintering sites for these insects. If any opening leads to the inside of the home, they can become a real nuisance, especially if they enter in large numbers. An effective method to handle them inside is with a vacuum cleaner. Spraying them with pesticides is unnecessary and unhealthy.
The best way to keep them out of your home is to block their entry points with a sealant, screening and weather stripping. Using high quality sealants like Energy Seal™ or Woodsman™ will help prevent these and other insects from entering your home for years to come. When sealing, pay special attention to window and door frames. That’s where openings typically appear as a home settles and logs season.

Although ladybugs and boxelder bugs do no damage or reproduce indoors, they can still be a nuisance. If a gathering of insects on the exterior walls of your home bothers you, spray them with a simple solution of soap or detergent and water. To help keep them off of the walls, you can use a pesticide containing deltamethrin, cypermethrin, permethrin or bifenthrin. These products only last about three to four weeks, so the treatment will have to be repeated every so often and should only be used during periods of peak activity. Be sure to follow label directions and read and understand all precautions that must be taken when using any pesticide.
Most pest control companies offer some type of exterior treatment for these insects as well. But be aware that any type of exterior treatment must be applied before the insects enter the home in the fall of the year.

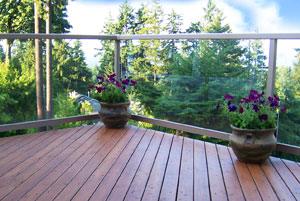
Your decks and railings do not weather in a uniform fashion like your log walls. After a year or two with some deck stains, areas exposed to direct sunlight may hold little or no trace of the original finish, while shaded surfaces may show very little, if any degradation.
Maintaining Your Deck
There are three primary elements to your deck which can maximize longevity and structural integrity as well as aesthetics. These include periodic maintenance between applications of stain, preparation of applying new stain and the staining itself.
Regardless of the stain used on your deck, its life can be extended with periodic cleaning. Pooling water can easily be swept off with a push-broom, which can help prevent premature failure of your deck stain. However, cleaning it periodically will make the biggest contribution to maximizing its life and appearance. A diluted solution of Log Wash™ (1 cup per gallon) can easily be applied through a garden pump sprayer ($20 – $30 at any garden center or hardware store) then lightly pressure washed off. If you don’t have access to a pressure washer, a strong jet stream from a garden hose will also work. Remember, here you are trying to clean the deck, not remove the finish.
For decks that may have excessive levels of dirt, mildew, green algae, etc., the mechanical action of scrubbing or using a medium bristle push broom after applying Log Wash will help a lot. Make sure to thoroughly rinse off all detergents as you never want them to dry on the wood surface.
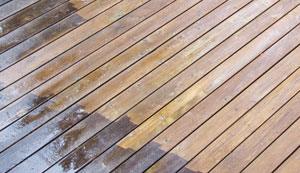
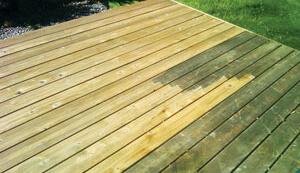
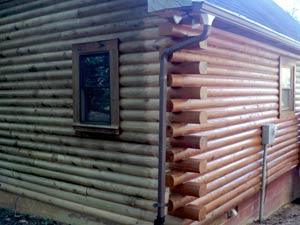
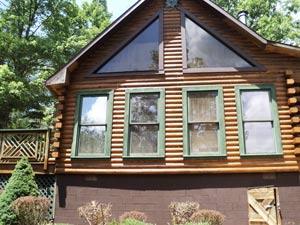
For decks that have darkened from sun exposure with little or no stain left, a deeper pressure washing can be done to remove the darkened surface in order to get down to clean, bright wood. Photos 1 and 2 above show these results. If necessary, Wood ReNew™ and a pressure washer may be used to clean away any gray UV damaged wood fibers, as well as deep rooted mold and dirt residue.
Your deck is ready to stain immediately after cleaning. Pick your color and apply 1 coat of Deck Defense. Once the initial coat of Deck Defense applied to bare wood, a future maintenance coat applied to a surface previously coated with Deck Defense is easy – clean and recoat, no mechanical or chemical stripping required.
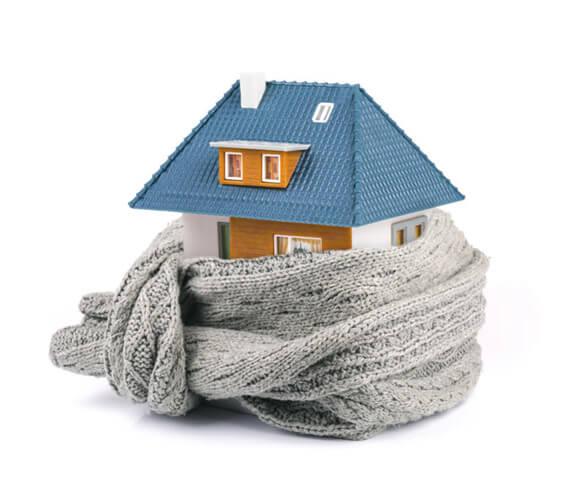
Have you noticed your heating bill increasing year after year? It could be that your home has cracks that let heat escape, costing you money. Seal up cracks and seams before the weather turns cold and it’s too late to do anything about it.
Specifically designed for milled and scribed log homes, Energy Seal is a revolutionary product offering superior binders that effectively seal all interior and exterior gaps and cracks.
Energy Seal is a 100% acrylic polymer sealant formulated to provide a long-lasting and resilient barrier for any chinkless log home. Since logs constantly twist, turn, swell, and shrink during the life of a log home, annoying gaps can appear. These gaps promote the retention of moisture, which can lead to log decay and damage, as well as seepage of air and water.
Energy Seal will virtually eliminate these problematic gaps by adhering directly to the logs while eliminating any air space. When applied on your log home it stops outside air infiltration, increasing energy efficiency.
Energy Seal is not affected by ultraviolet rays and resists most chemicals, salt spray, mold & mildew, and has low thermal conductivity.
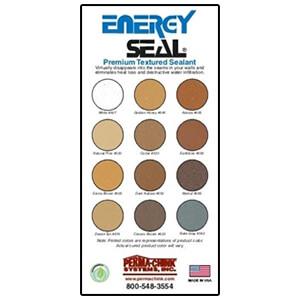
Log homes can tend to appear darker because wood absorbs excess light. Energy Seal’s lightly textured design and colors reflect light to brighten and even out log wall tones, dramatically eliminating shadow lines.
Unlike commonly used caulks, which look shiny and artificial, Energy Seal is textured to match the visual characteristics of wood and look like it belongs there. It easily tools to a smooth, professional finish, virtually disappearing into the walls after it’s applied. It softens the lines on log walls and accepts the color of wood finishes. In fact, Energy Seal so closely matches your walls, most people can’t tell the seams are sealed.
There is nothing on the market that can beat Energy Seal’s natural appearing colors, ease of application, coverage and hiding properties: Energy Seal is the only product created for the unique sealant needs of the milled log home.
Check out the color selection of Energy Seal to complement your finish. Enhance the beauty of your home and start saving money right away!
We are proud to announce our new supply of the widest range of dispensing tools in the industry from Albion Engineering Company. Albion is a high quality alternative to the tools typically found in hardware stores and do-it-yourself outlets. Professional tools, built to last.
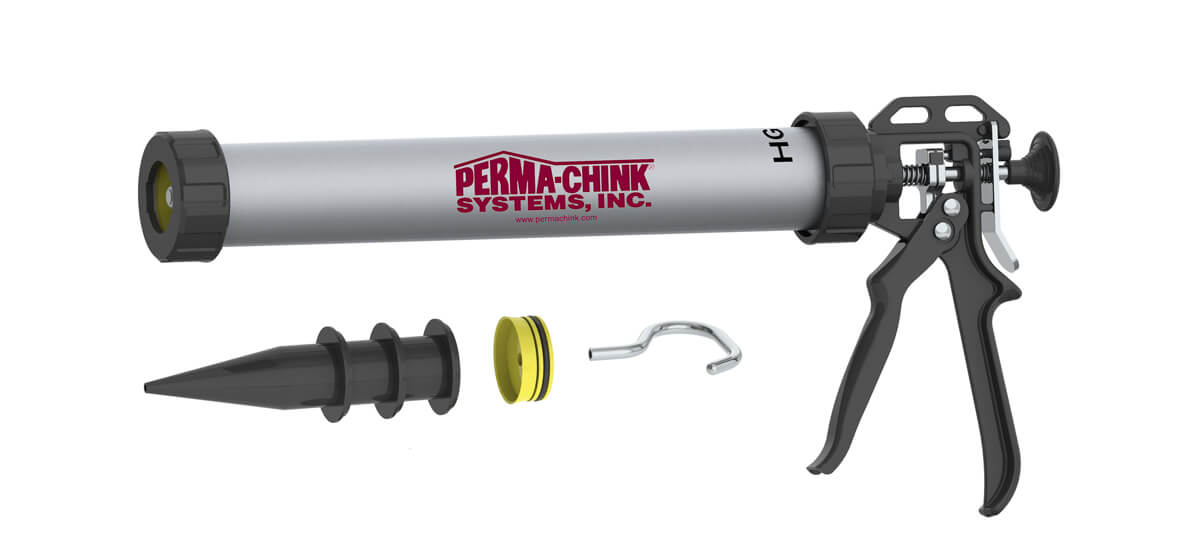
1. The Albion Bulk Loading Caulking Gun is our most popular tool for applying Perma-Chink or Energy Seal. It is built to meet the demands of serious professionals, utilizing rugged, heavy-duty all steel drives and lightweight aluminum barrels to reliably dispense a wide range of materials.
Available sizes 20 oz. and 30 oz.
- Professional Quality
- Efficient 12:1 Drive Ratio
- Lightweight Aluminum Barrel
- Double Grip Plates for Long Life
- No Spanner Wrench Needed!
- Barrel Rotates for no-stop application
- Kit includes 3 nozzles, one spare piston and a steel ladder hook-pull
2. Albion Smooth Rod Manual Drive Guns are Portable, Efficient, and Adaptable.
Heavy duty cradle smooth rod rod caulking guns. Great for professional use where bead consistency, control and clean up save time and money. A simple push of the recoil releases all pressure on the plunger and instantly stops the flow of sealant. To remove the tube, press the lever and pull back on the rod to expose the entire tube and slip it out of the gun.
Smooth Rod Style Caulking Guns for applying Perma-Chink, Energy Seal, Check Mate 2 and Woodsman.
Available in sizes for 11 oz. tubes and 30 oz. tubes
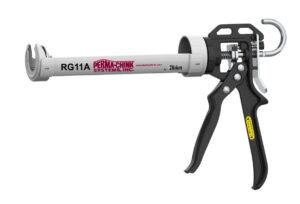
- Professional Quality
- Smooth Rod for reliable dispensing
- Efficient 12:1 Mechanical Advantage Drive
- Convenient Thumb-Release for no run-on caulking
- Full size handle for comfortable dispensing
3. Cordless Guns with a State-of-the-Art Performance, Portability and Control.
How Fast is Fast! A Cordless Gun can dramatically decrease the amount of time on a chinking job.
Available in sizes for 11 oz. tubes and 30 oz. tubes AND 20 oz. bulk
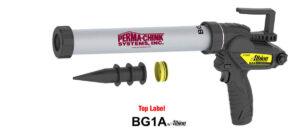
- Powerful – 400 lbs. of Dispensing Force
- Fast – Dispense 11 oz. Cartridge in 16 seconds
- Lightweight Aluminum Barrel
- Long Lasting – 12 V Lithium-Ion Battery
- Control – Variable Speed Trigger with Maximum Speed Dial
- Auto Reverse for No-Drip Dispensing
- Comfortable rubber over molded handle. Swivel barrel
- Fast 30-minute recharge. Battery Fuel Gauge
- Ladder pull hook

During the winter months many homeowners use firewood as a source of heat or create an attractive atmosphere. But along with the firewood comes many types of living pests. Most firewood pests will not harm people or animals, nor will they start infestations of wood within the home.
However, there are a few pests, like Black Widow spiders, that are of concern. Some types of wood boring beetle infestations occasionally begin by emerging from stored firewood. But most pests are harmless, yet annoying, insects like cockroaches, pillbugs, centipedes, ground beetles, and sowbugs that all like to hide over winter beneath bark, or in the cracks of firewood, becoming active within days after the firewood is brought into a warm home.
The best way to control firewood pests is to properly store and manage the firewood. NEVER SPRAY FIREWOOD WITH PESTICIDES!!! Harmful vapors could result from burning pesticide-treated wood.
Store your firewood at least two feet away from the side of your home, and keep it off of the ground. This keeps firewood dry and allows air to circulate throughout the woodpile.
Burn the oldest wood first; the older the wood the greater the chance that insects may get into it.
When you are ready to bring some firewood inside, knock the logs together to shake any insects that may be clinging to the wood.
That being said, the most important thing you can do is to bring inside only what you will burn that day! Firewood stored by the fireplace, in the garage, or in the basement allows pests to warm up and emerge within your home. And although a neat stack of firewood may look attractive setting next to the fireplace, twenty or so wood roaches running across your carpet may convince you otherwise.
Managing firewood pests is essentially a matter of keeping them outdoors instead of within your home. The shorter the time that firewood is inside, the lower the chance there will be for these pests to emerge and scatter.
By Seth Murphy
Papadiy.com
Owning a home is a big part of the American Dream: a place to call home, where your family grows and thrives. Being a homeowner however, has its fair share of responsibilities and it’s a year round job. As you prepare for winter and ice storms, there are a few must do’s to ensure your family’s peace of mind. Every homeowner is inevitably faced with the possibility of having to hire a professional to do home repairs and maintenance. However, there are plenty of DIY maintenance tips that can keep your house in tip top shape so you can save the most complicated jobs to the professionals.
Pipe Dreams
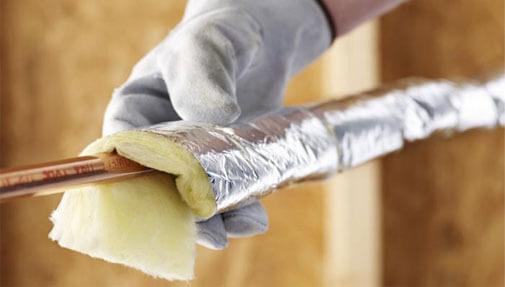
The last thing you want before your Holiday dinner party is a burst pipe that leaks or floods the basement or another part of your house. When water freezes it expands and increases pressure inside the pipe. This might cause it to burst and leak water inside your home causing major damage. Some simple DIY tips can keep this from happening. Popular Mechanics magazine suggests that before winter weather settles in make sure that you:
- Insulate pipes in unheated rooms
- Open cabinet doors when you’re not home to let heat reach the pipes
- Leave the faucet leak slightly to keep water flow
The Sprinkler System

Neglecting simple winterizing tips on your sprinkler system can lead to costly and labor-intensive repairs to your irrigation system. According to Do It Yourself you want to first be knowledgeable on the kind of system installed and refer to the manual or the instructions. Essentially you want to shut off the water, drain the system, and leave in the half open position for the winter. This is an involved process that might benefit from hiring a professional. A small error in winterizing your sprinkler system can cause extensive damage and require you to replace the whole system.
Sealing Air Leaks
Finding the outside source of the air leak around window and door frames might be difficult. The opening source of the leak may be several inches from the spot where it is felt inside the home. The best way to attack air leaks is from exterior surfaces. You can seal the interior but if a crack or crevice is leaking air it may also leak water as well. Sealing the leak from the outside with Energy Seal prevents water penetration along with air infiltration.
Other Insulation
Insulating your garage is also important and can be relatively simple to do yourself if you have the tools and some experience. Weather stripping your garage is a good place to start. This will prevent drafts and the escape of any heat. You can also insulate the walls with foam board and fiberglass batt insulation.
Consider putting in a heating unit in the garage to keep temperature regulated so you can continue working there through winter. Family Handyman magazine discusses two options of natural gas heaters for your garage: “a forced-air garage heater that blows warm air or a “low intensity” infrared tube heater that radiates heat.
Plant Care
Tending to your garden and plants is a good DIY project for the upcoming winter. Every plant has different needs and is built to withstand different weather conditions. HGTV Magazine writes that the biggest problem is protecting the roots from rapidly fluctuating temperature. You want to bring in outdoor plants indoors, insulate some plants.
The Spruce has a few tips on keeping plants healthy through the winter.
- Most plants need less water in winter and so adjusting your watering schedule is an important part. The most important time to water is during the day, however you can water plants sufficiently before a freeze to prevent desiccation.
- Keep in mind the indoor temperature by keeping the plants away from furnaces, fireplaces, and drafts.
- Go easy on the fertilizer so as not to upset the plant’s natural cycle.
If you live in windy weather conditions, protect flowers from wind damage with fences or shrubs or some other protective barrier. However, be careful not to completely block all sunshine. Before a freeze you can shelter tender sprouts with an inverted bucket or a blanket. As far as your trees go, make sure to prune long branches as a good method to prevent wind damage.
Help maintain the value of your home by keeping in mind important seasonal and year round maintenance. Always assess the complexity of the job and the tools needed in order to decide whether you want to do it yourself or hire a professional. These decisions can end up saving you thousands of dollars in damage later. Your home is where your American Dream becomes a reality, don’t neglect it.
Is Chinking Cosmetic or a Sealant?
Perma-Chink has evolved into an elastomeric compound that has been specifically designed for use in log home sealing applications. Perma-Chink adds to the overall integrity of the structure by not only preventing water and air from entering the home, but also adding greatly to the overall effectiveness of the entire building envelope – keeping heat and air from escaping during the heating and cooling seasons. While it looks fantastic when properly applied, Perma-Chink is most definitely a sealant first and a cosmetic product second.
It should also be mentioned that a properly applied chinking compound will help keep out unwanted insects and other nuisance pests. In the case of a “chinkless” style home, many homeowners often desire to add a chink line for cosmetic purposes to differentiate the home from a smooth-sided home. Or oftentimes on a full log wall system Perma-Chink is used as a contrast in the color of the chosen finish.
Who Can Apply Chinking Properly? A DIYer or a Pro?
Basically anyone can apply Perma-Chink properly if they follow instructions that are available. Some homeowners attend workshops or seminars to learn how, should they choose to apply the product themselves. But in today’s busy environments, some homeowners choose to use the services of trained contractors as the design of their dream home may require the use of specialized equipment, such as lifts or scaffolding, and a trained contractor can usually shorten the time required to accomplish the job. Therefore the homeowner can tend to the other necessities involved to get moved in, and sometimes there are just not enough hours in the day for the homeowner to do this.
How has Chinking Changed Over the Past Decade?
Perma-Chink was the first synthetic chinking produced in 1981. There have been many significant changes made in formulations to improve the adhesion, flexibility, and longevity. Early formulations were lacking in elongation and freeze-thaw stability, which resulted in performance issues and storage and application concerns. Today’s Perma-Chink offers excellent qualities in all areas to meet the needs of the industry. Application can be accomplished in a much wider range of temperature extremes with little or no worries about product performance. There have also been additions to the color palette of the products to keep up with the homeowner’s desire to mix and match shades and hues of today’s finishes.
How is Log Chinking Repaired?
When Perma-Chink is properly installed, there are usually no repairs needed unless it is damaged somehow. The hard part is keeping people from trying to “feel” it before it cures, which results in indentations or fingerprints; and those usually occur right at the front door for some reason. But if repairs are needed, small separations can easily be repaired by applying a small bead of chinking into the damaged area and smoothing out with a small brush and water. Most chinking issues are the result of improper application of trying to make too little go too far. Again, read the directions prior to application and you should not have to make repairs.
Can You Stain Log Chinking or Change its Color in Any Way?
The answer is yes; Perma-Chink can be stained, but it will not take the color as wood does, so the results may be undesirable. Perma-Chink manufactures Chink Paint to change the color of the chinking, if so desired. Chink Paint uses the same raw materials as the chinking, so they are completely compatible with each other.
No matter how much you know about log home chinking, there is always something new to discover.
All About Linseed Oil – And Why It’s No Good For Wood
We occasionally get calls about the exterior of a home that has turned black.
Almost without fail it’s the result of using an oil-based stain that contained linseed oil.
Linseed oil is a yellowish oil derived from the dried seeds of flax plants, and is also known as flax seed oil. Linseed oil is used as a carrier in many brands of oil-based paints and stains. Since linseed oil is organic, many varieties of mold fungi thrive on it. Over time mold can proliferate to point where the coated surface can turn dark brown to black. One way to tell if the darkening is due to mold rather than UV damage is inspecting areas protected from direct sunlight like under eaves and overhangs; it will be the same dark color as the rest of the wall.
When this occurs, washing with Log Wash alone may not be enough to remove all of the discoloration due to mold growth. We recommend to first use Wood ReNew, along with some scrubbing, in order to remove the visible mold. Once the surface is cleaned with Wood ReNew, use Log Wash to help remove any residual linseed oil.

We don’t recommend blasting alone as a method of removing a heavy growth of mold. Linseed oil penetrates into the wood, and although blasting may remove most of the surface discoloration, there may be enough residual linseed oil remaining in the wood to support mold growth under the finish. If the home has been blasted, it will be necessary to give the home a good washing with a two cups of Log Wash per gallon of water solution before applying Prelude.
The best way to prevent this problem is to avoid the use of any product that contains linseed oil. No Perma-Chink Systems finishes contain linseed or other types of organic oils.
For more information, read these technical tips:
Cleaning with Wood ReNew and Log Wash Technical Tip
Why we recommend (and produce) water-based products