Blog
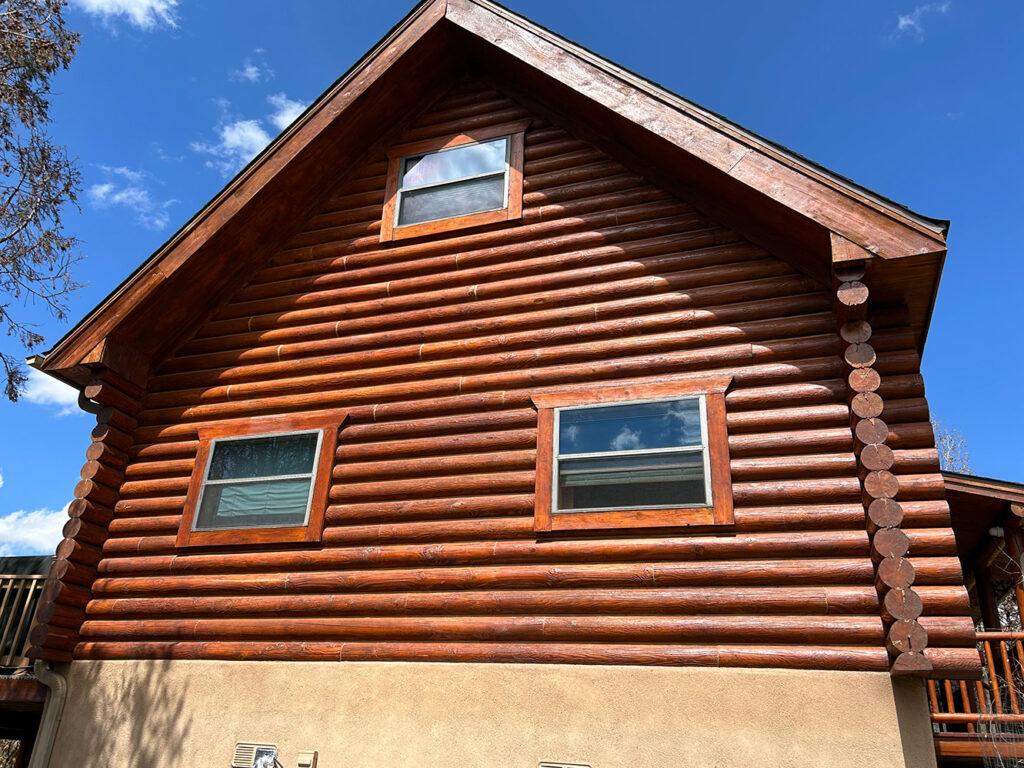
Spring Cleaning! Steps to Prolong the Life of Your Log Home
Every Spring life begins anew. Flowers bloom, trees blossom, and the grass grows thick and green. The springtime is the perfect time to clean and start fresh! Log homes have their own cycles of maintenance, slightly different than a stick-built home. We have found that in the springtime, it’s an excellent time to get things ready for the summer and shake off the wet fall and winter.
We will walk you through our recommended process to ensure your home keeps looking great for a long time. From cleaning to inspection to evaluating your log home’s finish, we’ll prepare you with a system that’s easy to follow.
Cleaning The Exterior with Log Wash
After months of rain, wind, leaves, snow, and pollen, there’s a bit of gunk on your log home. It’s always a good idea to clean your home before inspecting it, as the grime can potentially cover issues you wouldn’t notice otherwise.
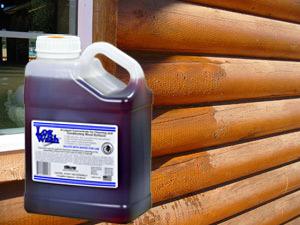
Log Wash™ is a general purpose, low-pH cleaner concentrate for removing dirt, grime, pollen, and mold and mildew stains from bare wood surfaces and existing finishes. Log Wash will also remove some types of brown stains and lighten the color of bare wood. Log Wash is not effective for removing grayed, oxidized wood fibers; PCS developed Wood ReNew to bring wood back to its natural look. Whenever bare wood surfaces are left exposed to the elements for more than seven days, the surfaces should be cleaned with a solution of Log Wash before the first coat of finish is applied.


Preparing For Inspection
One key to keep your log home in tip-top condition is to take an hour or so once the weather turns nice to inspect the exterior of your home for signs of potential problems.
Before we start the inspection process, here are a few tips:
- Make a diagram of your home that you can carry with you while you conduct your inspection. It does not have to be fancy, just a simple plan that you can use to note where something needs to be done.
- If you have a digital camera, take it with you during your inspection. It’s amazing how something you see may disappear when you go back to look for it.
- Use a checklist of inspection points that are relevant to your home. It’s easy to forget what to look for by the time you get to the third or fourth wall.
- As mentioned earlier, give your home a wash down with Log Wash before you start your inspection. It’s difficult to determine the condition of a finish if it’s covered with a layer of winter dirt.
The Inspection
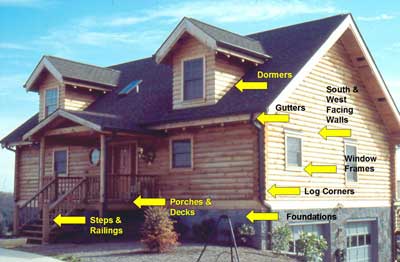
Start at one corner of the home and be sure to go all the way around. Inspect each wall individually and don’t try to inspect too much at a time. Begin by standing back away from the wall and looking for some of the more obvious problems such as:
- Filled gutters and blocked down spouts. If you are not sure about them, use a garden hose to check that they are in good working order.
- Look at the dormers and upper story windows for signs of water damage. If you have a problem seeing that far, use binoculars to inspect the higher areas.
- If you have a sprinkler system, turn it on to make sure that no water hits the log or foundation walls.
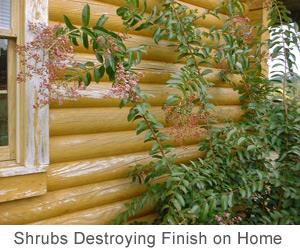
- Plants and shrubs should be no closer than 24 inches to any log wall. If necessary, trim them back or move them. Tree limbs should be no closer than three feet from your walls or roof.
- Move any piles of firewood at least two feet away from the foundation and never store firewood on your porch.
- Look for any wood in contact with the ground, even if it’s pressure treated. For protection against termites and rot, all wood should be at least 12 to 18 inches above the soil line.
When you stand back from a wall you can better see general patterns of wear and fading of your finish, especially on the south and west walls.
Close-Up Inspection
Now that you have inspected the wall from a distance, it’s time to get up close to see what’s going on.
Log Finish Condition
- Look closely at the finish. Round logs tend to weather more on the upper half than the lower half since this area is most exposed to the sun and rain.
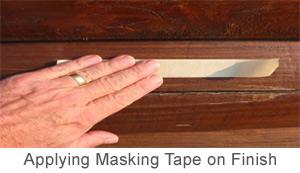
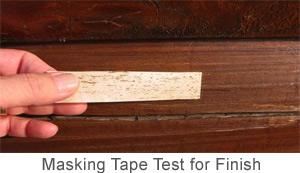
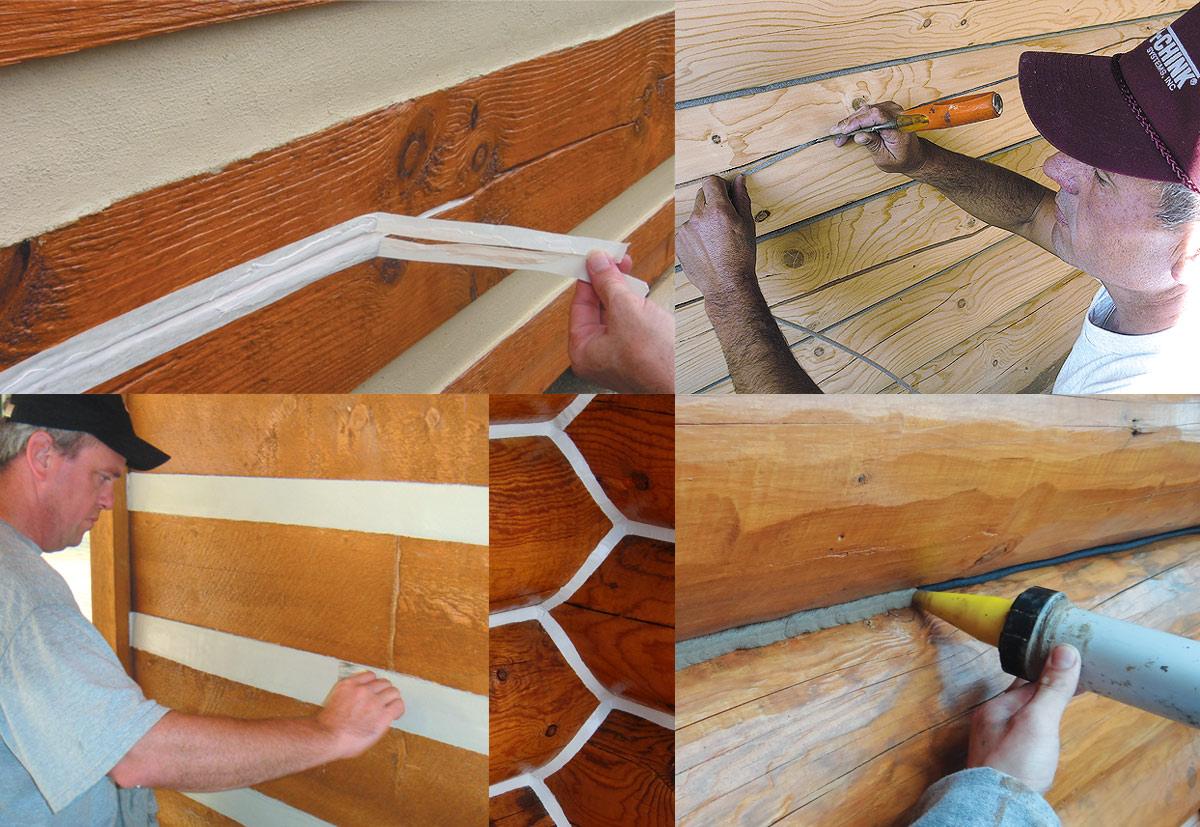
- Test the adhesion of the finish by placing a strip of masking tape on the log surface and removing the tape. If the tape is clean, your finish is working as intended.
Dealing With Checks (log cracks)
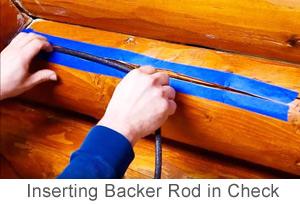
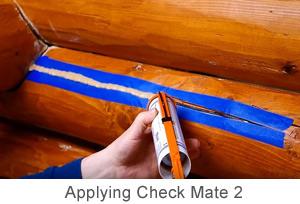
- Are there any new upward-facing checks that have opened up since your last inspection? If so, use Backer Rod and Check Mate 2 to seal them. It’s also a good idea to pour a little PenaShield® in the check before you seal it to kill any rot fungus that may have started to grow. Learn more about sealing checks here.
Areas of Decay
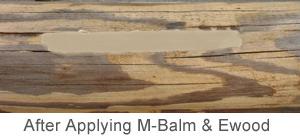
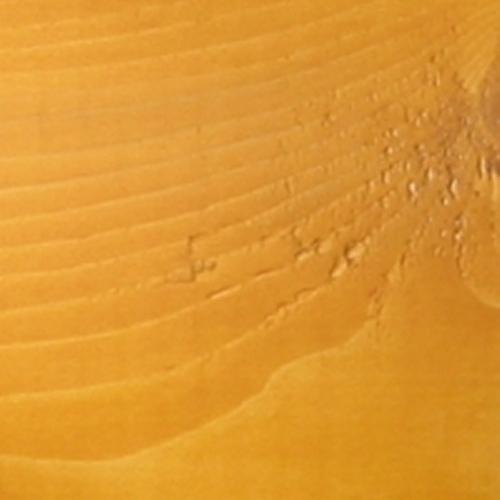
- If you have logs showing signs of decay, take along a small hammer and lightly tap the logs every few feet. If a log sounds hollow or you get a dull thud, you may have a pocket of rot that needs to be addressed. Use a thin screwdriver to probe the area. If the wood is soft, dig it out, apply some PenaShield, let it dry and fill the void using M-Balm and E-Wood.
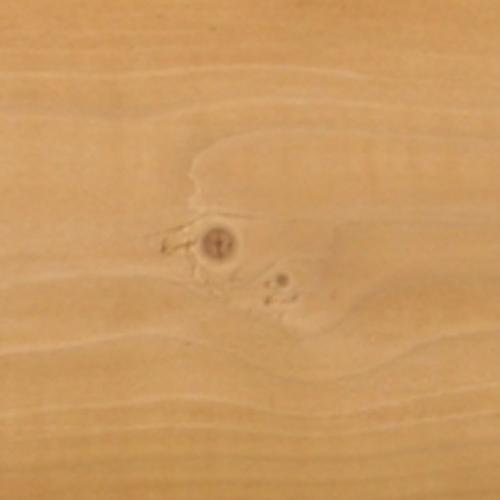
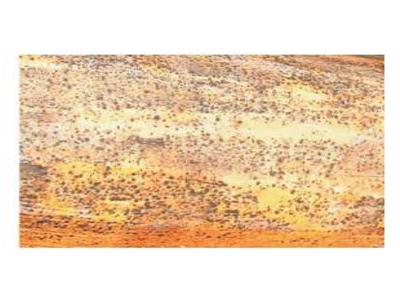
While inspecting the logs, look for signs of insect infestations. A few small beetle holes here and there are no cause for alarm. Most of the holes will probably be old and empty. If you think that the holes are new, apply a strip of masking tape over them and check it a week or so later. If the infestation is active, holes will appear in the masking tape. It takes many years for these beetles to do much damage. Just make a note of it (keeping the inspection checklist handy is one way), and when it comes time to completely refinish the home, treat the bare wood with Bora-Care® before a new finish is applied.
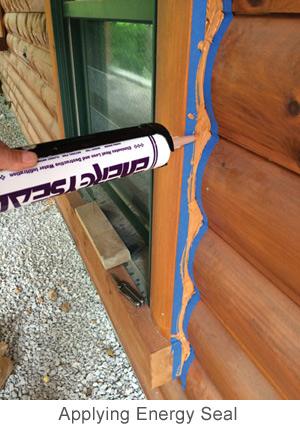
Window and door frames are the source of many water related problems. Check to see if the caulk is adhering to the adjoining surfaces. If it’s not, pull it out and re-caulk with Energy Seal or Woodsman. Never use a silicone-based caulk; it won’t adhere to wood!
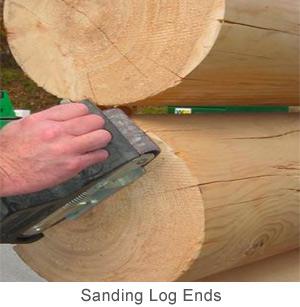
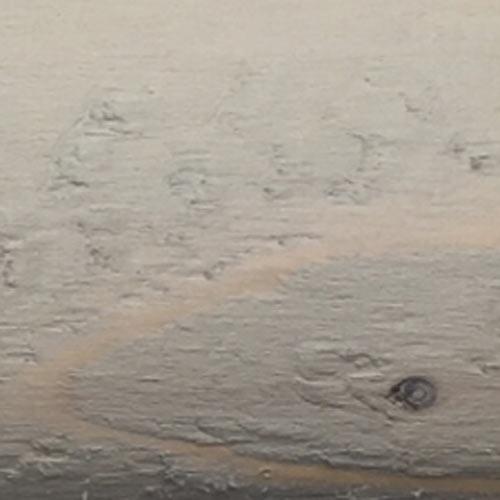
Give special attention to all log ends, especially if they extend out beyond roof overhangs. The ends really absorb water and that’s where a lot of rot problems start. Consider sanding the butt ends, putting on a fresh coat of stain and sealing them with Log End Seal, then apply LIFELINE Advance over the entire home. Log ends that stick out in the weather take a beating and need a little extra care to keep them in good shape.

Finished!
And that should be it! It might seem like a lot of work, but not maintaining your log home could end up costing you thousands of dollars in repairs or worse, a lost home.
Inspecting your home every year is the best way to keep on top of any developing issues. Over the past 45 years, we’ve developed the best system in preserving log homes, and we’ll be there to help you along the way.
Caulks and specialty log home sealants are used to keep air, water, and insects from getting into your home.
The most important decision you will make is choosing the right sealant for your log or timber home.
Many sealing problems are attributed to the caulking material itself, and most often the proper sealant was not used for the job. It’s easy to run to the local big-box home improvement store and pick up some all-purpose caulking, but therein lies the problem.
There are six types of caulks: butyl, oil-based, ethylene vinyl acetate, urethane, silicone, and acrylic/latex. All are designed to do a specific job, and none are suitable for every application.
Caulking vs. Sealants
The most frequent mistake made by log home owners is choosing a silicone caulk. Silicone-based caulks are excellent for many applications, but they do not work well on wood. Silicones are formulated for use on non-porous surfaces like metal, plastic, or glass. However, wood is porous, and silicones do not adhere to either damp or dry wood. In addition, silicone caulk is difficult to tool and clean up and does not accept a stain or paint.
Presently, the most widely used products are acrylic/latex sealants. Although they are suitable for a wide variety of applications, their quality depends on the specific formulation and manufacturer. And that is where Perma-Chink Systems comes in. The deficiency in these caulks is they are not designed specifically for log and timber homes.
Premium acrylic/latex sealants such as Perma-Chink, Energy Seal, Check Mate2, and Woodsman are manufactured from high-quality components to perform specific tasks. They are more expensive than a tube of general-purpose caulk, but they are formulated for excellent appearance, high performance, and ease of application. These sealants are made to be long-lasting and durable for the ultimate in wood care for decades.
Apply New Sealant Over Old Caulking? – NO!
An application of new sealant over old, failed caulk is rarely a good idea, even if it looks like the caulk still adheres to the wood. It may take a little more time, but old caulk should be removed for several reasons. If the caulk no longer adheres to the wood, it may be because moisture got under the caulk creating decay. Old caulk must be removed to properly treat and seal the wood substrate.
Newly applied sealant can only work if it is applied to a clean, sound wood surface or a compatible stain. So, if you want to use the old caulking as a backing material, you can apply a new sealant over the surfaces to adhere to a clean wood surface beyond where the old caulking reached. Otherwise, you should remove the old stuff.
Removing Old Caulk Between Logs
The right tools can make the removal process easy. Remember the old church key used to punch a hole into soda or beer cans? It is a handy tool to scrape out old caulk. Hook knives also work well. If the old caulk is silicone-based, you can usually remove it with your fingers. Always inspect failed caulk areas for evidence of moisture. If the wood is damp, these areas should be properly treated before a new sealant is applied.
Sooner or Later? When is the Best Time to Seal Your Log Home?
If you are doing other work, a decision to make early in the process is when to apply your sealants. This decision might have some bearing on which sealant to use. One consideration is that some sealants take a stain much better than others.
Smooth-surfaced sealants like Check Mate 2 do not stain as well as textured sealants like Energy Seal. If you are planning to apply sealants to your log walls first and then stain afterward, Energy Seal is your best choice.
Usually, the best time to seal logs is after the LIFELINE stain has been applied. The log surfaces are fresh and clean and whichever Perma-Chink Systems sealant you select will adhere to wood surfaces stained with LIFELINE. If you are going to use a topcoat like LIFELINE Advance for exteriors or LIFELINE Acrylic for interiors, we suggest that the topcoat be applied after Energy Seal. This gives the most even appearance over the entire wall. However, if you want to hide the sealant and want a seamless appearance, apply Energy Seal before you stain.
Now let us look at various caulking applications around a log home and select the right product for each job.
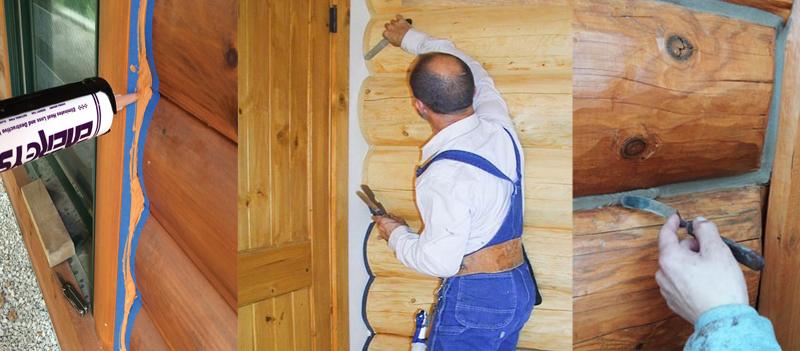
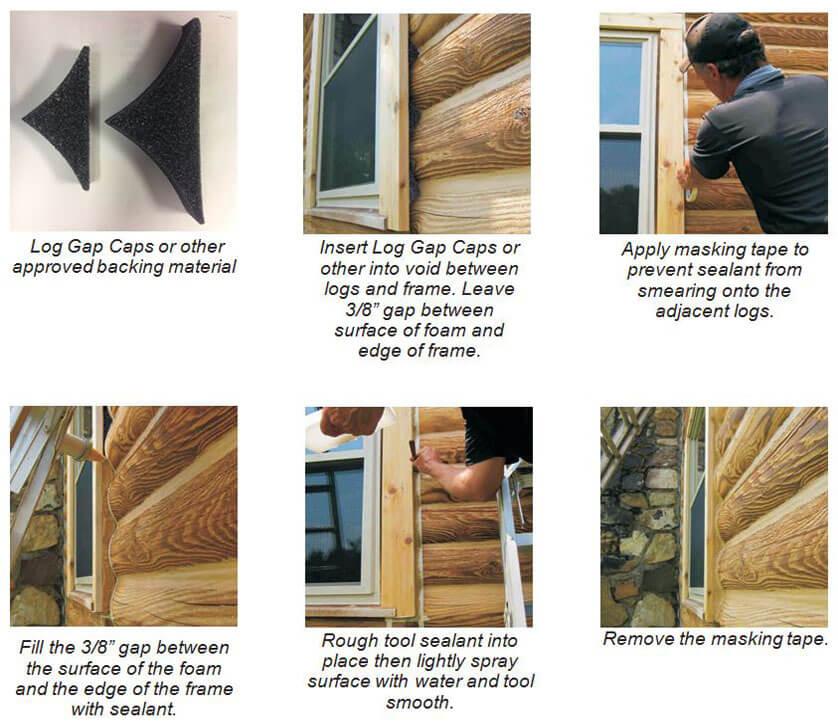
Sealing Door and Window Frames
When sealing around window and door frames you have several options.
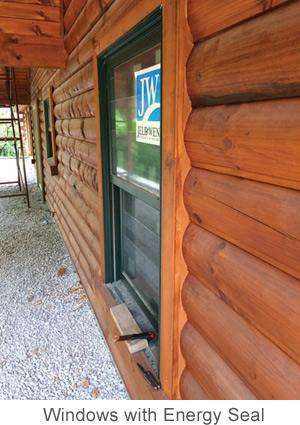
For either new or older log homes, we recommend Energy Seal since it has outstanding elongation and adhesion. This means that as your home settles and shifts, Energy Seal stretches to maintain its bond to the wood. It is available in 12 different colors and since it is textured, it will take the color of the stain.
On chink-style homes many people want the sealant to match their chinking. If that is the case, Perma-Chink can be used to seal around window and door frames, too.
Checks and Small Gaps in Logs, Log Corners and Log Ends
Upward-facing cracks and checks in logs should be filled with Check Mate 2.
Otherwise, they collect water that can lead to decay and insect damage. You need not worry about checks on the bottom half of round logs unless they penetrate through the log wall. Choose a color that is closest to the color of the stained logs. If checks are more than ¼ inch wide, stuff a length of backer rod into the check to about 1/4 to 3/8 inch below the surface before filling it with Check Mate 2. The Check-Kit has both backer rod and convenient applicator tubes. For more instructions on how to seal checks in logs and log siding click here
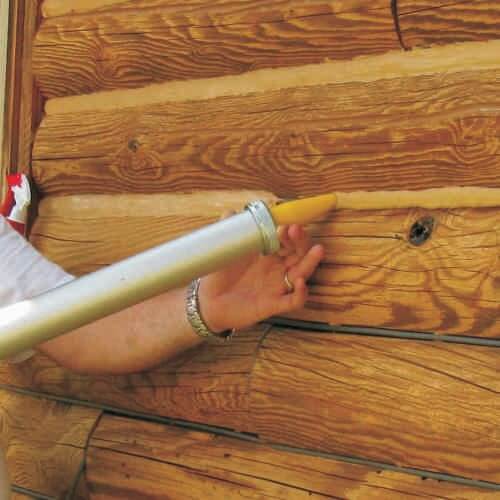
Sealant Application
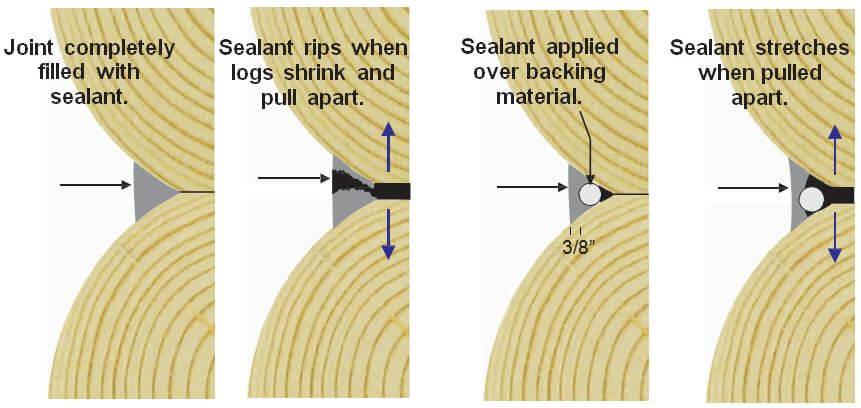
One of the most common mistakes made when sealing logs is to fill deep gaps or checks with the sealant material. Quality sealants are made to stretch and elongate with the movement of the joinery. When a sealant is applied too thickly, it loses its ability to stretch and may separate from the wood.
A good rule of thumb is that the thickness of the sealant should be approximately 1/2 the width of the gap you are trying to fill. However, sealant joints never need to be more than 3/8 inches thick. So, how do you fill a large gap?
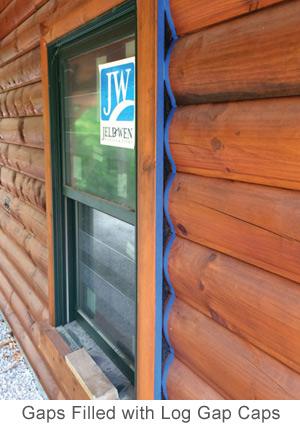
If you are trying to fill a void behind a window frame, for example, Log Gap Cap foam is the product to use. You can also put backer rod into gaps. See step-by-step instructions here.
The space left after the installation of the backing material is called the “caulking well.” This well should be approximately 1/4 to 3/8 inch in depth, regardless of the width. This space is what you fill with sealant. Some sealant applications have geometries that do not allow for these “textbook” conditions. But, whenever possible, adhere to these specifications for the highest performance seal.
For filling in large voids or gaps, urethane foams are an excellent choice. However, many foam systems have a high expansion ratio which forces foam out of the void you are filling. It is difficult to remove. If you are unsure about your backing material, check with Perma-Chink Systems before using it.
Tips On Applying Perma-Chink and Energy Seal
Some people think that Perma-Chink and Energy Seal is just like any other caulking product on the market, so they apply and finish it with the same methods. Typically, silicone caulking can be smoothed just by running a damp finger along the bead of caulking. Using that method with Perma-Chink or Energy Seal will net you disastrous results. To get a smooth, clean finish, spray the sealant liberally with water then tool it with a metal spatula or similar. It’s counter-intuitive to apply water to smooth it, but it’s the best way. Unlike smooth caulking, the texture in Perma-Chink and Energy Seal needs more water to maintain a smooth finish. And it’ll be much, much easier.
Conclusion
Remember, hot air that gets into your home in the summer and cold air in the winter increases your energy bills. Water penetration can cause decay and insect nesting. One of the best ways to keep insects out of your log walls is to eliminate the openings where they get in. Properly selected and applied sealants are among the best materials for protecting your home. Use the right sealant for the job for years of protection and comfort.
Call 1-800-548-3554 to request a copy of the “Log Home Sealant Application Guide” for more detailed information, or click here.

Despite our best efforts, sometimes problems develop in wood that requires some more serious work than just stripping the finish or applying a new topcoat. Wood decay does happen, and it can be repaired if caught early enough. Perma-Chink Systems offers two-part epoxy products, M-Balm and E-Wood, to repair damaged logs.
If you’re looking to restore your home’s beauty through taking the wood down to bare wood and applying a new finish, we can help you with that, too. We offer S-100 and StripIt, environmentally-friendly water-based strippers.
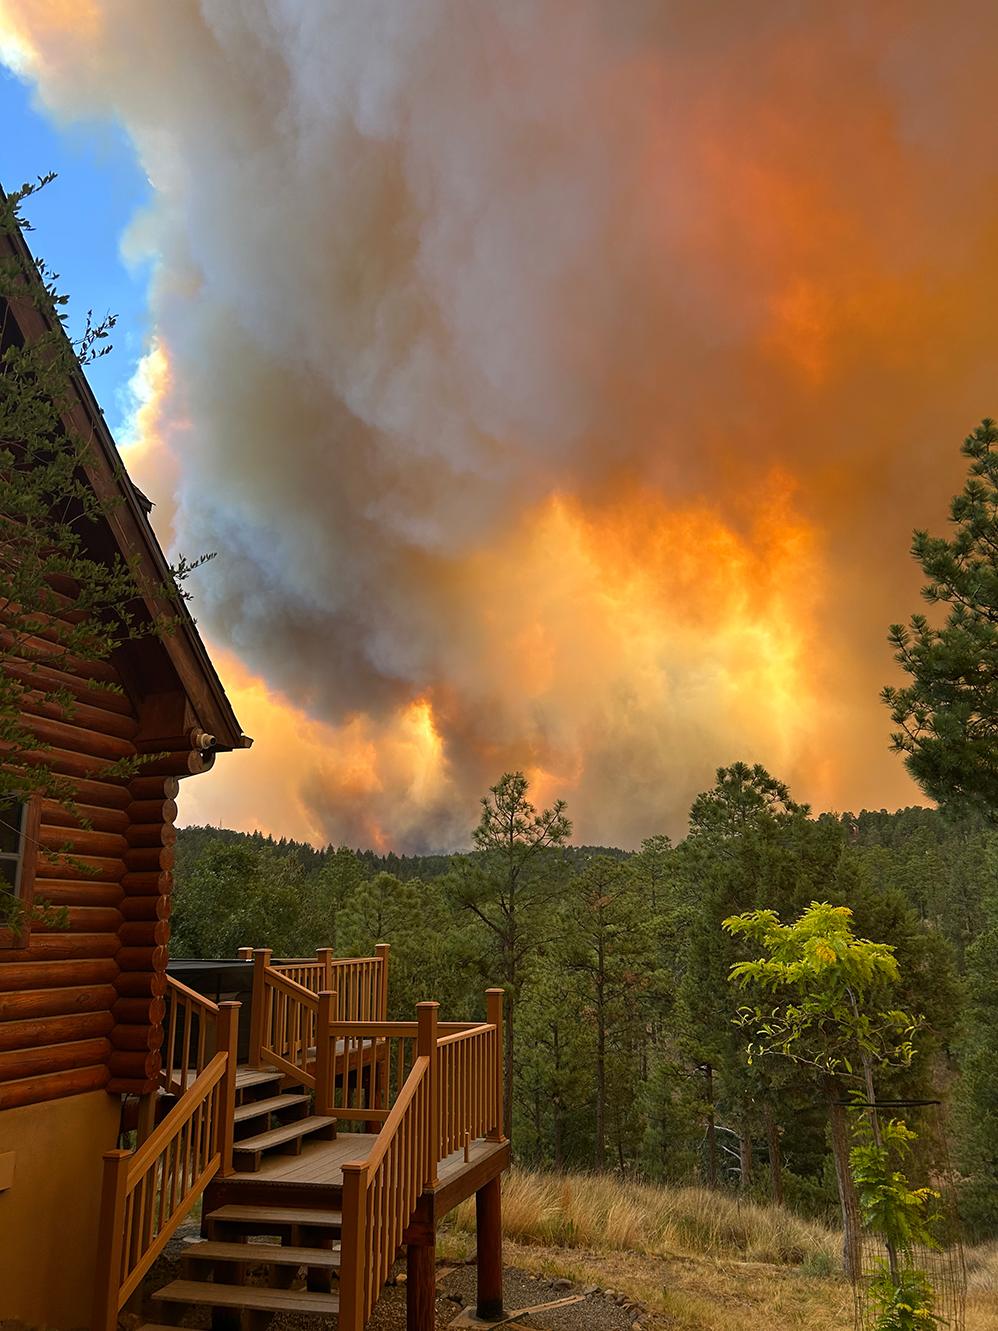
Surviving the South Fork Fire
I wanted to share our experience and express my gratitude for your incredible products and support.
Hi! My name is Brent Kriegel. We own a log home in Ruidoso, NM, which we purchased in September 2020. In July 2021, we fully restored the exterior—sandblasting off the old oil-based stain and using 100% Perma-Chink Systems products for Prep, Stain, and Energy Seal. The results were fantastic!
South Fork Fire & Home Impact
Fast forward to June 17, 2024, when the South Fork Fire devastated our area. The fire, which was declared a national disaster, burned 17,000 acres and destroyed 21 cabins in our subdivision, including our guesthouse and carport.
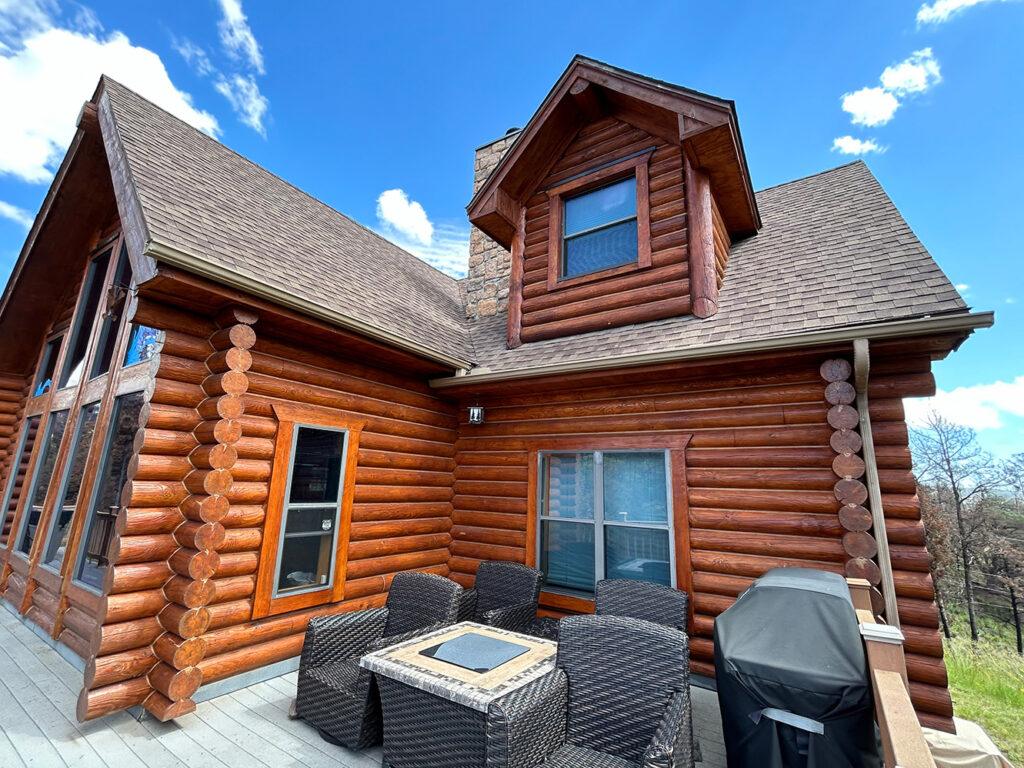
Amazingly, our log home—the primary residence—is the only structure still standing in our neighborhood.
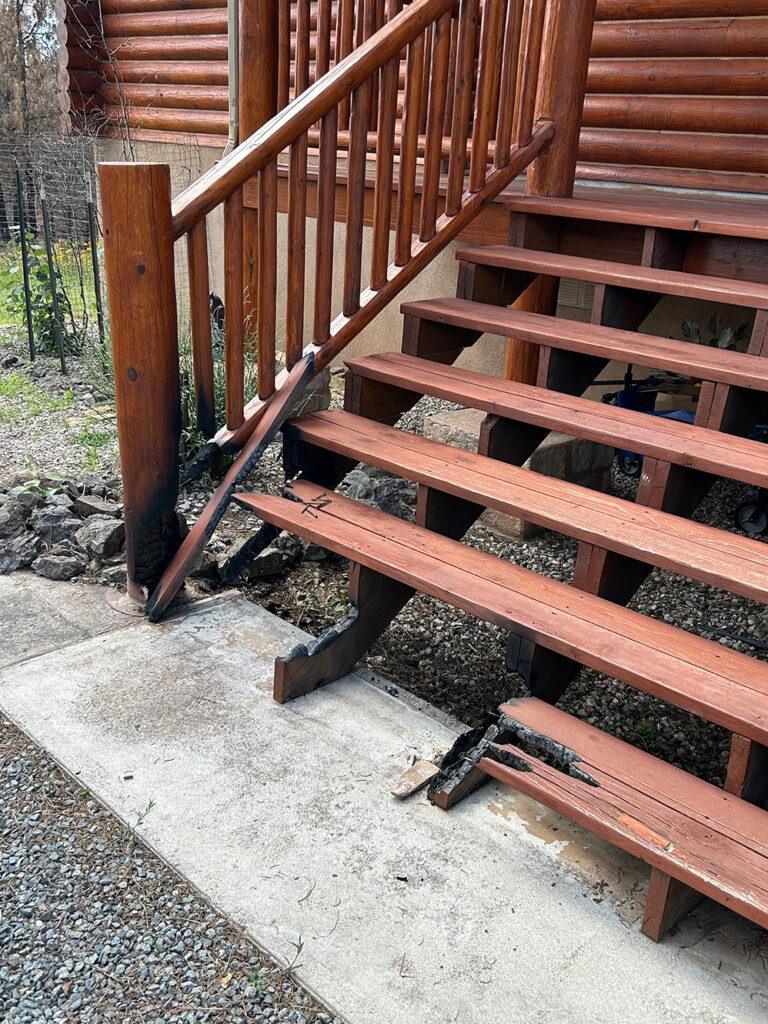
The damage to our cabin was minimal:
We lost the first couple of steps to our front porch and a pier from the back porch.
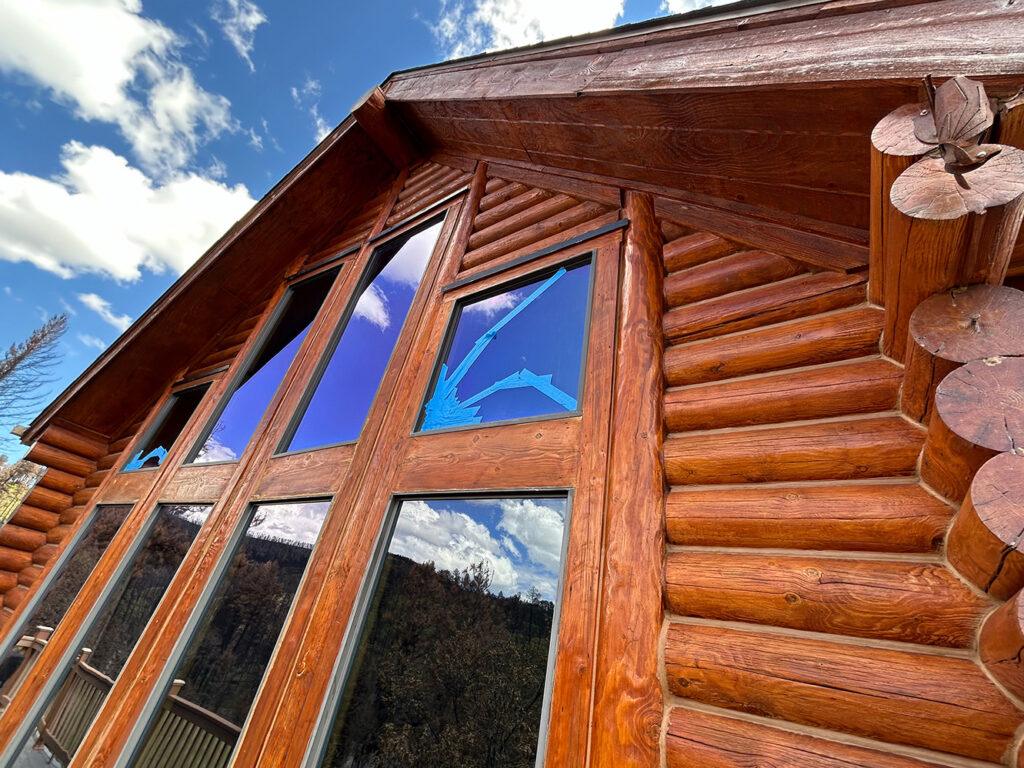
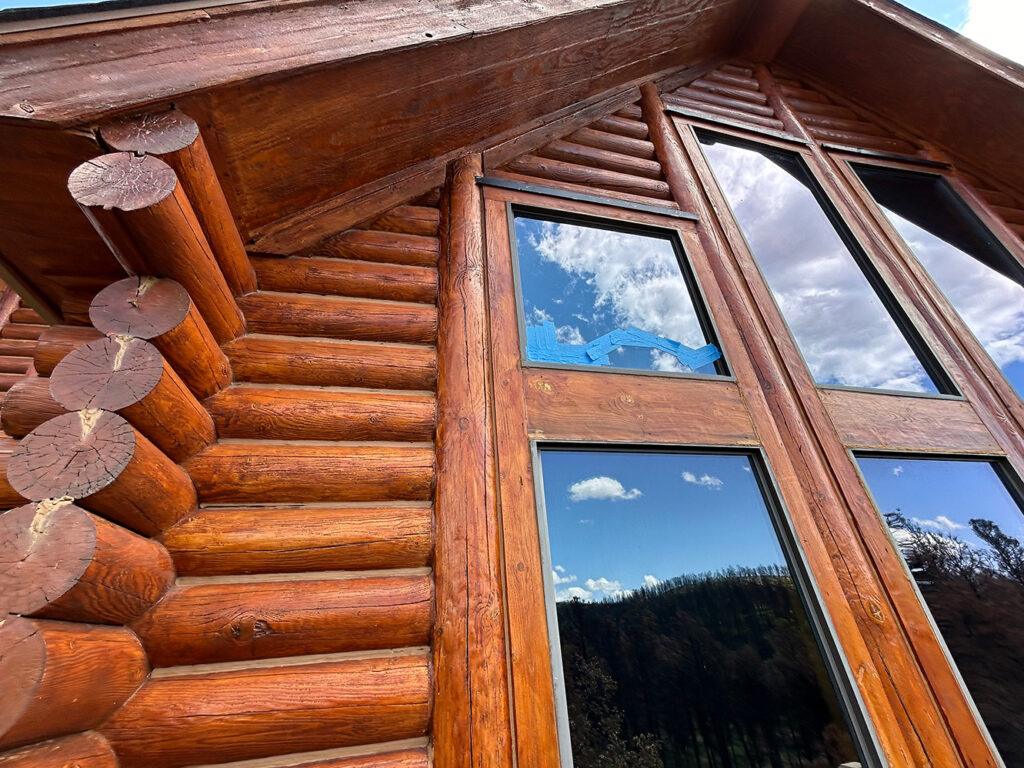
Six windows on the west side cracked from the heat.
Repairing the Damage
After utilities were restored, I connected with Dakota Zeman from Perma-Chink Systems for an inspection. We reviewed photos, FaceTimed for a closer look, and tested the exterior gloss. The solution was simple:
One coat of exterior gloss topcoat
Touch-up of the Energy Seal between the logs
The Completed Project
Four months later, we are back in our cabin, and everything is great. We experienced minimal smoke damage inside, which I credit to the Energy Seal sealant protecting between the logs. After applying a new coat of Lifeline Advance top gloss and fixing a few small Energy Seal areas, the cabin looks brand new again.
I’ve received multiple phone calls from locals, all asking how our cabin survived the fire. My answer is always simple:
“We are incredibly thankful—and I recommend building with solid logs and using Perma-Chink Systems products.”
Thank you and your entire team for your support during this difficult time.
Gratefully,
Brent K.
Ruidoso, NM
Closing Notes
We at Perma-Chink Systems thank Brent for being a great customer and we’re happy that the home was not severely damaged. As much as we would love to claim it, our products are not fireproof. Please mitigate fire risk by clearing around the home any flammable materials or foilage.
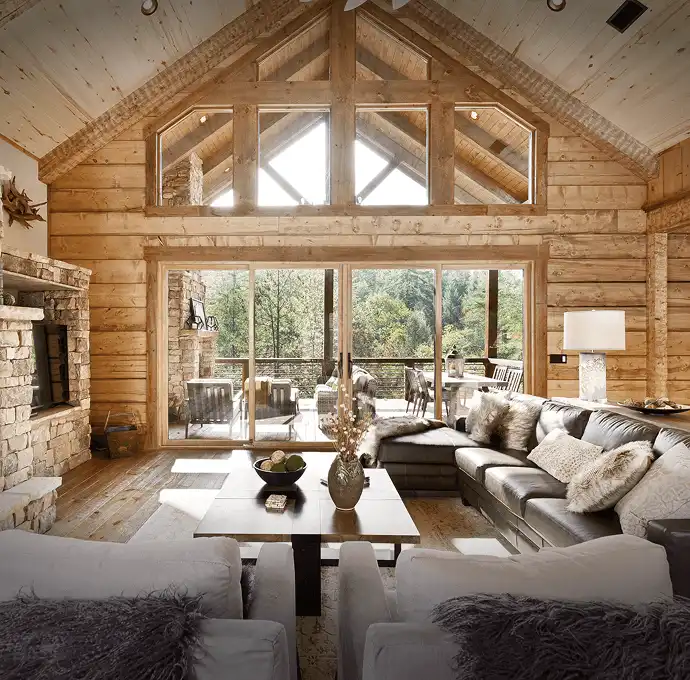
For years, Lifeline Advance™ Topcoats have been an essential part of our exterior finish systems. In addition to extending the life of the finish, Advance helps keep exterior wood surfaces cleaner by reducing the buildup of dust and dirt, making routine maintenance and washdowns much easier.
That’s because Advance is engineered specifically to perform as a true topcoat. Unlike many “clear” products on the market, it isn’t simply a non-pigmented version of a Lifeline™ stain. Stains are formulated for maximum color retention and strong adhesion to bare wood, while a clear topcoat must meet a completely different set of performance demands. That’s why we use an entirely separate formulation to deliver the durability, cleanability, and long-term protection you need from a high-performance topcoat.
For interiors, we follow the same approach: A pigmented finish designed for adhesion and color fastness, covered with a clear topcoat specially formulated for protection. Let’s go through the options homeowners have to best achieve their desired look.
Choosing a Pigmented Interior Stain & Clear Topcoat
The same concept applies to our Lifeline Interior stains as well. Acrylic Gloss and Satin (G/S) and PCS Clear Shield™ Gloss and Matte (G/M) are completely different formulations than Lifeline Interior.
Lifeline Interior, Lifeline Accents, and Prelude™ use a polymer system that provides distinct adhesion advantages when applied to bare wood. However, if these products are left exposed without a protective topcoat, they can be more susceptible to dirt pick-up and often making the surface harder to keep clean over time.
When topcoated with Acrylic G/S or Clear Shield G/M, the finished surface becomes far more resistant to dirt and grime. And because the topcoat creates a smooth, slick surface, it can typically be cleaned with much less effort.
Bottom line: Lifeline Interior, Lifeline Accents, and Prelude are strongly recommended to be topcoated with either Acrylic G/S or PCS Clear Shield G/M for the best long-term appearance and cleanability.
The Difference of Interior-Specific Topcoats
Whenever a house is over one or two years old, or you are sure your logs are dry, be sure to obtain samples of both PCS Clear Shield G/M and Acrylic G/S to try. If Acrylic G/S does not result in the smooth, slick surface that you may be expecting, try PCS Clear Shield G/M.
Choosing a Natural Finish on Interior Logs
What if you don’t want a pigmented stain on your interior wood? Do you need to apply Prelude or Lifeline Interior Clear before applying PCS Clear Shield G/M or Acrylic G/S? From a technical and performance standpoint it does not matter, although Prelude does include an additive called UV Boost that will help prevent the picture frame effect that occurs over time. Although UV Boost can be added to Lifeline Interior Clear, Acrylic G/S and PCS Clear Shield G/M, most people prefer not to spend more money than they need to, and using Prelude as a primer on bare interior wood will significantly decrease the amount of more expensive Acrylic G/S or Clear Shield G/M you will require.
Order today (don’t forget our FREE samples!) online at Store.PermaChink.com or call 1-800-548-3554.


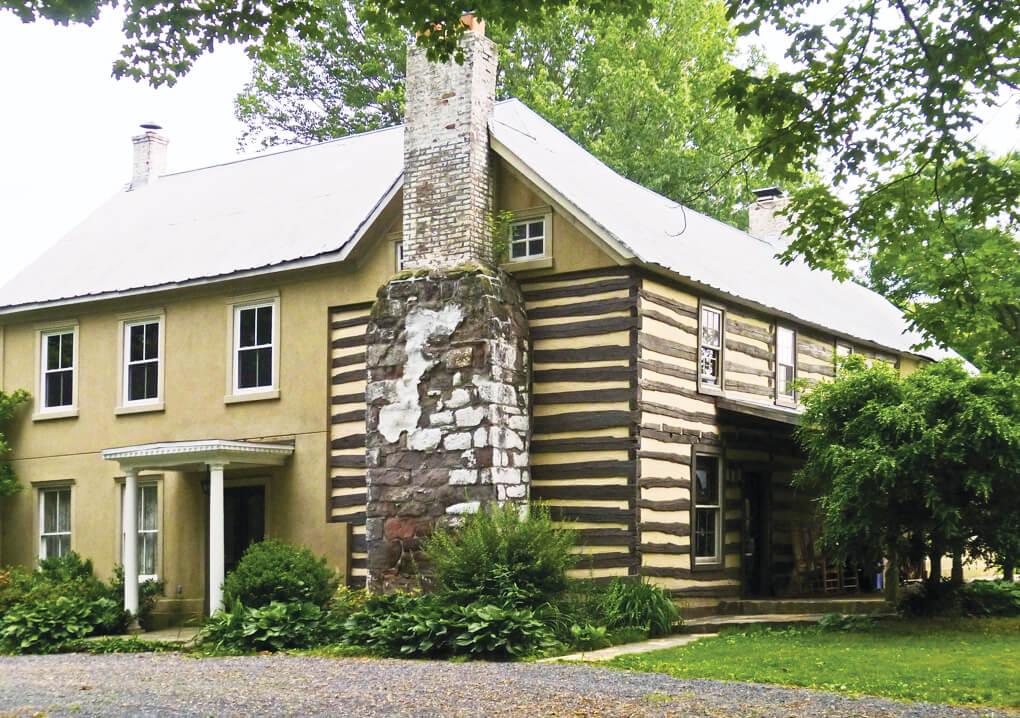
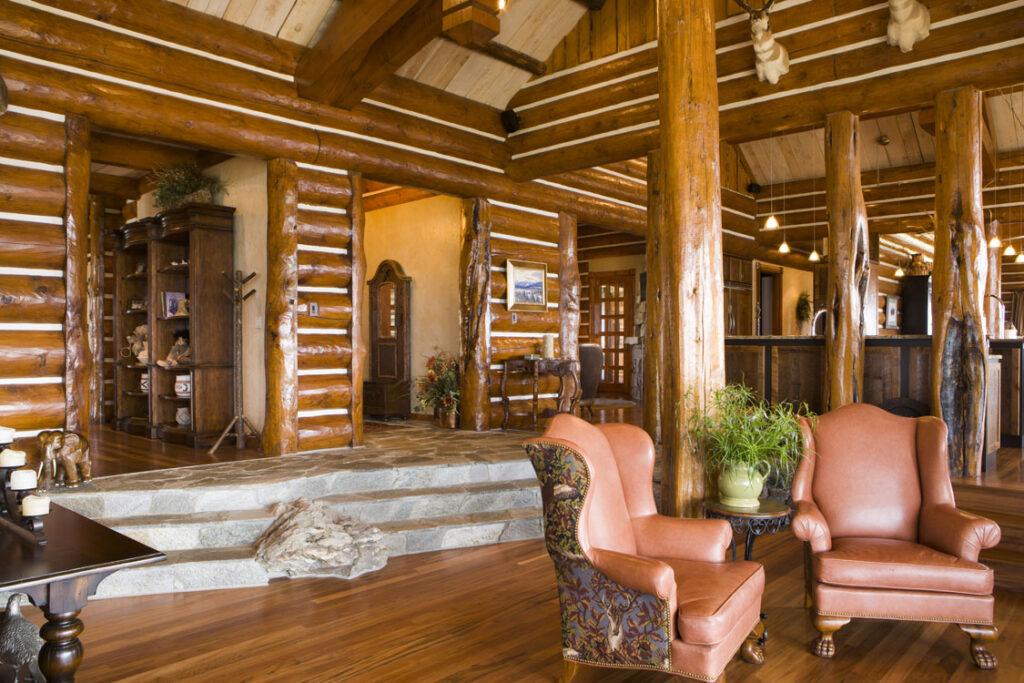
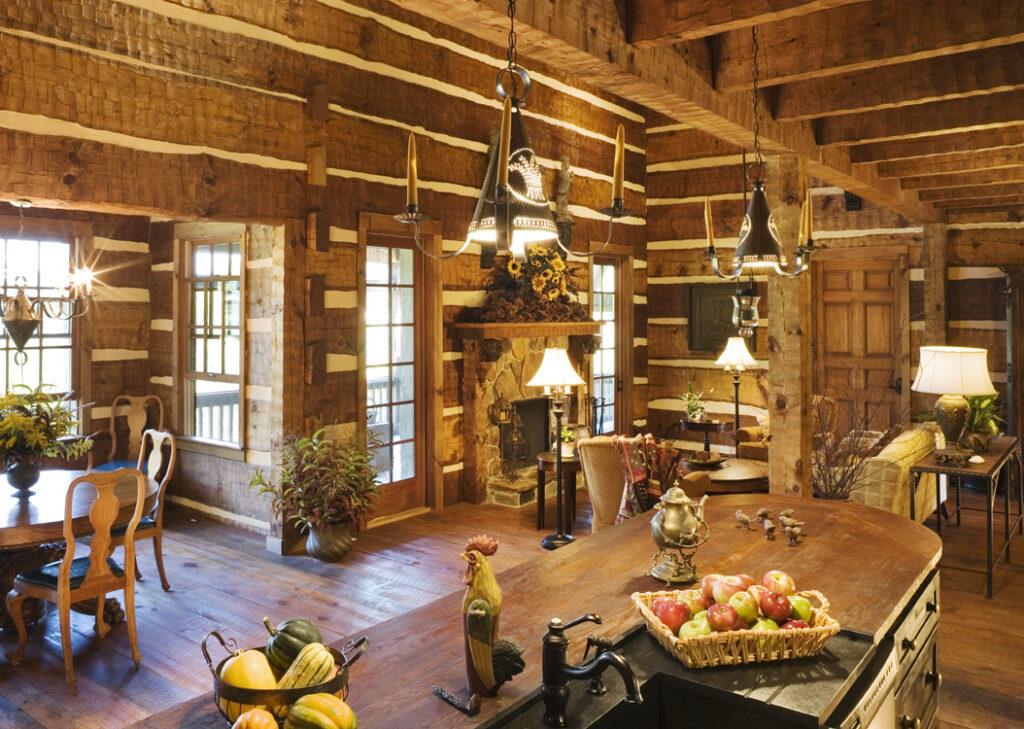
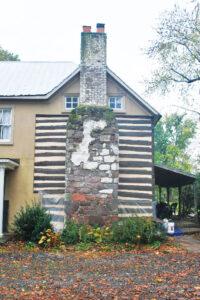
As our country was founded, established and expanded, log homes were prevalent across the colonies. President Abraham Lincoln was famously raised in a log home, and that home is still preserved today. Some of our greatest presidents came from humble beginnings and modest homes. What some people might not know is a log home constructed in 1808 was built on George Washington’s Farm.
Perma-Chink Systems has the honor of being part of the restoration and preservation of the log home, remembering history as we do it. In honor of President’s Day, we take a look at the restoration of this log home on Washington’s Farm.
“When I stumbled upon Washington Farm’s log home, built in 1808, I knew the logs would need a LOT of restoration. Due to the historical significance of the structure I was determined only to work with the best in the country. Of all the contractors I contacted none of them were as prompt, courteous and knowledgeable as Mr. Pat Woody and his team. The pricing proposed was very reasonable and the work meticulous. I HIGHLY recommend Woody Wood Chinking to other historical log home enthusiasts without hesitation.”
– M. Boblitt
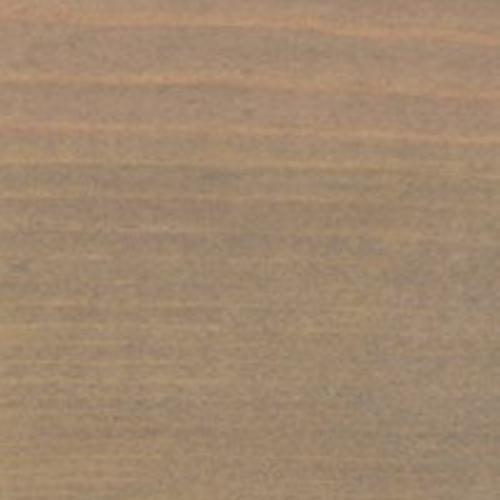
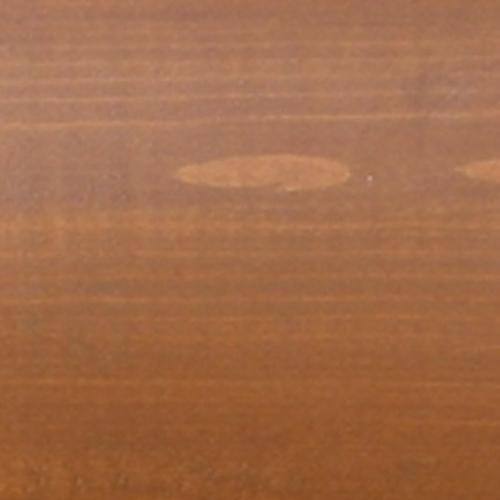
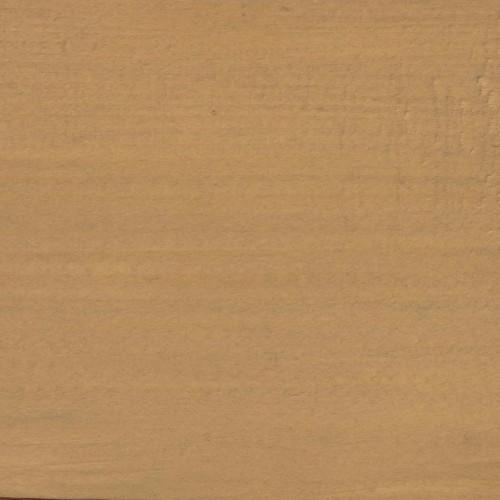
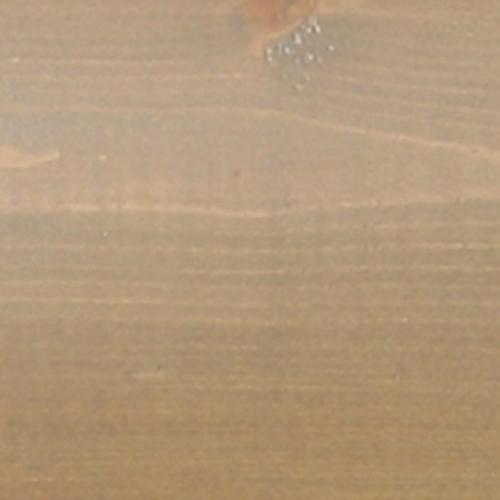
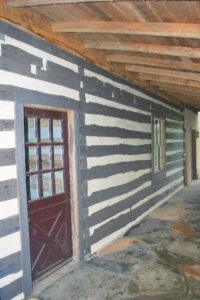
“We pressure washed the logs, then removed the exterior chinking, backer and insulation. We replaced the insulation and installed backing material. We then applied Lifeline Ultra-2 Stone Gray color to the logs. We applied Perma-Chink Sandstone chinking to the exterior. Finally we applied Lifeline Advance satin topcoat. Working on the job was myself, Chris Woody, my dad, Pat Woody, and our friend Nathon Foster.”
– Chris Woody, Woody Wood Chinking
For more information contact Woody Wood Chinking at 434-384-0515

When it’s time to restore your log or timber home – or you’re building new – choose the products used to preserve history. Perma-Chink Systems has the leading log and timber home care products from sealants to finishes to cleaners and more.

519 acres owned 1794-1799 by the First President
Thomas Sprigg, Jr., patented in 1725 as “Woodstock” 1,102 acres here, inherited in 1782 by Sprigg’s three granddaughters, Sophia, Rebecca and Elizabeth. Sophia married John Francis Mercer (later Governor of Maryland, 1801-1803.) in 1794. Nearly half of the property was conveyed to George Washington to settle a debt owed by Mercer’s father. Washington owned this land at his death in 1799.
Erected by Maryland Bicentennial Commission and Maryland Historical Society
Presidents have come from varied backgrounds, humble and not-so-humble. Take a look at former homes of Presidents in our article Presidential Birthplaces.
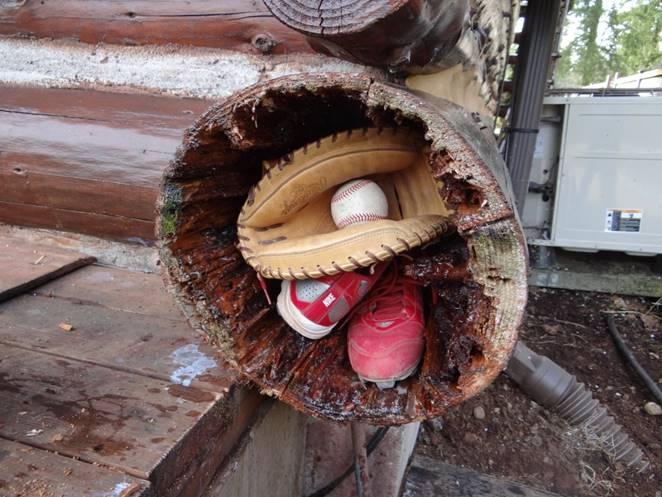
A hollowed-out piece of timber on your home might make a convenient storage space for sports equipment or toys, but it’s a problem. Before you panic and list your home up on Zillow or Redfin, let’s take a look at the situation.
What To Do When You Find Log Rot?
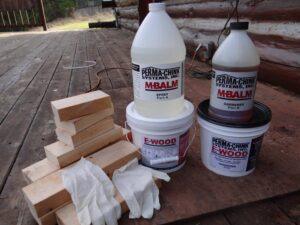
How much decay have you found? If it’s not halfway deep through the log, or less than a couple of feet lengthwise, odds are it can be repaired easily. M-Balm and E-Wood from Perma-Chink Systems are specially formulated epoxies designed to repair decay and soft spots in homes. Large voids can be repaired with filler wood like 2×4 boards to add some rigidity to the repaired section.
The biggest threat to log homes is decay damage, caused by moisture-loving fungi. The three basic categories of wood-destroying fungi are soft rot, brown rot, and white rot. Preventing rot begins with eliminating as much contact as possible with moisture, which breeds fungi. The best product that addresses moisture prevention is using borate preservatives, which destroy wood fungi and protect against decay. It also fights against wood-boring insects.
If you do discover decay in your logs during inspections, it can most likely be mitigated and eliminated without the need for a costly log replacement. If the decay does not exceed more than half the depth of the log, or only a few feet lengthwise, use M-Balm and E-Wood.
E-Wood epoxy has the ability to be cut, sanded, textured, and finished like real wood.
How To Repair Log Rot?
Jeff Kyger of Northwest Log Home Care showed us a decay issue and the resolution utilizing M-Balm and E-Wood to repair the log. While it is a handy storage space for sports equipment, the decay could have progressed deep in the wood and compromised the home. Jeff was able to repair the log decay damage with M-Balm and E-Wood.

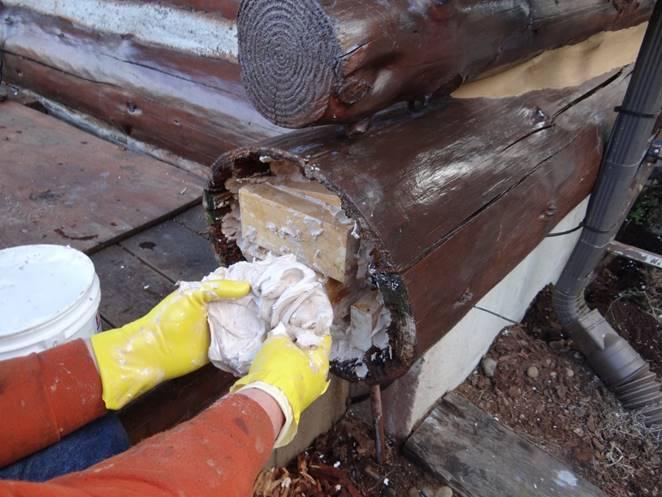
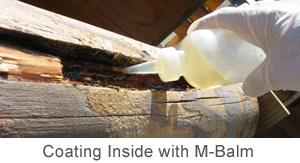
The first step in repair is to clean out the decay and get the log dry.
We recommend applying PenaShield to the cleaned area to eliminate any possible decay fungi and prevent future infestation. Once the decay cavity has dried, coat the exposed wood with M-Balm to bond loose fibers and create a solid bonding surface area for the filler agent. M-Balm epoxy liquid penetrates deeply into porous wood, curing and hardening into a strong water-resistant mass that includes the original wood fibers and the epoxy mixture.
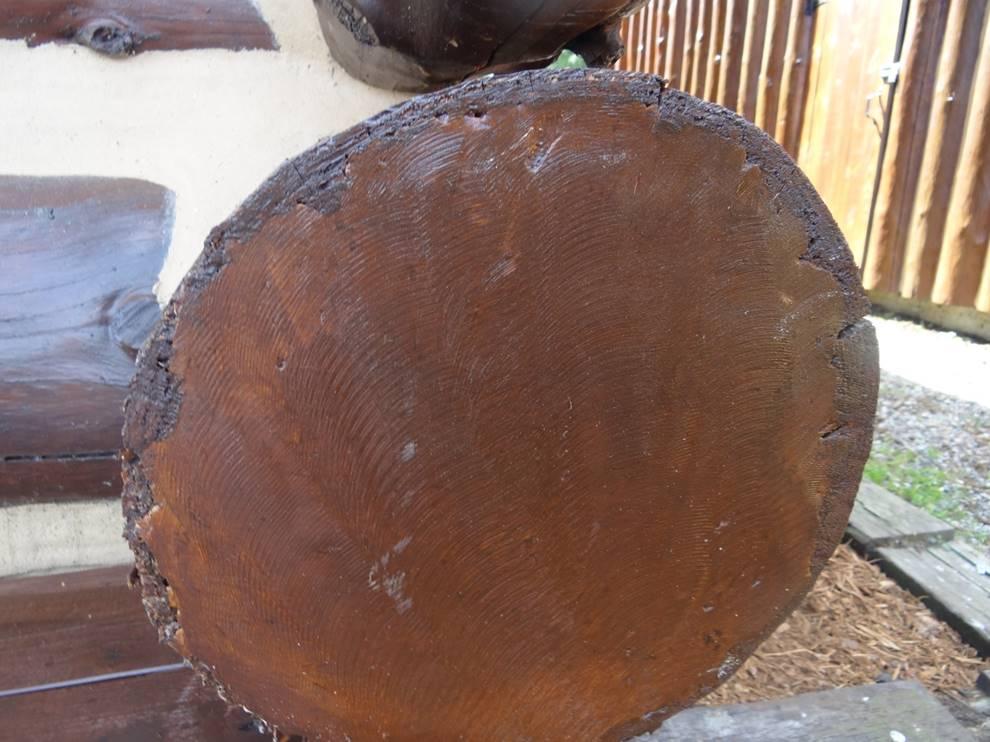
E-Wood epoxy can be stained with Lifeline stains during mixing or after application to match your log home color.
What About Small Areas of Wood Rot?
For small voids, use E-Wood Paste. E-Wood paste epoxy works excellent on window trims, small checks on log ends and other places where putty may be difficult to apply.
How To Find Log Rot?
Regularly inspect your home for rot and stop it from spreading and causing an expensive repair. We recommend annual inspections every spring season, where cleaning the home allows a focused look at your log home. With Perma-Chink System’s wood restoration products M-Balm and E-Wood, decay can be repaired and your home restored to like-new condition.
Check out our tech tip on repairing large voids, and our other Tech Tips for more in-depth instructions on maintaining and repairing your log home.
If you have any questions or need to order product, call us at 1-800-548-3554.
One feature of Perma-Chink’s LIFELINE™ finish systems is their ability to breathe, but what does this mean? The term describes the ability of water vapor to permeate a film.
What Exactly Does “Breathable” Film Mean?
To understand, it takes a little bit of chemistry and physics but the concept is fairly simple. Technically, for those of you who want to impress friends, the scientific term is vapor permeability, which is the ability of water vapor to permeate through a film.
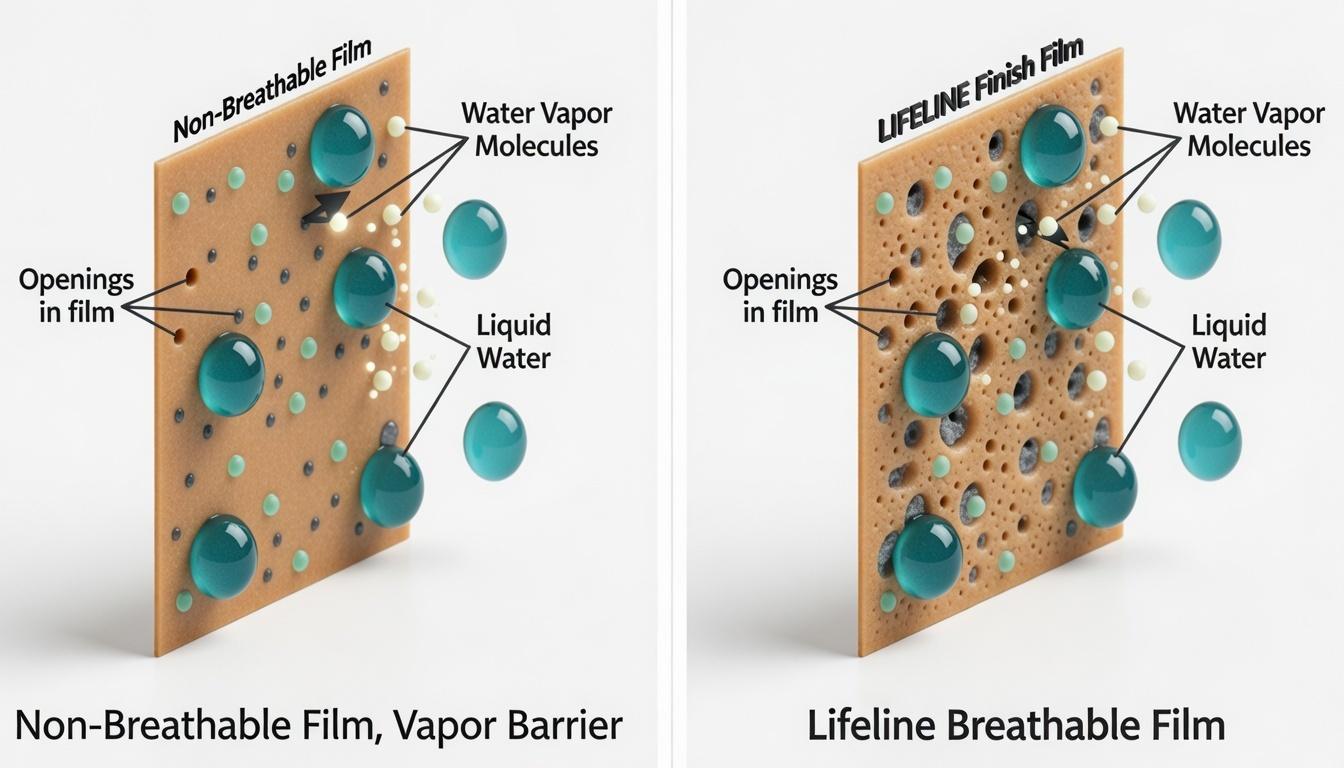
Polymer films are composed of long chains of molecules that are bound together in a three-dimensional matrix. This matrix, in films like polyurethane and alkyd coatings, is quite dense and there is not much space between the polymer chains. These polymer chains prevent small water vapor molecules from making their way through the film. On the other hand, LIFELINE finishes form a less dense matrix with room enough for water vapor molecules to penetrate through the film, but not enough space to allow liquid water to make its way into or through the film.
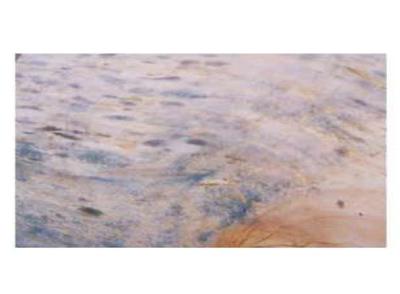
The water vapor transmission rate is measured to determine the extent of vapor permeability through a film. It can be thought of in terms of a film with many small holes- or pores- that filter out large objects but allow smaller objects to pass through (see illustrations below). These types of films are known as semi-permeable membranes, but they are often referred to as breathable films. Our LIFELINE finish system, the image below on the right, is one such system.
In addition to the chemical composition, another factor that influences vapor permeability is the thickness of the film. The thicker the film, the more difficult it becomes for water vapor molecules to permeate the film. That is one reason we constantly remind people to apply our finishes in thin layers. When applied too thickly, even acrylic latex films cannot breathe or become a vapor barrier.
Why Breathability Is Important
Logs and timbers that can’t breathe are prone to trapping moisture within the wood. Over time, this trapped moisture can promote mold growth, which may eventually lead to wood rot. Damp conditions also make wood more attractive to destructive insects such as termites. By protecting logs and timbers with a breathable finish, moisture can escape while the wood remains protected from the elements. This helps keeping the wood healthier and longer lasting.
Energy Seal™ is specially formulated for sealing narrow gaps in log home joinery such as butt joints, window trims, door trim and corners. These gaps should be no larger than one inch wide. Energy Seal contains a fine aggregate that gives it a texture which enables it to more closely match the texture of wood and accept a stain, so that it will blend in with the stained wall color if so desired. Although it can be used in wider joints, we typically recommend using Perma-Chink® Log Home Chinking for wide chink joints.
When Should Energy Seal Be Applied?
The best time to apply Energy Seal is after the home has been cleaned and before the finish is applied. The wood surfaces will be fresh and clean and Energy Seal adheres best to bare wood surfaces. That’s not saying that it won’t adhere to stained and/or top-coated surfaces, but it adheres best to bare wood. Application to surfaces with a freshly applied oil-based stain should be avoided. For the least visible caulk lines choose a color that’s a shade lighter than the stain color you plan to use. It’s easier to cover a lighter color sealant with a darker color stain than it is to hide a dark colored sealant with a light colored stain. However, if you prefer the look of visible caulk lines, apply Energy Seal after you stain. Just be sure that the surface is clean and dry.
If you are going to be applying Lifeline Advance Topcoat, apply the topcoat after the Energy Seal. This results in a more even appearance to the sealed areas and helps them blend in with the rest of the wall. Furthermore, it helps keep the Energy Seal application clean and easier to clean when maintenance cleaning is required.
Using Backing Materials
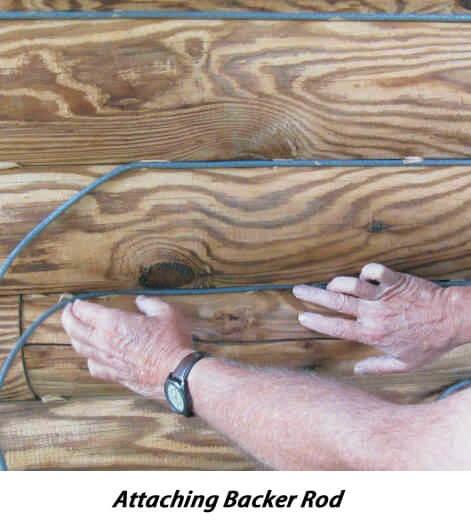
Backing materials furnish an even surface for the application of a sealant and make it easier to apply a uniform thickness across the joint or gap. They also provide two-point adhesion to ensure maximum elasticity and flexibility after the sealant has cured (they form a bond breaker in the center of the sealant band with adhesion to the wood at both sides). The use of improper or poorly installed backing materials can result in unsightly sealant joints and substandard performance. They are an integral part of the sealant system and should always be used whenever and wherever possible.
There are a number of products specifically designed for use as backing materials for sealants. For smaller gaps, joints and cracks the most commonly used material is round backer rod. It comes in a range of sizes and is relatively inexpensive. Since it is flexible it can be pushed into a crevice without needing to be nailed or stapled. Grip Strip is designed for sealing larger gaps. Similar in composition to backer rod, it is shaped like a trapezoid so it can be squeezed in between round logs although it can be used in a variety of situations. It provides a flat surface for chinking or sealing.
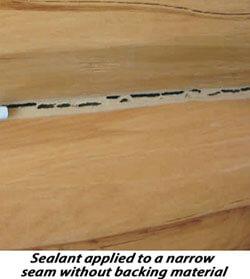
In situations where a joint, seam or gap is too small to insert Backer Rod you can hold it in place by applying small dabs of Energy Seal along the seam and then pressing the Backer Rod into them. The dabs of Energy Seal will hold the Backer Rod in place while a proper thickness of Energy Seal is applied on top. You can also use a narrow strip of water-resistant masking tape. You don’t want to use masking tape that wrinkles when it gets wet, since the wrinkles may show through the sealant. For extremely narrow seams an excellent option is to use pinstripe tape available at most automotive supply stores. The tape is vinyl; therefore, it’s waterproof and since our sealants do not bond to it, it makes an excellent material to use. Pinstripe tape is available in widths down to 1/8”.
Approved Backing Materials
- Grip Strip
- Backer Rod
- Log Gap Cap
- Expanded polystyrene (EPS) beadboard, foil-faced
- Polyisocyanurate board (Polyiso or R Max)
- Water-resistant masking tape or pinstripe tape
DO NOT USE
- Extruded Polystyrene (causes blisters)
- Polyurethane foam (Pur Fill, Great Stuff, Styrofoam)
- Blue Board, Pink Board or any other colored board (outgases and causes blisters)
- Bare wood or strips of bare wood (outgases and loss of elasticity, 3-point adhesion)
- Anything that you are unsure about check with Perma-Chink Systems before using it
The Role Backing Materials Play When Sealing a Seam
Round Logs
When deciding the width of a sealant joint between round logs a good guideline to follow is for the width of the sealant to be one-sixth the log diameter. For example, with six inch diameter logs 6” ÷ 6 = 1.0” wide sealant joint. The width of the backing material you require depends on the profile of your logs but you need to take into account that you will be applying a 3/8” thick layer of sealant over it and you’ll need at least ¼” top and bottom for adequate adhesion to the wood.
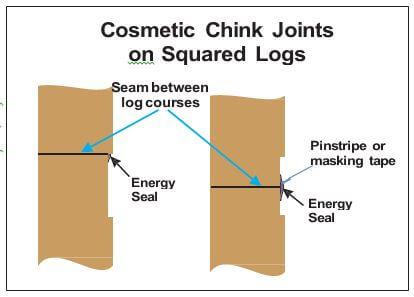
Squared Logs
We rarely see squared log chink joints less than 2” wide, so Energy Seal or Woodsman is seldom used in these situations. However, for cosmetic chink joints less than 3/8 inches deep we recommend sealing the seam with Energy Seal and then applying Chink Paint over the entire joint. On the other hand Energy Seal is often used on squared logs for sealing corners, butt joints, widows, door frames and other areas where a visible chink joint is not desired.
Applying Energy Seal
The overall performance of any sealant system is dependent on the use of proper application methods. Any sealant must be applied in a manner that will allow it to stretch in order to compensate for log movement. If it is applied too thick, once it cures it won’t be able to stretch enough to compensate for the movement and it may tear away from the wood. Think of it like a rubber band. A thick rubber band will not stretch as far as a thin one. However if the rubber band is too thin, it will break when it is stretched. The same thing applies to sealants. If applied too thick, they can’t stretch and if too thin they may be weak and will tear when pulled apart. In the case of our sealants the magic number is an applied wet thickness of 3/8”. When cured this results in the best elongation with maximum strength.
Have the Proper Tools
Before you start have all of the tools that you will need at hand and be sure that they are clean and in good working order.
These may include:
- Caulk gun or bulk loading gun
- Rags
- Trowels and/or spatulas
- Plant mister with water
- Masking tape
Weather Conditions
Freshly applied sealants should be protected from direct rainfall for a minimum of 24 hours. Either watch the weather or drape a newly sealed wall with plastic film. Be sure to allow some airspace between the wall and the plastic to facilitate drying. Avoid applying sealants in direct sunlight or when the temperature is less than 40° F. In cold weather it’s important that the logs be free of frost and dew in order to ensure that the sealant adheres tightly to the wood. The best surface temperature range for easiest application and best results is between 50° F and 80° F.
Application
Cut the applicator or tube tip to the desired diameter of the sealant bead you want to apply.
Step 1: Begin by holding the tip firmly against the seam or joint and apply a bead of sealant. You need to apply enough sealant to maintain a wet thickness of at least 5/16” and no more than ½” (target = 3/8”) across the entire seam or joint after tooling. Only apply as much sealant as you can tool smooth in about 15 minutes.
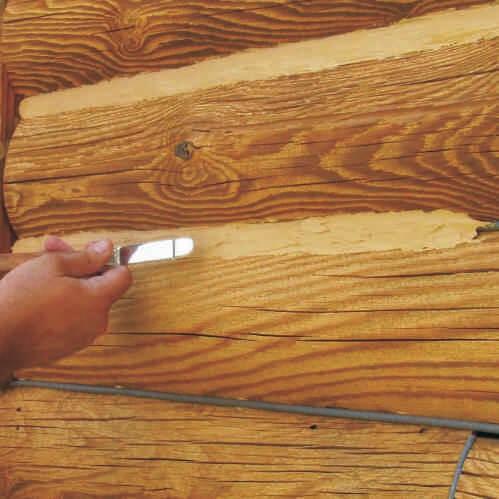
Step 2: Once the joint is filled trowel it out to approximately 3/8th of an inch thick across the entire joint. Do not spray it with water at this time! Make sure there is good contact between the sealant and the exposed edges of the wood. The most difficult areas to tool are corners. You tend to drag product out of the corners resulting in the sealant becoming too thin. You can occasionally check the thickness of the sealant using a toothpick to see if you are maintaining the proper thickness.

Step 3: Once the sealant is roughly in place and any entrapped air worked out of it, spray it with a light mist of water. Do not saturate the surface with water. If water begins to run down the wall, you have applied too much.

Step 4: Tool the surface smooth with a trowel or spatula. If you used masking tape to protect the surrounding wood be sure to remove it as soon as you are finished tooling and make sure that you have not left any lip on the top edge of the sealant that may catch water. If you have, tool it smooth.
Sealing Window & Door Frames
Clean-Up
If you get any sealant on the surface of the wood, be sure to wipe it off with a wet rag as soon as possible. If you allow it to dry it will be just about impossible to completely remove. Make sure to clean your tools and equipment with clean water occasionally during application. Dried sealant is difficult to remove from just about anything including clothes.
Drying and Curing
Drying time and curing time are two entirely different terms. In warm or hot weather, Energy Seal may begin to skin over in as little as ten minutes while a complete cure may take a couple of weeks. Cooler temperatures will slow both the drying time and curing process.
Learning about Mold and Mildew
Mold and mildew are terms that are used interchangeably since they refer to the same living micro-organisms. For simplicity we’ll refer to them as molds. Molds encompass a wide range of fungal species that can live on the surface most materials, including wood. They require air, water, and food. Their color is usually white or black, but can be just about any color. If the growth is green, it’s probably a plant-like organism called algae.
The molds that concern us live on wood fibers or even on finished surfaces. Bare green wood is very susceptible to mold growth since the high moisture content provides lots of available water, and the wood’s nutrients are readily available as food. Many types of mold grow on green wood. They vary from black spots to white tendrils (commonly called dog hair). All mold growth MUST be removed before any of our LIFELINE™ finishes are applied.
Use Specialized Cleaners not Bleach
While common household bleach has traditionally been used to remove mold, it should never be used on bare wood surfaces. It is fairly easy to remove mold and prevent their reappearance underneath our finishes without having to use caustic wood-damaging chemicals like chlorine bleach. Wood cleaning products like Wood ReNew™ and Log Wash™ usually do an excellent job when used correctly.
Know Where Mold and Mildew Grows
All of our exterior stains and topcoats contain dry film preservatives that help prevent the growth of mold on the surface of the finish. They do not prevent the growth of mold on the substrate under the finish. That’s why it’s so important to thoroughly clean the surface prior to applying the first coat of stain or primer. Mold spots forming under a finish is an indication that the surface was not properly cleaned during preparation. The only way to remove them is to strip the finish down to bare wood to get at the mold.
Occasionally shaded, warm, moist environments can create conditions so conducive to mold growth that they can overcome the preservative or mildewcide additives contained in the finish.
Prevent Mold and Mildew
One way to handle this type of situation is to thoroughly clean the walls with Log Wash and then apply a coat of Advance™ Clear Topcoat mixed with a Mildew-X additive. Just be aware that the addition of Mildew-X will diminish the reflectivity – or gloss – of Advance Gloss.
A final thought about maintenance of exterior finishes: An occasional wash with Log Wash will help keep the surface clean and mold-free. If needed, a maintenance coat of Lifeline Advance will renew the water repellants, UV inhibitors, and the mildewcides. Cleaning and maintaining your exterior finish will protect the wood and maintain the appearance of your home, including keeping it free of surface mold.
Perma-Chink Systems namesake product, Perma-Chink, is the leading sealant for log homes. We’ve extended the same performance and quality of Perma-Chink in our other sealants, Energy Seal and Woodsman.
Below are our Tech Tips for all our sealants, including our Chink Paint, which provides an excellent solution to refresh old, but sealed, chinking.
Sealants Application Guide