Blog
Which Is the Best Log Home Topcoat
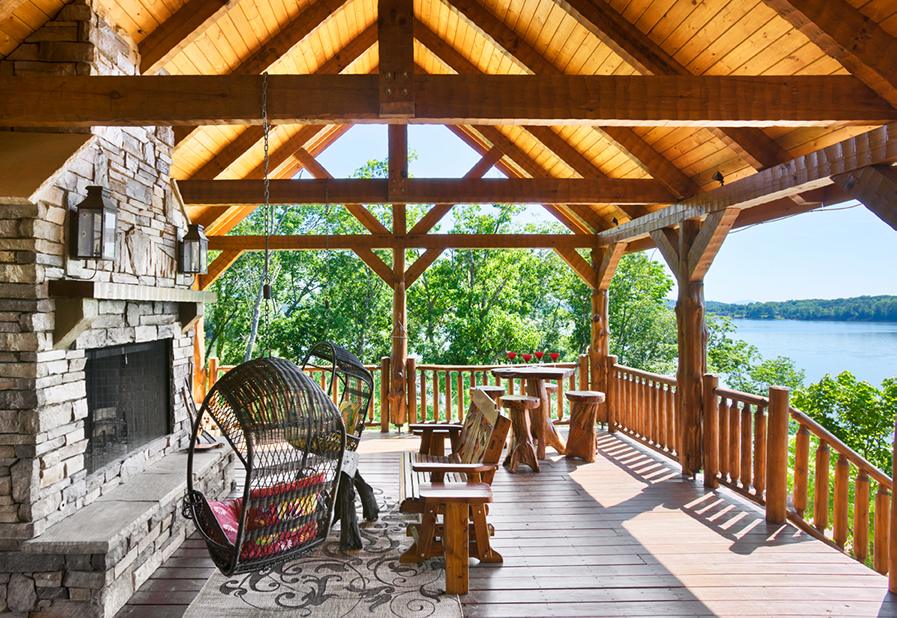
Often we get asked which performs better: Advance Gloss or Advance Satin? Overall, both topcoats protect the finish and your log home exceptionally well. While it mainly comes down to personal preference on which log home topcoat you choose, as the manufacturer of the topcoat, we’ve learned some things that can tip the scales if you’re undecided on which topcoat to select for your log or timber home. So the quick answer is we recommend Advance Gloss.
Reflectivity
When it comes to performance and longevity there is no doubt about it- a gloss topcoat will outperform a satin topcoat. Why? The most important factor is reflectivity. A smooth, glossy surface reflects more ultraviolet (UV) light than a less reflective one, like a Satin, or worse, a dull one. This is why a vast number of automotive finishes don’t come in satin versions, and why a shiny coat of wax helps retain a vehicle’s color.
Cleanliness
The next factor is cleanliness. The smooth, slick surface provided by Advance Gloss sheds dirt easier than the Satin. That’s because the flatting agent used in Satin results in microscopic roughness in the surface of the finish where airborne dust, pollen and pollutants can lodge. Although particulates can be removed with a good washing, it takes a bit more effort with the Satin finish than removing dirt from the Gloss surface.
Bee Deterrent
The last factor, at least in the Southeast, relates to how Advance Gloss reduces carpenter bee damage. A few years ago we did a survey of customers who used both our satin and gloss topcoats and the results clearly revealed that the gloss topcoat substantially reduced the number of carpenter bee holes. Although there was some reduction in carpenter bee activity using Advance Satin, it was not nearly as significant as the Gloss. Carpenter bees are searching for a wood space to create a chamber to lay their eggs. If this wood surface is coated and that coating is reflective, it creates a mechanical deterrent for carpenter activity.
Order Samples To Test
Whenever requesting exterior finish samples, include a sample of Advance Gloss and Advance Satin, even if you are only interested in one topcoat. By applying both on your wood, you will be able to see the difference for yourself. You may end up choosing the other topcoat because of the way it looks and how it highlights the color of the stain. Although there are other gloss topcoats on the market, none that we have tested retained their level of gloss for more than a few months. Advance Gloss, on the other hand, has been on homes and walls since 2003, and they continue to retain most of their initial gloss.
Just as clear coats are vital to the performance of today’s automotive finishes, our Lifeline Advance™ topcoats are an integral part of all exterior finish systems. Not only do they extend the life of the color coats, but they do much more to protect your log home.
The Benefits of Lifeline Advance
Advance Topcoat significantly improves the look of the finish by enhancing the color, clarity, and depth of the finish. In other words, they make our finishes the most beautiful log home finishes in the world. Second, they help keep the surface clean. The very nature of a pigmented stain makes it susceptible to dirt pick-up through adhesion or impregnation. Since we have designed Advance to form a smooth, strong film, it makes it much more resistant to dirt accumulation. In addition, the smooth surface makes it easy to clean off any dust or pollen that may accumulate on the surface of the logs. A simple application with Log Wash™ and a rinse with a garden hose will remove the dirt and grime that may be hiding the beauty of your home.
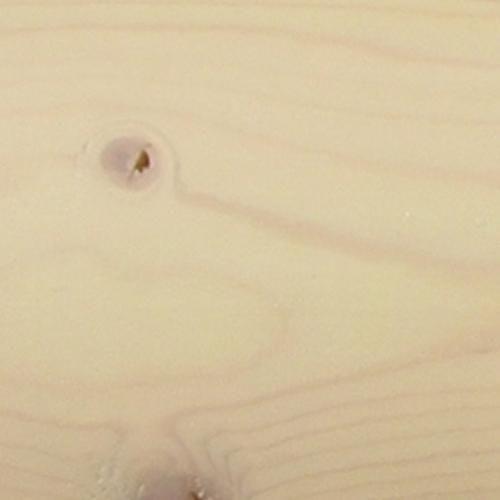
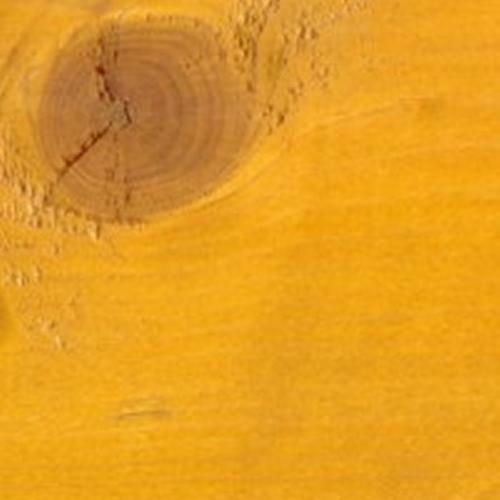
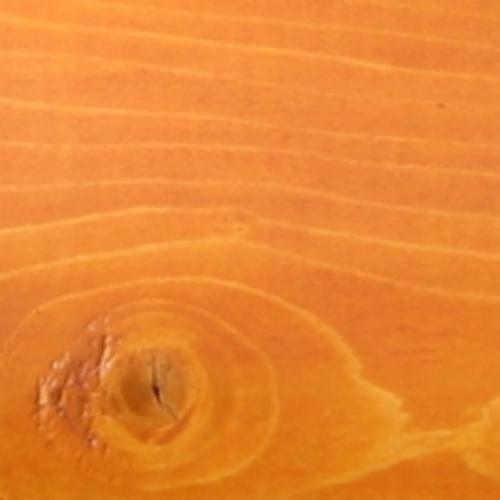
 compared to same color coat with Advance")
Another feature a smooth topcoat provides is greater mechanical resistance to the growth of mold, mildew, and algae. In addition to water, these organisms need something to grip onto. If the spores land on a tough, smooth surface that rapidly sheds water, they won’t have an opportunity to germinate and spread. The surface of your logs stays free of unsightly mold spots and patches of algae.
Of course, the best feature of Advance Topcoat is the protection it provides to the color-containing stain. Years ago, cars left the manufacturer with a coat of paint. More expensive cars may have had several coats of paint, but no matter how many coats were applied, after a few years on the road the paint turned dull and started to flake off. Then car coating experts discovered the benefits imparted by clear topcoats.
Today’s car finishes remain shiny and last longer than ever thought possible, all due to the application of clear topcoats.
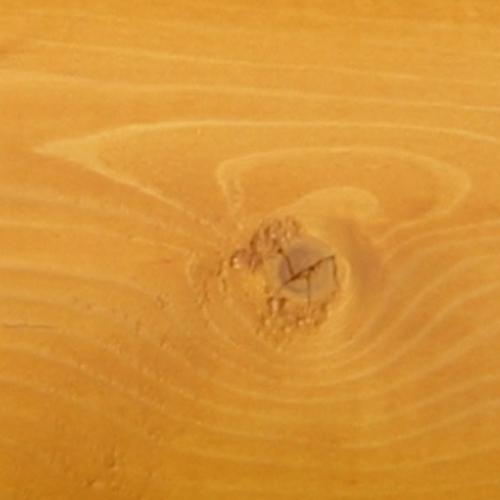
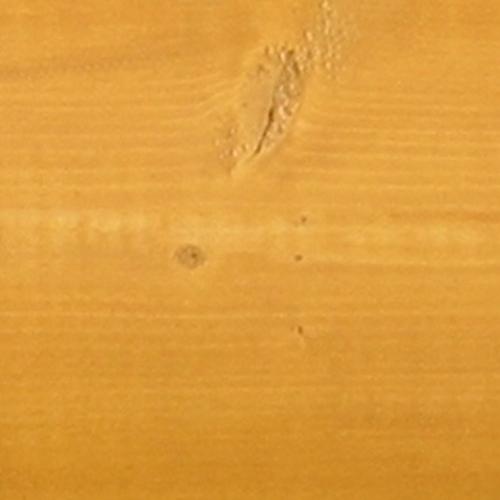
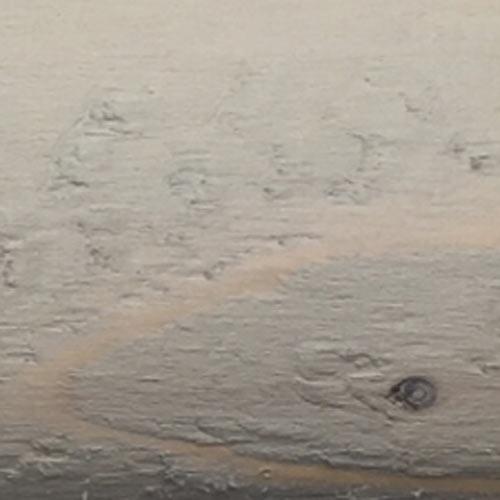
 with same color coat with Advance, after 15 months of accelerated weathering")
How Advance Contributes to Stain Performance Improvement
What is there about topcoats that contributes to this performance improvement? The most performance-enhancing feature of a clear topcoat is that it reflects sunlight. Sunlight is composed of several components, including ultraviolet (UV) light. It’s the UV that is responsible for fading colors and, in the case of wood homes, damaging wood fibers through a process called photo-oxidation. The more UV light that’s reflected off the surface, the slower the color coats will fade. Wood fibers will be also be exposed to less photo-oxidation, thus extending the life of the entire finish system.
Although satin finishes reflect a significant amount of sunlight, gloss topcoats reflect more, which is why car finishes are shiny and not dull. The same holds true for our Lifeline™ exterior finish systems. Because Advance Gloss reflects more sunlight over Advance Satin is one of the reasons that log home gloss finishes are becoming more popular. Read more about the differences of Advance Gloss and Satin finishes here.
An additional beneficial feature of a clear topcoat is the protection it provides to the color coats against degradation by airborne contaminates like sulfur dioxide, ozone, and particulates. Even natural contaminants like tree pollen and bird droppings can damage or discolor the color coats by chemical reactions, or promote mold growth. Our Advance Topcoats provide a barrier that prevents these negative events from occurring.
These are some of the reasons why Lifeline Advance Topcoats play a key role in the performance of all of our exterior film-forming finish systems.
Order Your Advance Topcoat Today
Contact us at 1-800-548-3554 or your local Perma-Chink Store to place your order during business hours, or order online at Store.PermaChink.com. We’ll be glad to help you choose the right sheen of Advance, too, either gloss or satin. If you want to try each sheen on your logs, order free samples online.
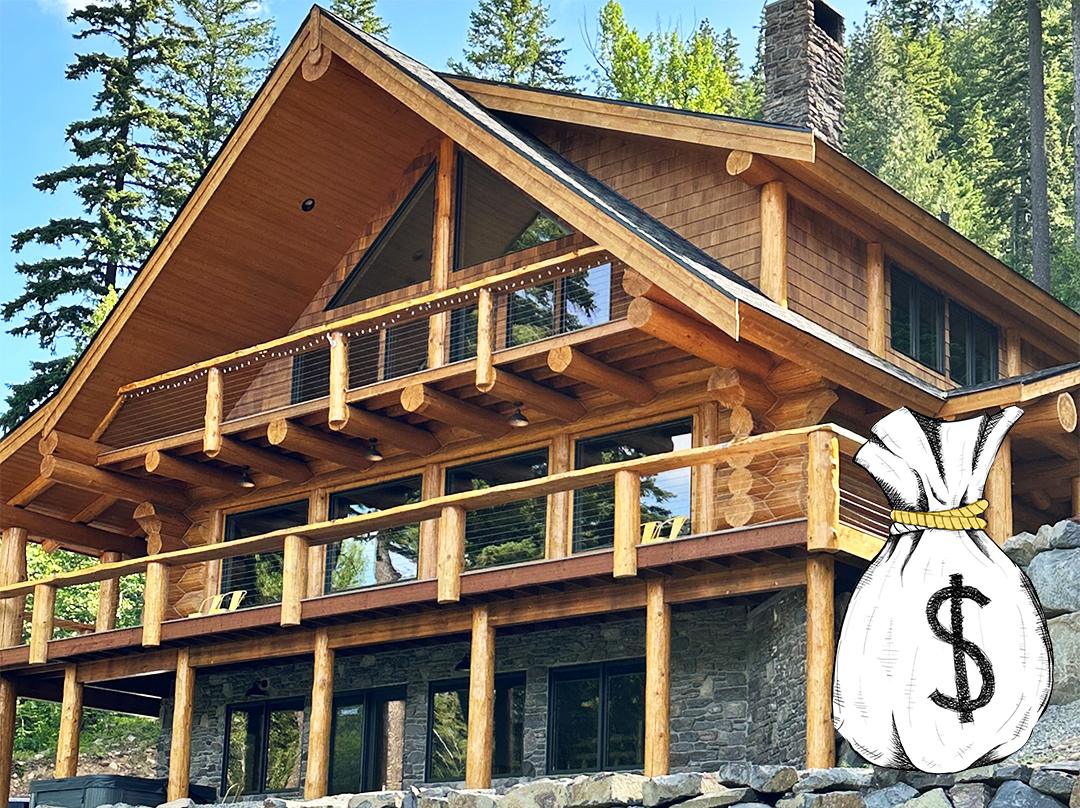
Stretching Your Dollar With Lifeline Ultra-2
For 44 years Perma-Chink Systems has cared for log and timber homes through exceptional products designed to outlast and out-perform anything on the market. Getting the most for your money is something we can all identify with, and we endeavor to create significant value for our customers.
One key feature that makes our stains and finishes a better value than other options on the market is the coverage rate. An average-quality wood stain available at any big-box home improvement store offers a coverage rate of 150 square feet (sqft) per gallon. Even a finish specifically made for log homes only averages 150-250 sqft per gallon for a first coat, and 300-400 sqft per gallon for second or maintenance coats.
But one stain brand rises above the rest – expertly formulated to complement the unique character and demands of large logs and heavy timbers.
It’s LIFELINE.
Maximum Coverage Rate Means Lower Total Cost
Our Lifeline Ultra-2 stain comes in with a whopping 350-450 sqft per gallon first coat and 600-800 sqft per gallon second coat. That’s double the coverage rate of other products on the market. Additionally, our other Lifeline family of Ultra-7, Exterior, and Accents finishes have similar coverage rates, making any of our exterior finishes an excellent value.
| Finish Brand | First Coat Coverage Rate Per Gallon | Second Coat Coverage Rate Per Gallon | Price per Gallon (as of 8/2025) | Total Price per Square Foot |
| Lifeline Ultra-2 | 350-450 sqft | 600-800 sqft | $115.99 | $0.46 |
| ProLuxe-Sikkens | 150 – 225 sqft | 300-400 sqft | $98.95 | $0.84 |
| Sashco Capture | 150-250 sqft | 250-350 sqft | $90.99 | $0.80 |
“High” Sticker Price Isn’t the Whole Story
Lifeline brand is not the lowest-priced option on the market by design. The science behind Ultra-2 engineered it to be better than available products, made with the highest-quality components, creating exceptional value when you look at the total cost. We’ve analyzed the cost difference between low-quality finishes and high-quality finishes in our Money Matters article, where labor expenses are a significant factor that gets overlooked when comparing project pricing.
For DIY projects, the material cost of Ultra-2 might be more expensive than the lower-cost choices, but the extra gallons needed to equal the coverage rate and years of durability of Ultra-2 negate any savings. Throw in the 5-year Limited Warranty Lifeline Ultra-2 has when properly maintained, the total cost can not be beat by competitors. Lifeline finishes cover double the square footage and can last more than twice as long. Lesser quality finishes degrade faster and do not offer the superior protection Lifeline finishes offer. The inexpensive finish will easily end up costing twice as much for the same coverage, and twice more again when it comes to refinishing the home in two or three years.
Here’s a comparison of the estimated total cost to stain 1,000 sq. ft. log home using the two stain options:
| Lifeline Ultra-2 at $115.99 per gallon | Proluxe Cetol Log & Siding Stain at $98.95 per gallon |
| • First Coat Coverage: 350–450 sq. ft. • Second Coat Coverage: 600–800 sq. ft. Coverage Efficiency Estimated Total Cost: Low Coverage $524.72 High Coverage $402.74 | • First Coat Coverage: 150–225 sq. ft. • Second Coat Coverage: 300–400 sq. ft. Coverage Efficiency Estimated Total Cost: Low Coverage $989.50 High Coverage $687.15 |
✅ Summary
• Lifeline Ultra-2 is significantly more cost-effective for both low and high coverage scenarios.
• Proluxe may be suitable for specific finishes or wood types, but it’s nearly double the cost at low coverage.
Get More with Ultra-2 – Performance That Pays for Itself!
At the end of the day, Lifeline Ultra-2 offers better coverage and longer durability than any product at a local big-box retailer. With less frequency between coats over the long, long life of your log or timber home, and impressive coverage rates, the value of Lifeline Ultra-2 is simply unmatched.
Don’t wait – order your free samples today! U-2 free samples
Custom colors are available in any shade, or we can match your desired color. Call 1-800-548-3554 to get started.

Stains & Finishes Application Guide
Download the full Application Guide for Stains & Finishes here.
Sealants Application Guide
Download the full Application Guide for Sealants here.
Application Surface Temperatures for Perma-Chink System products
Most of our labels list the recommended surface temperature range for the application of the product, but there are always situations when you may need to know a bit more detail about application temperatures in order to schedule or complete a job. This is a high-level recommendation for application temperatures. For more in-depth information, it’s recommended you please read the Application Temperatures article. In some cases, there are steps that can be taken to help cope with extreme hot or cold temperatures. Just remember that we are concerned with surface temperatures, not air temperatures. It is the temperature of the logs that must be considered, not the temperature on the thermometer hanging on the porch.
Lifeline™ Exterior Finishes
- Recommended Range
- All Lifeline stains 40°F – 90°F
- Lifeline Advance 40°F – 90°F
- Log End Seal 40°F – 90°F (not stated on label)
Sealants
Recommended Range
- Perma-Chink® Above 40°F
- Energy Seal™ Above 40°F
- Woodsman™ 40°F – 120°F
- Check Mate 2® 40°F – 90°F (not stated on label)
Finish Removers
Recommended Range
Cleaners & Brighteners
Recommended Range
- Log Wash™ 40°F – 90°F (not stated on label)
- Cedar Wash™ 40°F – 90°F (not stated on label)
- Wood ReNew™ 50°F – 90°F (not stated on label)
- Oxcon™ 50°F – 90°F (not stated on label)
Step 2 – Schedule Interviews
Perma-Chink Systems maintains current contact information, insurance and license information for all contractors on the referral list. Obviously, you’ll want to interview the contractors to determine their reliability, reputation, and experience, as well as their procedures that best meet your individual needs.
So here are the top 4 Key Questions you should ask each contractor candidate:
1. Does the contractor carry insurance?
A contractor should carry comprehensive liability insurance and workers’ compensation insurance to protect you in the event of a job accident. Ask for proof of general liability and workers’ compensation coverage for the type of project.
2. Is the contractor licensed?
Ask if the contractor is licensed by your state and/or city. Not all states or cities require contractors to be licensed.
3. Will the contractor provide references from previous jobs?
Most experienced log home contractors will have a portfolio of past jobs, along with photos and customers testimonial letters.
4. What is the contractor’s workmanship warranty?
Some contractors typically warrant their workmanship for one year or more. Longer warranties are not necessarily more valuable than shorter warranties. The length of the warranty is less important than the intent and ability of the contractor to stand behind his warranty. That is best evaluated using customer references.
Choosing a Contractor
There are several more important things to consider as you narrow down your contractor selection. All job bids (if well written) should contain enough detail provisions and terms to clearly state both parties’ expectations. Your contractor’s knowledge of local building laws, their schedule to do the work and, of course, the total price they bid for your project, is all part of the equation. When it comes to caring for your log home, it’s reassuring to know that you can choose a contractor on whom you can rely on for good advice as well trust that they’re dedicated to providing you with the best results possible.
Again, Perma-Chink Systems is happy to offer you all our resources to make this process a successful experience. We will contact you within 7-10 days to follow-up on the contractor’s response and also log information and future follow-up if the job was awarded to one of our preferred log home contractors. Give us a call at 1-800-548-3554 or e-mail info@permachink.com to get a referral to contractors in your area.
Choosing a Log Home Contractor: Getting It Done Right
Are you the hands-on type—someone who enjoys weekend trips to the hardware store and tackling projects yourself? At Perma-Chink Systems, we proudly support DIY enthusiasts by offering user-friendly products, expert how-to articles, and robust customer support. But while we make the DIY route possible, it’s not always preferable—or realistic.

Sometimes, life simply demands a professional. Whether it’s due to time constraints, physical limitations, lack of confidence, or simply not wanting to shoulder the task yourself, hiring a contractor becomes the smart move. And not just any contractor—a log home specialist.
Why a Log Home Contractor?
Think about it this way: would you hand over your car keys to a golf-cart mechanic? Both may know engines, but the experience gap matters. Similarly, log and timber homes require a specialized touch. Log home contractors understand the unique materials, techniques, and challenges these structures present. Their expertise means better results and fewer mistakes—and their existing relationships with product manufacturers often work in your favor.
Perma-Chink Systems offers a nationwide referral network of experienced log home contractors homeowners can access online on our website, our Find A Contractor tool. While these professionals aren’t directly affiliated with us, most are self-employed specialists trained to use our products with precision and care. Many of these relationships span years, and we continuously review our referral list to maintain the highest standards.
Two Key Steps & Four Critical Questions
Step 1 – Get Informed
Before speaking with any contractor, empower yourself. Knowledge gives you confidence and ensures better conversations. Dive into our literature, explore detailed application guides, attend one of our free homeowner workshops, or schedule a private webinar with our team of log home experts. Our specialists are ready to walk you through the process, explain the products, and help you understand what to expect. An educated homeowner is a contractor’s best client.
Step 2 – Conduct Smart Interviews
We keep up-to-date records of licensing and insurance for all contractors on our referral list, but it’s essential to vet them yourself too. Ask the right questions to ensure the contractor’s reliability, reputation, and fit for your project.

Here are four questions that should top your list:
- Do you carry insurance?
Look for comprehensive liability and workers’ compensation coverage. Always request proof before work begins. - Are you licensed?
Licensing requirements vary by state and city—make sure your contractor is properly credentialed according to local laws. - Can you provide references?
Seasoned contractors will happily share photos, testimonials, and previous work portfolios. - What warranty do you offer?
While warranty durations vary, what truly matters is the contractor’s integrity and track record of honoring their work—something former clients can confirm.
Making the Right Choice
When reviewing estimates, pay close attention to the details. A well-written bid should spell out clear expectations on both sides. Consider your contractor’s availability, knowledge of local codes, and, of course, overall cost.
Ultimately, you want someone you can rely on—not just to complete the job, but to do it with care and craftsmanship. With the right contractor, maintaining your log home becomes not just easier, but a whole lot more satisfying.
Let Perma-Chink Systems be your guide. We’re here to support you every step of the way, from initial exploration to follow-up after your project is complete. Within 7–10 days of your request, we’ll reach out to record your contractor’s response and keep tabs on next steps.
To get connected with qualified professionals in your area, call us at 1-800-548-3554 or email info@permachink.com. Let’s bring your log home project to life—with the right expert by your side.
The key indicators that your logs need a little R & R (repair and refinish)
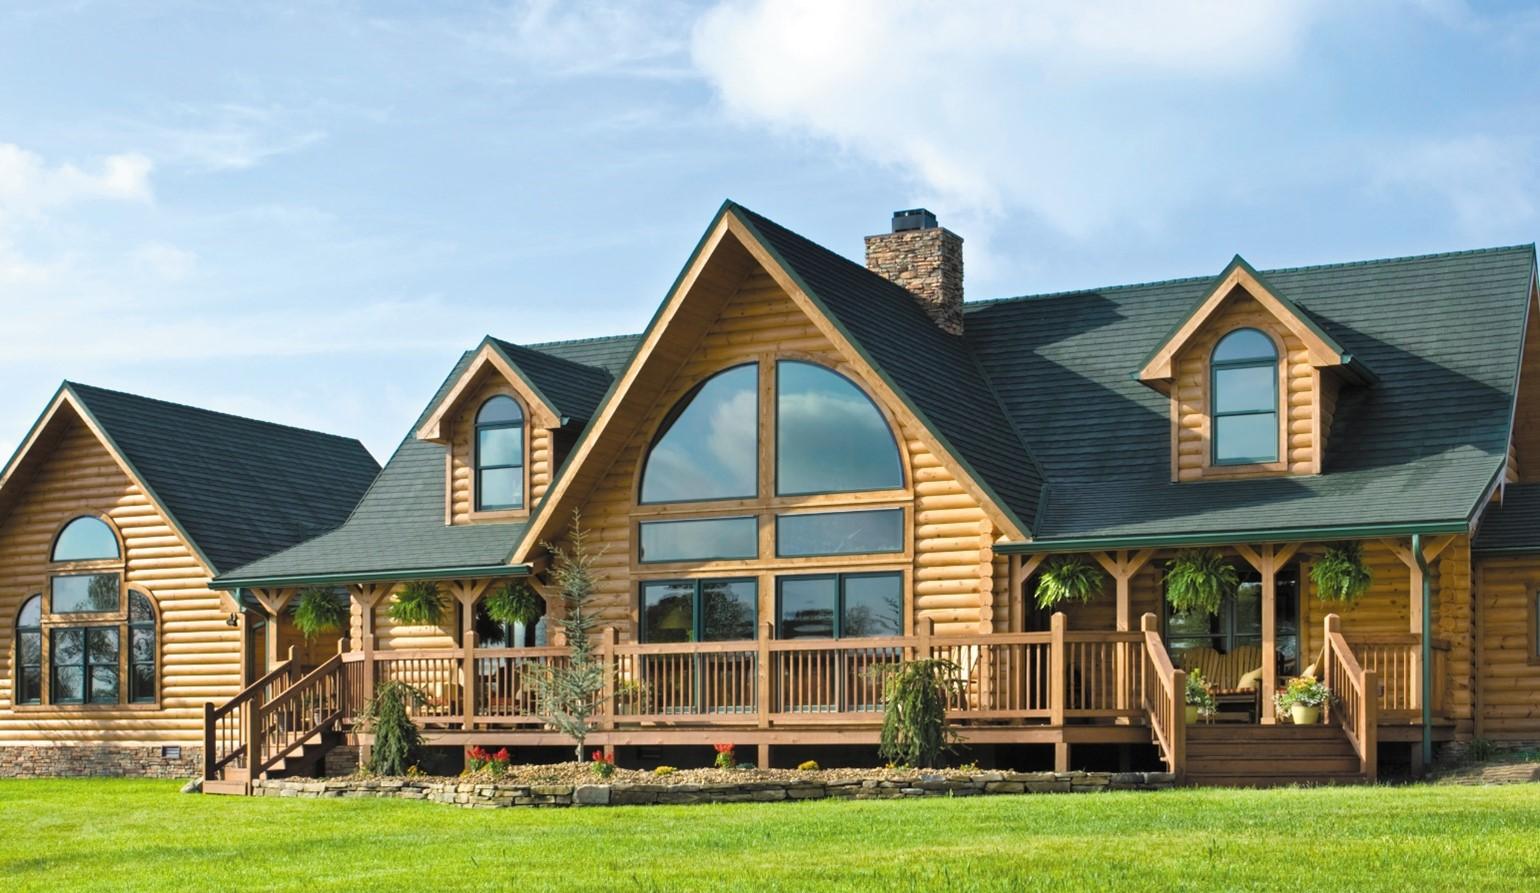
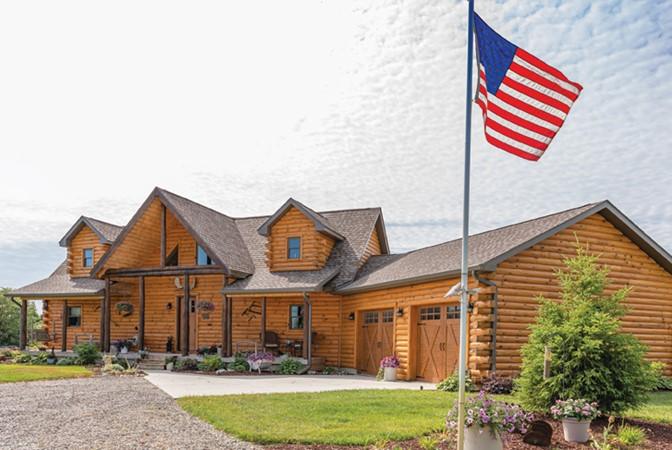
It’s difficult to ignore a log home; they possess a personality that always turns heads. Such natural good looks are part of their allure, but the attention they command extends to more than admiration. Log homes need regular maintenance to protect their beauty, performance and longevity. Fortunately, a few simple indicators will tell you exactly what your home needs (and when!). Here’s how to assess your logs’ status:
Annual Inspection of Log and Timbers
An annual inspection and exterior wash are an easy way to stay on top of your home’s maintenance needs. Sometimes a stain may look faded when, in fact, its appearance is just dulled by layers of dust, dirt and pollen. A simple wash will brighten everything up and return your home to its sparkling beauty. Ideally, this annual cleaning and inspection is done in late spring, after pollen season. A product like Log Wash from Perma-Chink Systems, Inc., which is environmentally friendly and is formulated with low pH, cleans the wood and preps it for a new coat of stain or topcoat if one is needed.
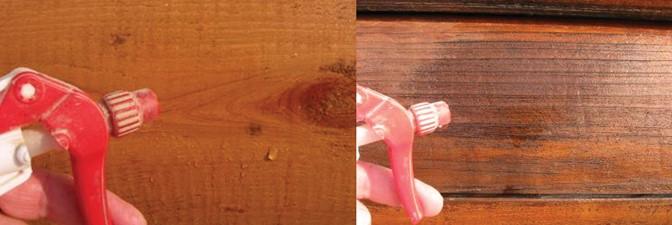
Perform a Water Test for Finish Integrity
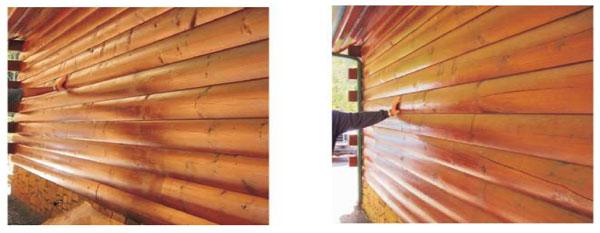
Washing your home is also the perfect opportunity to do a water test, which tells you if you need to reapply a topcoat or the stain. When you wash your home, if you see water sheeting over the logs and being repelled, it’s a sign that the finish is working. If you’re unsure, perform a spot test by using a spray bottle filled with plain water to spritz a small section of the dry log with water. If the water soaks in, it’s an indicator that you need to re-apply the finish. If it beads up, your finish is working and you’re in good shape.
Is Your Log Color Beginning to Fade?
Stains add color and dimension to logs, enhancing a home’s aesthetic. However, they play another critical role. A log home’s stain, whether oil or film-forming, is responsible for protecting the wood. So, when the appearance begins to fade, that means the protection is, too. Keep an eye out for areas where your wall color is beginning to fade, indicating it’s time for reapplication of stain.
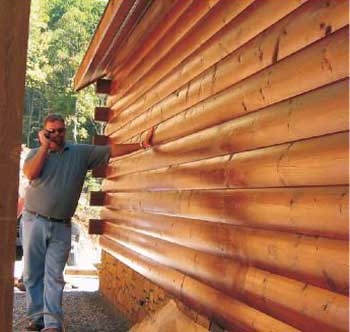
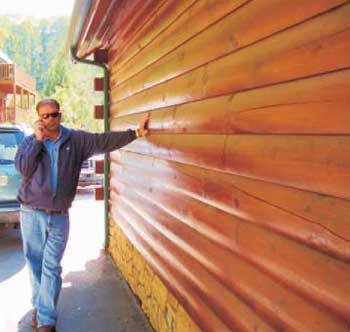
How to Perform a Tape Test
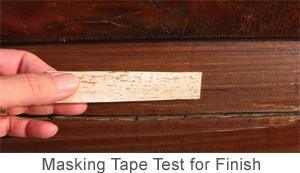
What if you purchased an older log home and don’t know what was applied prior to your arrival? Conduct a tape test! Simply take a short strip of high-adhesive masking tape and place it on the exterior wall, making sure the tape has good adhesion, then pull it off. If you see 50% or more pigment or stain color on the tape, that’s an indicator that not only do you need to re-stain the exterior, but you need to strip it down to bare wood. If you apply a new stain on top of a product that is peeling or flaking off, the new product isn’t going to stick.
Re-Application Made Easy
Once you’ve assessed your home and decided it’s time to reapply, Perma-Chink’s products not only prevent fading but also make application easier in the future. Unlike most film finishes, Perma-Chink’s system is a two-step process that involves a stain, such as LIFELINE™ Exterior, Ultra-2, or Ultra-7, Accents, then a topcoat finish of LIFELINE Advance. The extra step of adding a topcoat finish may seem like more work at first, but it saves you maintenance headaches down the road. That’s because with the LIFELINE brand, the stain protects the wood and the topcoat protects the stain, therefore extending the life of the stain.
Because the topcoat protects the stain, it may be years before you find that the stain needs to be re-applied. With conventional film-forming products or an oil-based stain, the stain will likely need to be re-applied every 2-3 years depending on the sun exposure.
Alternatively, if your log home has been repeatedly treated with an oil-based stain, it might be a good candidate for Log & Timber Defense. This product is a stain and sealant in one. It’s not film-forming and performs more like an oil by penetrating the wood, yet a water-borne finish that cleans up with soap and water.
Looks and Longevity
Knowing how to take care of your log home and choosing products that make maintenance easy will help ensure the beauty and durability of your log home for years to come. With Perma-Chink Systems, you get peace of mind, gorgeous looks, and a minimal maintenance routine that will give your home the longevity you desire. Order your stains today at Store.PermaChink.com or call us at 1-800-548-3554.
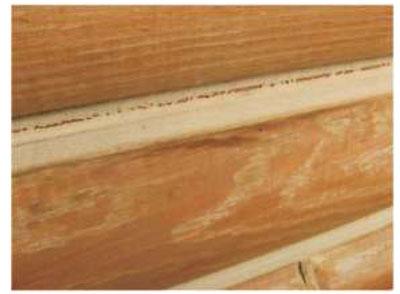
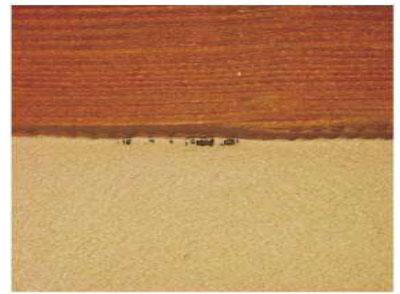
How Do Rips and Tears Happen?
Occasionally rips and tears form in log home chinking, especially in new homes that have been constructed with fairly green wood. Most of the time these tears appear on the top edge of the chink joint. That’s because during the tooling process, most people tend to pull product from the top to the bottom of the chink joint, which results in a thinner than recommended layer of chinking along the top edge. In addition, people forget to “push” the chinking up against the top edge, resulting in inadequate adhesion. When the logs shrink, it puts a strain on the chinking and if it was not properly applied, it can pull away from the wood. So when working Perma-Chink®, it is important to keep pushing the product towards the top of the joint.
Before making any repairs, determine if the chinking was properly applied originally (see our Application Guide here for reference). If you find that the thickness along the top edge is consistently less than 1/8”, you may be faced with constant repairs as it will be better to cut it out and start over again. You won’t be able to apply another layer of Perma-Chink on top of what’s already there to bring it to the proper thickness. If you do, the added layer will probably develop blisters in it.
Our rule of thumb is that if a tear is less than one foot long, it can be repaired. If it is longer than one foot, the chinking should be cut out and replaced. The reason for this is that on long tears, the chinking tends to sag out, and there is no way to hold it in place while the repaired area cures.
Begin with making sure the area that you are repairing is good and clean. You don’t want any dirt to interfere with the adhesion of the chinking. It’s easier to make a repair using a tube of chinking or a bulk loading gun than it is to scoop some out of a pail.
Put a bead of chinking along the tear, making sure that you have good contact with the torn chinking and the wood. Once it’s applied, you can press it into place with a tool or your finger. Now use a small, inexpensive paintbrush with the bristles cut to about 2” long, dip it into some water to get the bristles wet, then work the chinking smooth with the brush. This will help match the texture of the chinking repair with the surrounding cured chinking.
In the cases of older chinking in need of repair, it will be necessary to apply Chink Paint over the repaired area to make the color uniform.
Typically, the Chink Paint painted areas will be cleaner and brighter than the old, existing chinking, so you’ll probably want to Chink Paint all of the chinking to renew the look of your entire home. If you want to change the color of your chinking, this would be a good time to take advantage of Chink Paint.
What Causes Blisters?
There are several causes of blisters forming in uncured chinking. The first is whenever chinking is applied in hot, direct sunlight. The surface quickly skins over, preventing the water vapor from escaping from the underlying material. This problem is usually easy to diagnose, since the blister will start to form in the middle of the product, and if the blister is cut away, you can still see chinking under the blister.
Another common cause of blisters is chinking over unsuitable backing materials. This includes blue board, pink board, and other colored EPS (expanded polystyrene) foam and bare wood. These materials out-gas and as they do, they can form blisters in the soft, uncured chinking.
Only those products recommended by Perma-Chink Systems should be used as backing materials for Perma-Chink Log Home Chinking. Some blisters can be directly attributed to the application process. If the chinking is “trowelled” in by hand, small pockets of air can become entrapped during the process. It is very important to “mash” out the chinking in order to work the air out.
Entrapped air also occurs when you apply very small beads of chinking with a tube or a bulk load gun if the tip cut too small, when compared to the size of the joint. Air can be trapped between the beads when it is smoothed out, leading to blistering.

It’s important to work the chinking, although most people are hesitant to do this as it tends to pull during the process. A light mist of water on the surface of the chinking will help prevent pulling, although some chinking professionals only wet the tool they are using, until they get ready to finalize the finish. It is never necessary to flood the surface of the chinking with water, a very light mist is all that you need.
There is no satisfactory way to repair a blister other than to completely cut out the blistered sections and re-chink the entire joint. If you try to cut out and fill in the blisters, you will end up with visible depressions along the chink joint. Once the blistered section is removed, be sure to check the backing material. If it’s the wrong material, replace it with the correct material; if it is bare wood, cover it with masking tape. If you don’t use the correct backing material, you run the risk of blisters reappearing in the repaired sections.


Read Our Application Guide
Read our Sealants Application Guide to learn the best practices, ensuring a beautiful log home for generations.

Inspection Checklist – Downloadable PDF for print
| Wall A | Wall B | Wall C | Wall D | Wall E | Wall F | |
| Are gutters and downspouts clean and working? | ||||||
| Overall condition of roof and dormers. | ||||||
| Are shrubs and tree limbs away from the roof, walls, and foundation? | ||||||
| Sprinklers not hitting the wall? | ||||||
| Are there signs of finish wear or fading? | ||||||
| Check eaves and fascia. | ||||||
| What about the window and door trim? | ||||||
| Is the foundation in good shape? | ||||||
| Check plumbing and electrical penetrations. | ||||||
| Are crawl space vents clear and working properly? | ||||||
| Are there any signs of leaks around windows? | ||||||
| Are there cracks, tears or adhesion loss in chinking or caulking? | ||||||
| Are there any new checks that may need sealing? | ||||||
| Are there any signs of insect or decay infestations? | ||||||
| Are the exposed log ends showing signs of water penetration? | ||||||
| Does the topcoat still look to be intact or is it becoming dull? | ||||||
| Is the color coat showing signs of fading or darkening? | ||||||
| Have any discolorations appeared under the finish? | ||||||
| Are there any signs of peeling around checks and fissures? |
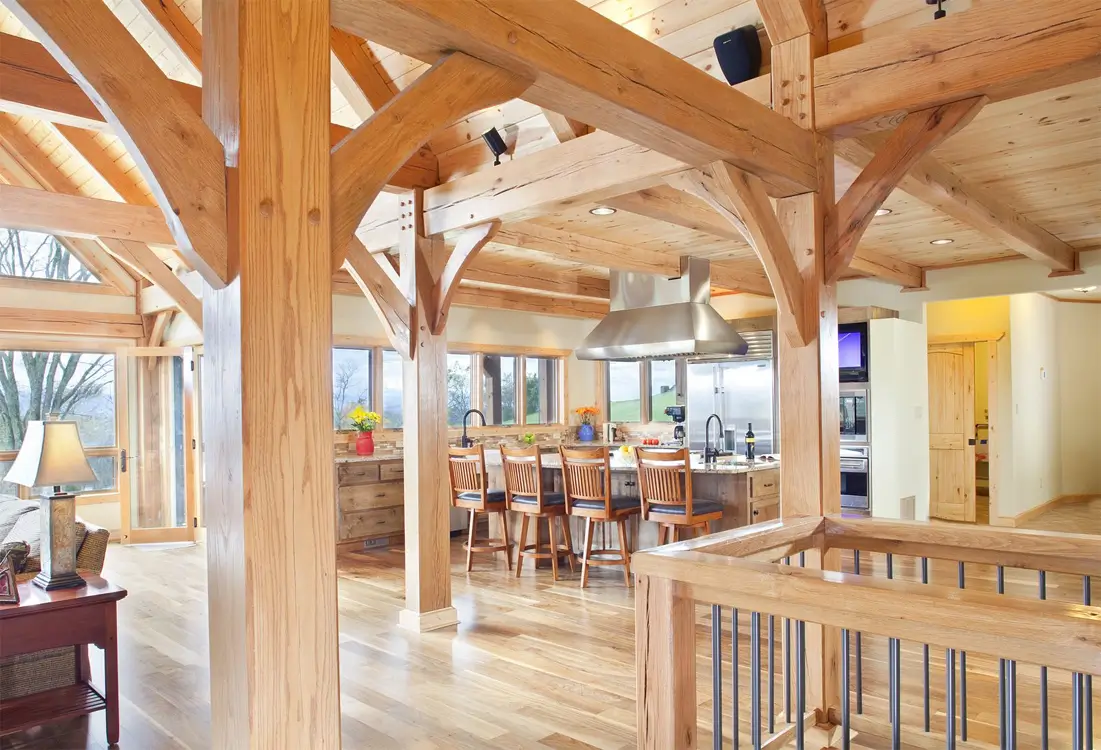
What Do I Use on the Interior of My Logs and Timbers?
The inside is where you do most of your living. As such, it’s important to take time to select the right interior stains and finishes for your log and timber home. In this way, you will achieve an interior that is visually pleasing and performs well for years.
Two Issues
When it comes to interior finishes, there are two phenomena that homeowners tend to overlook:
1. Surprising amount of surface area. Interior walls and ceilings dramatically increase the amount of surface area that requires treatment – there is about twice as much stainable interior surface versus the exterior. You’ll be looking at your stain choice years to come throughout your entire home. Choose wisely the color and stain product, which we recommend Lifeline Interior.
2. Choices, choices, and more choices. During a new build, homeowners are faced with hundreds of decision points along the way. It’s common for homeowners to ask the general contractor (GC) for advice, which is typically the “safe,” neutral off-white color. A GC wants to stay on schedule, but selecting your interior stain takes a little time. You can’t undo stain without a lot of added expense and time removing the old finish and applying the new finish.
What’s Your Color?
To make the best choice for your log home’s interior stain, think about how you spend time inside your home and the feeling you want to create. Does the space have abundant, natural light? Do you prefer cozy, dark walls and a lighter ceiling or a bright, fresh feeling with lighter walls? Another consideration is that wood absorbs light, so a darker stain may translate into a much darker room than you anticipated.
Then there is the tint base. Do you prefer browns, reds, grays, or a bleached look? Like many things, wood stain decisions can follow design trends, or stay within classic choices. Explore your options and be sure to choose a tint that will look beautiful to you over time. You can always darken a lighter stain, but not the reverse.
To order FREE color samples visit our store.


Distinct Needs
Not all interior wood is the same. Logs and heavy timbers are not like the wood of cabinets, moldings, and furniture. These smaller wood products are usually sprayed with nitrocellulose lacquer for protection, giving them a hard, shiny finish. Larger timbers and logs are more dynamic than cabinets, tables, and trim. If you try and put a similar lacquer on your interior log walls, the finish will crack and peel as these larger pieces of wood naturally contract and expand.
Some homeowners wonder if they can go “au natural” with their interior wood, avoiding the protection an interior finish provides. While interior logs may not be subjected to the same elements as their external counterparts, they will absorb cooking oils and odors, collect dust, handprints, and water stains if not protected. There’s another reason to finish them: Have you ever run your hand across rough-cut wood? It feels mildly like sandpaper. All those little crags and jags on the surface need to be covered in a light film; one that’s strong enough to be wiped down and protect the wood while remaining flexible enough to not crack as the log expands, shifts, and contracts over time.
Choose a stain that’s designed for its job. Exterior stains contain higher levels of biocides and preservatives that you don’t need or want inside your home, especially where you’re eating and sleeping. This is also why you want to avoid an oil-based stain. Oil-based products have high levels of volatile organic compounds (VOCs), which are extremely unhealthy in enclosed spaces.
Smart & Attractive
Start with a stain that gives you the aesthetic and exact level of transparency you desire. Here at Perma-Chink Systems, we recommend using our Lifeline Interior stain, which comes in a wide array of tones, including clear. After staining, add one or two clear coats of Lifeline Acrylic or PCS Clear Shield. Both add just enough film to protect your logs and minimize scratchiness so they can be easily wiped and cleaned. Lifeline Acrylic comes in gloss or satin sheens, with PCS Clear Shield offering gloss and matte sheens.
These stains also contain the right amount of UV protection to avoid “picture framing” with the addition of UV Boost. Picture framing is the shadowy discoloration that remains on the wall when you move a bookshelf or a picture. Your stains should not dictate how you can decorate your home if you have to cover outlines of wall hangings. Perma-Chink interior stains and finishes will ensure that the inside of your log home is just as breathtaking and gorgeous as the outside.
To order color samples, visit our store here.
One or Two Coat Log Stains? Warranty and Color Choices to Consider for Your Log Home Stain.
It does happen occasionally. A customer will call and asks, “Which wood stain should I choose?” We’re glad you called because we’re here to help.
The first question we need answered is the stain for outside or inside? Perma-Chink Systems offers both exterior and interior stains. We’ll cover exterior finishes here, as the original question is predominately referring to exterior finishes. If you’re looking for guidance on choosing interior finishes, read our article on interior finishes here.
Are you looking for a film-forming finish or something more like an oil-based stain? If you’re looking for film-forming finishes, our Lifeline family has multiple options that have you covered. Our newest addition Log & Timber Defense is like penetrating oil-based finishes, but forms a lattice-like coating to protect the logs and offers excellent protection.
The next question is do you want a log stain that is one-coat or two-coat application? For one coat applications, Lifeline Ultra-7 is your best option. Available in nine colors, Ultra-7 is the premier finish for log and timber homes. Lifeline Ultra-2, Lifeline Exterior, and Lifeline Accents all benefit from a two-coat application. Additionally, Lifeline Advance topcoat will ensure your stain lasts the test of time.
Warranty
We’re offering a limited 5-year warranty for Lifeline Ultra-7 and Lifeline Ultra-2 when covered with Lifeline Advance clear topcoat, see our warranty information here.
Color Choices
The third question we need answered is what color do you want? With over 70 color options among our Lifeline family, it’s likely you’ll find a color you’ll love on your home. If not, we can produce custom colors to enhance the beauty of your logs or timbers. Order free samples here or give us a call at 1-800-548-3554
Deck Defense FAQs
Click the question to see the answer
What makes Deck Defense™ better than other products?
Deck Defense is a true, penetrating water-borne product without any sort of emulsified oils or alkyds. The product penetrates the wood substrate and the forms lattices to strengthen and support the natural cellulosic fibers for protection from the inside out, not only on the surface.
How about water protection?
We have incorporated ingredients in the formula to serve as a deterrent to water intrusion. One must remember that waxes are sacrificial, and over time the beading on the surface will go away. This does not mean a re-coat is necessary. It is just an indication the waxes have worn away from the surface. The protection for the wood is still in place.
I already have a finish on my deck; does this have to be removed before I can apply the improved Deck Defense?
The old rule of thumb says for the best success with a coating, the best practice is to remove any old finish before applying a new product. However; if you are applying over an older, tired oil-based product, you can apply the new Deck Defense after a thorough cleaning with Wood ReNew™ or Log Wash™. If you have previous Deck Defense, you can also apply the newer product after cleaning. If there has been a film-forming product applied (Vista, Endure or “painted” surfaces), then it will need to be totally removed prior to application of the new Deck Defense.
Is there protection against UV damage in Deck Defense?
Yes, there are UV inhibitors within the product, plus, as transparent iron oxide pigments are also used to produce the desired color, they will enhance the UV protection through sun-blocking properties of the color itself.
Is Deck Defense safe for the user as well as the environment?
The product is considered non-toxic, but as with any product, certain precautions should be observed as they just make good sense. Wear gloves and eye protection when applying the product and avoid inhaling vapors (See precautions on the label). Shrubbery and plants should be rinsed before and after application (or covered). Covering adjacent surfaces like concrete or paver pathways is also a good practice.
Pre-Application steps needed?
First and foremost; the surface needs to be clean and dry. New treated wood needs to “season” prior to application. This process will vary with temperature and humidity and actual moisture content of the new wood. On older wood, a thorough cleaning with Wood Renew will help to restore the color of the wood and remove stains and dirt. Make sure to adequately rinse with water and check the pH of the run-off water to make sure all the surfaces have been rinsed well. Ph of run-off water should be around 6.5 to 7.5 (depending on the pH of the water source). Make sure to check fasteners and condition of wood prior to cleaning and replace any decayed or unstable wood.
Do I need to sand the wood first?
In an ideal world, sanding would be best. But most applicators and homeowners do not want to go through the effort or labor expense to do so. Sanding increases the mechanical adhesion of the surface and will also make the substrate color match better. The sanded surface also opens the substrate and promotes better penetration of the product. If a decision is made to sand, we recommend 60-grit or possibly even 40-grit paper. Media blasting may also be used but may be considered overkill unless the entire home is being media blasted. After sanding or blasting, wash with Log Wash, rinse well, and allow for complete drying prior to application.
How do I mix the product?
Prior to applying Deck Defense, mix well. The colorants used in Deck Defense do not settle hard and re-disperse easily. DO NOT USE POWERED MIXING EQUIPMENT, as this action can possibly shear the backbone of the product and cause possible product failures. As with any product, box the pails together if there are different batch numbers.
How do I apply Deck Defense?
Applying Deck Defense is very easy, and many methods or “tools” can be used. On surfaces such as decking or fencing, a low-pressure pump-up sprayer is the most economical. Deck Defense can also be applied with paint pads designed for deck application, or applied with a quality brush. Rollers can also be used, but due to the low viscosity of the product, there will be some excess “splatter” when rolling. An airless sprayer can be used, and we recommend the use of a 511 or 513 tip due to the low viscosity. Apply the product in a “flooding” method to completely cover the surface to allow good penetration.
Deck Defense should be back brushed when applied by a sprayer, or when using a pad, to make sure the product is spread evenly. Work in the same direction using broad strokes to alleviate “pooling” of product and promote even coverage for the best appearance. Do not allow “pooling” on surfaces. On vertical surfaces, work from the bottom up and back brush as you go. Do not apply in the hot sun as this can cause “flash drying” and interfere with the penetration of the product. Application temperatures are 40-90° F, and that is surface temperature, not air temperature. DO NOT APPLY DECK DEFENSE OVER FILM-FORMING FINISHES (Vista, Endure or “painted” surfaces) AS IT NEEDS TO PENETRATE THE SUBSTRATE FOR THE BEST PERFORMANCE.
How many coats are required?
Deck Defense is designed as a one-coat stain, although due to the deep penetrating properties of the product, it may appear lighter than expected. This is especially true on older surfaces that have been exposed for long periods of time. Also, as this is a semi-transparent product that allows the natural grain and texture of the surface to show through, colors may appear blotchy or uneven, and the user may want to apply another coat. If a second coat is to be applied it should be done in a “wet on wet” application, meaning the first coat needs to be wet when the second is to be applied. If a second coat is desired after the initial application has dried, allow one week for the first application to cure completely.
What is the dry time for Deck Defense?
Dry times will vary with application, airflow, temperature and humidity. Under ideal conditions – 60° F, and 50% humidity – Deck Defense will dry to the touch in about 20-30 minutes. Dry does not mean “cured”. Wait 4-6 hours before walking on surface and 24 hours before replacing heavy furniture.
What are the coverage rates for Deck Defense?
Coverage rates will vary considerably, based on type of substrate and methods of application. That’s why most folks buy a bit extra when they repaint, as they don’t want to go back and buy another gallon to finish. On rough sawn wood, like fences that really soak up product, it may be as low as 100-175 sqft per gallon. Older deck surfaces will also tend to soak up lots of product, so figure around 175-250 sqft per gallon. On new wood, expect around 250-300 sqft per gallon. A second coat application will require less product.
Is Deck Defense freeze-thaw stable?
Yes, this product is freeze-thaw stable. It’s not the freezing that could cause issues; it is the number of cycles a product is exposed to that causes damages.
What are the maintenance guidelines?
Good maintenance for decks, as well as other wood surfaces, will prolong the need for re-staining or removal. Deck Defense will not flake or peel when properly applied, so a general cleaning should be done every year with Log Wash. Maintenance requirements will vary with exposure and environmental conditions, and heavy traffic. Expect to see wear in high traffic areas such as steps and traffic patterns first. This does not mean protection is gone, but indicates for appearance purposes that it’s time for a light re-coat.
How do I clean up when I am finished?
If done right after application, tools and equipment are easily cleaned with soap and water. Warm water works best.
Due to the penetrating and adhesion properties of Deck Defense; keep overspray areas wet during application and rinsed promptly when finished. Removal after three hours will be difficult, but after three days it will be almost impossible without the use of strippers or solvents. Dispose of containers in accordance with local, state and federal guidelines (Do not reuse containers).
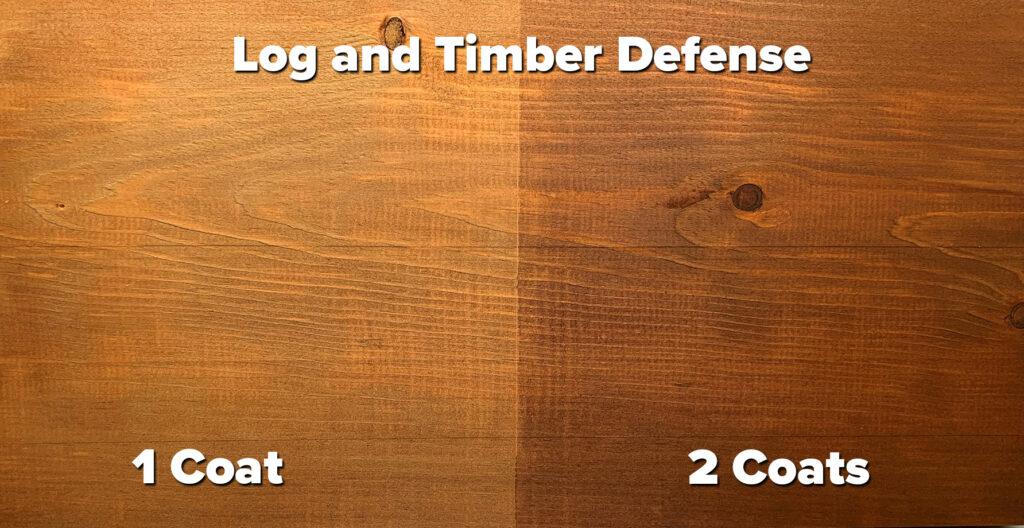
Perma-Chink Systems recently added another beautiful wood finish option for our customers – Log & Timber Defense™. Unlike our traditional Lifeline wood finishes, Log & Timber Defense penetrates your wood much like an oil coating. Once Log & Timber Defense penetrates the wood surface, it forms a strong lattice network within the wood, reinforcing and strengthening the entire system from the inside out. This mechanism greatly reduces the chances of peeling and flaking by leaving the system breathable to water vapor. Many traditional oil-based finishes can also form a network, but are often so high in solids that they can easily blister and peel. Vapor pressure builds up behind the thick, unbreathable solid film and pushes the film away from the wood. This leads to an unfortunate situation requiring removal of the compromised coating down to bare wood.
Log & Timber Defense Application Guidance
Log & Timber Defense is designed to be applied to bare wood in one or two coats. If it is applied to wood that already has an existing coating, this can prevent it from forming the lattice network inside the wood. Some customers ask: “Can I apply a topcoat such as Lifeline Advance™ to Log & Timber Defense?” We do not recommend application of a topcoat. The reason we do not recommend this is because when a maintenance coat is needed in the future, there will be difficulty with penetration into the wood because the topcoat forms a barrier to penetration leaving a film on surface. This could leave undesirable surface defects as well as an uneven appearance. Furthermore, it could lead to peeling and flaking of the finish.
Texture is another property that distinguishes Log & Timber Defense from our Lifeline Stains. Due to its penetrating nature, Log & Timber Defense leaves the surface with a more naturalistic, rustic beauty. It will appear much flatter in appearance. However, if a slightly different look is desired, a second coat of Log & Timber Defense may be applied, but the appearance will remain relatively flat. The second coat will increase color intensity and provide an increased level of overall protection for the system.
Difference of Lifeline Finishes
In contrast, our traditional Lifeline Stains are breathable film formers. This is to say they form a film directly on the surface of the wood but do not penetrate deeply into the wood. When applied correctly, our Lifeline stains are not likely to peel due to their breathability and excellent adhesion. They are, however, only slightly more likely than Log & Timber Defense to peel due to their film forming nature. In addition, our Lifeline Stains are designed to be applied over our existing topcoat with no problems with adhesion, color development, or film defects. The Lifeline stains will provide a much higher level of gloss development than Log & Timber Defense due to the films being primarily on the surface of the wood, with the added benefit of being able to apply the gloss topcoat to finish the system.
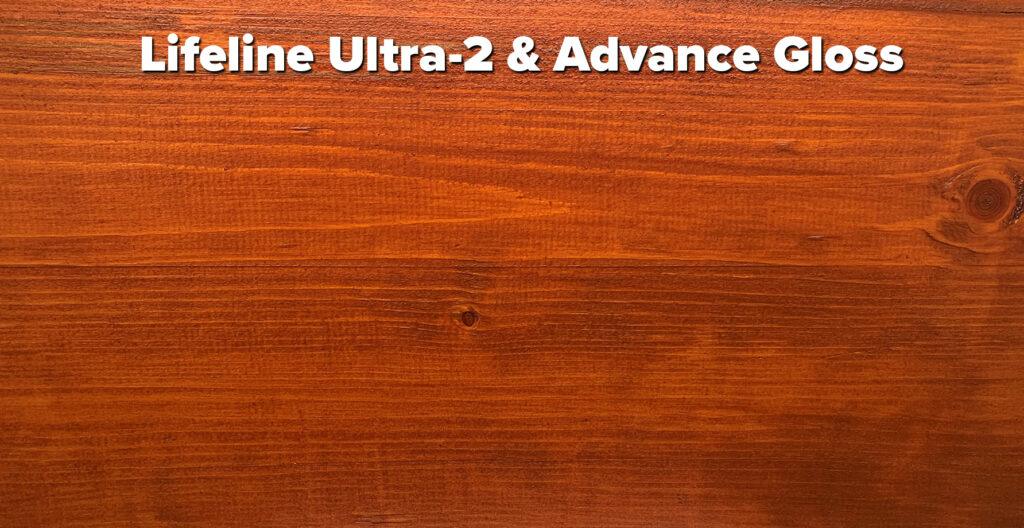
What About Protection From Mold & Mildew?
Both our Lifeline Stains and Log & Timber Defense are formulated with ingredients that inhibit the growth of mold and mildew. Log & Timber Defense is both a stain and sealant in one package. It helps to keep liquid water out, which reduces biological growth that can attack and destroy your wood. In contrast, traditional natural oils such as linseed oil can easily promote growth of mold and mildew.
Finally, both Log & Timber Defense and Lifeline Stains are both waterborne, low in odor, have easy soap and water cleanup, and are non-flammable. Each of our stains and finishes offer unique properties designed to give your home the very best protection possible.