Blog

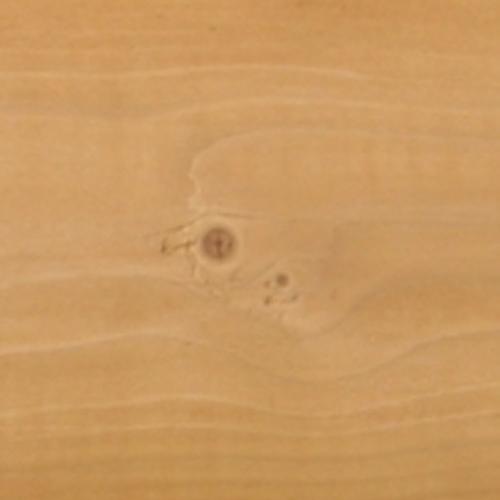
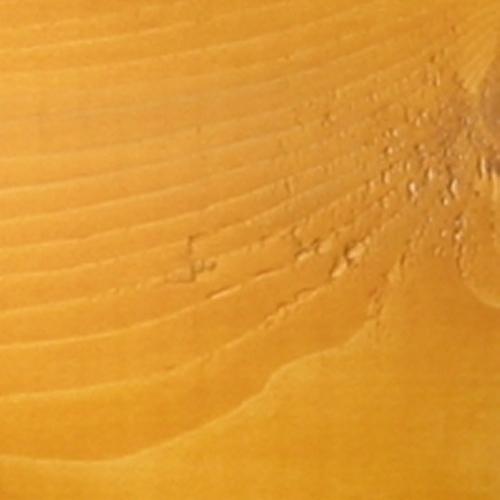
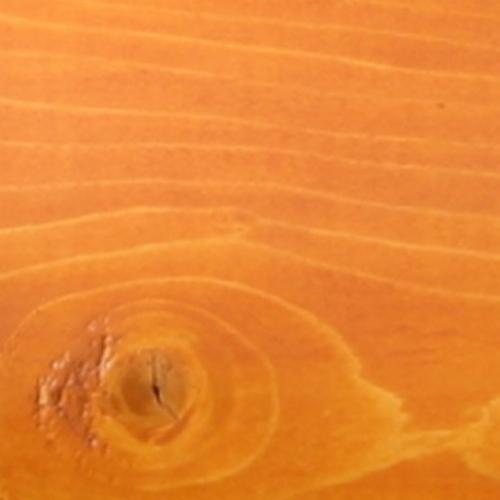
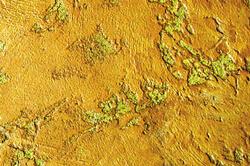
Have you ever seen the exterior of a home that has turned black? Almost without fail it’s the result of using a stain that contained linseed oil. Linseed oil is a yellowish oil derived from the dried seeds of flax plants, which is the reason it is also called flax seed oil.
Linseed oil is used as a carrier in many brands of paints and stains. Since linseed oil is organic, many varieties of mold fungi thrive on it and over time they can proliferate to point where the coated surface can turn dark brown to black. One way to tell if the darkening is due to mold rather than UV damage is that those exposed areas protected from direct sunlight under eaves and overhangs will be the same dark color as the rest of the wall.
When this occurs, washing with Log Wash™ alone will not be enough to remove all of the discoloration due to mold growth. We recommend to first use Wood ReNew™ along with some scrubbing in order to remove the visible mold. Once the surface is cleaned with Wood ReNew, use Log Wash to help remove any residual linseed oil that may still present.
Media blasting alone is not a satisfactory method of removing a heavy growth of mold. Linseed oil penetrates into the wood and although blasting may remove most of the surface discoloration, there may be enough residual linseed oil remaining in the wood to support mold growth underneath the finish. If the home has been blasted, it will be necessary to give the home a good washing with a Log Wash solution (2 cups per gallon of clean water) before applying Prelude™.
The best way to prevent this problem from reoccurring is to avoid the use of any product that contains linseed oil. None of our Lifeline™ finishes contain linseed or other types of organic, naturally derived oils.
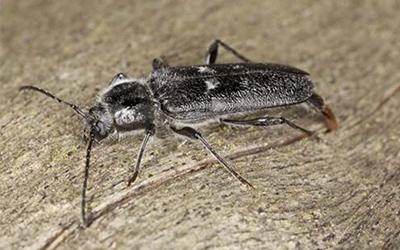
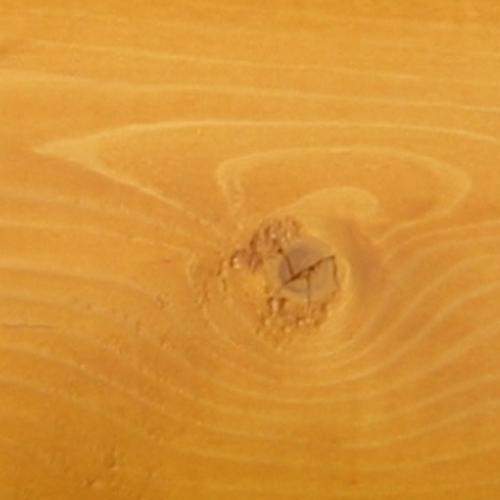
Wood-boring beetles can be found all across the United States. There are several types of beetles that can be considered “wood-boring” beetles. Often referred to as “wood worms” or “powder post beetles,” wood-boring beetles are responsible for damage to structural wood, second only to termites.
Wood-boring beetles are difficult to control once an infestation has begun. Therefore, prevention is the best management method. Great NEWS: the treatment for all types of wood-boring beetles is the same.
PenaShield® is one of the most effective ways to protect your home from wood‑boring beetles, termites, carpenter ants, wood rot, fungi, and more. Its active ingredient is borate salt, combined with proprietary glycol penetrants that allow it to diffuse quickly and deeply into the wood – providing both long‑term protection and preventive treatment against pests that damage wood.
Research results shows that the presence of borate in the wood does two things:
- It kills younger beetle larvae that are feeding in the wood.
- It prevents any old house borer eggs from hatching. The borate treatment interrupts the beetle’s life cycle and eventually the infestation will end.
About Wood-Boring Beetles
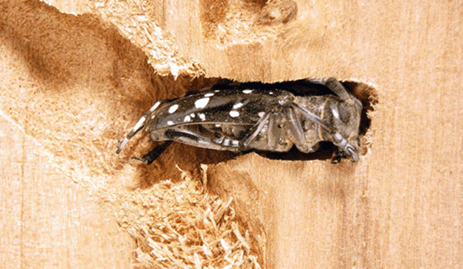
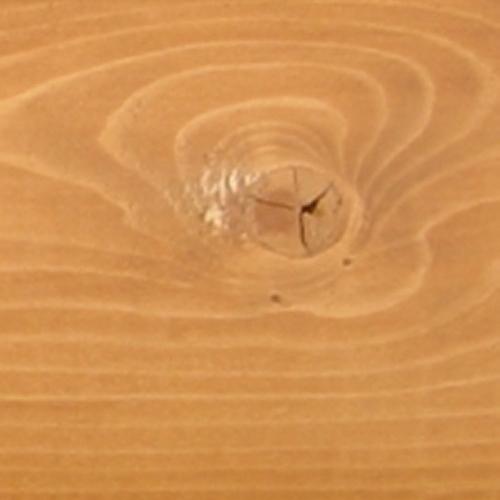
Wood-boring beetles invade and damage wood furniture as well as structural and decorative wood inside the building. The beetle larvae feed in and do most of the damage to wood, and when they reach the adult stage, they emerge through round exit holes, which they create by chewing through the wood surface. Adults of some species also bore exit holes through plaster, plastic, and even soft metals that might cover the underlying wood.
What are the signs that beetles are present in the wood?
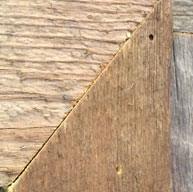
- Sawdust or frass is the first sign of beetle infestation.
- The chewing noise made by older larvae in the wood.
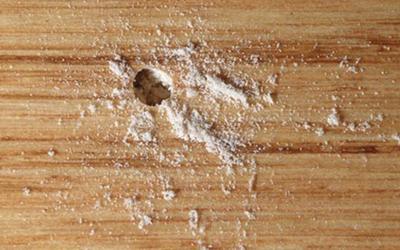
The life cycle of most wood-boring beetles is similar. It starts with an adult female depositing her eggs in the wood. The eggs hatch and a small grub-like larva emerges. It’s the beetle larvae that feed on wood, and they may continue eating the wood for several months or, in some cases, up to 20 years depending on the species. There comes a time in its life cycle when it’s getting ready to make the change that the larva makes a hole to the surface of the wood, so it can get out of the wood as an adult beetle. That’s why the holes are called “emergence holes.” Typically this is the first sign that beetles are present in the wood. Once the hole is complete and the tunnel is cleared of the sawdust or frass, the larva creates a pupa case and makes the transition to an adult beetle. The adult beetle eventually emerges from the hole, feeds on pollen and nectar and looks for a mate. Once impregnated, the female beetle can start the cycle all over again.
Order Your PenaShield or Bora-Care® to kill any wood ingesting insect it comes in contact with.
Customer Testimonial
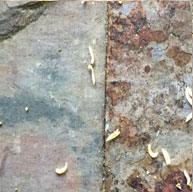
For active infestation I have successfully used borates against insects that are actively living in isolated spots on structures. In the pictures below, powder-post beetles infested barn wood on my porch. I injected borates into the actual holes using a syringe made for injecting marinade into food (any plastic syringe with a tip small enough to fit the hole will work).
These holes were treated and within a day there were dead larvae. It has been more than a year and they have not returned.
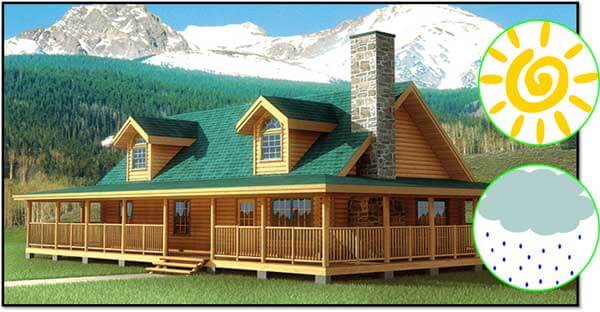
Protecting wood surfaces in a beach or water front environment is a challenging task. You are faced with numerous variables that contribute to erosion and degradation of the substrate including sunlight, wind, moisture, salt, and sand. The two most destructive environmental variables to an exterior coating system and wood are sunlight and water.
Sunlight is the major cause of damage to a number of materials, including plastics, textile, wood, coatings, and other organic materials. The type of damage, such as loss of gloss, chalking, elasticity, adhesion, and color change, varies depending on the material sensitivity and the spectrum of sunlight. Spectral sensitivity varies from material to material.
One component of sunlight is ultraviolet light, commonly referred to as UV. UV light is responsible for most damage to exposed wood because it changes or destroys the wood’s lignin, a component of wood that hardens and strengthens the cell walls. In more scientific terms this process is called photo-oxidation. The colorants contained in the color coats are responsible for absorbing UV light. The more colorant a finish contains the less UV light will get through to the wood itself.
Opaque finishes like paint and solid body stains are very efficient in blocking all of UV light from hitting the wood. That’s why when they peel off the freshly exposed wood may still look bright. On the other hand the objective of transparent stains is to allow the character of the wood to show through the finish.
In order to accomplish this transparency the pigment loading is significantly less than that contained in opaque finishes. Although some of the UV is blocked by the colorants, enough of it gets through to eventually photo-oxidize the wood. Since darker colors typically contain more colorant than lighter ones they tend to last longer. However, some lighter colors that contain titanium white, or KX colorant, also contain a high colorant loading which extends their life but they do give up some degree of transparency in return.
Lighter colored stains that contain titanium white (KX) will also absorb less heat; therefore, there will be less overall stress (day surface temperature versus night surface temperature) that the finish system and wood substrate is exposed to over the course of a 24-hour period.
Squared logs, timbers, and vertical flat siding are easier to maintain since the sun hits these wood pieces at the same angle and the UV light is evenly distributed over the entire surface. In addition, the flat vertical surfaces cannot accumulate snow and ice and even upward facing checks are not as prone to rainwater entering the logs. Squared wood pieces are subject to the same weathering parameters as round surfaces, but the weathering is mostly uniform over the entire exposed surface.
The second challenging variable for wood in a coastal environment is moisture. Coastal areas are notorious for their high relative humidity and pop-up thunderstorms. Keeping wood dry is the goal to protecting its long term integrity. If wood remains wet for long periods of time without drying out, conditions are favorable for the formation of wood decay fungi, the precursor to wood rot. Four conditions are necessary for the development of wood decay producing fungi. Eliminate any one of these and decay fungi cannot survive: oxygen, temperature (40° – 90°F), moisture content in excess of the fiber saturation point (> 25-30%), and a suitable source of energy and nutrients (that is, the wood).
Recommendations:
- There are two basic ways to combat the effects of weathering. By far the most effective method is to keep wood surfaces in the shade as much as possible by extending roof overhangs or constructing roofed porches around the home.
- Keep all vegetation at least 24 inches away from wood surfaces to allow for adequate ventilation and drying out of these surfaces.
- Clean the wood surfaces to remove all foreign materials from the wood prior to the application of an exterior finish system. The overall performance of even the best finish system is dependent upon proper surface preparation and application technique.
- Select and apply a highly durable exterior semi-transparent stain, like Lifeline™ Ultra-7 or Ultra-2 to protect the wood and enjoy the beauty of the wood grain. Select Lifeline™ Accents to highlight wood timbers and trim if more opacity is desired.
- Select a color that contains shades of brown, red, or gray. Consider colors that contain titanium white (KX) for lower surface temperature swings as well as good UV protection. (colors: Butternut, Wheat, Driftwood, Stone Gray or Gentry Gray).
- Apply an exterior clear topcoat, like Lifeline™ Advance Gloss or Satin, to protect the color coat and add additional UV and mold and mildew protection. Consider the Gloss for additional reflection of UV light.
- Fill all upward facing checks, cracks in wood, with a specialized acrylic sealant, like Check Mate 2™
- Clean the finish systems at least once a year with Log Wash™, a liquid concentrate for bare wood and maintenance cleaning, to remove all foreign debris for the surface of the finish system and extend its longevity.
- Perform an annual inspection of the coating system as a proactive maintenance approach.
- Darkening of the wood or finish when water is applied, is an indication of water getting through the coating and wetting the wood
- Checks or micro-fissures in the wood, especially upward-facing
- Cracks in the finish
- Color fading
- Pay close attention to the south- and west-facing surfaces
- Keep metal surface clean and freshly painted. Salt spray is highly corrosive.
You can’t completely stop or reverse the weathering of exterior wood, but you can slow the process dramatically by using the right type of finish system and a proactive game plan to combat the environmental elements.

Chink Paint™ is a high quality, elastomeric latex paint used to refresh or change the color of your log home chinking. Chink Paint is available in all eight standard colors of Perma-Chink® in either a textured or smooth finish (with or without aggregate, respectively). This difference provides the customer a choice as to whether or not they would like to add additional texture to the appearance of the chink joint.
Chink Paint can be used in several situations. Some log homes have cosmetic chink joints that serve no purpose other than giving the home the appearance of a chink-style structure. These false chink joints are typically quite shallow and do not allow enough room in the joint for both backing material and the proper recommended thickness of chink. It is much easier to paint the joint with Chink Paint Textured than it is to apply a thin layer (less than 3/8 inch) of Perma-Chink and be more susceptible to negative performance qualities like tears and blistering.
When staining a home that is already chinked, it takes less effort to paint the existing chinking with Chink Paint than it does to try to protect the chinking with masking tape during the staining process. It is virtually impossible to prevent some stain from getting on the chinking and once stained, it is extremely difficult to clean or paint the discolored areas and blend with the surrounding chinking.
If you are applying a new finish to your home, you may as well refresh or even change the color of your existing chinking. This really gives the home a new, clean look. Since Chink Paint has a texture identical to Perma-Chink, it’s impossible to tell if the surface is original Perma-Chink or Chink Paint.
When applying Chink Paint, the first step is to make sure the product is well mixed. Chink Paint, both Textured and Smooth, contain a blend of raw material ingredients that need to be uniformly dispersed to ensure proper color, adhesion and long-term performance. Furthermore, Chink Paint Textured contains an aggregate to give it the similar textured appearance to Perma-Chink. Over time this aggregate may settle to the bottom of the pail, so it’s important to stir it well to make sure the contents of the container are uniform before beginning.
Chink Paint is best applied using a paint brush with about two to three inches of fairly stiff bristles. An expensive brush is not needed, and can be disposed of once the job is completed. A chip brush works just fine, especially for the textured version. Keep a wet rag handy to wipe off any Chink Paint that may get on stained surfaces and clean-up with soap and water.


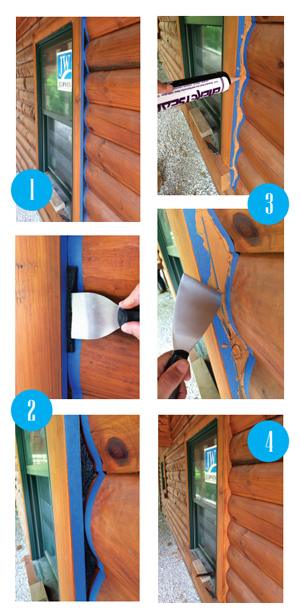
A lot of wasted energy is released through poor sealing of windows and doors. Luckily, we at Perma-Chink Systems have a solution to solve these air leaks. Energy Seal and Log Gap Cap work together to seal the windows and doors.
How to Seal Step-by-Step:
1. Use masking tape around the window or door seam.
2. Insert Log Gap Cap into the crevice using trowel. Log Gap Cap provides an even surface for sealant application and makes it easier to apply a uniform thickness across the gap.
3. Apply Energy Seal™ and tool smooth.
4. Remove masking tape as soon as tooling is complete.
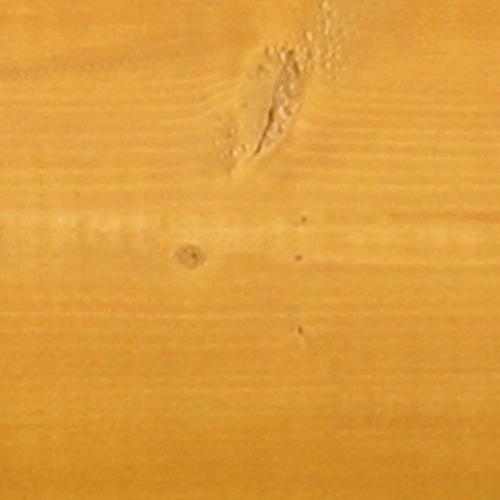
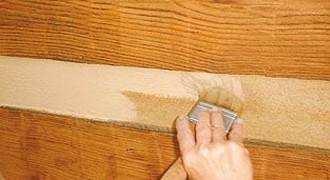
We occasionally get calls about repairing spots of finish that have peeled from logs, handrails, etc. In most cases, the peeling is associated with checks or small fissures that have opened up after the finish was first applied. When this occurs, rain water soaks into the bare wood on either side of the check, and when the sun beats on the area the wood turns to water vapor and expands with enough force to push the finish right off of the surface. If the peeling is limited to a few small areas, touching them up is not very difficult.
Before we get started on the best way to perform the repairs, there is one thing we need to cover. If you have leftover product that’s more than two years old, you need to obtain enough fresh stain and topcoat to accomplish the repairs. Using old product is risky and unnecessary. Give us a call, and we’ll see if there is anything we can do to help.
Recommend Procedure
Following are the recommended procedures for touching up peeled areas:
Step 1: Sand the peeled areas with 60 to 80 grit sandpaper. Do not use a finer grit. We want the stain to have something to grab onto. Be sure to sand off any surrounding stain film that looks like it may have lost its adhesion.
Step 2: If it’s just a few small areas wipe down the sanded spots with a damp rag. For larger spots or multiple areas on a wall, it’s best to wash the entire wall with a two cups per gallon Log Wash™ solution. Allow the wall to dry.
Step 3: If the peeling is associated with checks that are 1/4” or more wide, seal them with Check Mate 2® after sanding and cleaning, but before staining. This will help make the Check Mate 2 less visible.

Step 4: Using a rag, not a brush, apply one or two coats of stain to the bare wood. You want to apply enough stain to match the color of the surrounding wood. Since the coarse sanded area may be more absorbent than the original surface, one coat of stain may be sufficient to match what’s already there. Using a rag helps avoid lap marks and gets some stain down into any unsealed checks, as well as small cracks and fissures.
Once the stain has been applied and the color matches the surrounding wood, one coat of Advance™ Topcoat can be applied with a brush or rag. Lap marks are not much of a concern since the Advance is clear and colorless.
How about EuroPlast?
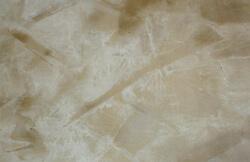
Looking for just the right compliment to enhance the interior walls of your dream home? Consider the ageless appeal of Venetian plaster. For centuries architects, designers, builders, and owners alike have marveled at the splendor of this highly popular form of wall surfacing, and throughout the ages the artisans who were skilled at creating such beauty have been revered and sought after. With today’s advanced technology, you can now have this distinctive elegance and appeal at a fraction of the cost- in as little as two days.
EuroPlast and Euroseal by Stuc-O-Flex International
Consider this revolutionary approach to dramatic design. EuroPlast is a pre-colored, acrylic polymer-based interior and exterior coating system that transforms vertical walls into a classic example of old world Venetian-style plaster. This versatile decorative coating exhibits a rich aesthetic appearance with an unlimited selection of color and texture opportunities. Achieve a wide range of effects from rustic plaster to smooth polished limestone.
EuroPlast is a decorative finish providing color, texture and hard durable surface that resists staining, dirt pick-up, and abuse. Applications easily go over interior and exterior surfaces including stucco, concrete, brick, block, plaster, cement-board sheathings- even primed drywall for interior applications.
Euroseal is a pure acrylic sealer that is applied over the EuroPlast finish. Euroseal has a unique ability to transform newly constructed walls into a classic example of centuries-old plaster. This semi-transparent sealer is formulated to obtain an uneven antiqued, or “mottled,” appearance. Euroseal is available in clear or in an unlimited selection of semi-transparent colors. The material can provide a high level of gloss or an eggshell appearance, depending on your design requirements. Euroseal colors are available in pre-tinted containers, ready to apply. The product is intended to create an old world or weathered look while adding a striking characteristic to completed walls.
If this unique product might be that one element to compliment and enhance the beauty of your dream home contact Stuc-O-Flex International, Inc @ 1-800-305-1045 or e-mail: techservice@stucoflex.com

So how do our Communication and Distribution Systems work and how are they different from other suppliers?
Communication
Our Communication System is a nationwide VOIP Internet-based system. That means that each of our Branches and our Knoxville, Tennessee Factory are connected 24/7 like a large office – but the office is nationwide. Answering calls, forwarding calls, etc., happen nationwide the same way as a direct call to a local office are.
That means that every office and every sales desk is connected with a simple stroke of a keyboard. In addition, our Call Forwarding capability automatically connects an incoming call anywhere in the nation. Yes, at times you may be connected with a Customer Service Representative other than the one you typically talk to, BUT – the CSR that does answer the call has your entire order history on the screen in front of them immediately. That is thanks to our second system, which is an online database.
Each time an order is placed, whether it be from a new Retail Customer, or an existing Applicator, Dealer, or Manufacturer, the order is entered in real time into our Accounting Database. That database is immediately updated with any new Customer data – purchased products, colors, quantities, shipping addresses, etc. That means that any order that customer has ever made is instantly available on the screen, and we can tell them anything the customer has ever ordered (for example: I bought Lifeline Ultra-7 for a project 8 years ago and I forgot the color and now I need some touch up and additional for a garage, and by the way, that was for the Rutherford house in Pigeon Forge, not the Pinkerton house in North Carolina). We can tell you in real time what stain was used, what color, how much was purchased, when it was purchased, and where it was sent to. Every CSR in the company has that information, for every customer, on the screen in front of them as soon as the call is answered. Then, if the customer would like to talk to a particular individual (my ‘favorite’ salesperson), we can use the same network to send a notification to that CSR to call you back or attach any particular notifications for the order.
Because of the time difference from the East Coast to the West Coast, this system is available from 8:00 AM Eastern Time until 5:00 PM Pacific Time. That means that a call placed at say, 8:00 PM, on the East Coast will be answered by a salesperson in Redmond, WA that has your Customer History and can take the order or answer any question. That also says that you can make a call at 5:00 AM in Washington State and place an order with a CSR in Tennessee. That is a tremendous advantage for a Contractor who needs to place an order before normal business opening times, or after normal business hours. Remember, it doesn’t make any difference who answers the phone or where they happen to be – they have your Customer History on the screen in front of them and can take the order, handle shipping, and answer any questions you might have – and make the order at your particular price level.
Distribution
If you can’t get the product when you need it, it’s all for naught. If you are an Applicator, Manufacturer, or a Homeowner, you all need the product available at a particular time. Products that arrive a day or two late, or a week late, cause havoc with application crew scheduling or weather changes, and can reverberate through the season if early season jobs are late and will negatively impact schedules.
Our Manufacturing Plant is in Knoxville Tennessee, centrally located in the heart of the Log Home Industry. It is also located at the intersection of the major North/South and East/West highways. It’s no coincidence our factory is in that location! We of course have massive ‘Whole House’ inventories (products for an entire home project), but that location also feeds seven fully-stocked Whole House Company-owned Branches. Each one of those Branches is stocked with a Whole House inventory. Not one or two ‘Overage or Sample’ inventory. Additionally, each Branch location can make any custom stain color you desire and also stocks inventory for a number of Independent Distributors.
The point here is that we are located at strategic locations across the USA and are well-stocked to handle anything from multiple Whole House orders to samples and anything in between. These locations disburse our inventory so that we can fulfill orders from a number of large stocking locations that are close to you, our customers. We are not dependent on large inventory shipments or Whole House shipments arriving from one location. This drastically lowers shipping time and expense.
In addition, each of our seven Branches is staffed with a minimum of three experienced Log Home Specialists. Larger Branches have five and up to eight Inside Customer Care Specialists. No matter when or who you call, be assured you’ll be connected with Industry Experts that can help you get the right product at the right time.
While adequate air exchange is essential for health and safety, many older log homes have a far higher rate of air exchange than is necessary. This is often due to poor design and/or construction which allow air leakage from the inside or outside of the building, but log homes are additionally prone to settling, seasonal expansion and contraction of the logs, and other factors that can cause log joints to move over time.
Given that the typical 30 x 40 log home can easily have more than a linear half mile of log-on-log surface area, determining leakage pathways is often complex and extremely difficult to visualize; leaving log homeowners no other choice than to apply a sealant to all log joints in hopes of locating and correcting the problem areas.
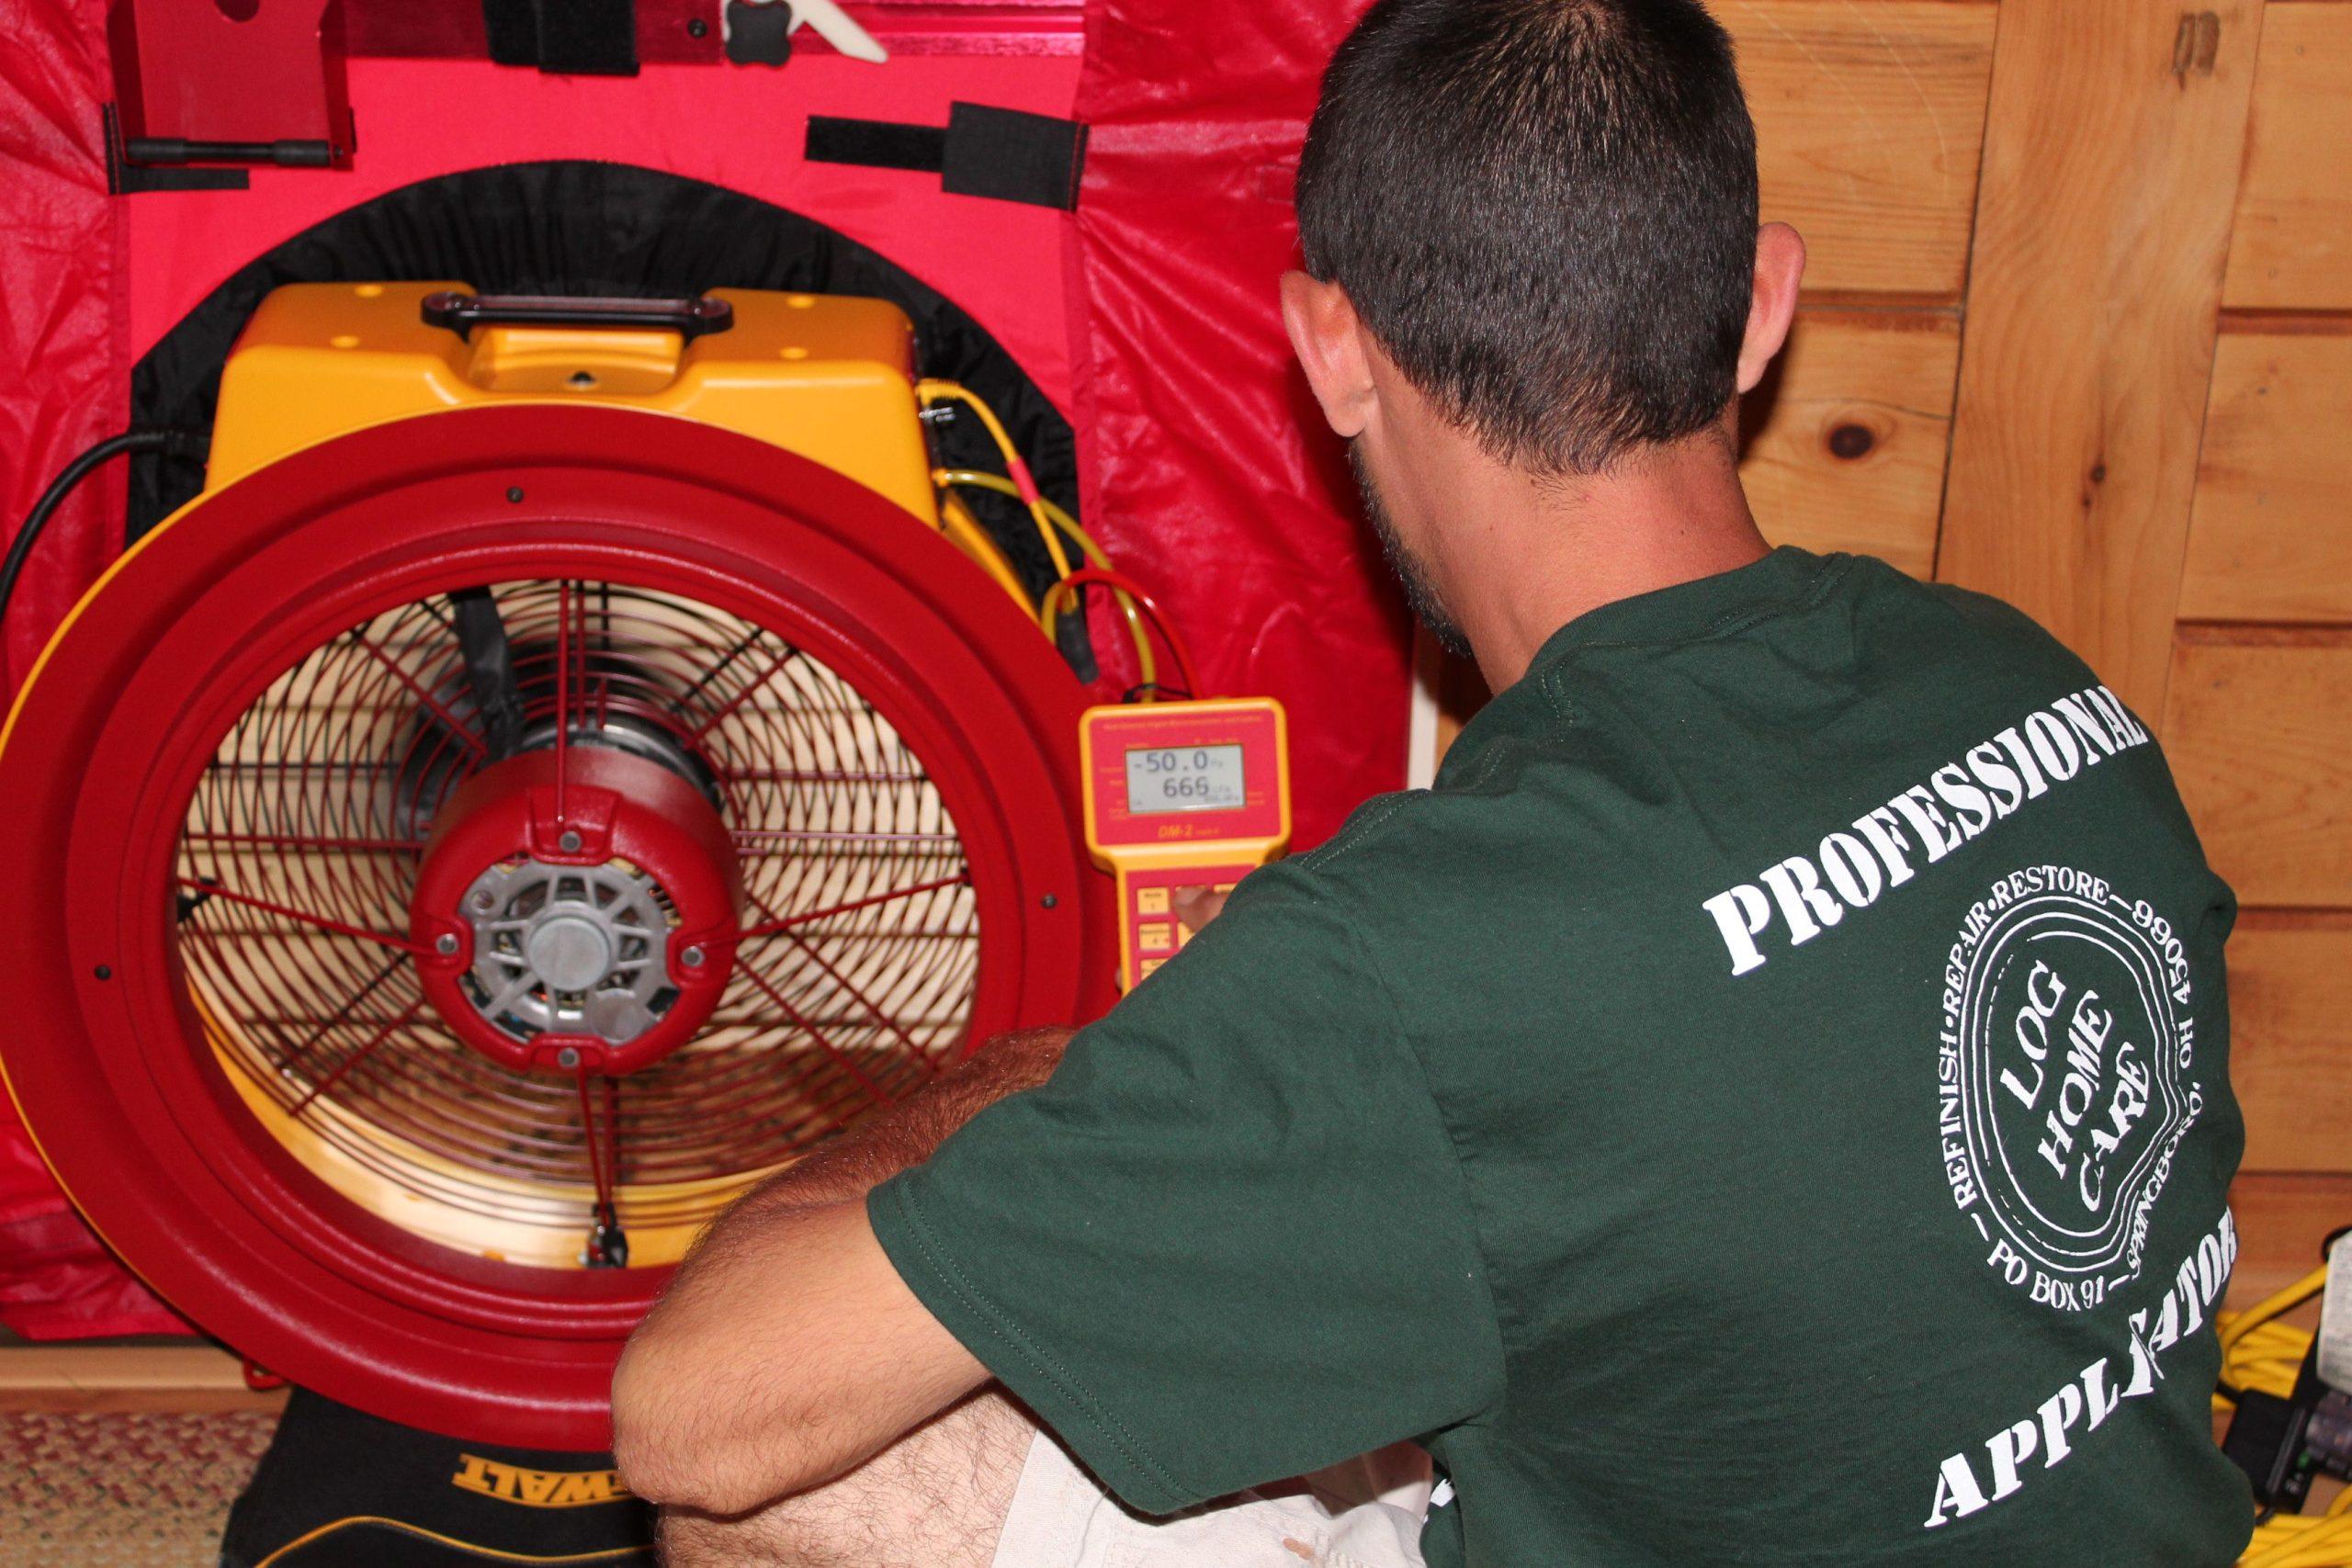
To identify areas of energy waste, infrared thermal imaging has quickly become a valued tool in identifying problems related to energy loss, water and insect infiltration, inefficient HVAC systems and much more. A thermal imaging camera identifies patterns of heat loss that are invisible to the naked eye and quickly indicates the air leaks within the log home with measurement data that can easily be compiled into a written report.
Professional log home applicators are using leading-edge infrared technology coupled with a computer controlled blower door to depressurize the home to an industry standard of -50 pascals, which simulates a 20 mph wind blowing on all four sides of the structure simultaneously. As air is drawn through failed log joints the temperature of the log surfaces changes, producing a thermal image that can be recorded. This allows the applicator to accurately identify and repair the problem areas to stop the energy loss immediately.
Wayne Bell, owner of Log Home Care, uses this technology and reports: Thermal imaging provides both an immediate cost benefit from the reduction in labor required to seal the home and future savings on energy costs. The computerized blower door provides information about air exchange within the structure, expressed in square inches, which can easily be understood when expressed in terms of an open door or window.

“Don’t confuse this equipment with the inexpensive infrared thermometers sold at home improvement stores,” Wayne clarifies. “Advances in technology have reduced the prices of this equipment but it still represents a major financial investment for the applicator. Prices vary by applicator, but homeowners can expect to spend several hundred dollars for blower door testing and thermal imaging services, but a portion of that charge is rebated back as a credit to the homeowner if our firm does the sealant work”, says Wayne.
“Whether we simply provide a printed report that illustrates what needs to be done or we handle the entire process of applying sealant to the home, our company couldn’t be happier with Perma-Chink Systems products. When dealing with log joints that may allow for both air and water infiltration, we use Energy Seal and backer rod on the outside of the structure. If the joint is leaking air but there is little risk of water infiltration, we can alternately use Check Mate 2 (often the clear color) in the interior if needed, but our preference is to do our sealant work on the exterior surfaces. By reducing air leakage, the homeowner obtains a better level of comfort in their log home and Perma-Chink Systems provides the products to make that possible.”
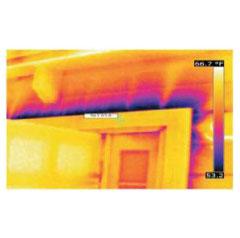
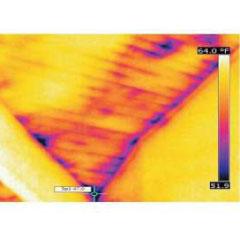
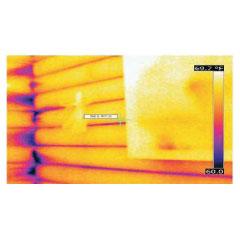
The home featured in these photos indicated an open surface area of 66.5 square inches which equates to a 24” wide window being left open nearly 3” but many log homes exhibit air exchange rates several times higher.

Bora-Care®, PenaShield®, and Tim-Bor® are all used as solutions that contain water. Since time and cold temperatures affect each of these products somewhat differently, we’ll address each product individually.
Bora-Care®
For proper use, Bora-Care® can be mixed in three different ratios, which are 1:1, 2:1, and 5:1. Unmixed Bora-Care concentrate can remain stable for many years. Bora-Care needs to be stored in a cool, dry storage area inaccessible to children and pets. Do not allow Bora-Care to freeze. If Bora-Care is allowed to freeze, then it can make it ineffective.
For example, if you are making a 1:1 ratio, you will use equal parts of Bora-Care and water. Using warm water makes it easier to mix, but it’s not necessary to use warm water. Once the 1:1 and 1:2 solutions are mixed with water they must be used within 24 hours. The 5:1 solution will remain stable for up to 30 days. The reason for this is after 24 hours or so borate salts will begin to drop out of solution forming white crystals on the sides and bottom of the container. If left in the spray equipment for too long these crystals will block up the spray tip and/or filter screen and once crystalized, they are very difficult to dissolve. The colder it is, the faster the borates will drop out of the solution.
If you have mixed Bora-Care that you want to keep, you need to get it out of your sprayer ASAP and into a plastic container. Thoroughly rinse out your sprayer as soon as possible. Although borate crystals will form in the container, if the mixed solution is heated to about 95°F there is a good chance that the crystals will re-dissolve. Furthermore, if the solution is not used within 24 hours the borate crystals will start forming again.
PenaShield®
One common assumption about PenaShield® is that it is simply Bora-Care that has already been mixed with water. This is not the case. PenaShield is an entirely different formulation than mixed Bora-Care. Although the chemical components are the same as those in Bora-Care they are present in entirely different ratios that help keep the borate salts in solution. If PenaShield is subjected to cold temperatures (less than 40°F) for extended periods of time, there is a chance that some of the borate salts will begin to coat the inside walls of the container. This is not a sign that the PenaShield is freezing, it’s just that the temperature has reached a point where the solubility of the borate salts has dropped below 10%. Like most salt solutions, the lower the temperature, the less salt will remain dissolved in water. Once this occurs the solution needs to be warmed up to 80 to 90°F for the borate salts to re-dissolve.
The best way to warm it up is to fill a bucket with hot water, put the container of PenaShield into it, then after an hour or so take it out and shake it until the crystals disappear. With 2.5-gallon containers it’s a bit more difficult to do this unless you can find a large bucket. However, you can fill a bathtub or kitchen sink with hot water and do the same thing. Just placing the containers in a warm room will not heat the solution up enough to dissolve the borate salts. You will want to ensure that you store PenaShield away from areas children and pets may gain access to. PenaShield should also be protected from freezing.
Tim-Bor®
Tim-Bor® is typically used as either a 10% solution by dissolving one pound of dry borate powder in one gallon of water or a 15% solution by dissolving one and a half pounds of dry borate powder in one gallon of water. Using warm water speeds up the process. It should be mixed up in a bucket, not in a pump-up sprayer. Once the solution in the bucket is clear and there are no clumps of undissolved Tim-Bor, then it can be transferred to a garden sprayer. Tim-Bor solution must be used as soon as possible and should not be stored for an extended length of time.
Just like Bora-Care and PenaShield, Tim-Bor needs to be stored in a dry place where children and pets cannot gain access to.
Note: Solutions of Tim-Bor can and will freeze if the temperature drops below 20°F. However, it is not worth trying to save or salvage Tim-Bor solutions that remain unused.