Blog
Wood Finishes & Stains
Calling our pigmented finishes “stains” can be a bit confusing, but we understand how finishes can be called a stain. The term “stain” implies that the wood fibers are stained with the colorants contained in the products. However, in the case of film-forming water-based finishes, like our LIFELINE™ family of finishes, the wood fibers are not impregnated with the colorants. Our LIFELINE finishes behave more like latex paints than penetrating oil-based stains. Yet we can refer to our finishes as stains or varnish since that is what the market is used to.
Pigmented Finishes for Log and Timber Homes
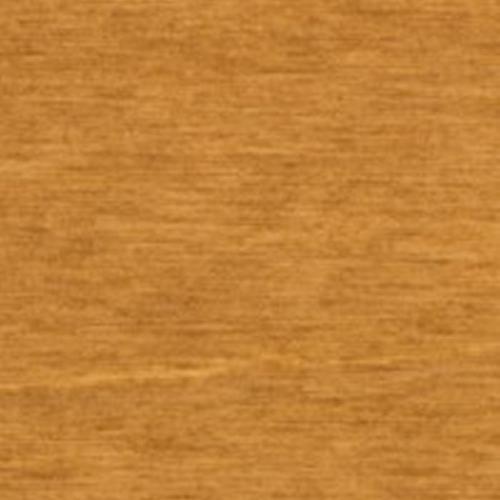
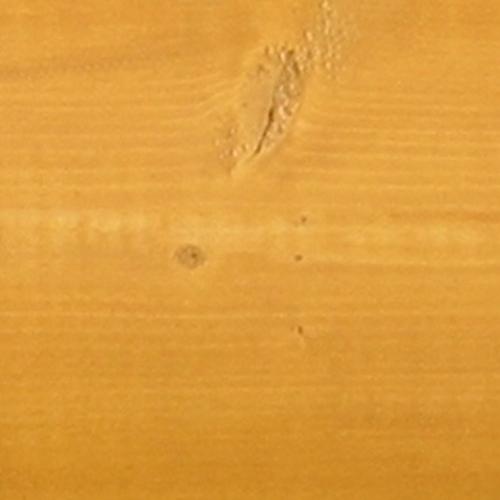
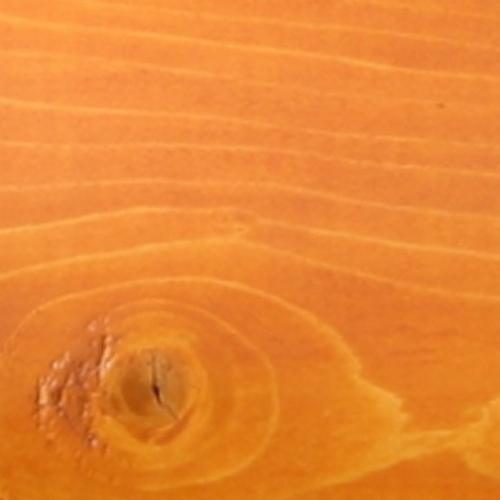
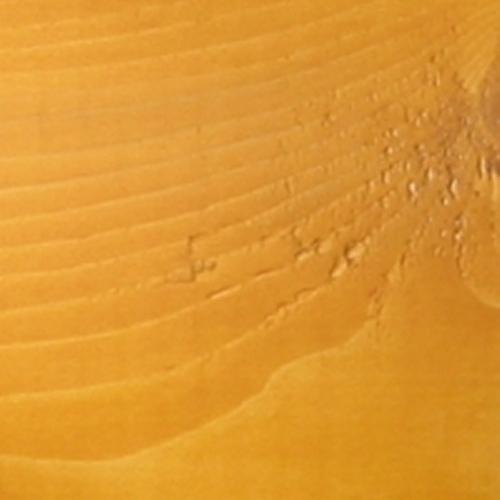
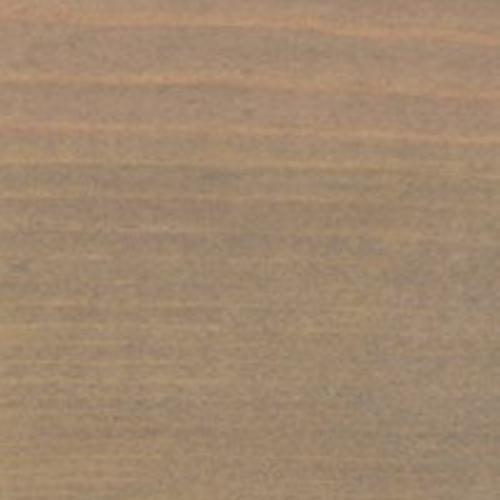
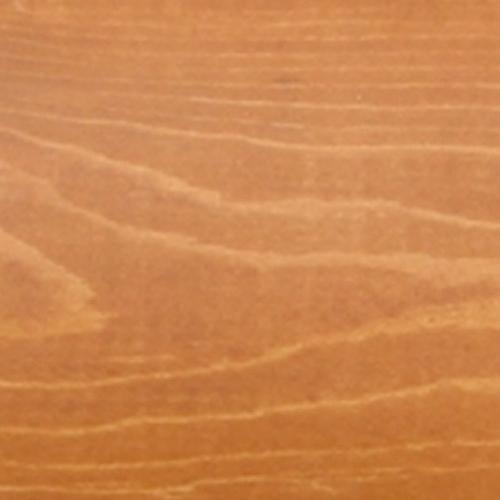
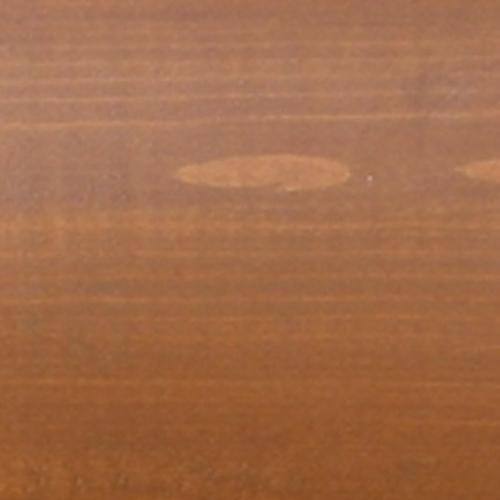
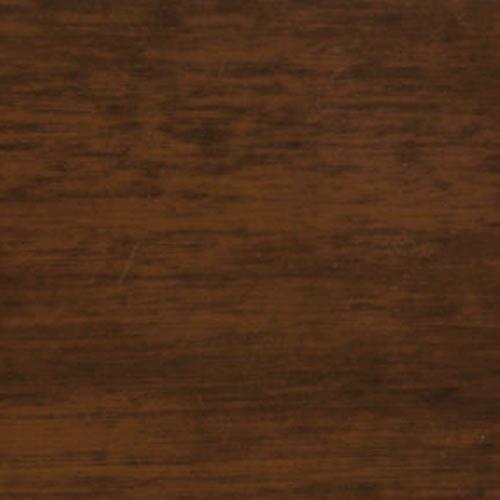
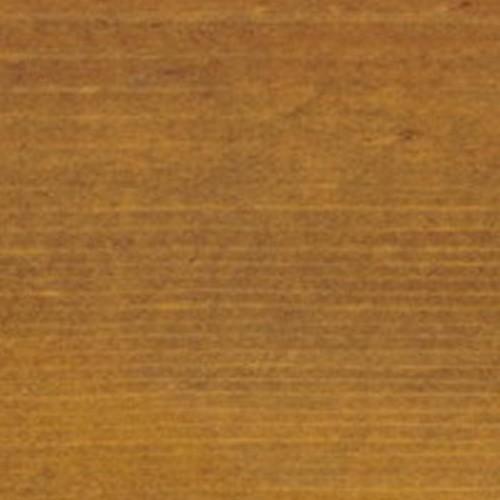
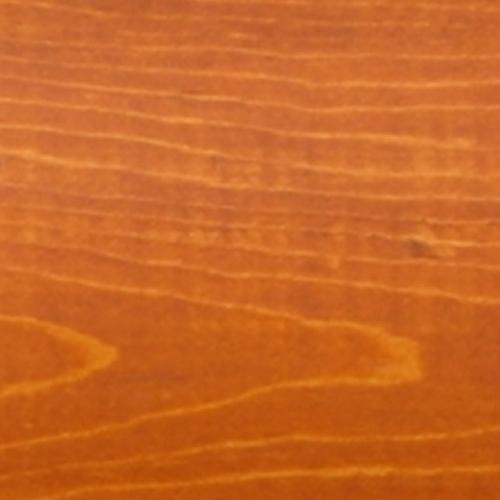
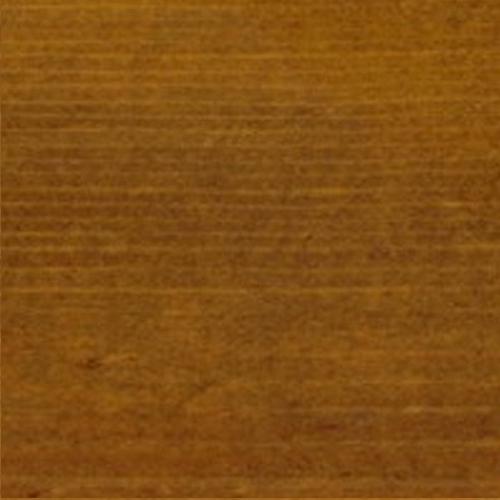
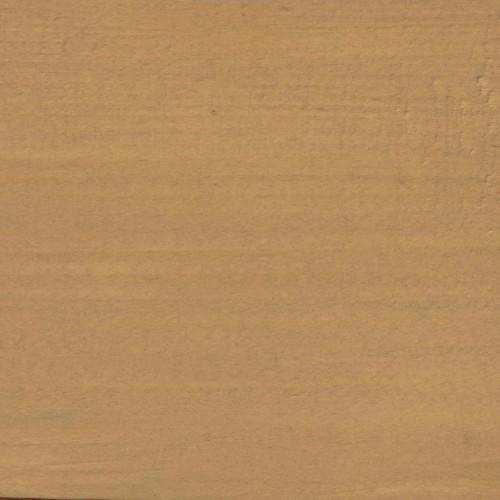
Speaking of pigmented finishes, that’s just a fancy way of saying we have finishes with color. And do we add color! We offer the most color options for log and timber homes of anyone on the market. Many homeowners choose finishes that highlight the natural beauty of wood, selecting colors like Dark Honey, Dark Natural, or Cedar. Others enjoy a deep, rich color base like Chestnut, Walnut, or Classic Brown.
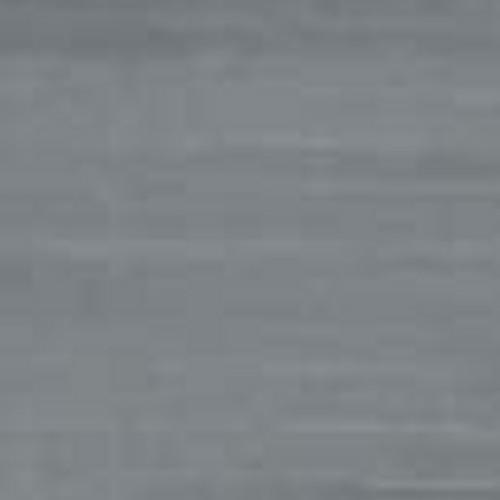
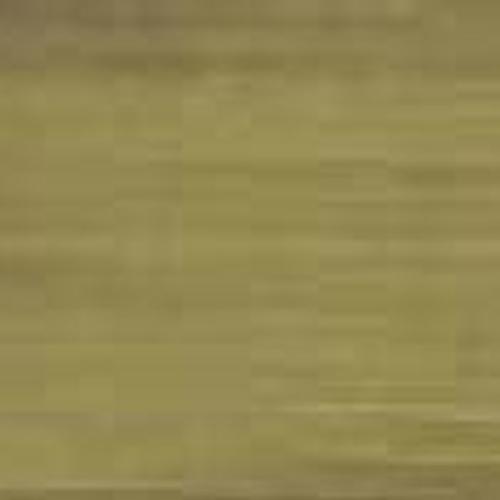
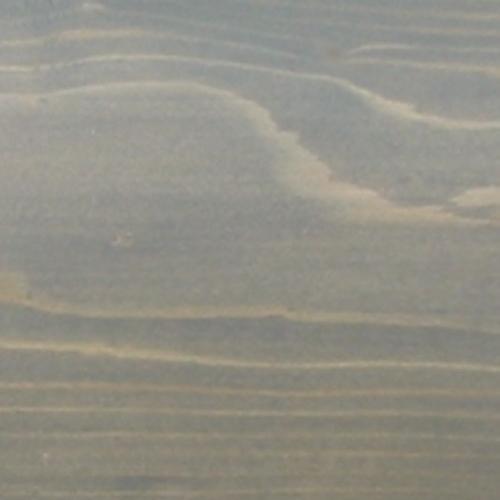
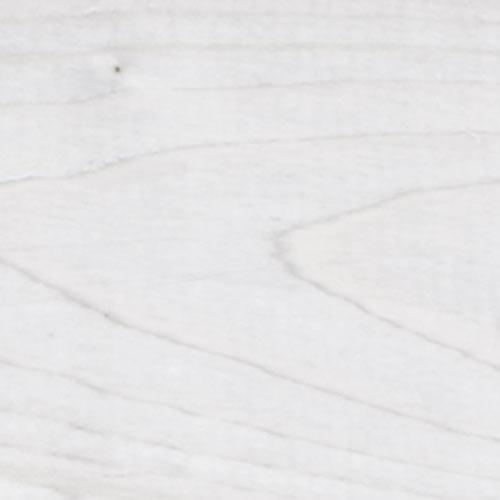
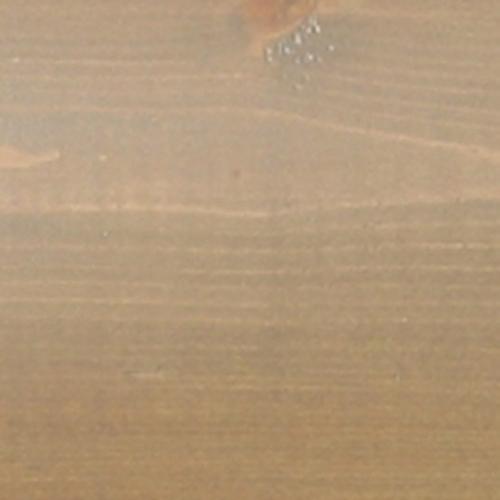
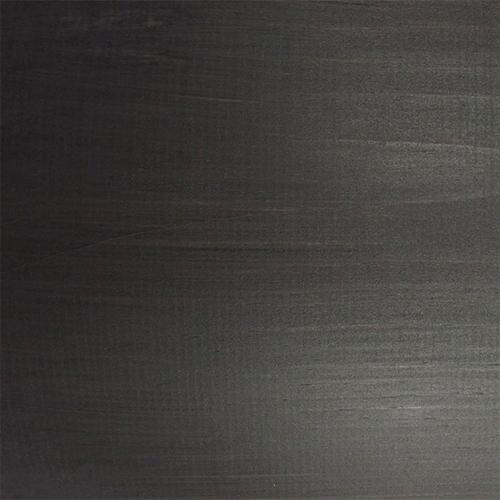
A few years ago we saw grays as a key color for paint, home textiles, and interiors. And second only to blue, as the most popular color for menswear. We expanded our color options to include more gray tints, offering trend-setting grays. Depending on your personal choice, our family of gray wood stains extend from a lovely aged-wood Smoke color to a New England-style Barn Gray. And with our ability to make custom colors, you can find a gray somewhere in between – or any other color for that matter.
Whatever color direction you choose, know our products provide exceptional coverage, lasting color, and superior protection when used as part of the Perma-Chink Systems. If you’re undecided on what color you should finish your log or timber home in, don’t worry! We offer free samples of all our finishes so you can be confident in your choice of color. Explore our Photo Gallery of exteriors for fresh ideas and inspiration.
Topcoats
One of the most frequently asked questions we receive about our Lifeline Advance™ topcoat is why don’t we include the topcoat in with the stain. The answer to this simple question is that if we did, it would no longer be a topcoat. Topcoats play a specific role in protecting any finish system.
Our Lifeline Advance clear topcoat plays essentially the same role as an automotive clearcoat, protecting the color coats from the weather, sunlight, and dirt.
Unlike other brands, Lifeline Advance is specifically designed as a high performing topcoat with a unique set of characteristics that has yet to be duplicated by anyone else in our industry. One of the reasons Lifeline Advance outperforms all other topcoats is that it is designed for a very specific purpose and should never be applied to bare wood.
Pairing Finishes and Topcoat – The Winning Combination
When you pair a LIFELINE stain with Advance topcoat, you get the maximum protection for your log home. This combination provides long-lasting color for your home, with the topcoat giving the home protection from the elements. Your home will look great for years to come.
Stain and Sealer in One – Log & Timber Defense and Deck Defense
Our newest finish, Log & Timber Defense, is a semi-transparent finish that penetrates like oils, but without the negative effects of oil-based stains. Unlike oil-based products, it cures to form a protective structure within the wood, helping reinforce and support the natural fibers from the inside out.
Deck Defense is a premium semi-transparent stain designed to enhance the natural beauty of your wood decks, railings, and fences. It’s formulated for long-lasting performance and easy application.
While it’s entirely water-based, Deck Defense penetrates deeply like traditional oil finishes.
Best of all, Deck Defense and Log & Timber Defense do not require a topcoat, making it a convenient and efficient choice for lasting protection.
Free Samples! And Excellent Customer Service
If you’re ready to finish your log or timber home, or have a renovation project that needs a finish, we are here to help. Sample orders and product orders can be fulfilled online at store.permachink.com or you can call any of our nationwide stores at 800-548-3554.


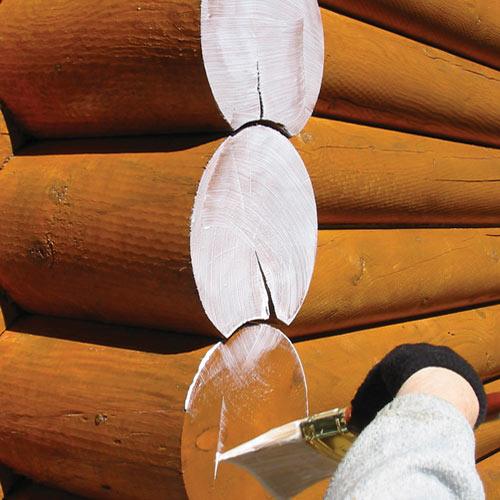
Some of the most vulnerable areas of a log home are the corner log ends. This is because the cross section end grain is exposed and the ends often stick out beyond the walls, allowing sunlight, wind, rain, snow, and ice to wear away the stain and expose bare wood. Logs can safely absorb large quantities of water before reaching moisture content levels that will be inviting for decay fungi.
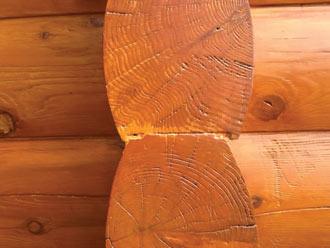
The exposed end grain acts like small straws sucking water into the log, giving rot and decay an opportunity to start eating away the wood. In addition, wood cracks and checks are prone to start at the ends. If left unprotected long enough, log or log corner replacement may eventually be required.
Being aware of the susceptibility of log ends to weathering, rot and decay, we developed Log End Seal™, a clear polymer finish that prevents water from penetrating into log ends and provides a layer of protection against log end damage. Although it is a sealer, Log End Seal is designed to allow moisture already in the wood to slowly escape. This helps reduce those large checks that often form on log ends.
To prevent excessive moisture absorption, Perma-Chink Systems developed Log End Seal, a product unique and specially formulated to protect log ends. Although Log End Seal is a fairly simple and easy product to use, there are some tips that can help you avoid problems especially in the fall when cooler temperatures slow down the curing process.
Apply Log End Seal
The basic steps of applying Log End Seal:
- Sand log ends with 60-grit sanding disc or paper
- Apply Lifeline stain
- Apply Log End Seal
- Apply Lifeline Advance topcoat finish
Let’s take a more detailed look at the individual application steps.
Step 1: Sand log ends with a sanding disc or sandpaper (60-grit). Log End Seal requires application in one (1) thin coat. In order to attain a thin coat, the log ends need to be sanded fairly smooth. If the ends are not smooth, the rough surface texture will prevent a thin coat application. This will result in thicker film, and will take longer to cure.
Step 2: Apply the Lifeline stain on the sanded ends, ensuring complete coverage. Allow time for the finish to dry before applying Log End Seal.
Step 3: Apply one thin coat of Log End Seal to the log ends, after the Lifeline stain has dried.
One of the characteristics of Log End Seal is that it stays white until it is fully cured, and if it gets wet during the curing process the white color can last for several weeks. If Log End Seal is applied in a thick coat and gets wet, it may take several weeks or months for it to become completely clear and transparent. This is the most frequent cause of complaints from our customers. Eventually it will cure and become clear but in the meantime the log ends on your home will have a white haze.
Tip: Choosing the right application tool can help prevent applying too thick a film. Rather than using a standard paintbrush, a paint pad or sponge brush works best. Since Log End Seal is thick and viscous, some people prefer to apply it with a wide-blade trowel. Any of these tools will work as long as the Log End Seal is applied in a thin coat.
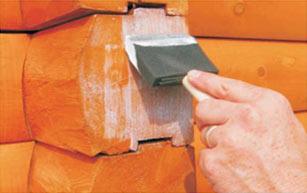
Step 4: Finally, apply a single coat of Lifeline Advance™ clear top finish to help protect the Log End Seal surface to remain clean and dry.
Coverage Rate: When applied correctly, one gallon of Log End Seal goes a long way. One gallon covers 30 to 40 square feet, which equates to 100 eight-inch diameter log ends, or 180 six-inch diameter log ends.

Both M-Balm® and E-Wood® are two component epoxies that are used for repairing soft spots, rot pockets and other types of defects in logs and timbers. Although they can be used individually, they are typically applied as a pair with each product playing a specific role.
M-Balm
When the A and B components of M-Balm are mixed together, they form a low viscosity liquid. In other words, it is not much thicker than water. The purpose for this low viscosity is to allow the product to soak into wood fibers. After about 15 to 20 minutes, the liquid M-Balm will begin to harden and once hard, any loose, friable wood fibers will be consolidated into a solid mass.
One limitation of M-Balm is that the wood must be very dry, 15% moisture content or less, for the M-Balm to be able to soak into the wood. This presents a challenge when attempting to repair areas that have been damaged by decay, since typically these areas are quite damp. The best thing to do in these cases is to remove the source of the moisture by eliminating any leaks or draping a plastic film over the area to prevent rainwater from saturating the wood. You must wait until the wood is dry before attempting to repair it.
Note: When repairing wood that has been damaged by decay fungi, we recommend that the area first be treated with PenaShield® borate wood preservative to eradicate any decay fungi that may still be alive and to prevent any future infestations from reoccurring. PenaShield solution may be applied while the area is still wet or moist but it is still important that the wood be allowed to dry before applying M-Balm.
The easiest way to apply M-Balm is with some type of plastic squeeze bottle like a clean, empty mustard container. Just be sure to mix the two components together before you pour them into the container. You need to be aware that within a few minutes after being mixed together the liquid gets hot- very hot! The greater the volume, the hotter it will get.
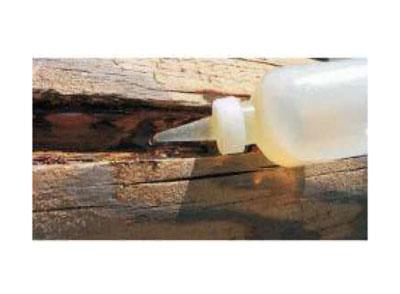
The heat is the result of an exothermic chemical reaction that takes place between the A and B components. It’s best to mix small quantities of M-Balm at a time, not only for this reason but once mixed, M-Balm hardens in just 15 minutes. Any product that’s not applied within that time will end up being unusable. M-Balm can be applied with a brush, but once it begins to cure the brush will become hard and will have to be discarded.
Whichever application method you use, try to avoid getting any M-Balm on the surface of the wood. It’s impossible to cover cured M-Balm with a paint or stain, and any spots of M-Balm that get onto the visible surface will always stick out from the rest of the wall.
Whenever you are planning to fill a pocket or void using E-Wood, or any other type of wood filler, it’s important to first use M-Balm to consolidate any loose wood fibers present on the inside surfaces of the void. Wood fillers and putties, like E-Wood, will not adhere to loose fibers, and if you don’t consolidate them first with M-Balm, you run the risk that the patch will fall out of the void sometime in the future.
It is not necessary to wait until the M-Balm cures before filling the void. Being an epoxy it will cure even in the absence of air.
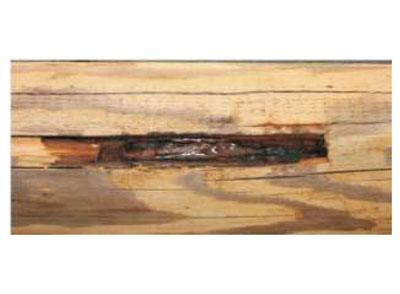
E-Wood
E-Wood is a two-component epoxy putty that can be used to fill holes or voids in wood. It should not be used to fill checks or gaps between logs since once it cures, it has no flexibility; any movement will cause it to pull away from the wood. E-Wood is somewhat challenging to mix together, since both components are thick and putty-like. Equal amounts of both A and B components must be kneaded together by hand until the color is uniform throughout the mass.
Up to two (2) ounces of Lifeline™ stains can be added to 24 ounces (12 ounces of component A and 12 ounces of component B) of blended E-Wood to aid in the hiding of the repair.
Once it is thoroughly mixed, it can then be pressed into the void and shaped to match the contour of the surface. If desired a texture or pattern may be worked into the surface of the uncured E-Wood to help it blend in with the surrounding wood.
Stain can be applied to the surface of the E-Wood either before or after it has cured. E-Wood will begin to harden in about an hour or two, so you have more time to work with it than you do with M-Balm. Being an epoxy, no shrinkage will occur once the E-Wood is in place.
For additional information about M-Balm and E-Wood see: “M-Balm & E-Wood” and “How to Repair Large Voids” technical tips.
Energy efficiency is a subject that most people are aware of, including log home owners and those people contemplating the purchase of a log home. Energy costs are on the rise, and energy efficiency is a key consideration well before the first log is ever laid down on-site.
With this in mind, we occasionally get asked about the R-value of our chinking and/or backing materials, since many people assume that they provide some insulation value to the exterior walls. In point of fact, neither the Perma-Chink® nor the backing material contributes any significant insulation value to a wall. What they do impact is the elimination of outside air infiltration into the home. This has a much greater impact on the overall energy efficiency of a home than adding a minor amount of insulation to a wall.
The R-Value of Wood
When trying to compare R-value of log homes and stick-built homes, it’s not quite an effective comparison. Not only do the types of wood (softwood or hardwood) affect the R-Value, but so does the climate where the log home will be located. While energy-related organizations have a hard time acknowledging the effectiveness of log homes, the Department of Energy recognizes the ability of logs of being “thermal batteries.”
A material’s thermal resistance or resistance to heat flow is measured by its R-value. In a solid log wall, the logs provide both structure and insulation. The R-value for wood ranges between 1.41 per inch (2.54 cm) for most softwoods and 0.71 for most hardwoods. Ignoring the benefits of the thermal mass, a 6-inch (15.24 cm) softwood log wall has a clear-wall (a wall without windows or doors) R-value of just over 8.
Logs act like “thermal batteries” and can, under the right circumstances, store heat during the day and gradually release it at night. This generally increases the apparent R-value of a log by 0.1 per inch of thickness in mild, sunny climates that have a substantial temperature swing from day to night. Such climates generally exist in the Earth’s temperate zones between the 15th and 40th parallels.
What If We Want to Improve Thermal Efficiency?
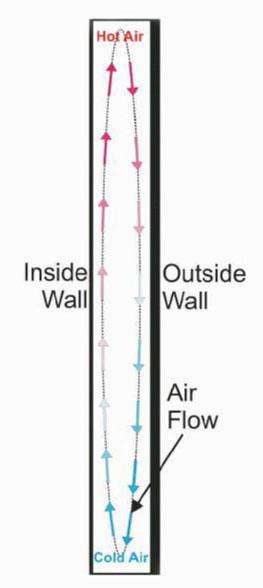
The next question is what can be used in the void between the exterior and interior chink joints to increase thermal efficiency? Surprisingly, the answer for many situations is nothing. Look at Diagram 1; it is a cross section of a typical stud bay without any insulation in a stick-built home.
During the winter, the outside wall gets cold while the inside wall stays warm. The air next to the inside wall heats up and rises to the top of the bay.
This sets up an air circulation flow where the heat from inside the home ends up warming the outside wall thus increasing the energy usage within the home.
During the summer the circulation flow is reversed and the hot air next to the outside wall ends up warming the inside wall. The objective of placing insulation between the studs is to eliminate this air circulation flow. But what in insulation reduces the conductivity of heat from one side to the other? Surprisingly, the answer is air.
Air is a very poor thermal conductor. The prime objective in most types of insulation is to entrap air in small cavities, so that it can’t circulate. However, the matrix that holds these small air cavities does conduct heat. Since some insulation matrixes conduct heat better than others, it’s what differentiates the R-value of the various types of insulation like fiberglass, cellulose, styrene foam, etc. But it’s the dead air spaces that do the work.

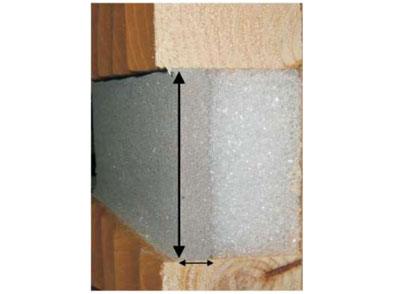
When we take a look at the cross section of a chink joint, Diagram 2, what do we see between the exterior and interior backing materials? Dead air space. For chink joints less than three inches wide, trying to gain thermal efficiency by filling the void between the outer and inner log surfaces is futile and may even be self-defeating.
Perhaps if you have a six-inch chink joint and live in Alaska, it may be worthwhile to insulate this space, since it is large enough and the temperature difference between the exterior and interior surfaces great enough to start an air circulation flow pattern. But if you live in a moderate climate zone and have a two- to three-inch chink joint, it’s probably not worth the cost and effort.
The best method to improve thermal efficiency is to ensure the home is properly and completely sealed. You can evaluate your log home’s efficiency with an Energy Audit, which may identify areas of energy loss.
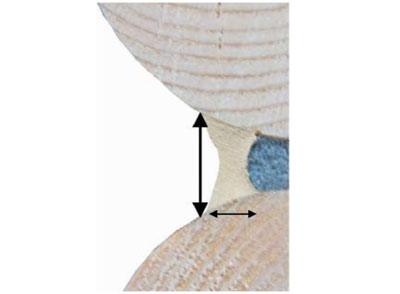
When it comes to ordering sealants like our Perma-Chink® or Energy Seal™, there are two dimensions that you need to know in order to determine how much product you will need: the width and the cumulative length (linear feet) of the gaps or joints that you want to seal.
The width is fairly easy to determine. If it is a chink joint on a squared log, it’s the average distance between upper and lower log surfaces (Figure 1). If it is round log chink joint, you first have to insert a length of proper size Grip Strip™ and then measure the distance between the top and bottom logs about 3/8 of an inch in front of the surface of the Grip Strip (Figure 2).

In the case of Energy Seal, it’s the width of the gap and size of the backer rod that determines the width of the Energy Seal (Figure 3).
When estimating your purchase requirements for an entire log home, the task of determining how many linear feet of sealant you will need can be somewhat overwhelming. However, if you break it down to one wall at a time, then add all of the walls together, it becomes much simpler.
Calculating the number of linear feet of chink joints or sealant gaps in a log wall is fairly easy. Start by measuring the length of the wall with a tape measure. Then count the number of joints you need to seal. Usually it is the number of log courses minus one. When you multiply these two numbers together you have the linear feet of sealant required for that wall. Don’t worry about subtracting the windows or doors unless they take up a substantial portion of the wall area. You will need to seal around them anyway.
If you are planning to run a bead of sealant in the corners or other vertical seams of round logs, you need to know the height of the wall then multiply the height by a factor of 1.25 to compensate for the increased surface area created by the curvature of the logs.
Once you have determined both the width of the sealant joint and total number of linear feet you will be sealing, we have an online calculator on the Perma-Chink or Energy Seal web pages. The calculator will tell you the number of pails required to complete your project. If you were thinking about using tubes of either product consider this: the price difference between two pails of Perma-Chink or Energy Seal and an equal amount of material in tubes more than covers the cost of a bulk loading gun and follow plate.
Calculator Links
We are excited to share a very unique project, something that could very be a first for this company – a log home interior of a van, sealed with Perma-Chink. Yes, a van as in the automobile variety.
This project is a fantastic example on the flexibility of our products, and the creative imagination of our customers. We’ll turn over the background of the project to the customer, Barbara P., in their own words.
“In 2002 and 2003, we discussed the possibility of buying a log cabin that my Dad lived in with his Grandfather back in the 1920’s and early 1930’s. We found out that the price was out of our reach. Shawn, my husband, then thought about customizing a new van to look like a log cabin. I have been a member of Moon Lite Vans, Inc. for 46 years and vanning for over 47 years and never saw a van with this kind of interior.
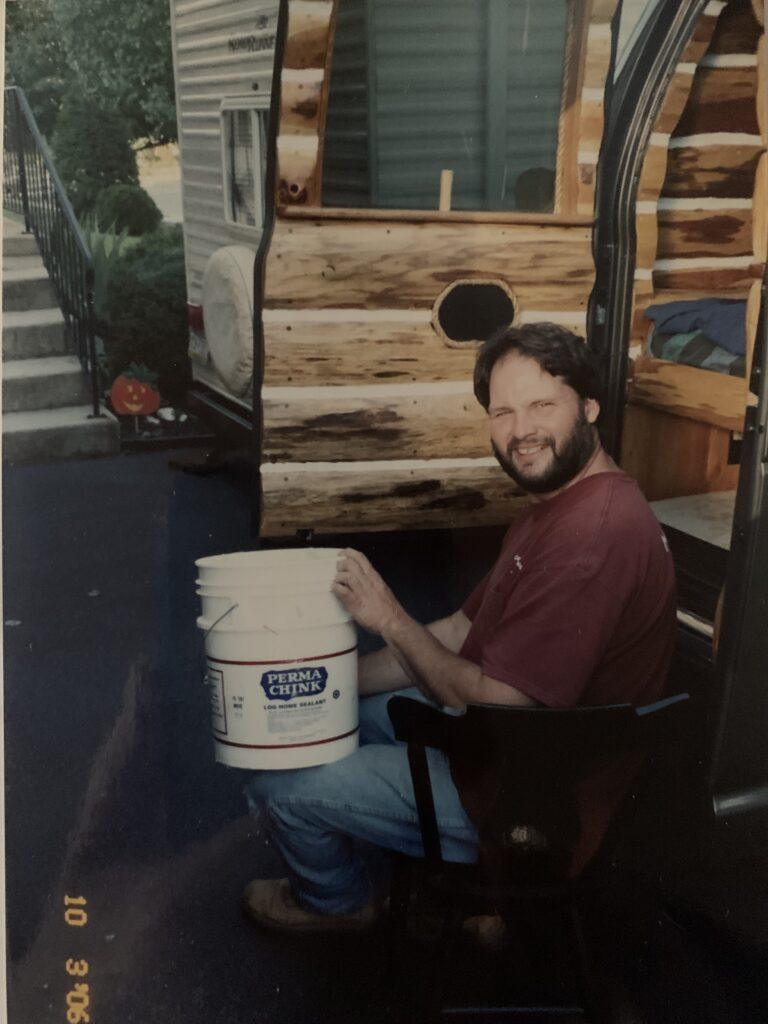
In 2004, we ordered our new van and when we received it, he started to work on turning it into a log cabin on wheels. We bought the oak slab wood from a sawmill in Berks County and he debarked all of the wood with a draw knife and other hand tools. He insulated the whole van and proceeded to contact Kline Construction Company in Boyertown, PA to find out where we can purchase the Perma-Chink to be used in the making of the interior of the van. He installed all the oak wood and then applied the Perma-Chink.
We also used the Perma-Chink when we remodeled the recreation room in our home. It now looks like the interior of a log cabin. It also is the reason why we visited the Petersburg, PA location because we needed some more of the Perma-Chink.
We have always talked about visiting the Perma-Chink location in Petersburg, Pa and finally did in May, 2024. We are so glad we did. It was great to meet everyone there and hear the history of the company.”
And now, the pictures!
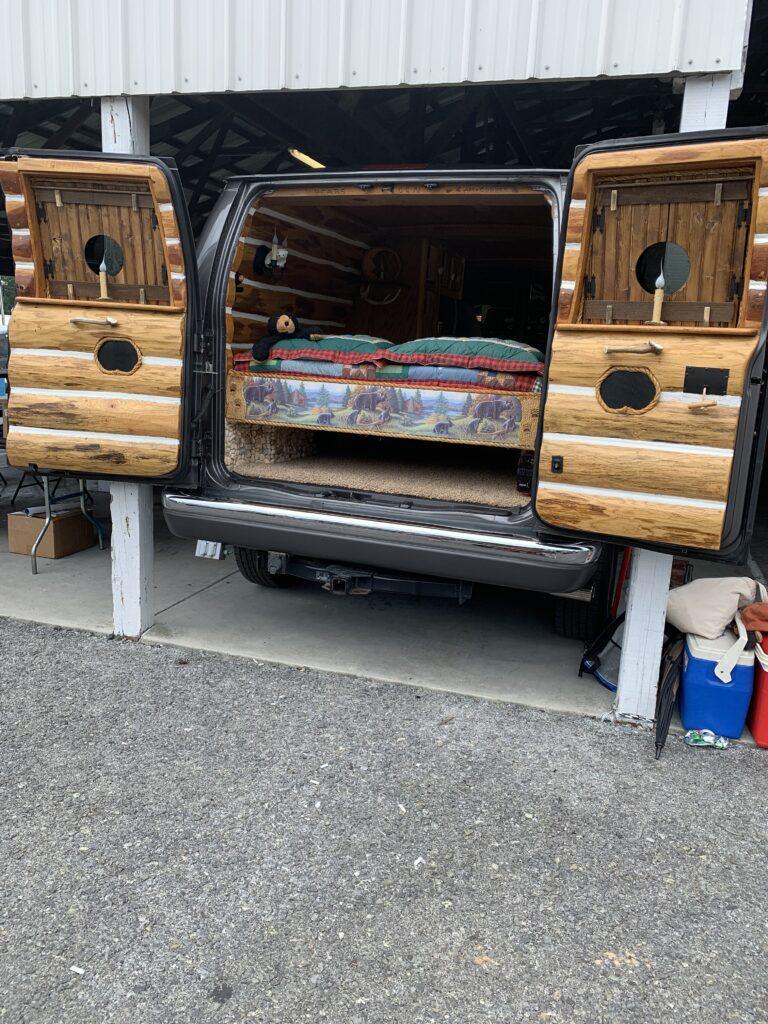
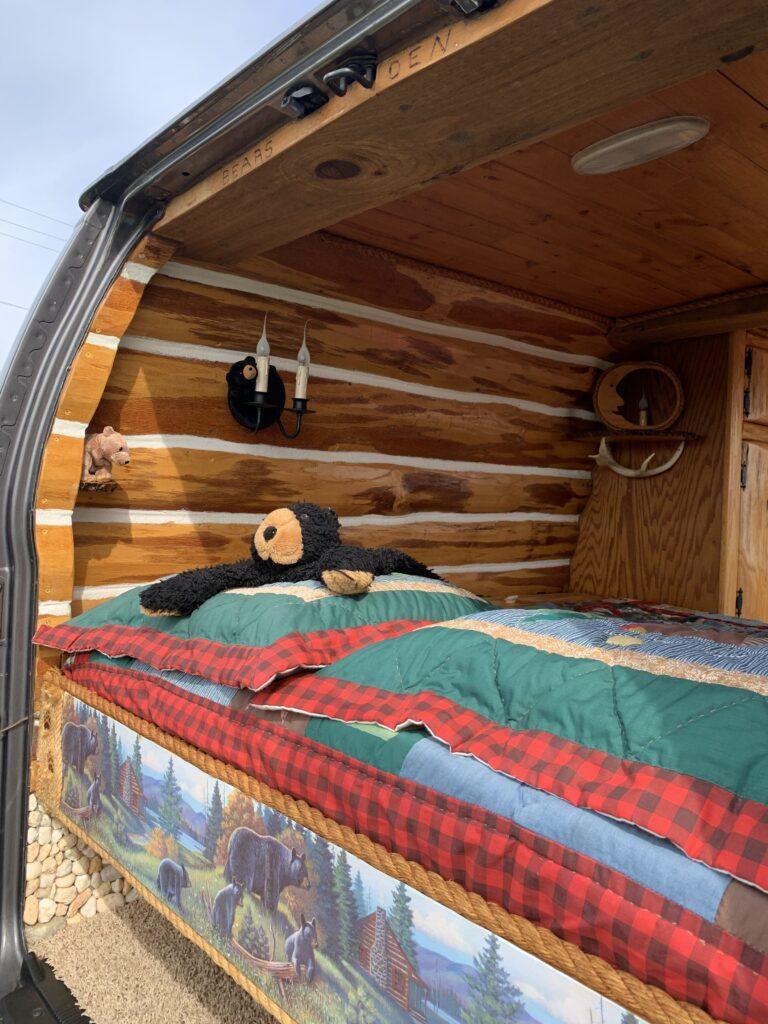
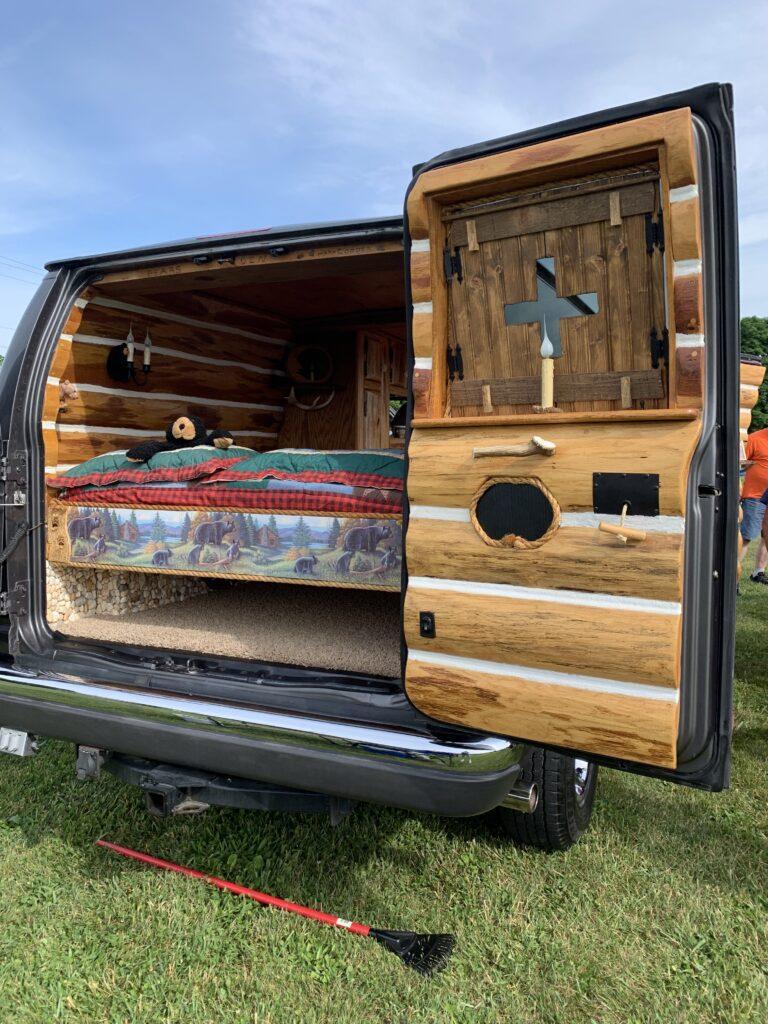
There you have it! A beautiful project that illustrates the flexibility of our product and the creative ingenuity of van (and home) owners. We thank Barbara and Shawn for sharing their labor of love with us, and for choosing Perma-Chink to create the look they desired.
As always, Perma-Chink and our whole line of products is available at Store.PermaChink.com – order your project materials today!
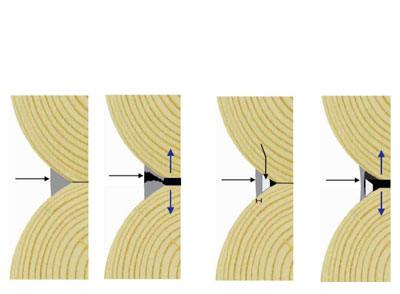
Homeowners often ask why we specify the use of backing materials on the application instructions for all our sealants. Is there something special about our sealants that require backing material?
Many general-purpose caulks never mention the use of backing materials on their labels. When applied to wood, any type of sealant, be it a high-quality Perma-Chink Systems’ sealant or an inexpensive construction caulk, will perform better if a backing material is used in joints that are 1/4” or greater wide. We want our customers to know the proper and best way to seal a joint so that it does not fail.
The use of backing material behind a sealant serves two purposes; First, to assure the proper thickness of the sealant so that it can stretch and contract without breaking; and second, to provide a surface that the sealant will not bond to so that it can stretch without tearing away from the wood. The dynamics of sealing an exterior joint or crack in wood is the same regardless of the width of the gap or the product being used. If the wood is unseasoned at the time a sealant is applied, the wood will shrink with time.
To compensate for the shrinkage the sealant must be applied in a manner that will allow it to stretch. When a sealant is applied too thick, once it cures it will not be able to stretch to compensate for the wood’s shrinkage and may fail. When applied too thin, it becomes too weak to stretch without breaking. Think of it like a rubber band. A thick rubber band cannot stretch as far as a thin one. However, if the rubber band is too thin, it will break when it is stretched. If applied too thick they can not stretch without tearing and if too thin they will be weak and will tear when pulled apart. In the case of sealants manufactured by Perma-Chink Systems, the magic number is an applied wet thickness of 3/8”. This results in a cured sealant with excellent elongation and maximum strength.
Backing Materials
Backing materials serve to provide a suitable sealant thickness and surface for the proper application and performance of the sealant. A variety of materials can be successfully used. Some important features of a good backing material include:
- It must be inert, not outgas, or react with the sealant.
- The sealant should not adhere strongly to it.
- It should not wrinkle or deform when the sealant is applied over it.
- It needs to be able to withstand temperatures of at least 190 degrees Fahrenheit
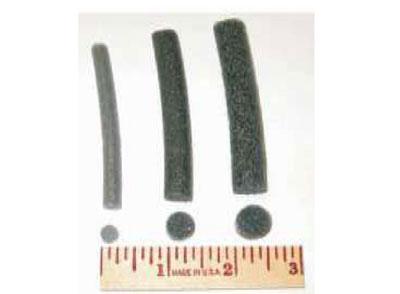
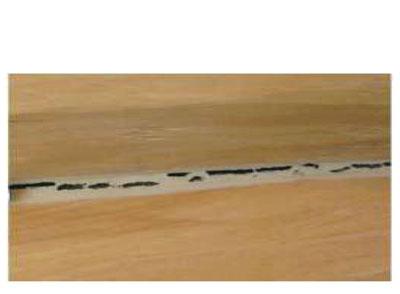
There are several products specifically designed for use as backing materials for sealants. For smaller gaps, joints and cracks the most commonly used material is round backer rod. It comes in a range of sizes and is relatively inexpensive. Since it is flexible it can be pushed into a crevice without needing to be nailed or stapled. Grip Strip is designed for sealing larger gaps. Similar in composition to backer rod, but shaped like a trapezoid so it can be squeezed in between round logs. It can be used for a variety of situations to provide a flat surface for chinking or sealing.
For wide chink joints between squared logs, we typically recommend the use of polyisocyanurate board (polyiso or R Max) or expanded polystyrene (EPS) beadboard. When cured, the sealant should release from the backing material. If the sealant stays adhered to the backing material, this places much more demand on the sealant at the top and bottom of the joint. Failure is often the result of improper backing materials being used.
Materials that should never be used as backing include Blueboard or any other colored beadboard (they outgas and create blisters in the sealant), open cell foams (they absorb water), foil-faced extruded polystyrene (XPS) (causes blisters) or anything that you are not sure about.
Avoid foil-faced materials as the chinking will adhere tightly to the foil. This will interfere with joint movement across the entire joint placing more stress on the top and bottom of the joint. If you are unsure or need assistance with selecting the proper backing material, give us a call, and one of our technical representatives will assist you in determining the proper backing material.
What about joints that are too narrow to insert even the smallest diameter backer rod? In these situations, a narrow strip of water-resistant masking tape works quite well. You do not want to use regular masking tape that wrinkles when it gets wet. The wrinkles may show through the sealant. An excellent option is to use pinstripe tape available at most automotive supply stores. The tape is vinyl, so it is waterproof and our sealants will not adhere to it. Pinstripe tape is available in widths down to 1/8”.


We often get asked this very question. To help answer this we must look to our experience both past and present. For 40 years now Perma-Chink Systems® has been working to develop products that meet both the demands of Nature and our Customers. The result of this experience has been a wide range of products that help solve specific needs. Our wood finishes can be split into four main categories: exterior film forming, exterior penetrating, interior film forming and specialty. Let us take a closer look at these products and discover what makes each one unique.
A Breathable Finish
First, our exterior film forming stains carry the Lifeline designation and are all breathable. Therefore, they allow water vapor to pass through while stopping liquid water from getting through. These types of finishes bond well to vertical wood surfaces but do not penetrate deeply into the wood. The protection is primarily on the surface. However, our Lifeline Ultra-7™, Lifeline Ultra-2™ and Lifeline Accents do contain special additives that help protect specifically the lignin in wood at the interface where the stain and wood meet one another.
Lignin acts as the structural framework for wood much like steel beams in commercial buildings. When lignin breaks down due to UV exposure, the interface between the coating and wood is compromised and delamination of the coating often results.
Lifeline Ultra-7
Lifeline Ultra 7 is our premier all-acrylic wood finish system containing special high-performance additives that reduce UV degradation and biological attack. It is designed for a one coat application however two coats can be applied to provide more protection and color uniformity.
Lifeline Ultra-2
Lifeline Ultra 2 is designed to be a two-coat application of finish. This finish system is very flexible, has inhibitors for ultraviolet light as well as biological growth, giving it an advanced level of protection.
Lifeline Accents
Lifeline Accents is designed to provide our customers with exciting colors and features and an affordable price point.
Lifeline Exterior
Finally, Lifeline Exterior, another two-coat system similar to Lifeline Ultra 2, is also very flexible, has additives designed to provide protection from UV and biological attack and is economical. All three of these wood finish systems have differing levels of protection designed to meet the needs of our customers.
Each of these finish systems should be sealed with our Lifeline Advance™ clear topcoat. This breathable topcoat helps keep the surface clean and relatively dry, reduces biological growth and helps reduce UV degradation which greatly extends the life of your finish system.
Our New Defensive Additions
Log and Timber Defense™ and Deck Defense™ are our two exterior penetrating products designed for both horizontal and vertical surfaces. These two wood finishes dive into the wood and seal the wood from the inside out. While reapplication of product may be necessary more often than our film forming stains, you don’t have to worry about chipping and peeling of the coating with these products. Both products work best on unsealed surfaces allowing for better penetration of each product. Decks are often difficult due to the intense UV exposure and abrasion they receive over time. Protection of these surfaces with Deck Defense is a smart move. However, because these products penetrate, application of a topcoat such as Lifeline Advance or our wood primer Prelude is strongly discouraged.
The Right Choice
Each of our wood finishes helps meet specific needs of your home exterior. Whether it be function, longevity, ease of application, quality, fashion, performance, or economics – Perma-Chink Systems֯ has a wood finish solution suited just for your home.

Applications of all Perma-Chink exterior finish removers, cleaners, stains, topcoats and sealants can be a bit of a challenge in extremely hot weather, which we consider over 90°F. However, if you know what to expect and avoid you can easily cope with applications during the hot summer months. We’ll address each of our product lines individually. And for all our products, we recommend keeping the product pails out of the direct sun on hot days to minimize the heat build-up.
Finish Removers
Although finish removers work better at higher temperatures than cold ones, in order for them to continue doing their job they must remain damp. If you allow them to dry out they will no longer work. In the case of S-100®, if it is a very hot, dry day you should mist the wall with water prior to applying the S-100. This will help cool the wall down and extend the time before it starts to dry out. If you see it beginning to dry, lightly mist it with water. Just be sure not to apply so much water that it starts to run down the wall.
StripIt® is a bit more resistant to drying out than S-100. However, when exposed to direct sunlight it will start to dry out, stop working, and turn into a white, powdery coating. If it does appear that it’s drying, apply an additional application of StripIt to keep it wet, or cover it with plastic film. Do not mist StripIt with water.
If S-100 or StripIt completely dries on the chinking, sealants or wood, reapply some chemical stripper to aid in solubilizing the dried residue and remove with a pressure washer.
Cleaners
Like the finish removers, cleaners also stop working if they dry out. Keep Wood ReNew™ and Log Wash™ damp with a light mist of water until it’s time to wash them off. The same thing applies to Oxcon™ if it’s used. It’s especially important to keep Oxcon wet. If it dries and crystallizes on the wood the resultant oxalic crystals become very difficult to rinse off.
Stains and Topcoats
It is the surface temperature of the wall that has the largest impact on the application of a Lifeline stain or topcoat in hot weather. The hotter the surface temperature, the faster the water will evaporate and the finish will dry. It is not unusual for log surface temperatures to exceed 170°F when exposed to hot sunlight. At these temperatures, drying times can be reduced to a matter of seconds, too fast for adequate back-brushing and proper film formation. Once the finish is on the wall, it does not really matter if it gets hit by hot, direct sunlight. It’s the surface temperature during the application process that’s critical. On the south and west walls it may be best to start early in the morning while the walls are still cool. Later in the afternoon, even if the sun is no longer hitting the wall, the surface temperature may still be well over 100°F.
Sealants
Perma-Chink®, Energy Seal™, Woodsman™, Check Mate 2®
Sealants are more sensitive to direct sunlight even in cooler temperatures than they are to heat, in general. That’s because direct sunlight accelerates the “skinning over” of the sealant, trapping the water contained within the product. When this water converts to water vapor and tries to escape from the product, it can create bubbles or blisters on the surface of the sealant. High ambient temperatures do influence the viscosity of sealants; they become more fluid, but for the most part they can still be successfully applied even when the temperature exceeds 90°F as long as the freshly applied product is protected from direct sunlight.
While we call our pigmented finishes “stains,” in reality they behave more like water-based paints than traditional oil-based stains. The word stain itself implies that the wood fibers become stained with the pigments contained in the product, whereas water-based finishes form a film that covers the wood fibers without actually coloring or “staining” them.
If water gets behind the film there is a chance for the finish to blister, lose its adhesion and peel off. Most people seem to understand and accept the consequences of water getting behind paint, but they have a difficult time accepting that a stain can behave in the same manner. This not only applies to water-based products like LIFELINE™, but can also happen with oil-based finishes if the surface is not properly prepared or the finish is not correctly applied.
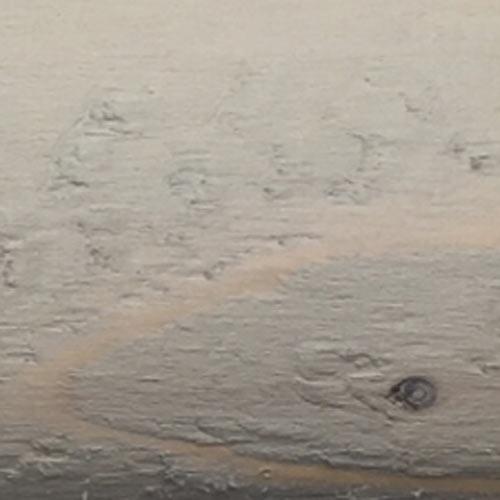
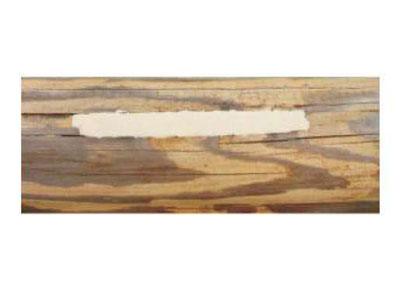
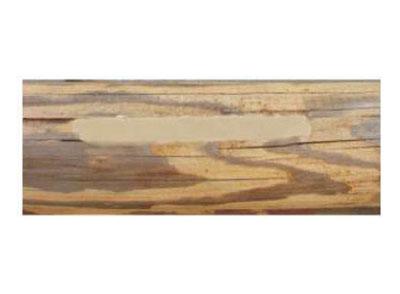
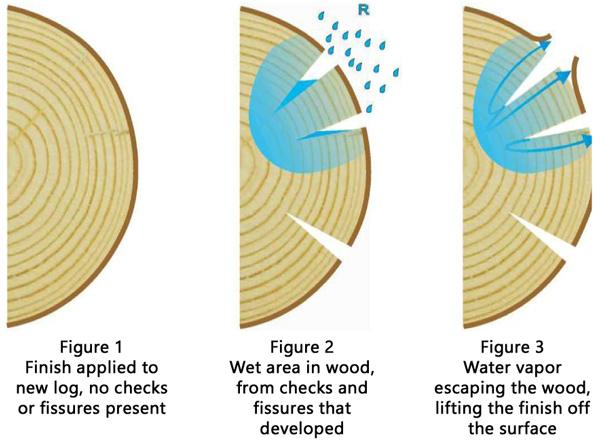
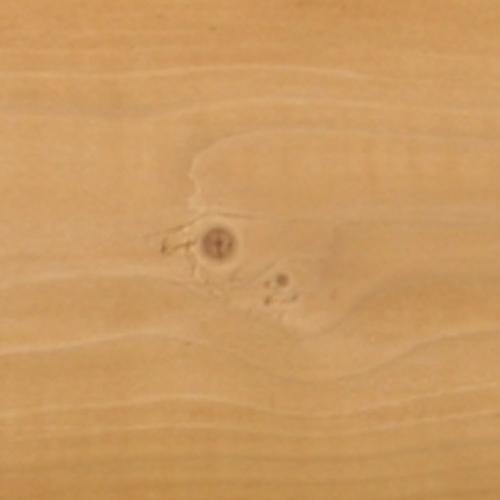
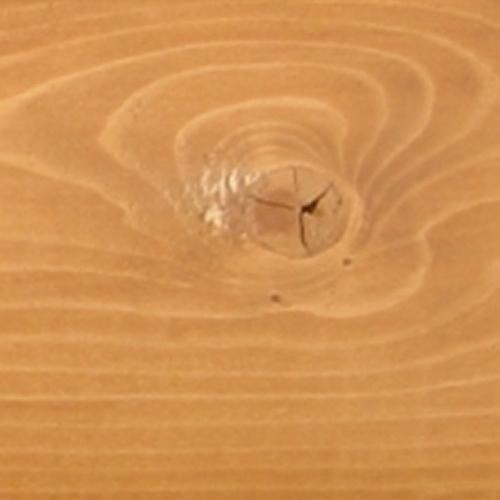
Most peeling issues are associated with finishes on new logs or new log siding. When the finish is first applied, the surface of the logs or siding is intact [Figure 1]. Later on, fissures and checks may develop, especially on the sunny walls, which allow rain water to seep behind the finish and into the wood [Figure 2]. Gravity plays a role in this, since most peeling occurs below the checks and fissures. When the sun comes out and beats on the wall, the water turns to water vapor and pushes the finish right off the surface [Figure 3].
Two additional factors play a role in the susceptibility of a finish to peeling. The first is vapor permeability. The more vapor permeable a finish is, the less likely it will peel. However, even vapor permeable finishes like LIFELINE can peel when applied too thickly, or if too many coats of finish are applied. That’s why we recommend thin coats of finish and maintenance coats of LIFELINE Advance™ topcoat only as needed! It is much more important to keep the surface clean than it is to apply an additional coat of topcoat every two to three years. Every coat that is applied will further reduce the vapor permeability to the point where water vapor can no longer escape from the wood without the risk of pushing some of the finish off.
The second factor is surface preparation. Peeling issues can occur if cleaner residue remains on the surface of the wood after cleaning, an inappropriate cleaner like bleach was used to clean the wood without thoroughly rinsing and neutralizing it, or the surface was sanded too smooth before application. The presence of mill glaze, dirt, sanding dust or other contaminates may also prevent adequate adhesion of the finish to the wood. Proper adhesion of the first coat of finish will not be attained if the application is made to wet or damp wood.
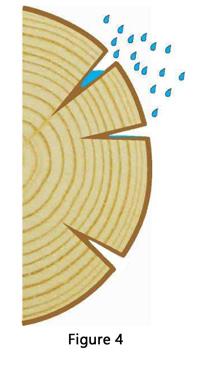
Once the checks and fissures have opened, and a new coat of finish is applied, peeling rarely becomes an issue. That’s because during the application process the finish now has an opportunity to get into them, forming a water resistant barrier between the surface of the cracks and the bare wood [Figure 4].
One of the reasons for back-brushing is to work the finish into the cracks and fissures, thus preventing water penetration into the wood. But if the wall has been recently washed, make sure that there is no water remaining in the checks and fissures and the wood around them is absolutely dry before you apply the first coat of finish.
Factors
Some factors that can contribute to peeling include:
- Surface Improperly Prepared
- Contaminates like oil or wax
- Mill glaze
- Sanding dust
- Sanded too smooth
- Inappropriate Products Used
- Bleach solutions
- Caustic strippers
- High pH cleaners
- Inadequate Rinsing
- Application Errors
- Spraying without back-brushing
- Product applied too thick
- Application at too high or too low a temperature
- Product applied to wet or damp wood
- Freshly Opened Fissures/Checks
- Exposed to rain and direct sunlight
For information about repairs, see “Repairing Peeled Spots.”
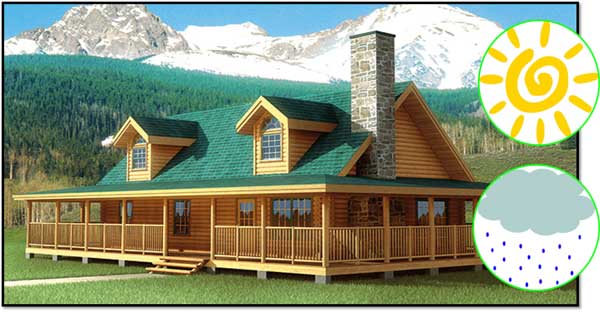
Sunlight offers life to Earth, yet also be one of the most damaging objects in our world. While we relish the warmth from the sun and we love the summertime fun, the sun’s ultraviolet rays damage any surface that isn’t protected. For humans, we get protection from clothing and sunscreen. But for your log home, what does it get? What can be done to lessen weathering brought on by UV light?
Given enough time, the sun and environment will eventually wear down any exterior finish whether it is latex paint, oil-based stain, or a semi-transparent finish. The goal is to prolong the life of the wood as long as possible through a combination of home design and protective log finishes.
Protect Through Planning
Structurally, log home surfaces can be protected by having covered porches or extending eaves to shade log surfaces, but sometimes that is not possible with the home’s design or the owner’s preference. A home could also be shaded by tall trees, minimizing direct sun exposure.
The best non-structural protection from UV exposure is using Lifeline finishes and Advance topcoat. Working in concert, these two layers offer unrivaled protection, minimizing the damage UV light can do to untreated wood. Lifeline finishes can last decades if properly cared for as part of a whole-home defensive strategy against UV and environmental damage.
How Lifeline Finishes Protects Against Weathering
Lifeline Ultra-7 and Ultra-2 finishes block UV light through the color pigments, which means some finish colors are more effective than others at blocking UV light. Darker colors contain more colorants, thus contain more UV blocking power than lighter colors. Certain light colors which include titanium white contain a high colorant loading, making them very effective against UV light and reflective of the sun’s heat. This reduces stress on the logs brought on by temperature swings. This is why we recommend finishes with pigments, rather than just applying a clear coat to exterior logs. Lifeline Exterior and Accents can offer the same protection with the addition of UV Boost to the finish.
Advance topcoat, in gloss or satin, protects the finish by reflecting UV light and defending the surface from other environmental attacks. Gloss does have an advantage over satin, reflecting more than a satin sheen. However, Advance is most effective when it is clean, free from the abrading effects of wind or accumulation of pollen and dirt. That is why we recommend a yearly cleaning of the logs with Log Wash. Much like the clearcoat on a car, a topcoat does all the heavy lifting when it comes to fighting the environment.
Effect of Weathering on Squared Logs
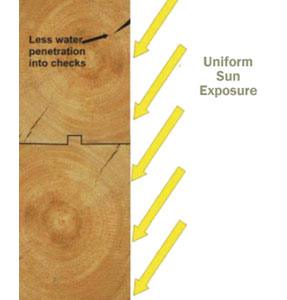
The construction method of the log home is also something to pay attention to when it comes to weathering. Flat surfaces get attacked by UV light evenly across the surface. Homes built with squared logs will have uniform exposure, so any weathering will appear evenly. Squared logs also do not accumulate as much dirt and debris as round logs, which can keep the finish cleaner.
Effect of Weathering on Round Logs
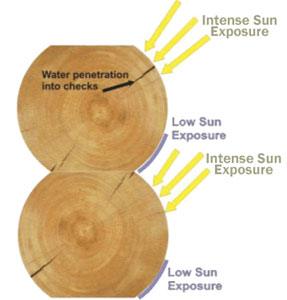
Round logs, the most traditional construction method of log homes, have high and low sun exposure sections, making any weathering first noticeable on the tops of the log. Snow and ice can accumulate on the top portion of the logs, introducing more moisture into the log and log checks. This will accelerate weathering on the tops of the logs if not maintained properly. Conversely, the lower portion of the log is out of direct sun exposure, maintaining its protection and longevity.
Effect of Weathering on Log Siding
Round log siding probably presents the greatest challenge to forestalling the effects of weathering. Typically used in high-exposure locations such as dormers and gable ends, log siding has some features which make it even more difficult to protect from the effects of the weather. Siding is often manufactured from lower quality wood than logs, frequently using green wood. This makes it more susceptible to twisting, warping and cracking.
Log siding is greatly affected by temperature swings, since it does not have the high thermal mass of full logs. Think of it like heating a pot of water and a cup of water – which one will boil faster? That same concept, applied to logs, introduces more mechanical stress (growing, shrinking, twisting) during the course of the day. This movement can introduce small fissures in the wood, ultimately allowing rainwater to get behind the finish and cause damage to the wood and finish.
What Can A Homeowner Do To Prevent Weathering?
A homeowner can fight weathering through protecting logs from harmful UV light using structural or environmental shading, and choosing a finish designed to protect the wood. We have compiled best practice recommendations for keeping your home looking great for generations. All homes will have different levels of UV exposure, and location matters a great deal in the effort required to combat UV damage.
Here are the following best practices to combat weathering:
In short, all our wood stains and finishes perform phenomenally – providing excellent UV protection, allowing wood to breathe as the home acclimates seasonally, and ensuring maximum color retention.
For over 40 years Perma-Chink Systems has been protecting log homes and protecting them right. Our focus is on preserving log and timber homes for future generations. We want log home owners to focus on making memories in their home, not spending all their time maintaining the home.


Recommendations
- There are two basic ways to combat the effects of weathering. By far the most effective method is to keep wood surfaces in the shade as much as possible by extending roof overhangs or constructing roofed porches around the home.
- Keep all vegetation at least 24 inches away from wood surfaces to allow for adequate ventilation and drying out of these surfaces.
- Clean the wood surfaces to remove all foreign materials from the wood prior to the application of an exterior finish system. The overall performance of even the best finish system is dependent upon proper surface preparation and application technique.
- Select and apply a highly durable exterior semi-transparent stain, like Lifeline™ Ultra-7 or Ultra-2 to protect the wood and enjoy the beauty of the wood grain. Select Lifeline™ Accents to highlight wood timbers and trim if more opacity is desired.
- Apply an exterior clear topcoat, like Lifeline™ Advance Gloss or Satin, to protect the color coat and add additional UV and mold and mildew protection. Consider the Gloss for additional reflection of UV light.
- Fill all upward facing checks, cracks in wood, with a specialized acrylic sealant, like Check Mate 2™
- Clean the finish systems at least once a year with Log Wash™, a liquid concentrate for bare wood and maintenance cleaning, to remove all foreign debris for the surface of the finish system and extend its longevity.
- Perform an annual inspection of the coating system as a proactive maintenance approach.
- Darkening of the wood or finish when water is applied, is an indication of water getting through the coating and wetting the wood
- Checks or micro-fissures in the wood, especially upward-facing
- Cracks in the finish
- Color fading
- Pay close attention to the south- and west-facing surfaces
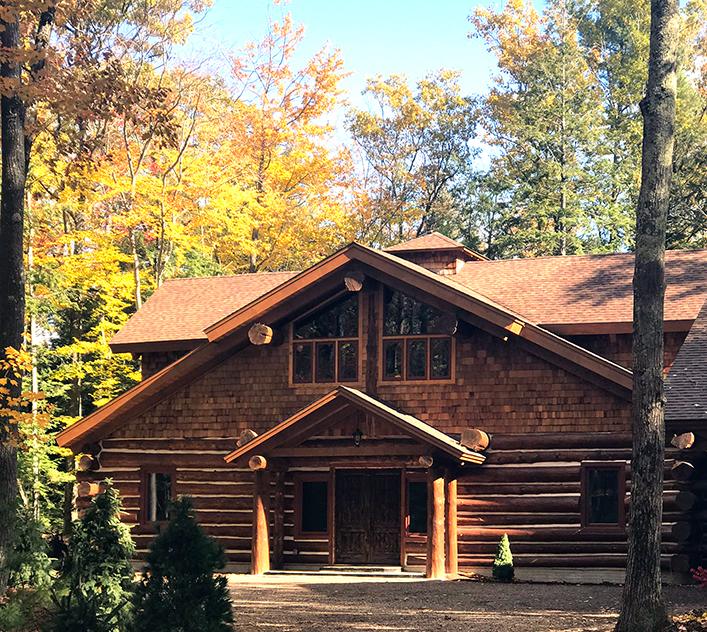
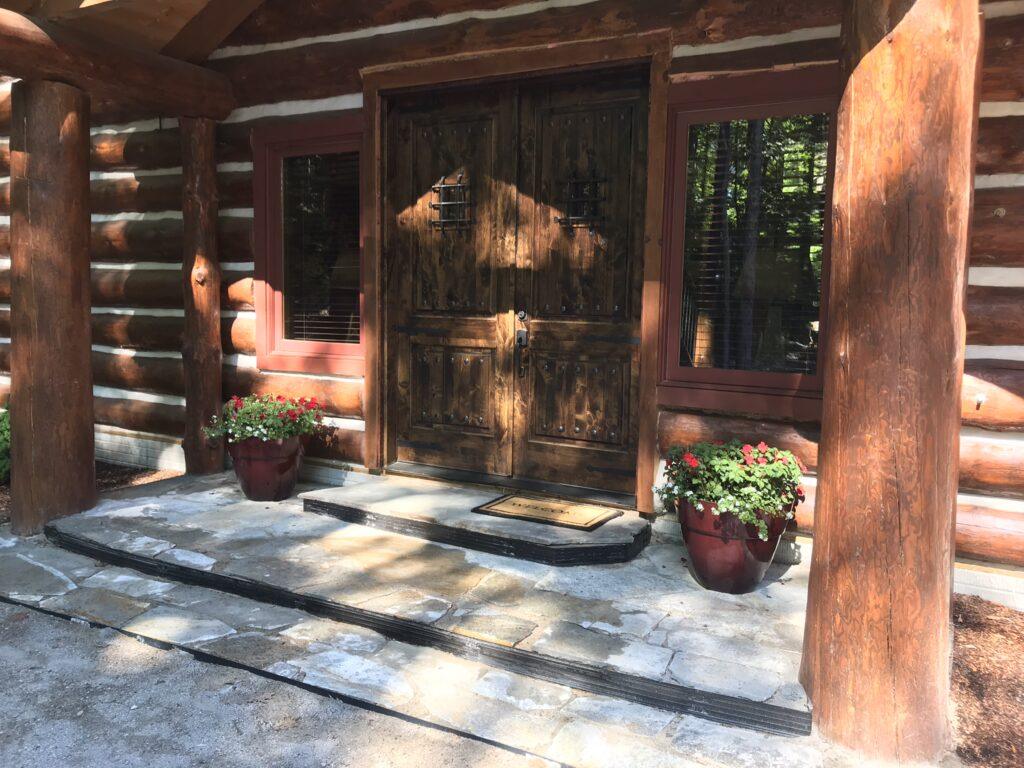
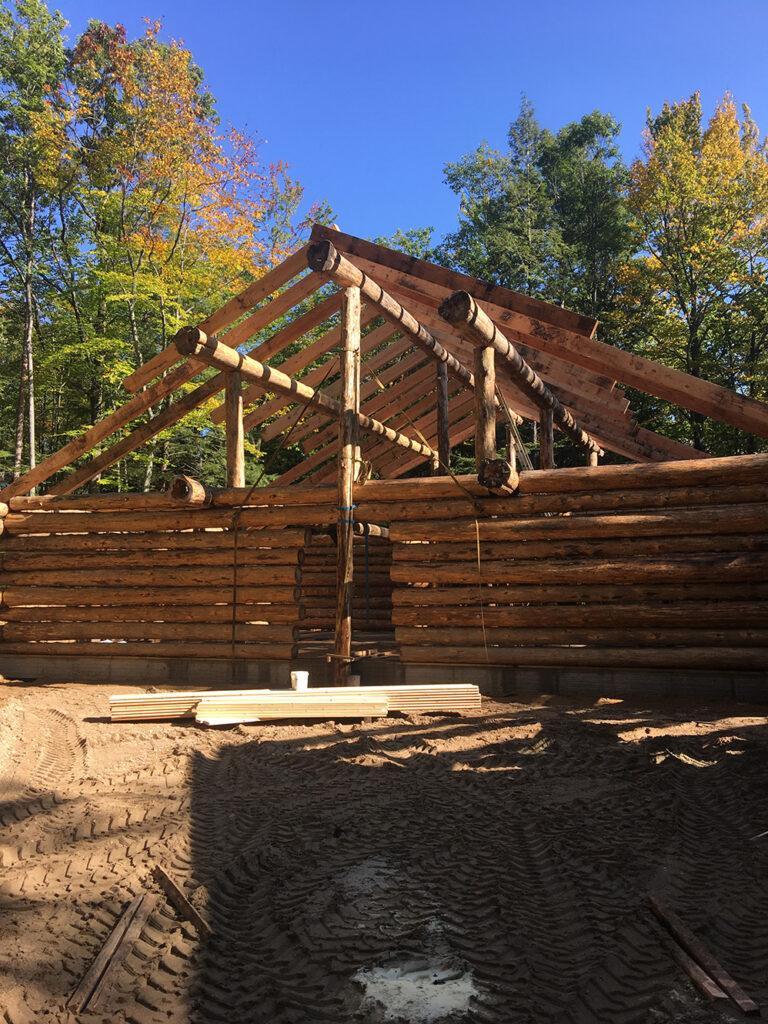
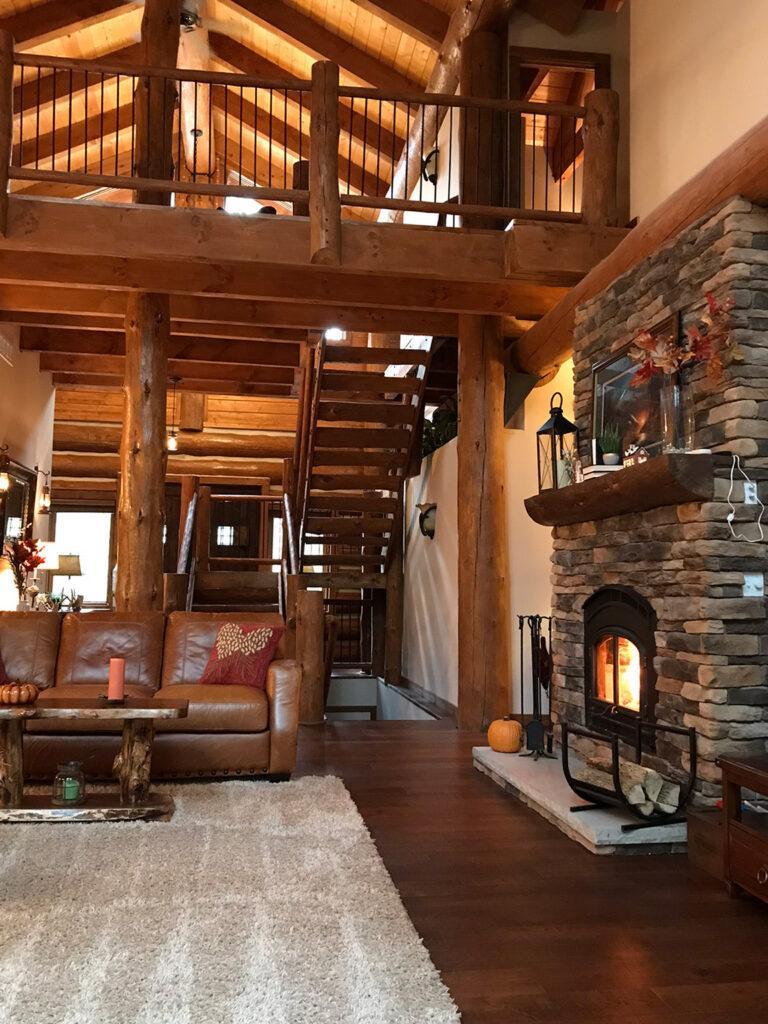
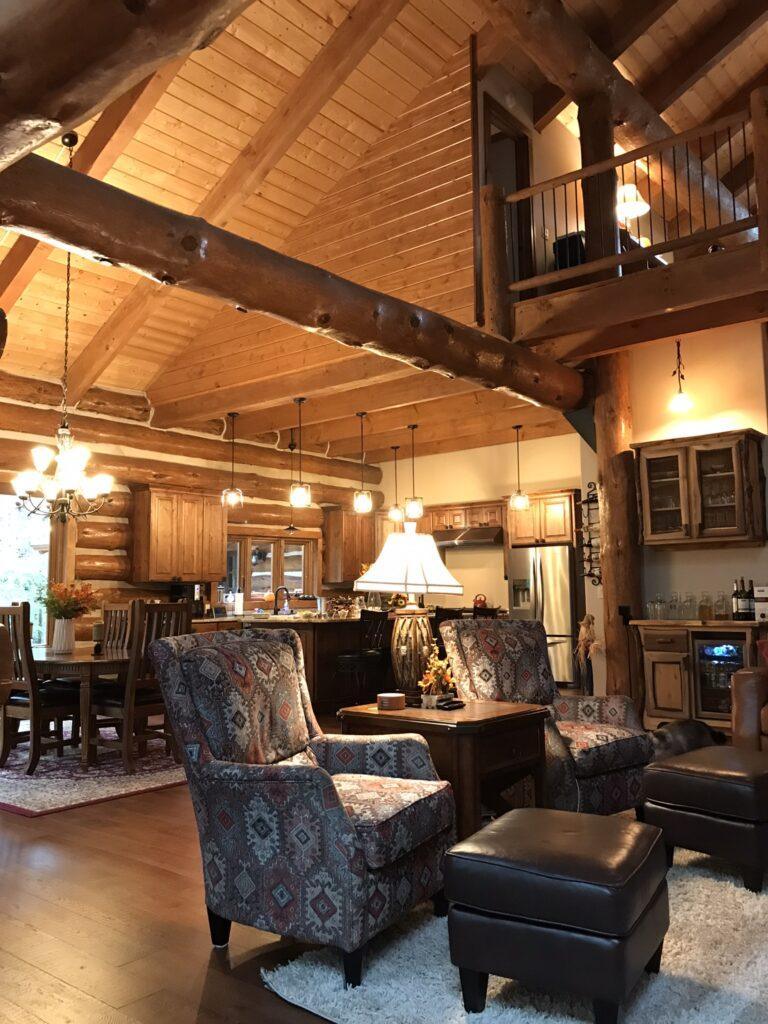
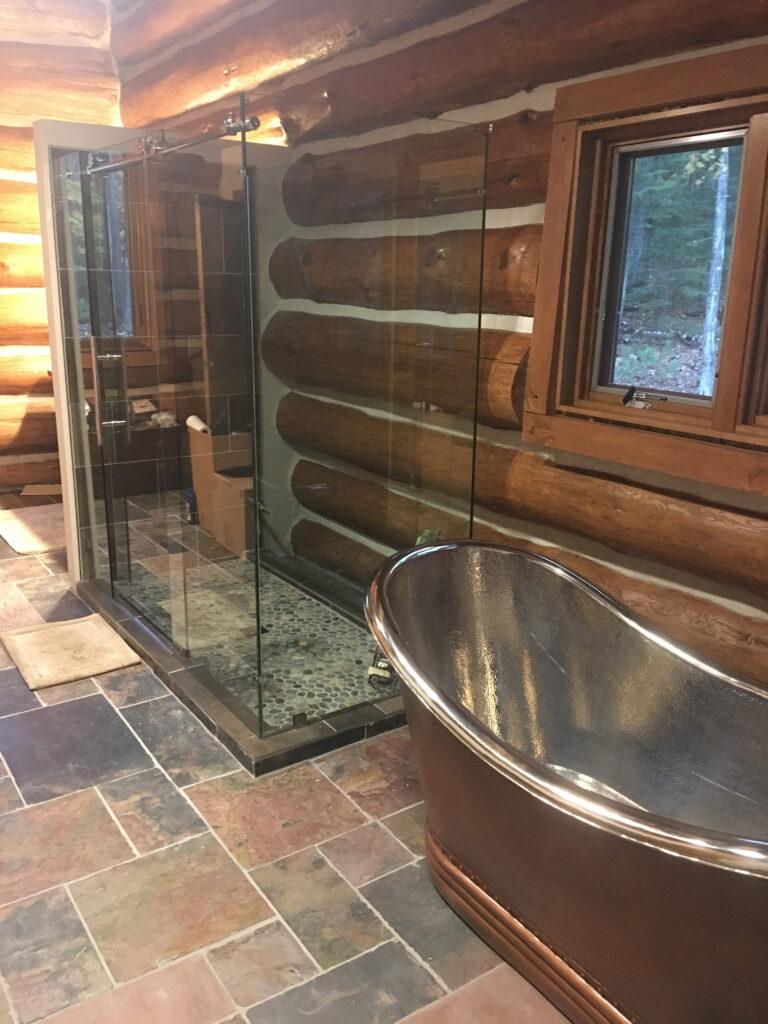
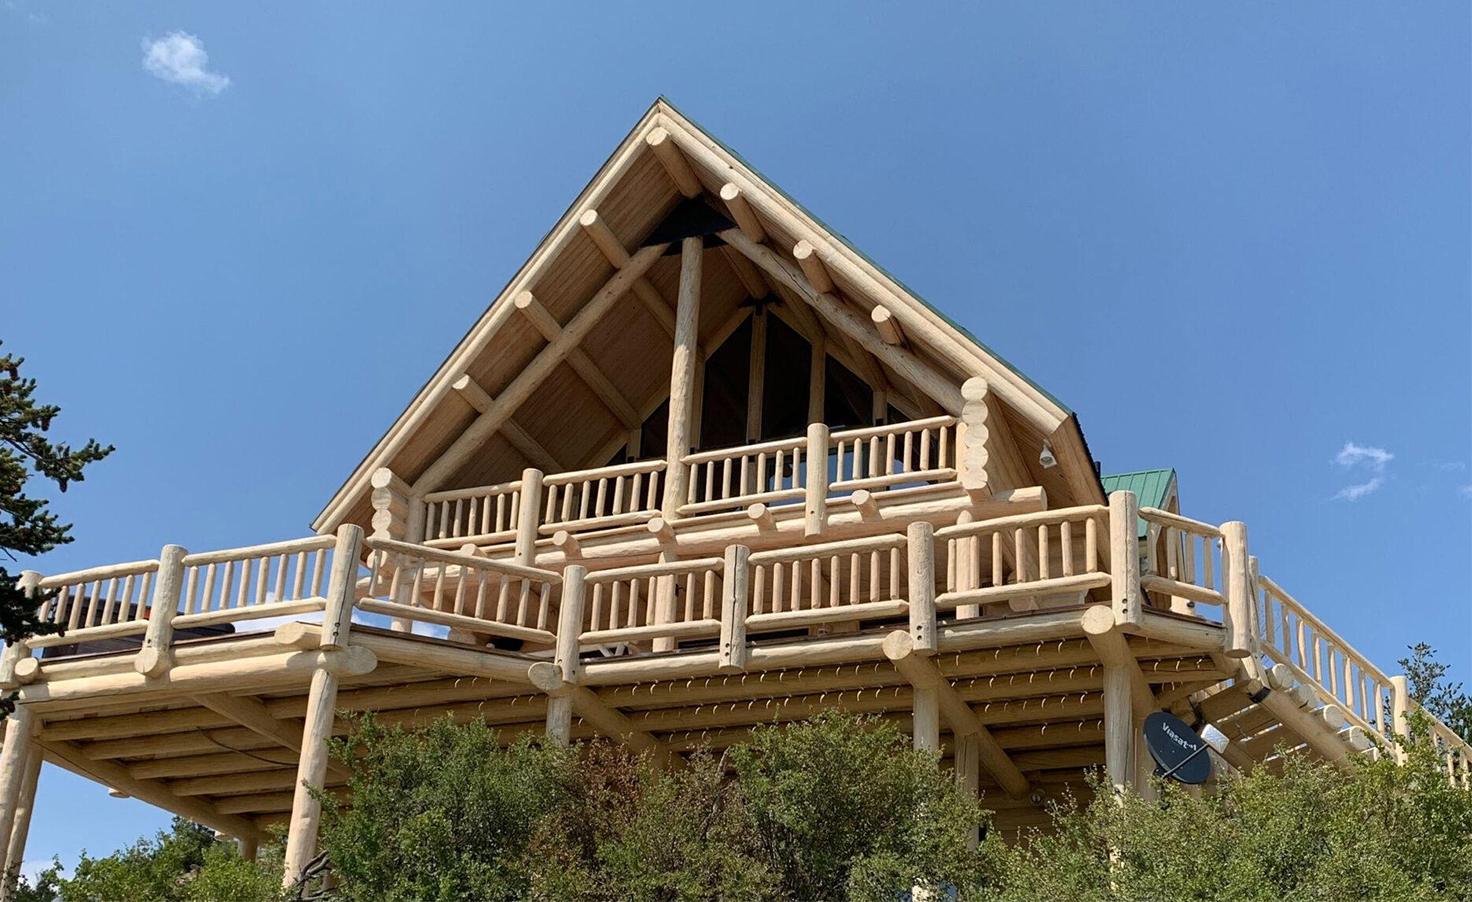
This Michigan log home was completed by the homeowners over 2 years in 2016-2017. Red pine logs were regionally sourced from Wisconsin and northern Michigan. The homeowners peeled, sanded, stained, and sealed the log home themselves, making this home a beautiful labor of love.
The exterior is finished with Lifeline Ultra-2 Sequoia with Advance Gloss, and log gaps sealed with Perma-Chink Stone. Interior logs and beams were finished with Lifeline Ultra-2 Dark Natural and Advance Gloss topcoat for the rest. Gaps were filled with Energy Seal – Dark Natural for interior, Dark Walnut for exterior gaps.
“Using your products was so effortless with easy application, no odor, and easy clean up. We have recommended Perma-Chink to others who have log homes in the area.” – Roger & Diane G.